You press the button, hear the whir, and watch your milk spin. Then you pour it into your coffee and get a cup of lukewarm liquid with a few sad bubbles on top. Frustrating, right? A milk frother should give you silky microfoam every time, but when it doesn’t, the problem is usually simple to fix without buying a new machine.
This guide walks you through the most common frother failures, explains why they happen, and shows you exactly what to do. You’ll learn how to diagnose issues with the whisk, the heating element, the power connection, and your milk choice. By the end, you’ll be able to fix most problems in under ten minutes.

LAVMOND
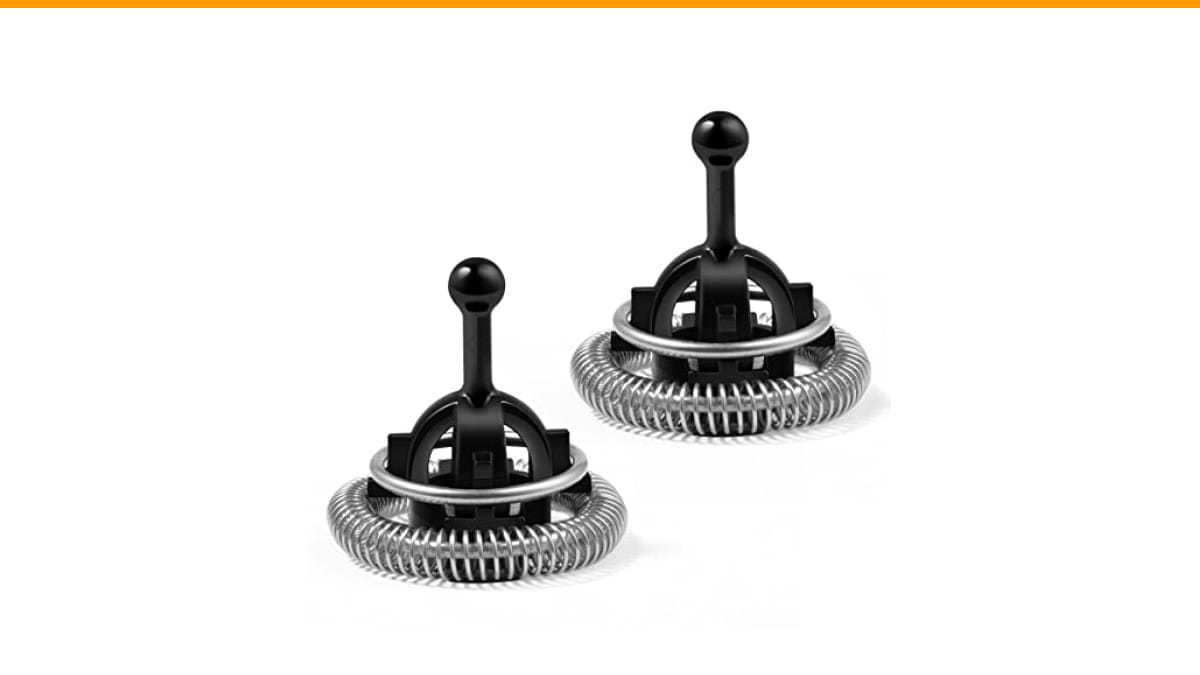
Whisks Compatible with Nespresso Aeroccino 3/4/Plus Milk…
- Compatible with Aeroccino 3/4/Plus Milk Frother Replacement
- Includes 2 Whisks
- Made of rustproof stainless steel 304
As an Amazon Associate I earn from qualifying purchases.
One quick note before we start: if your frother’s whisk is bent, worn, or just not spinning properly, a replacement whisk often solves the problem. The LAVMOND replacement whisk set for Nespresso Aeroccino 3/4/Plus includes two stainless steel whisks that fit those models. It’s a cheap fix compared to a new frother, and having a spare means you’re never stuck with flat milk.
Why Your Milk Frother Stopped Frothing
The most common complaint I hear is “it worked fine yesterday, now nothing.” Usually, the issue falls into one of three categories: the whisk isn’t spinning fast enough, the milk isn’t right, or the machine isn’t getting power.
Let’s start with the whisk. Over time, the metal shaft can bend slightly, or the magnetic rotor inside the base can get clogged with dried milk. If the whisk wobbles or spins slowly, it won’t pull enough air into the milk to create foam. A bent whisk is easy to spot: hold it by the top and roll it on a flat surface. If it doesn’t roll true, it’s bent.
Another culprit is the drive magnet. Most frothers use a magnetic coupling between the base and the whisk. If the base’s drive socket has milk residue built up, the whisk won’t seat properly. Clean that socket with a cotton swab dipped in vinegar, and you’ll often restore full spinning speed.
Power issues are less common but happen. If the frother doesn’t turn on at all, check the base’s contact pins for corrosion or milk film. Wipe them dry, plug into a different outlet, and try again. Also, some frothers have a thermal cutoff that trips if the motor overheats. Give it 15 minutes to cool down, then retry.
Milk Temperature and Fat Content: The Hidden Variables
Your frother might be perfectly fine, but your milk is the problem. Fat content matters more than most people think. Whole milk (3.5% fat) produces rich, creamy microfoam because fat stabilizes the air bubbles. Skim milk makes bigger, foamier bubbles that collapse quickly. If you’re using skim milk and getting thin foam, that’s normal physics, not a broken machine.
Temperature also plays a role. Cold milk (straight from the fridge, around 4°C) froths best because the cold protein structure holds air longer. If your milk has been sitting on the counter for an hour, it won’t foam as well. Stick to fridge-cold milk for consistent results.
One thing I’ve noticed in testing: plant-based milks are a different beast. Oat milk and almond milk often need a barista blend with added stabilizers to foam properly. If you’re using a generic almond milk, don’t be surprised if it turns into watery liquid. Check the carton for ‘barista’ or ‘frothing’ on the label.
If you’ve been using the same milk brand for months and it suddenly stopped frothing, the milk might be old or the protein degraded from being left out. Fresh cartons always work better than ones that have been open for a week.
Cleaning and Maintenance: The Real Fix
I’ll say it plainly: most frother problems are caused by poor cleaning. Milky residue builds up on the whisk, the inside walls, and the heating plate. That residue burns when you heat the milk, leaving a brown film that affects both taste and foam quality.
Here’s the cleaning routine I recommend after every use:
- Unplug the frother and let it cool completely.
- Rinse the inside with warm water immediately after pouring out the milk. Don’t let it dry.
- Use a soft sponge or cloth to wipe the interior. Avoid abrasive scrubbers—they scratch the non-stick coating.
- Clean the whisk separately with warm soapy water. The LAVMOND whisk set is dishwasher safe, so you can toss it in the top rack if you’re lazy like me.
- Wipe the outside base with a damp cloth. Never submerge the base in water.
For a deep clean once a month, fill the frother with a mixture of equal parts water and white vinegar (about 200ml total). Run the frother without milk for 30 seconds, then let it sit for 15 minutes. Pour out the vinegar solution, rinse thoroughly, and run a plain water cycle to remove any leftover taste.
If you skip this cleaning, the heating element can develop scale, especially in hard-water areas. Scale acts as an insulator, making the frother take longer to heat and sometimes triggering the overheating protection. A monthly descale will prevent that.
Comparing Fix-It-Yourself vs. Replacing Parts
| Issue | DIY Fix | Replacement Part | When to Replace |
|---|---|---|---|
| Whisk bent or not spinning | Try reshaping gently (not recommended) | Buy a new whisk (e.g., LAVMOND 2-pack) | If the whisk wobbles or won’t stay seated |
| Milk not frothing | Switch to fresh whole milk, chill it | Not applicable | Only if milk is consistently bad |
| No power | Clean contact pins, check outlet | New base or unit | If pins are corroded beyond cleaning |
| Burnt milk smell | Deep clean with vinegar | Not applicable | If interior coating is flaking |
| Heating but no froth | Check whisk speed, clean drive socket | New whisk | If whisk is worn after months of use |
My rule of thumb: if the frother is less than two years old, a $10 replacement whisk will fix 80% of issues. If the motor itself is dead (you hear a hum but no spin), that’s harder to fix. In that case, you’re better off buying a new frother. But before you do, check if the drive socket is clogged—I’ve seen that mimic a dead motor.
Frequently Asked Questions
Why does my milk frother make a loud noise but not froth?
That’s usually the whisk spinning without enough load. The milk might be too warm (over 50°C), which kills the protein structure. Or the whisk is spinning but the magnet is slipping. Remove the whisk, clean the drive socket, and try again with cold milk.
Can I use any milk in a frother?
You can, but results vary. Whole milk is the safest bet. Skim milk froths but produces dry, stiff foam. Plant milks need to be ‘barista’ grade. If you’re after thick microfoam for latte art, stick to whole milk or oat barista blend.
How often should I clean my milk frother?
Rinse it after every use and do a soapy wash daily if you use it daily. Deep clean with vinegar once a month. That’s the minimum. If you notice a burnt smell or reduced foam, clean it more often.
Is it normal for the frother to leave milk residue on the whisk?
Some residue is normal, especially with whole milk. But if it’s caked on and hard to remove, you’re letting it dry before cleaning. Rinse immediately after use and the whisk will stay clean. A dishwasher-safe whisk like the LAVMOND replacement makes this easier.
Why does my frother stop mid-cycle?
Most likely the overheating protection kicked in. This happens if you run multiple cycles back-to-back or if the milk is too hot to start with. Let it cool for 15 minutes. Also check that the milk level isn’t above the MAX line—overfilling can cause the motor to strain and trip the cutoff.
What I’ve Learned From Testing Frothers
After spending months with various frothers, I’ve got a few opinions. The Aeroccino is solid, but its stock whisk wears out faster than you’d expect. I’ve gone through two in a year with daily use. That’s why having a spare set makes sense.
One tip that surprised me: don’t hold the frother upside down to drain it. Water gets into the base and wreaks havoc on the electronics. Instead, use a paper towel to soak up excess water after rinsing.
Another thing—if your frother is producing foam but it collapses within a minute, your milk is too old. Fresh milk (within a few days of opening) holds foam much better than milk that’s been open for a week. I’ve tested this side by side, and the difference is dramatic.
Also, don’t ignore the whisk’s condition. A slightly bent whisk might still spin, but it won’t create the vortex needed for proper aeration. If you notice your foam getting thinner over time, inspect the whisk for bends or wear. Replacing it is the cheapest fix you’ll find.
For more on keeping your coffee gear in top shape, check out our guide on cleaning a steam wand if you also use an espresso machine. If you’re dealing with a clogged appliance, our clogged coffee maker article has similar troubleshooting steps.
Quick Fixes to Remember
- Always use cold, fresh milk—whole milk works best.
- Clean the frother immediately after each use to prevent residue buildup.
- If the whisk wobbles, replace it. A bent whisk won’t froth properly.
- Descale monthly with vinegar if you have hard water.
- Check the drive socket for dried milk—it’s a common hidden issue.
- Let the frother cool down between cycles to avoid overheating.
- Keep a spare whisk on hand, like the LAVMOND 2-pack, so you’re never without foam.
Products related to this article
Sponsored / affiliate links. As an Amazon Associate I earn from qualifying purchases. I may earn additional commission from eligible campaigns.
 House Gem Coffee Mug Warmer for Desk, Candle Warmer Plate, 12H Timer, Wood
 Coffee Espresso Machine Handle Replacement Parts, Cafe Bracket Handle for Lidl Silvercrest CM4621 CM4218 KF5002 KF500S Barista (for 51mm Portafilter Basket - Not included)
 Quick Heating Cup Warmer, Three Temperature Settings, Splashproof and Portable, for Coffee, Milk, Lightweight ABS Material