You press the button, hear a hopeful hum, and then… nothing. Or the wand spins, but your milk stays flat. Or it heats up so fast the milk scalds before any foam appears. A broken milk frother ruins the morning routine faster than a bad cup of coffee. Most people assume the unit is dead and buy a new one. That’s often a waste of money.
This guide walks through the most common milk frother problems and fixes, from electrical failures to froth quality issues. You’ll learn what to check first, what you can repair at home in minutes, and when it’s genuinely time to replace the unit. The approach is simple: match your symptom to the fix, starting with the cheapest and easiest solution.

LAVMOND
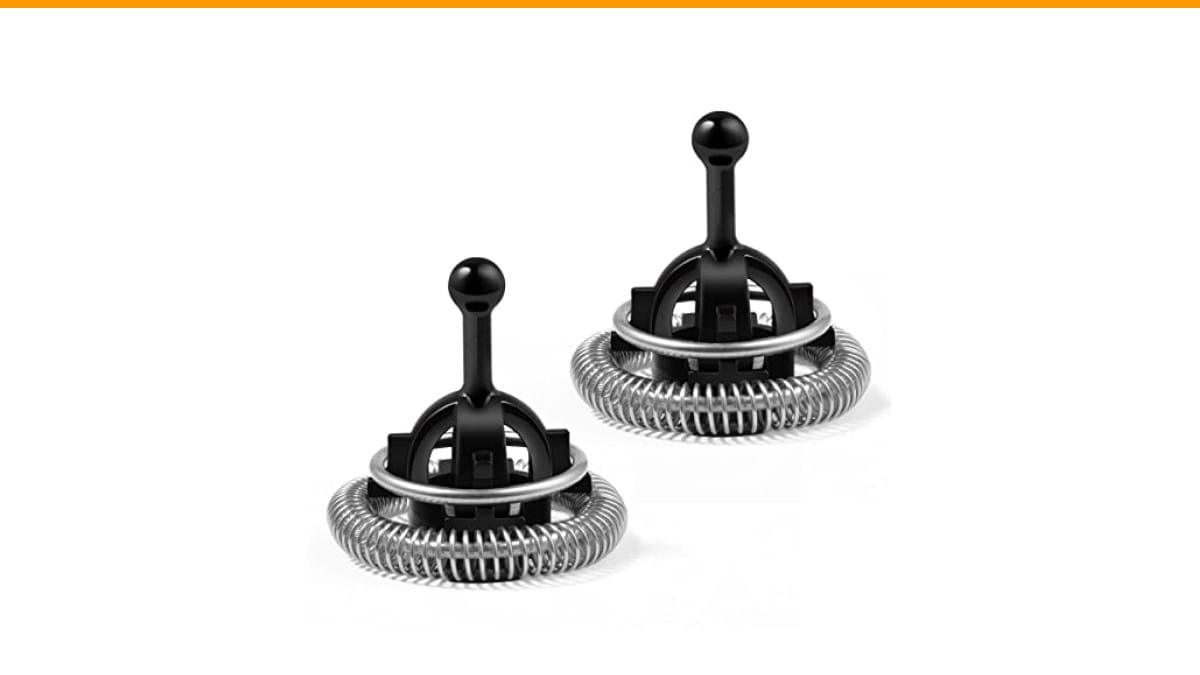
Whisks Compatible with Nespresso Aeroccino 3/4/Plus Milk…
- Compatible with Aeroccino 3/4/Plus Milk Frother Replacement
- Includes 2 Whisks
- Made of rustproof stainless steel 304
As an Amazon Associate I earn from qualifying purchases.
One quick note before proceeding. If your Nespresso Aeroccino 3, 4, or Plus has lost its spinning power, the culprit is often the whisk itself. The LAVMOND replacement whisks are a rustproof stainless steel 304 two-pack that fits those models. It’s a cheaper first step than buying a whole new frother.
Quick Diagnosis: Match Your Symptom to the Fix
Before you take anything apart, figure out which category your problem falls into. This saves time and prevents you from fixing the wrong thing.
- Unit won’t turn on or blinking light: Power source, battery, or thermal fuse.
- Motor runs but wand doesn’t spin: Blockage, magnetic drive, or worn whisk.
- Heats but no froth: Milk chemistry, temperature, or technique.
- Froth is watery with large bubbles: Fat content too low, milk too hot, or whisk speed issue.
- Strange grinding noise: Debris in the drive mechanism or a failing bearing.
This flowchart approach works because most frothers use similar mechanics, whether it’s a handheld wand or a countertop electric unit. Start with the simplest check, then work your way down the list.
Power & Electrical Issues (Not Turning On, Blinking Lights)
Electrical problems are the most common reason frothers get tossed. But many of them are trivial to fix.
Checking the Power Source and Batteries
For cordless handheld frothers, dead batteries are the obvious first suspect. But don’t just swap them out. Check the contacts inside the battery compartment for corrosion. A white or green crusty buildup on the spring or the terminal blocks the connection. Scrape it off gently with a small screwdriver or a pencil eraser. If the contacts look clean, test the batteries with a multimeter. A battery that reads under 1.2 volts under load is weak, even if it looks fine.
For plug-in units, check the outlet first. Plug in a lamp or phone charger to confirm the outlet works. Then inspect the cord along its full length, especially where it meets the base or the plug. Frayed cords are a fire hazard. If you see exposed wire, stop. Do not attempt a DIY splice on a heating appliance. Replace the unit.
If the cord is fine but the unit still won’t power on, the base contacts might be dirty. Milk splashes onto the charging contacts and dries into a film that blocks current. Wipe the contacts on both the base and the frother with a cloth dipped in white vinegar, then dry it completely.
Resetting the Motor and Thermal Fuse
Many electric frothers have a thermal cutoff switch that trips when the motor overheats. This happens if you run the unit for several consecutive cycles without a break. The fix is simple: unplug the unit, let it cool down for 30 to 60 minutes, then try again. If it works after cooling, you just need to respect the duty cycle. Most frothers are designed for one or two cycles, then a rest period.
If it still won’t run after cooling, the thermal fuse itself may have blown. This is a small component inside the base. Replacing it requires opening the housing, which almost always voids the warranty. Unless you’re comfortable with a soldering iron and basic electronics, this is a repair shop job. And frankly, a replacement fuse costs a few dollars, but the labor will exceed the price of a new budget frother.
Breville frother not working is a related guide that covers similar electrical diagnostics for that specific brand.
Mechanical Failures (Not Spinning, Strange Noises)
You hear the motor hum, but the whisk sits still. Or it spins slowly and makes a grinding sound. This is almost always a mechanical issue, not an electrical one.
Clearing Blockages in the Frothing Wand
For handheld frothers, dried milk residue is the number one culprit. The small shaft where the whisk attaches gets caked with milk protein. This creates friction that stalls the motor. Remove the whisk and soak the shaft in hot soapy water for 10 minutes. Use a toothpick or a soft brush to clear any residue from the small holes or grooves. Rinse and dry thoroughly before reattaching.
For electric countertop units with a fixed whisk, check the area where the whisk meets the base. A small piece of dried milk or a stray coffee bean can jam the drive gear. Unplug the unit, remove the whisk, and inspect the drive socket. Use a cotton swab dipped in warm water to clean it out.
Fixing the Magnetic Drive System
Many modern frothers, including the Aeroccino line, use a magnetic coupling. The motor turns a magnet in the base, which spins a matching magnet in the whisk. There are no gears to jam. If the motor runs but the whisk doesn’t turn, the magnetic connection is broken.
The most common cause is a worn or demagnetized whisk. Over time, the magnet inside the whisk loses strength, especially if it’s been dropped or exposed to high heat. The fix is a new whisk. That’s where the LAVMOND replacement whisk pack comes in. It’s a two-pack, so you get a spare for when the first one eventually wears out. It’s a much cheaper fix than replacing the entire frother.
Another cause is a gap between the whisk and the base magnet. If the whisk isn’t seated fully, the magnetic field won’t engage. Push down firmly until you feel it click into place. Also, check the whisk’s plastic collar for cracks. A cracked collar allows the magnet to wobble and lose alignment.
Heating Problems (Not Heating, Overheating)
Some frothers only froth cold milk. Others heat. If yours heats but does it poorly, the issue is usually mineral buildup, not a dead heating element.
Descaling Mineral Buildup
Hard water leaves calcium and limescale deposits on the heating element. This acts as an insulator. The element gets hot, but the heat doesn’t transfer to the milk efficiently. The result is lukewarm milk, longer heating times, or the unit overheating internally and tripping its safety cutoff.
Descaling is straightforward. Mix a solution of one part white vinegar to two parts water. Fill the frother to its max line. Run a heating cycle without the whisk attached (if your model allows it). Let the solution sit for 15 minutes, then pour it out. Rinse thoroughly with fresh water and run two or three plain water cycles to flush out any vinegar taste. Do this every 4 to 6 weeks if you have hard water.
Don’t use commercial descalers unless the manual specifically recommends them. Some contain acids that can damage the non-stick coating inside the pitcher.
Testing the Heating Element
If descaling doesn’t restore heating, the element itself might be dead. This is harder to diagnose without a multimeter. The heating element typically sits under the base plate. Testing it requires disassembly. If you’re not handy with electronics, this is the point where you stop. A new frother costs less than a repair shop’s minimum bench fee.
One thing to test before you give up: the thermal fuse. If the unit overheated once and the fuse blew, it will stop heating entirely. This is the same fuse that controls the motor. If the motor runs but the heat doesn’t, the fuse is likely fine, and the element is the problem.
Froth Quality Issues (Weak Froth, Large Bubbles)
This is the most frustrating category. The machine works perfectly, but the output looks like dishwater bubbles, not silky microfoam. The problem is rarely the machine. It’s almost always the milk or the technique.
Adjusting Milk Temperature and Fat Content
Milk chemistry matters more than people think. Protein creates the foam structure. Fat stabilizes it. Whole milk (around 3.25% fat) produces rich, creamy microfoam. Skim milk produces stiff, dry foam that collapses quickly. Plant-based milks are the hardest to froth because their protein structure is different.
Temperature is the other critical variable. Milk froths best between 130°F and 150°F (54°C to 65°C). Below 130°F, the foam is weak. Above 150°F, the proteins denature and the foam breaks down. If your frother has no temperature control, you have to experiment with the amount of time you run it. Start with a shorter cycle and check the temperature with a kitchen thermometer. Adjust from there.
For plant-based milks, look for barista blends. They have added stabilizers and a higher protein content specifically designed for frothing. Regular oat or almond milk will often produce a watery, separated mess. When testing a few brands side by side, barista blends consistently produce denser foam with smaller bubbles.
Calibrating the Frothing Technique
For handheld frothers, technique is everything. The wand must be angled correctly and moved in a specific pattern. Start by placing the whisk just below the milk’s surface at a 45-degree angle. Turn it on and let it pull air in for 5 to 10 seconds. Then slowly lower the wand deeper to incorporate the foam. Keep the wand moving in a slow circle to avoid creating a vortex that just spins the milk without adding air.
For electric frothers, the technique is mostly automated. But you can influence the result by how much milk you add. Too little milk and the whisk can’t engage properly. Too much and there’s no room for expansion. The max fill line exists for a reason. Respect it.
If you’re getting large bubbles consistently, the milk is too cold. Let it sit at room temperature for 10 minutes before frothing. Cold milk traps larger air bubbles that pop quickly.
Maintenance Routines That Prevent Future Breakdowns
Most frother failures come down to neglect. A simple weekly routine extends the life of your unit significantly.
- Rinse immediately after use. Dried milk is the enemy. A quick rinse under hot water prevents caked-on residue.
- Wash the whisk by hand or in the dishwasher. Check your manual. Some whisks, like the stainless steel ones, are dishwasher safe. Others are not.
- Dry the base and contacts. Moisture in the base leads to corrosion and electrical issues.
- Descale monthly. This prevents the most common heating issue.
- Don’t overfill. Milk that boils over gets into the motor housing and wreaks havoc.
- Store the whisk separately. Leaving it attached can put pressure on the drive mechanism.
Cleaning the steam wand on a traditional espresso machine is a different process, but just as important. For that, see our guide on how to clean a steam wand.
When to Call a Pro vs. When to Replace (Cost Analysis)
Here’s the honest math on repair versus replacement. A budget handheld frother costs $15 to $25. A mid-range electric frother costs $40 to $80. A premium model with multiple settings can run $100 to $150.
Replacement parts, like a whisk or a lid, cost $10 to $20. If a cheap part fixes the problem, it’s a no-brainer.
If the motor or heating element is dead, stop. The labor to open the unit, diagnose the fault, source a part, and reassemble it will cost at least $50 to $75. That’s more than a new budget model. Unless your frother is a high-end unit with features you can’t easily replace, a dead motor means a new frother.
Warranty matters. Most frothers have a 1-year warranty. If you’re within that window, contact the manufacturer first. Don’t open the unit yourself. Opening the housing voids the warranty.
| Issue | DIY Fix Cost | Repair Shop Cost | Replacement Cost |
|---|---|---|---|
| Worn whisk | $10 – $20 (new whisk) | Not worth it | $40 – $80 |
| Dirty contacts | $0 (clean with vinegar) | $30 – $50 | $40 – $80 |
| Mineral buildup | $0 (descaling solution) | $40 – $60 | $40 – $80 |
| Blown thermal fuse | $5 (part) + labor risk | $50 – $75 | $40 – $80 |
| Dead heating element | $15 (part) + high skill | $75 – $100 | $40 – $80 |
If your frother is making unusual noises, check our guide on automatic espresso machine loud noise for related mechanical diagnostics.
Frequently Asked Questions (FAQs)
Why does my milk frother blink red but won’t turn on?
A blinking red light usually means the unit detected a fault. Common triggers are overheating, a jammed whisk, or a safety interlock not being engaged. Unplug it, remove the whisk, and check for obstructions. Let it cool for 30 minutes. If the light persists, check the base contacts for dried milk. If none of that works, the control board may be faulty, which means replacement.
Can I use any milk in my frother?
You can, but results vary wildly. Whole milk gives the best, most consistent microfoam. Skim milk creates stiff foam that’s drier. Plant-based milks are hit or miss. Barista blends of oat, almond, or soy are formulated to froth well. Regular versions often separate or produce watery foam. Cold milk from the fridge also froths better than warm milk, as long as it doesn’t go below the ideal temperature range.
Why does my frother make a loud grinding noise?
That sound is usually a mechanical jam. For handheld units, check the whisk for dried milk residue or a bent shaft. For electric units, inspect the drive socket for debris. If the noise continues after cleaning, the bearing in the motor is likely failing. This is not a user-serviceable part. Start shopping for a new unit.
How often should I descale my milk frother?
Every 4 to 6 weeks if you have hard water. Every 8 to 10 weeks if you have soft water. If you notice longer heating times or a faint burnt smell, descale immediately. Ignoring buildup is the fastest way to kill the heating element.
Is it safe to put the frother base in the dishwasher?
No. The base contains the motor, heating element, and electrical wiring. Water will destroy it. Only the removable pitcher, lid, and whisk are dishwasher safe, and only if the manual says so. The LAVMOND replacement whisks are dishwasher safe, which makes cleanup easier. Always hand wash the base with a damp cloth.
What to Remember When Your Frother Acts Up
Most frother problems are simple to fix if you approach them logically. Here’s the short version.
- Check the power source and contacts before anything else. Dried milk and corrosion cause most electrical failures.
- Let the unit cool down. Thermal overload is common after back-to-back cycles.
- Clean the whisk and drive mechanism. Blockages cause most spinning failures.
- Descale regularly. Mineral buildup causes most heating failures.
- Use the right milk. Fat and protein content directly affect froth quality.
- Respect the fill lines. Overfilling leads to messes and motor damage.
- Cheap parts first. A new whisk is cheaper than a new frother.
Start with the cheapest fix, work your way up, and don’t be afraid to replace the unit when the repair cost exceeds the value. A working frother is a small luxury. A broken one is just a countertop ornament.
Products related to this article
Sponsored / affiliate links. As an Amazon Associate I earn from qualifying purchases. I may earn additional commission from eligible campaigns.
 Coffee Espresso Machine Handle Replacement Parts, Cafe Bracket Handle for Lidl Silvercrest CM4621 CM4218 KF5002 KF500S Barista (for 51mm Portafilter Basket - Not included)
 Quick Heating Cup Warmer, Three Temperature Settings, Splashproof and Portable, for Coffee, Milk, Lightweight ABS Material
 Coffee Mug Warmer & You are Awesome Mug Set, Electric Cup Warmer for Desk