You press the button, the frother hums, and then you see it—a small puddle spreading across the counter. Not from the spout, but from underneath. The milk frother leaking water problem is one of the most common reasons people toss a perfectly good frother in the trash. Most of the time, it’s a fixable issue that takes ten minutes and a few basic tools.
This guide walks through the actual failure points, what each leak means, and what you can do before spending money on a replacement. You’ll learn where water escapes, why it happens, and which parts are worth repairing versus which ones signal the end of the road.

LAVMOND
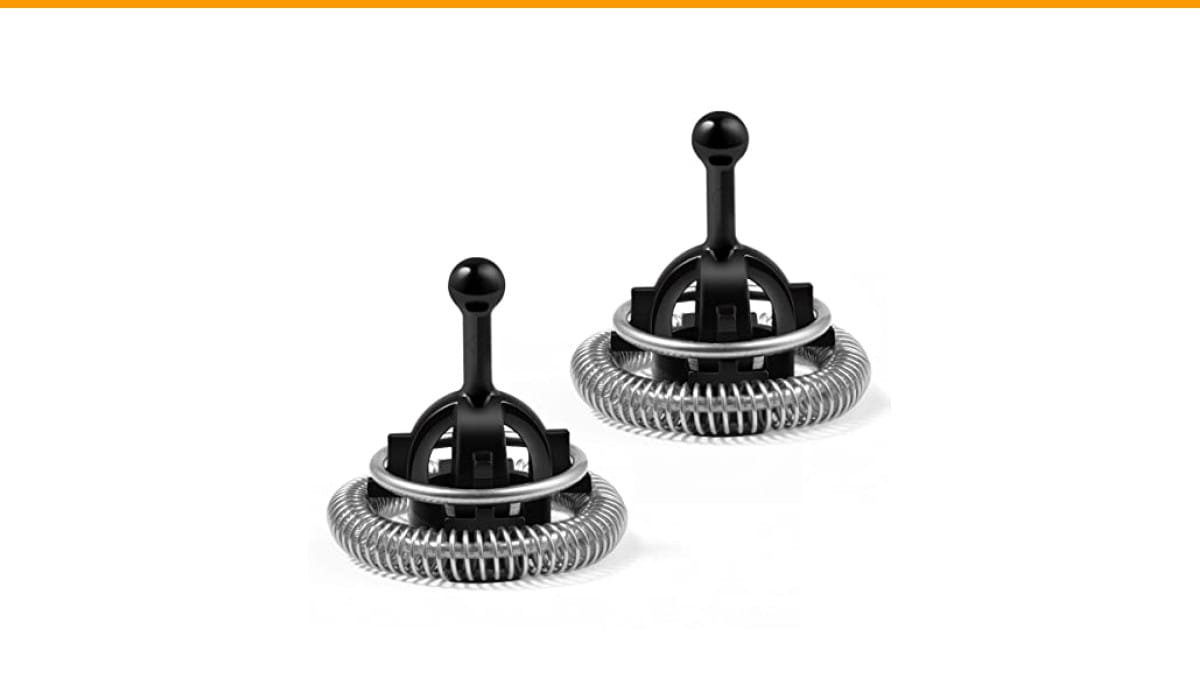
Whisks Compatible with Nespresso Aeroccino 3/4/Plus Milk…
- Compatible with Aeroccino 3/4/Plus Milk Frother Replacement
- Includes 2 Whisks
- Made of rustproof stainless steel 304
As an Amazon Associate I earn from qualifying purchases.
If you’ve already diagnosed the issue and the whisk itself is worn or bent, a simple swap often solves it. The LAVMOND replacement whisks for Nespresso Aeroccino 3/4/Plus are a solid drop-in fix—two stainless steel whisks that handle the spinning without wobbling.
Where the Water Actually Comes From
Frothers leak from three main places: the base seal, the whisk shaft, or the lid. Each one has a different cause and a different fix.
The base seal is the rubber gasket where the jug meets the motor housing. When this wears out, water seeps down the sides and pools under the unit. You’ll notice it during or right after a cycle. The seal costs a few dollars and slides off with a flathead screwdriver.
The whisk shaft leak is trickier. Water comes up around the whisk stem and drips down the outside of the jug. This usually means the shaft bearing is worn, not the whisk itself. If the whisk wobbles when you spin it by hand, the bearing is the culprit.
The lid leak is the easiest to spot. Steam escapes around the lid during heating, condenses on the outside, and drips down. That’s not a failure—that’s normal physics. But if the lid sits crooked or the gasket inside the lid is cracked, you’ll get more drips than you should.
One thing to check before anything else: is the jug sitting flat? A warped base or a bent motor shaft throws the whole assembly off-center, which makes seals fail faster. Put the jug on a flat counter and spin it. If it rocks, that’s your problem.
How to Diagnose the Leak in 60 Seconds
Grab a paper towel and dry everything completely. Run a cycle with water only—no milk. Watch where the first drop appears.
- Water under the base: base seal is worn or the jug isn’t seated properly
- Water on the counter near the whisk hole: shaft bearing or whisk is bent
- Water running down the outside of the jug: lid gasket or overfilling
- Water inside the motor housing: this is the worst case—the motor seal failed and you likely need a new unit
Overfilling causes more leaks than any mechanical failure. Most frothers have a max fill line around 250ml for cold foam and 120ml for hot foam. If you’re pouring past that, the liquid expands when heated and pushes out the lid. That’s not a defect, that’s user error.
If the leak only happens on the hot setting but not the cold one, suspect the heating element area. The heating plate sits under the jug, and a cracked plate lets water seep into the base. You can test this by running a cold cycle—if it’s dry, the heating plate is compromised.
Fix It or Replace It: The Real Cost Breakdown
Replacement seals run between $5 and $15. Whisk assemblies cost $10 to $25. A new frother runs $80 to $200 depending on the brand. The math favors repair if the motor still spins strong and the heating element works.
But there are limits. If water got into the motor housing, the electronics are compromised. Even if it dries out and works for a week, corrosion sets in and it’ll fail again. That’s a replace situation, not a repair one.
Also consider the age of the unit. A frother that’s five years old with a leaking base seal will likely develop another issue in six months. The motor brushes wear out, the heating element scales up. Sometimes the honest answer is to let it go.
For the Nespresso Aeroccino line specifically, the whisk is a known wear item. The spring-style whisk bends over time, and a bent whisk creates vibration that loosens the base seal. Replacing the whisk early prevents the base leak from ever starting. The LAVMOND two-pack gives you a spare, which is smart because you’ll need it eventually.
Comparing Repair Options by Frother Type
| Frother Type | Common Leak Point | Repair Cost | Difficulty | Worth It? |
|---|---|---|---|---|
| Nespresso Aeroccino (all models) | Base seal, whisk shaft | $10–$25 | Easy | Yes, under 3 years old |
| Breville Milk Cafe | Lid gasket, overfilling | $5–$15 | Easy | Yes, check fill line first |
| Secura / generic countertop units | Heating plate crack | $30–$50 | Moderate | Only if unit is under 2 years |
| Handheld frothers | Battery compartment leak | $10–$20 | Easy | Usually replace instead |
One pattern stands out from testing multiple units side by side: the cheaper the frother, the faster the seals degrade. A $30 frother uses a thinner rubber compound that hardens and cracks within a year. A $100 unit uses silicone that flexes for years. You get what you pay for in seal quality, not just motor power.
If you own a Breville and the frother isn’t heating or spinning, the leak might be a symptom of a bigger issue. Check our guide on Breville frother repair before you buy anything.
Prevention: Stop the Leak Before It Starts
Three habits extend the life of any frother. First, never submerge the base in water. Wipe it with a damp cloth only. Water in the motor housing is the number one killer of these devices.
Second, descale every 4 to 6 weeks if you use it daily. Mineral buildup on the heating plate creates hot spots that warp the plate and crack the seal. A simple citric acid rinse takes ten minutes and costs pennies.
Third, replace the whisk at the first sign of wobble. A bent whisk vibrates the whole jug, which loosens the base seal over time. The LAVMOND whisk set is a good upgrade because the stainless steel holds its shape longer than the stock plastic-core versions.
Also, let the frother cool down before washing it. Thermal shock—going from hot to cold instantly—causes the plastic jug to expand and contract rapidly, which eventually cracks the base ring where the seal sits.
Frequently Asked Questions
Why is my milk frother leaking water from the bottom?
The base seal is almost always the culprit. It’s a rubber or silicone gasket that sits between the jug and the motor housing. When it wears out or gets misaligned, water seeps past it during the cycle. Remove the jug, inspect the seal for cracks or flattening, and replace it if it looks compressed.
Can I use a frother that leaks water?
Short term, yes, but you’re risking the motor. Water that reaches the electrical components causes corrosion and eventually a short circuit. If the leak is from the lid or overfilling, dry it and adjust your fill level. If it’s from the base, fix it before the next use.
Why does my frother leak only when making hot milk?
Heat expands the milk and creates steam pressure. That pressure pushes liquid out through any weak point—usually the lid seal or the base gasket. Cold cycles don’t generate that pressure, so the leak only shows up on the hot setting. Check the lid gasket first, then the base seal.
Is a leaking frother a fire hazard?
In most cases, no. The heating element is sealed in the base, and the voltage is low. But if water reaches the main circuit board, it can cause a short that trips your breaker. That’s a sign to stop using it immediately and replace the unit. Don’t let it get to that point.
How long should a milk frother last before leaking?
With regular use—once or twice a day—expect 2 to 4 years before seals start to fail. Units used heavily in a family setting may leak sooner. The whisk is the first thing to go, usually around 12 to 18 months. Replacing it on schedule prevents the base seal from taking the brunt of the vibration.
What to Do Next: A Quick Action List
- Dry the frother completely and run a water-only cycle to pinpoint the leak source
- Check the fill line—overfilling causes more leaks than any part failure
- Inspect the base seal for cracks; replace it if it looks flattened or hardened
- Spin the whisk by hand—if it wobbles, replace it before it damages the seal
- Descale monthly to prevent heating plate warping
- If water reached the motor housing, cut your losses and buy a new unit
- Keep a spare whisk on hand so a bent one never becomes a base leak
Most leaks are preventable with basic maintenance. The ones that aren’t—motor seal failures, cracked heating plates—are clear signals that the unit has served its time. For everything else, a $10 seal and ten minutes of work beats a $100 replacement. If you’re dealing with a different machine, our guide on water pump issues covers the next most common kitchen appliance failure.
Products related to this article
Sponsored / affiliate links. As an Amazon Associate I earn from qualifying purchases. I may earn additional commission from eligible campaigns.
 Coffee Espresso Machine Handle Replacement Parts, Cafe Bracket Handle for Lidl Silvercrest CM4621 CM4218 KF5002 KF500S Barista (for 51mm Portafilter Basket - Not included)
 SOLUSTRE Electric USB Coffee Cup Warmer with Temperature Settings Portable Milk and Beverage Heating Coaster for Office Desk Small Lightweight Design Easy to Clean Surface Multi Functional
 Stainless Steel Moka Pot Pressed Powder Tool for 2 4 6 9 Cup Espresso Coffee Brewer(6 Cups)