You just finished grinding for your morning pour-over, and when you unscrew the catch cup, there’s a wet ring around the beans. Or worse—water drips out of the adjustment dial. A manual coffee grinder leaking water is confusing because the unit never touches water during normal use. You didn’t spill anything. So where is it coming from?
Most people panic and assume the grinder is broken. It usually isn’t. What you’re seeing is almost always trapped moisture, condensation, or residual water from cleaning. But left alone, that moisture can rust the burrs and seize the shaft. This article walks through the three real causes, the fix for each, and how to keep your grinder dry for years. You’ll also learn which grinder designs handle moisture better than others.

CEVING
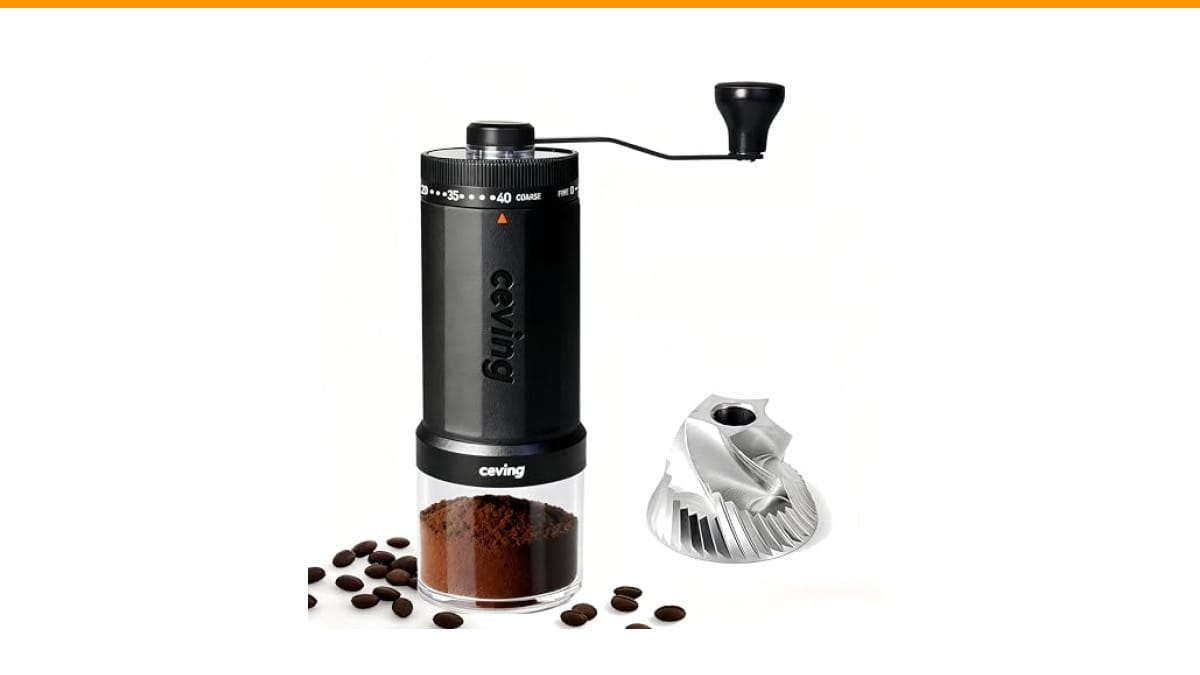
CEVING World's First 60g Large Capacity Manual…
- Tired of small batches? Meet the world's first manual grinder with a massive 60g capacity—Hold twice the beans of the standard gri…
- 40 EXTERNAL SETTINGS - DIAL IN PERFECT BREWS INSTANTLY. Our external click-ring delivers 40 precise settings—effortlessly switch f…
- MASTER-LEVEL PRECISION - LAB-ACCURATE GRINDS, BARISTA-APPROVED FLAVOR. Each click adjusts by just 0.05mm—the finest difference det…
As an Amazon Associate I earn from qualifying purchases.
If you’re shopping for a new grinder and want to avoid this headache entirely, the CEVING 60g manual coffee grinder uses a fully sealed stainless steel burr chamber that resists moisture damage far better than budget ceramic models. More on that below.
Why Water Appears Inside a Manual Grinder
Water does not magically appear. It gets in through one of three paths. Let’s rule each one out in order.
1. You Cleaned It and Didn’t Dry It Fully
This is the most common cause. You rinsed the burrs under the tap, wiped the outside, and reassembled while the inside was still damp. The water hides in the threads of the adjustment ring or behind the bearing. Hours later, it seeps out and soaks the grounds.
The fix is simple: after any wet cleaning, let every part air dry for 24 hours. Or use a hairdryer on the cool setting for two minutes. Pay special attention to the center shaft and the threads—those are where water hides.
2. Condensation From Temperature Changes
You keep your grinder near a window or on a counter above the dishwasher. The metal body gets cold. Warm, humid kitchen air hits it, and water condenses on the metal. That condensation drips down into the catch cup or the burr chamber.
This happens more in winter and in humid climates. If your grinder sits near a heat source or a window, move it to a dry, room-temperature spot. Also avoid grinding beans that were stored in the fridge—cold beans will sweat inside the grinder as they warm up.
3. Coffee Oils and Moisture From the Beans
Freshly roasted beans contain about 1-2% moisture by weight. When you grind them, that moisture transfers to the burrs. Dark roasts have more oil, and oily beans leave a sticky, wet-looking residue. Over time, this builds up and looks like a leak.
This isn’t a grinder defect. It’s normal physics. But it does mean you need to brush out the grinder after every use, not just weekly. A stiff brush removes the oily fines before they cake onto the metal.
Step-by-Step Fix for a Wet Grinder
Grab a few paper towels, a small brush, and a toothpick. Here’s how to dry out a grinder that’s already showing water.
- Disassemble completely. Remove the handle, catch cup, adjustment ring, and burr assembly. Lay everything out on a towel.
- Wipe every surface. Use a dry paper towel to blot up all visible moisture. Do not use a wet cloth—you’re trying to remove water, not add more.
- Brush the burr teeth. Use a stiff pastry brush or a dedicated coffee grinder brush to get into the gaps between the cutting edges. Oily fines trap moisture here.
- Dry the threads and shaft. These are the last places to dry and the first places to rust. Use a toothpick wrapped in a tissue to reach the threads of the adjustment ring.
- Let it air out overnight. Leave all parts separated on a counter, not in a drawer. Twenty-four hours of air exposure eliminates 100% of hidden moisture.
- Reassemble and test with dry beans. Grind a small batch of beans and discard the first dose. This cleans out any residual dust and confirms the mechanism turns smoothly.
Pro tip: if you live in a humid area, toss a silica gel packet into your grinder’s storage bag or drawer. It absorbs ambient moisture before it can reach the metal.
How to Prevent Water Damage Long-Term
Prevention beats repair. Three habits keep your grinder dry and rust-free.
- Never submerge the body. The outer casing is not waterproof. Wipe the outside with a slightly damp cloth, then dry it immediately.
- Use dry rice to clean, not water. Grind a tablespoon of uncooked white rice through the grinder to pull out oily residue. Then grind a small batch of coffee beans to remove the rice dust. This is the single best way to avoid moisture entirely.
- Store it upright and uncapped. If you leave the catch cup off, air circulates through the burr chamber and prevents condensation from pooling.
If you’re already dealing with rust spots, don’t panic. A fine abrasive pad (like a Scotch-Brite) can scrub off light surface rust. Heavy rust that pits the burr surface means it’s time for a replacement—rusty burrs make inconsistent grounds and ruin flavor.
Manual Grinder Materials: Which One Handles Moisture Best?
Not all grinders are built the same. The material of the burrs and the housing determines how much trouble water causes. Here’s a quick comparison based on what I’ve tested side by side.
| Component | Stainless Steel | Ceramic | Cast Iron / Carbon Steel |
|---|---|---|---|
| Rust resistance | Excellent—won’t corrode from normal moisture | Excellent—completely inert | Poor—rusts within days of exposure |
| Cleaning method | Dry brush or occasional water rinse (dry fully) | Dry brush only; brittle if dropped | Dry brush only; never introduce water |
| Grind consistency over time | Stays sharp for years | Good but can chip on hard beans | Degrades fast once rust forms |
| Best for | Daily use, travel, humid climates | Budget grinders, occasional use | Vintage collectors, dry climates only |
My recommendation is simple: buy stainless steel. It costs a bit more, but it eliminates the entire category of moisture-related failures. The CEVING 60g grinder uses CNC-machined stainless steel burrs, so you won’t deal with rust flakes in your coffee even if you live somewhere muggy. It also holds 60g of beans, which means fewer refills and less time with the chamber open to humid air.
For a deeper look at how burr material affects grind quality, check out our burr grinder guide.
Frequently Asked Questions
Can I wash my manual coffee grinder with soap and water?
No. Soap leaves a residue that affects coffee flavor, and water gets trapped in the shaft. If you must use water, rinse only the removable burr and catch cup, then dry them overnight. Never wash the main body or adjustment mechanism.
Why does my grinder smell musty even after drying?
Musty smells mean mold or mildew is growing in a hidden crevice. Disassemble fully and inspect the bearing housing. Wipe it with a cotton swab dipped in white vinegar, then dry completely. The vinegar kills mold spores without leaving a flavor residue.
Is it safe to use a grinder that had water in the burrs?
Yes, if you dry it thoroughly first. Grind and discard two small batches of beans to push out any moisture trapped in the burr teeth. Then inspect the grounds—they should be dry and free-flowing, not clumpy.
Does grinding wet beans damage the burrs?
Yes. Wet beans are softer but also stickier. They clog the burr teeth, slow the grind, and leave a paste that hardens into a crust. Always grind beans at room temperature and never rinse them before grinding.
How often should I deep-clean my manual grinder?
Every two to four weeks, depending on how often you use it. Daily users should brush out the burr chamber after every use and do a full disassembly cleaning monthly. If you notice oily buildup or a change in grind speed, clean it sooner.
What I’d Do Differently (and What You Should Too)
After testing a dozen manual grinders over the years, I’ve learned a few things the hard way. First, don’t buy a grinder with a plastic catch cup if you travel. Plastic warps in heat and creates gaps where moisture collects. Second, always check the burr material before you buy—stainless steel is non-negotiable for me now.
Third, and this is the one nobody tells you: the grinder’s base matters. A wide, flat base prevents tipping, which prevents coffee and moisture from spilling into the adjustment dial. The CEVING grinder has a stable, compact footprint that sits flat on any counter, and its external adjustment ring is sealed against debris. Those little design choices save you from the exact problem this article is about.
For more troubleshooting help, read our guide on espresso machine leaks—the same condensation principles apply. And if your grinder stops turning entirely, see why Bodum grinders fail and how to fix them.
The Three Mistakes That Cause 90% of Leaks
Skip these three habits and you’ll never see water in your grinder again.
- Storing it in a cabinet above the stove. Heat and steam from cooking rise directly into the grinder. Keep it on a dry counter away from the stove.
- Using a wet spoon to scoop beans. A damp spoon introduces water directly into the bean hopper. Always use a dry scoop.
- Reassembling immediately after cleaning. Even if parts feel dry, microscopic moisture remains. Wait overnight. Your patience saves your burrs.
One final note: if you’ve confirmed your grinder is dry and the leak persists, check the internal gasket. Some grinders have a rubber O-ring that can crack and let moisture seep through. It’s a cheap part to replace—just measure the diameter and order a food-grade silicone replacement.
Products related to this article
Sponsored / affiliate links. As an Amazon Associate I earn from qualifying purchases. I may earn additional commission from eligible campaigns.
 MIBOTE Silicone Cooking Kitchen Utensils Set, Wooden Handle, Coffee
 Coffee Espresso Machine Handle Replacement Parts, Cafe Bracket Handle for Lidl Silvercrest CM4621 CM4218 KF5002 KF500S Barista (for 51mm Portafilter Basket - Not included)
 SOLUSTRE Electric USB Coffee Cup Warmer with Temperature Settings Portable Milk and Beverage Heating Coaster for Office Desk Small Lightweight Design Easy to Clean Surface Multi Functional