You buy a bag of quality beans, grind them a week later, and the cup tastes flat and slightly sour. The culprit isn’t the roaster. It’s moisture. Water is the enemy of roasted coffee—it accelerates staling, triggers off-flavors, and can even lead to mold if conditions get bad enough. Most people focus on oxygen when storing beans, but humidity does just as much damage, often faster.
This guide walks through exactly how to keep moisture out of a coffee bean storage container. You’ll learn why humidity matters, what container features actually work, where to place the container in your kitchen, and a few simple tricks that cost almost nothing. By the end, you’ll know how to keep beans fresh for weeks longer than the average bag on the counter.
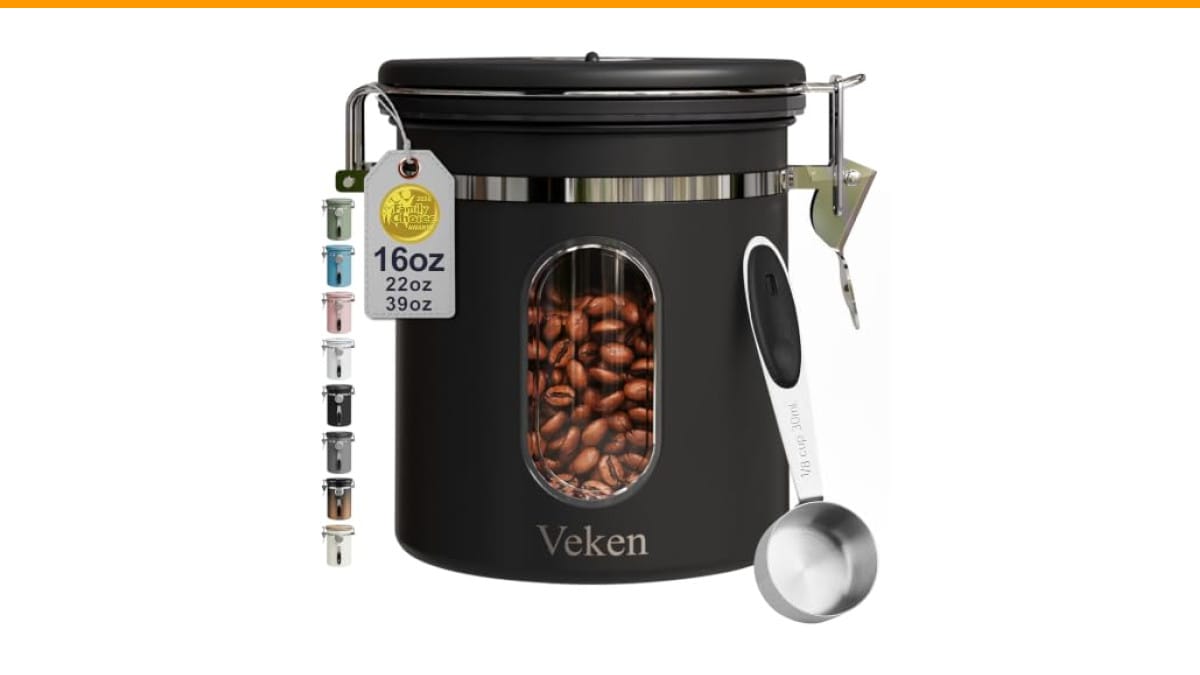
If you’re shopping for a new container, the Veken Coffee Canister with Window solves most moisture problems out of the box. It uses a one-way CO2 valve and a silicone rubber seal to block humid air, plus a date tracker on the lid so you know exactly when the beans were stored. The 304 stainless steel body also keeps light out, which is another freshness factor people overlook.
Why Moisture Ruins Coffee Beans Faster Than Air
Roasted coffee beans are porous. Think of them like tiny sponges that have been dried and toasted. The moment they’re exposed to humid air, they start absorbing water vapor. That moisture triggers two problems.
First, it accelerates oxidation. The chemical reactions that turn fresh coffee flavors stale happen much faster in the presence of water. A bean stored at 60% relative humidity will taste noticeably older after a week than one stored at 40%.
Second, moisture invites microbial growth. While roasted beans are too dry for most bacteria, mold can still develop in a sealed container if the internal humidity climbs above 70% for several days. You won’t always see it—mold can grow inside the bean’s crevices before it becomes visible on the surface.
The practical target is simple: keep the air inside your container below 50% relative humidity. Most kitchens sit between 40% and 65% depending on season, cooking habits, and geography. If you live in a humid climate or store beans near the stove, you’re already fighting an uphill battle.
Container Features That Actually Block Moisture
Not all coffee canisters are created equal. A decorative jar with a cork lid looks nice but does almost nothing against humidity. Here’s what to look for, ranked by importance.
The Seal Is Everything
The lid’s gasket determines how much humid air gets in. A silicone rubber gasket pressed against a rigid rim creates a true airtight seal. Cheap plastic lids with a thin foam ring compress over time and start leaking within months. Test your container by closing it, pressing gently on the lid, and listening for air escaping. If you hear a hiss, the seal is already compromised.
One-Way Valves Help More Than You’d Think
Freshly roasted beans release CO2 gas for days after roasting. If your container is completely sealed with no valve, pressure builds up. Some containers handle this by venting slightly, which lets humid air back in. A one-way CO2 valve solves this by letting gas escape while preventing outside air from entering. The Veken canister includes this valve, which is a feature you usually only see on more expensive storage systems.
Material Matters for Temperature Stability
Stainless steel and ceramic maintain a more stable internal temperature than thin plastic or glass. Temperature swings cause condensation. If your container sits in a warm kitchen and the temperature drops at night, moisture can form on the inside walls. Heavier materials buffer those swings. The Veken uses 304 stainless steel, which also blocks light—another factor that degrades coffee oils.
What to Skip
Avoid containers with wide mouths that you open frequently. Every time the lid comes off, humid kitchen air rushes in. Also skip containers with wooden lids or cork seals. Wood absorbs moisture and swells, which eventually ruins the seal. And stay away from clear glass jars unless you keep them in a dark cabinet—light accelerates staling almost as fast as oxygen.
Where You Place the Container Matters
You can buy the best canister on the market and still ruin beans by putting it in the wrong spot. Location controls how much moisture the container is exposed to in the first place.
Keep the container away from the stove, dishwasher, and sink. Steam from cooking and washing dishes raises local humidity dramatically. Even a well-sealed container will eventually equalize with the surrounding air when opened. If you open the lid next to a boiling pot, you’re letting steam directly into the container.
The ideal spot is a cool, dry cabinet away from any heat source. Countertop storage looks nice but exposes the container to kitchen humidity all day. If you must keep beans on the counter, choose a stainless steel or ceramic container and avoid placing it near the window where sunlight heats the interior.
Don’t store coffee in the refrigerator or freezer. This is a common myth that causes more harm than good. The fridge is humid, and condensation forms every time you open the door. The freezer works only if you never open the bag until it fully thaws, which is nearly impossible in practice. Room temperature in a sealed container is the right call.
Practical Tricks to Absorb Residual Moisture
Even with a good container, a little moisture can sneak in during opening and closing. These tricks help keep the internal environment dry.
Silica gel packets are the simplest solution. Drop one food-safe packet into the container with your beans. It absorbs excess humidity and stays effective for months. Just make sure the packet is labeled food-safe and doesn’t touch the beans directly if it has any printed ink. Replace it every three months or when it feels soft.
Another option is a small food-grade desiccant sachet designed specifically for coffee storage. These work the same way as silica gel but are often shaped to fit inside canisters. They cost a few dollars for a pack of ten and last a full year.
You can also reduce moisture at the source by letting freshly roasted beans degas before sealing them. Beans straight from the roaster release CO2 and moisture for the first few days. If you seal them immediately in an airtight container, that moisture has nowhere to go. Leave the lid slightly cracked for the first 24 hours after roasting, then seal it fully.
| Storage Method | Moisture Protection | Best For | Trade-Off |
|---|---|---|---|
| Airtight stainless steel canister with valve | Excellent—seals out humid air, valve releases CO2 | Daily use on counter or cabinet | Costs more than plastic, but lasts years |
| Glass jar with rubber gasket | Good—but light degrades beans | Dark cabinets only | Fragile, and light exposure shortens shelf life |
| Plastic container with clip lid | Fair—seals degrade over time | Short-term storage under 2 weeks | Cheap, but not durable for long-term use |
| Original bag with fold and clip | Poor—the bag’s seal is not airtight | Finishing beans within a few days | No protection against humidity at all |
| Freezer in original bag | Poor—condensation forms on thawing | Only for long-term storage of unopened bags | Risky, and flavor often suffers |
Signs Your Container Has a Moisture Problem
You don’t need a hygrometer to know if things are going wrong. The beans will tell you.
Fresh beans have a dry, matte surface and a strong aroma when you open the container. If the beans look shiny or slightly oily after a few days, that’s a warning sign. Surface oil is normal for dark roasts, but if a light or medium roast starts looking greasy, moisture is likely involved.
Another sign is a dull, flat smell when you open the lid. Fresh coffee should smell vibrant and sweet. If it smells musty or like cardboard, moisture has already done its damage. Clumping is the final red flag—if the beans stick together or feel soft when squeezed, they’re absorbing water.
If you see any of these signs, take action immediately. Move the beans to a dry container, add a desiccant packet, and use them within a week. The flavor won’t fully recover, but you can stop further damage.
Frequently Asked Questions
Can I use rice to absorb moisture in a coffee container?
Rice works as a desiccant, but it’s not ideal. Uncooked rice absorbs moisture slowly and can transfer its own starchy dust to the beans. Silica gel packets are more effective and don’t leave residue. If you’re in a pinch, a small dry rice packet in a paper sachet works, but replace it weekly.
How often should I clean my coffee storage container?
Clean it every time you finish a batch of beans, or at least once a month. Coffee oils build up on the walls and can turn rancid, which then transfers off-flavors to fresh beans. Wash with warm soapy water, dry thoroughly, and let it air out completely before adding new beans. Moisture left in a freshly washed container is a common cause of mold.
Does the one-way valve really make a difference?
Yes, especially for freshly roasted beans. The valve lets CO2 escape without letting humid air in. Without it, pressure builds up and forces the seal to leak. If you buy beans within a week of roasting, a valve is worth having. For beans that are already weeks old, the valve matters less because degassing has slowed down.
Should I store beans whole or ground to avoid moisture?
Always store whole beans. Ground coffee has far more surface area, which means it absorbs moisture and oxygen much faster. A whole bean can stay fresh for weeks in a good container; ground coffee starts losing flavor within hours. Grind only what you need right before brewing.
Is it okay to leave the container on the counter near the coffee maker?
It’s convenient, but not ideal. Coffee makers produce steam and heat, which raises local humidity. If your container sits right next to the machine, it’s exposed to that moisture every time you brew. Move it a few feet away or into a cabinet. The extra step is worth the freshness.
What Actually Works: A Quick Recap
- Buy a container with a silicone gasket and a one-way CO2 valve—the Veken stainless steel canister checks both boxes.
- Place the container in a cool, dry cabinet away from the stove, sink, and coffee maker.
- Add a food-safe silica gel packet to absorb residual humidity inside the container.
- Let freshly roasted beans degas for 24 hours before sealing them airtight.
- Clean and fully dry the container between each batch of beans.
- Skip the fridge and freezer—room temperature in a sealed container is better.
- Watch for oily surfaces, dull aroma, or clumping as early warning signs.
Keeping moisture out of a coffee bean storage container doesn’t require expensive equipment or complicated routines. A quality canister, smart placement, and one small desiccant packet handle 95% of the problem. The remaining 5% is just paying attention to how the beans look and smell. Do that, and your morning cup will taste like the roaster intended, even three weeks after opening the bag.
For more on keeping your coffee gear in top shape, check our machine maintenance guide and grinder cleaning tips.
Products related to this article
Sponsored / affiliate links. As an Amazon Associate I earn from qualifying purchases. I may earn additional commission from eligible campaigns.