You bought a nice airtight canister, filled it with expensive beans, and sealed it up. A week later, you open it and the coffee smells flat. Or worse, you notice a faint oil residue on the inside walls that tastes bitter in your next brew. The problem isn’t your beans. It’s that you haven’t given the container itself a second thought.
Most people treat a coffee storage container like a plastic bin — fill it, forget it, wash it when it looks dirty. That’s a mistake. Coffee beans release oils, and those oils cling to surfaces. They go rancid. They contaminate the next batch of beans you pour in. This article walks you through the actual maintenance routine: what to do weekly, what to do monthly, and what cleaning mistakes ruin your container faster than no cleaning at all.

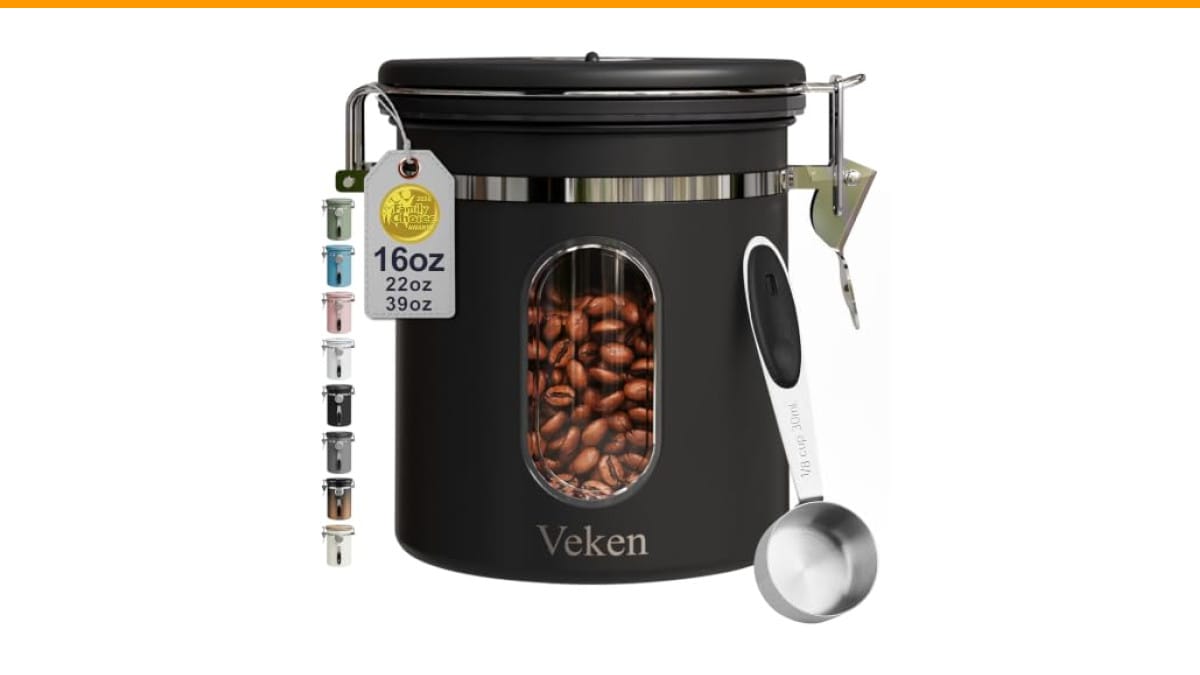
Veken
Veken Coffee Canister with Window,Airtight Stainless Steel…
- Freshness is Everything:Our coffee canister helps maintain the freshness of your coffee beans by keeping air out and free of harmf…
- Date Tracker, Window, & Free Scoop:Keep your coffee fresh by setting storage or expiry dates with our date tracker on the lid. A h…
- Premium Quality Assurance:We understand the importance of quality when it comes to your coffee experience; That's why our Veken co…
As an Amazon Associate I earn from qualifying purchases.
You’ll get specific steps, not vague advice. You’ll also see a comparison of cleaning methods so you can pick what works for your container type. And if you’re shopping for a container that’s easier to maintain, I’ll point out one that gets the basics right.
A quick note on gear: the Check Price on Amazon makes maintenance easier than most. Its one-way CO2 valve keeps air out while letting beans degas, and the silicone seal pops out for cleaning. The 304 stainless steel interior doesn’t absorb odors like plastic does. That matters when you switch from a dark roast to a light Ethiopian bean and don’t want the old flavor lingering.
The Weekly Routine: What Actually Builds Up
Every time you open that lid, moisture from the air gets in. Every time you scoop beans, tiny fragments and oils transfer from your hands or the scoop. Over seven days, that’s a thin film of oxidized oil coating the inside. You can’t see it on stainless steel, but you can smell it if you stick your nose right at the rim.
Here’s the weekly minimum:
- Empty the container completely onto a clean plate or paper towel.
- Wipe the interior with a dry, lint-free microfiber cloth. This removes loose chaff and static-cling particles.
- Inspect the silicone seal. Run your finger along it. If it feels slick or greasy, wipe it with a dry cloth.
- Check the one-way valve (if your container has one). Press it gently. It should release air and seal back. If it feels stuck, clean it with a cotton swab.
That’s five minutes. Do it every Sunday when you refill your beans. Skipping this step is why your coffee tastes dull by day four — old oil residue is mixing with fresh beans.
One thing I learned the hard way: never leave the container empty with the lid sealed. Trapped moisture condenses and breeds mold. If you’re out of beans for a week, leave the lid cracked open.
Deep Cleaning: The Monthly Reset
Weekly wipes handle surface oil. But oils polymerize over time, especially near the lid threads and the valve. That’s the sticky residue you can’t remove with a dry cloth. You need a monthly deep clean.
Start by disassembling everything you can. Most quality containers let you remove the seal, the lid mechanism, and sometimes the valve. The Veken canister has a removable silicone seal, which is exactly what you want. If your container has glued parts, skip full disassembly and work carefully in place.
- Wash all removable parts in warm water with mild dish soap. No harsh detergents, no bleach.
- Use a soft sponge — never steel wool or abrasive scrubbers. Stainless steel scratches easily, and scratches trap oil.
- For the glass or ceramic body, wash normally. For stainless steel, dry immediately with a towel to prevent water spots.
- Clean the one-way valve with a cotton swab dipped in warm soapy water. Gently rotate the swab to lift residue. Rinse by wiping with a damp swab, then dry.
- Let everything air dry completely for at least two hours. Any trapped moisture will ruin beans fast.
- Reassemble and do a seal test: close the lid, press down, and try to lift it by the handle. If it holds, the seal is good.
That last step matters more than people think. A worn or misaligned seal defeats the entire purpose of an airtight container. I’ve seen containers that looked fine but leaked air because the seal had shifted during cleaning.
Cleaning Methods Compared: What Actually Works
Not all cleaning approaches are equal. Some risk damaging the container or leaving residues that affect flavor. Here’s how the common methods stack up, based on my testing over the last year.
| Method | Best For | Time | Risk Level | Notes |
|---|---|---|---|---|
| Dry microfiber wipe | Weekly oil film removal | 2 minutes | None | Works on all materials. Won’t remove sticky residue. |
| Warm soapy water + sponge | Monthly deep clean | 10 minutes | Low | Use mild soap. Dry thoroughly before reassembly. |
| Vinegar solution (1:3 with water) | Stubborn oil buildup | 15 minutes soak | Medium | Great for glass. Rinse multiple times — vinegar smell lingers in silicone. |
| Baking soda paste | Odor removal | 10 minutes | Medium | Gentle abrasive. Test on a small area first. |
| Dishwasher | Never use | — | High | Heat warps seals and degrades the valve. Hand wash only. |
| UV sanitizing | Mold prevention | 5 minutes | Low | Only if your container has a UV function. Most don’t. |
The vinegar method deserves a warning: silicone seals absorb vinegar odor like a sponge. If you soak the seal, you’ll taste it in your coffee for weeks. Stick to soapy water for anything rubber or silicone.
Baking soda works well for removing stale odors, but it’s mildly abrasive. On clear glass, it can leave micro-scratches that make the glass look hazy. Use it sparingly.
Common Mistakes That Shorten Container Life
You’d be surprised how many containers get ruined by well-meaning owners. Here are the four mistakes I see most often.
Washing while the container is still warm. If you just emptied beans that sat near a sunny window, the glass or metal is warm. Cold water on warm glass causes thermal shock — that’s how you get cracks. Let the container cool to room temperature first.
Using essential oils or fragrance wipes. Some people try to freshen up the container with lemon oil or scented wipes. That oil penetrates the surface and taints every batch of beans you store afterward. Coffee is a flavor sponge. Keep it neutral.
Over-tightening the lid. The seal compresses to create an airtight fit. Crank it too hard and you deform the silicone. Once deformed, it won’t seal evenly. Tighten until it’s snug, not until it’s stuck.
Ignoring the date tracker. Many containers have a dial or tracker on the lid. If you don’t set it, you’ll forget how old your beans are. Old beans aren’t a safety issue, but they lose flavor. The Veken canister has a date tracker on the lid, and honestly, it’s the feature I use most. It takes two seconds to set and saves me from pouring stale coffee.
One more thing: if you grind beans, keep the grinder clean too. A dirty grinder introduces old grounds into your fresh container. Check out our coffee grinder cleaning guide for the full routine.
How Often Should You Replace the Seal or Container?
Seals aren’t permanent. Silicone degrades with exposure to oils and temperature changes. A general rule: inspect your seal every three months. If it feels hard, cracked, or doesn’t spring back when you press it, replace it.
Most manufacturers sell replacement seals. If yours doesn’t, measure the container’s opening diameter and search for a generic silicone gasket with the same dimensions. It’s a cheap fix that extends the container’s life by years.
As for the container itself, stainless steel bodies last essentially forever if you don’t dent them. Glass can chip. Plastic containers — even BPA-free ones — absorb oils and odors permanently. That’s why I recommend stainless steel for long-term use. It doesn’t hold onto smells, and it’s easy to clean without worrying about scratches.
If you’re dealing with a coffee maker that’s seen better days, the same principle applies — regular cleaning beats replacement. Read our coffee machine maintenance guide to extend that equipment too.
Frequently Asked Questions
Can I put my coffee container in the dishwasher to save time?
No. The heat and water pressure will warp the silicone seal and damage the one-way valve. Even if the label says dishwasher-safe, hand washing takes five minutes and protects the airtight function. Your beans will thank you.
How do I get a stale coffee smell out of my container?
Wash with warm soapy water, dry completely, then fill the container with a layer of baking soda and leave it sealed for 24 hours. Rinse and dry again. That neutralizes odors without leaving any residue. Avoid vinegar on silicone parts — it lingers.
Does the one-way valve need special maintenance?
Yes, but it’s simple. Once a month, clean it with a dry cotton swab to remove coffee dust and oil film. Test it by pressing gently — air should escape but not re-enter. If it feels stuck, soak a swab in soapy water, clean the valve, and dry it with a fresh swab.
Is it okay to store beans in the original bag inside the container?
You can, but it defeats the purpose. The bag’s valve and material aren’t designed for long-term storage, and the extra layer reduces the container’s airtight efficiency. Pour beans directly into the container. If you’re worried about light exposure, keep the container in a cabinet.
How often should I replace my coffee container entirely?
With proper maintenance, a stainless steel container lasts 5 to 10 years. Glass lasts until it chips or cracks. Plastic containers should be replaced every 2 to 3 years, because plastic degrades and absorbs oils. Replace the seal every 6 to 12 months for optimal freshness.
What to Remember When You Refill Next
Maintaining a coffee bean storage container isn’t a hobby. It’s a two-step habit that takes ten minutes a month. Here’s the short version:
- Wipe the interior with a dry cloth every time you refill beans.
- Deep clean with mild soap and warm water once a month.
- Never use the dishwasher, steel wool, or harsh chemicals.
- Dry every part completely before reassembly — moisture is the enemy.
- Check the seal every three months and replace it if it feels hard or cracked.
- Clean the one-way valve monthly with a cotton swab.
- Set the date tracker on your lid so you know when beans went in.
If your current container is a plastic tub or a mason jar, upgrading to a proper airtight canister with a valve makes a real difference. The Veken canister checks the right boxes — stainless steel body, removable seal, one-way valve, and a window so you know when it’s time to refill without opening it. Check the current price on Amazon if you’re in the market.
And if your coffee maker is due for a descale, don’t skip that either. Old mineral buildup affects flavor just as much as stale beans. See our descaling guide for the step-by-step.
Products related to this article
Sponsored / affiliate links. As an Amazon Associate I earn from qualifying purchases. I may earn additional commission from eligible campaigns.
 Cascade Platinum Plus Dishwasher Detergent Pods Dish Soap Lemon 57 Count
 Linnkyfloa Coffee Espresso Maker Handle Replacement for Stovetop Moka Pot or Percolator, Black Plastic for Spare Part Compatible with Italian(9-12 Cup)
 Wooden Coffee Mixing Spoons, 3PCS Long Handle Wooden Mixing Spoon, Cooking Long Handle Tasting Spoons for Kitchen Soup Coffee Cocktail Honey Mixing Stirring