You bought an automatic espresso machine so your morning routine would be effortless. Then one day the shot runs slow, the crema looks thin, or a faint sour smell lingers no matter how many blank flushes you run. That’s the moment most people realize they’ve been ignoring maintenance. The good news is that keeping your machine in top shape takes less than 10 minutes a day once you know the routine.
This guide covers exactly what to do and when. You’ll learn the daily, weekly, and monthly tasks that prevent scale buildup, stale coffee oils, and costly repairs. I’ll also share the descaling products I trust and the mistakes I’ve seen ruin otherwise fine machines.

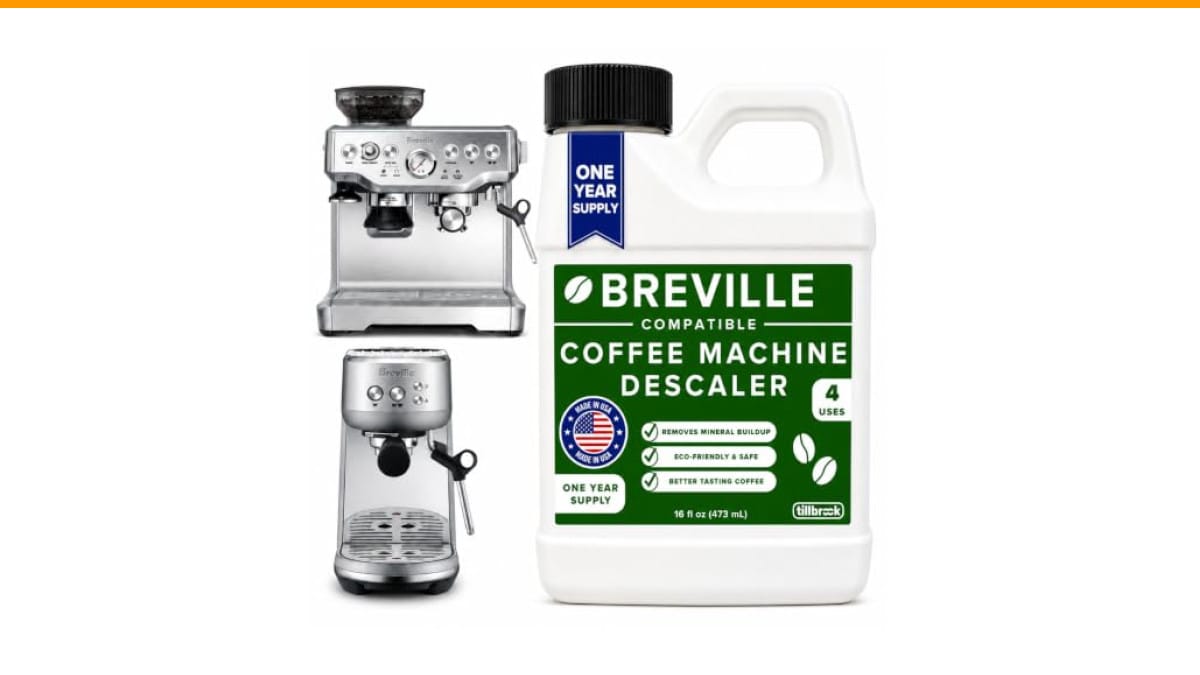
Tillbrook
Breville Espresso Machine Compatible Descaler, 4 Uses,…
- EXCEPTIONAL RESULTS: Introducing Tillbrook Coffee Machine Descaler specifically formulated for Breville—the best choice for removi…
- 1 YEAR SUPPLY: Our concentrated formula is easy to use and provides remarkable value with 4 cleanings per bottle. Simply add 1/2 c…
- SCIENTIFICALLY ENGINEERED: Our advanced descaling solution is carefully crafted with powerful, all-natural ingredients that remove…
As an Amazon Associate I earn from qualifying purchases.
Let’s start with the one thing that matters most: water.
Why Water Quality Determines Your Machine’s Lifespan
Your espresso machine is essentially a small boiler with pumps and valves. Every drop of water leaves behind minerals, and those minerals don’t just vanish. Over months, calcium and magnesium form a crusty layer on the heating element and inside the brew group. That layer insulates the water from the heat, so the machine has to work harder and hotter to reach brewing temperature. The result is bitter shots, longer brew times, and eventually a dead heating element.
Hard water is the enemy. If you live in an area with hard water (most municipal water in the U.S. is moderately hard), you should use filtered or bottled water. But even soft water contains some minerals. That’s why descaling isn’t optional—it’s as essential as coffee beans.
Here’s a rule I use: descale every 3 to 4 months if you use filtered water, or every 2 months if you use tap water. Some machines have a descale indicator, but don’t wait for it. By the time the light comes on, scale has already built up.
For the descaling step, I’ve been using Tillbrook's Breville-compatible descaler. It’s a concentrated formula that makes four full descaling cycles per 16-ounce bottle. One bottle lasts a year if you stick to the 3–4 month schedule. It’s designed to dissolve limescale without attacking the rubber seals or leaving a chemical aftertaste, which is more than I can say for some cheap vinegar solutions.
Now let’s break down the actual maintenance routine.
Daily Maintenance: The 5-Minute Habit That Prevents 90% of Problems
You don’t need to be obsessive, but you do need to be consistent. Here’s what I do every single day, and it takes less time than waiting for the machine to warm up.
- Flush the group head. Before pulling your first shot, run water through the group head without a portafilter for 5–10 seconds. This clears any leftover coffee oils and warms the brew chamber.
- Purge the steam wand. After steaming milk, wipe the wand with a damp cloth immediately. Then open the steam valve for 2 seconds to blow out any milk residue inside the tip. Milk protein bakes onto the wand if you leave it, and that creates a breeding ground for bacteria.
- Empty and rinse the drip tray. Don’t let coffee sludge sit overnight. It grows mold and attracts fruit flies. A quick rinse under the tap is enough.
- Wipe the exterior. A damp microfiber cloth on the stainless steel keeps fingerprints from baking on. Skip the harsh cleaners—they can strip the coating.
That’s it. Four steps, under five minutes. The one thing people skip most often is the steam wand purge, and it’s also the most common cause of foul smells. Make it a non-negotiable.
If you notice the machine making unusual noises or leaking water, those are early warning signs. I’ve covered loud noise causes and water leak fixes in separate guides.
Weekly Maintenance: Deep Clean the Brew Group and Portafilter
Once a week, you need to go a little deeper. The daily flush removes surface oils, but coffee residue builds up in the tiny holes of the portafilter basket and inside the brew group.
Here’s my weekly routine:
- Backflush with water. If your machine has a blind basket (a basket with no holes), insert it, add a bit of water, and run the cleaning cycle. This forces water through the brew group and flushes out oils that normal brewing leaves behind.
- Soak the portafilter and basket. Remove the basket and soak both in warm water with a drop of dish soap for 10 minutes. Then scrub with a soft brush. Don’t use a metal scrubber—it will scratch the chrome and create hiding spots for bacteria.
- Clean the steam wand tip. Unscrew the tip (if removable) and soak it in the same soapy water. Use a pin to clear any clogged holes.
- Wipe the group head gasket. The rubber gasket around the group head collects old coffee. A quick wipe with a damp cloth keeps it flexible and prevents leaks.
If you use your machine more than twice a day, do this twice a week. The extra oils from frequent use can turn rancid quickly.
For a deeper clean, including the internal parts you can’t see, I wrote a full deep clean guide that covers the disassembly steps.
Monthly Maintenance: Descaling and Replacing Parts
Descaling is the big one. Every 3–4 months (or more often with hard water), you need to run a descaling solution through the entire water path. Here’s the method I use:
- Empty the water tank and fill it with the recommended amount of descaler concentrate (usually about 4 ounces) plus water to the max line.
- Place a large container under the steam wand and another under the group head.
- Run a brew cycle (without coffee) until the tank is about half empty.
- Stop, let the solution sit for 15 minutes to dissolve the scale.
- Finish running the rest of the solution through.
- Refill the tank with fresh water and run two full tanks through to rinse thoroughly.
The Tillbrook descaler I mentioned earlier makes this simple because the bottle has clear instructions and the right concentration for 4 uses. I’ve also compared it side by side with a generic citric acid powder, and the Tillbrook solution was noticeably faster at dissolving the chalky scale in my test kettle. It also left zero aftertaste, which is critical—if you don’t rinse enough, you’ll taste the descaler in your next shot.
During the monthly check, also inspect the water filter (if your machine has one). Most filters need replacement every 2–3 months. A clogged filter reduces flow and makes the pump work harder.
And don’t forget the grinder. If your machine has a built-in grinder, run a few grams of grinder cleaning tablets through it monthly. Burrs accumulate coffee oil that goes rancid and alters flavor.
Comparing Maintenance Methods: What Actually Works
| Method | Frequency | Time Needed | Effectiveness | Best For |
|---|---|---|---|---|
| Daily flush & wipe | Daily | 5 minutes | Prevents oil buildup | Every user |
| Weekly backflush | Weekly | 10 minutes | Removes coffee oils | Machines with a 3-way valve |
| Monthly descaling | Every 3–4 months | 30–45 minutes | Removes limescale | All machines, especially hard water areas |
| Vinegar solution | Every 3–4 months | 30 minutes | Works but leaves smell | Budget users |
| Commercial descaler (like Tillbrook) | Every 3–4 months | 30 minutes | Fast, no aftertaste | Most reliable option |
I’ve used both vinegar and commercial descalers. Vinegar is cheap and works, but it leaves a sour smell that lingers for days unless you rinse multiple times. Commercial descalers cost a bit more but save time and don’t risk damaging the machine’s internal seals. For a $500+ machine, the extra $10 a year is worth it.
Common Mistakes That Shorten Machine Life
Even experienced owners make these errors. Avoid them and your machine will outlast your countertop.
- Using tap water without testing. If your water leaves spots on glasses, it’s hard. Use filtered water.
- Skipping the rinse cycle after descaling. Residual descaler can corrode the boiler. Always run at least two full tanks of fresh water.
- Ignoring the drip tray. A full drip tray can overflow into the machine’s electronics. Empty it daily.
- Using dish soap on the group head. Soap residue can ruin the taste of your coffee. Use plain water or a dedicated cleaner.
- Not replacing the water filter. A used filter becomes a bacteria farm. Change it on schedule.
If you’re troubleshooting a specific issue, I’ve written a comparison of automatic vs. semi-automatic that also covers common failure points, and a home descaling guide with more detail on the chemical side.
Frequently Asked Questions
How often should I descale my automatic espresso machine?
Every 3 to 4 months if you use filtered water. If you use tap water, do it every 2 months. Some machines have a descale light, but don’t wait for it—the light only comes on after scale has already built up.
Can I use vinegar to descale my espresso machine?
You can, but I don’t recommend it. Vinegar is acidic enough to dissolve scale, but it also attacks rubber gaskets and leaves a persistent smell. Commercial descalers are formulated to be gentle on seals and rinse out completely. The extra cost is worth the peace of mind.
What is backflushing and do I need to do it?
Backflushing is running water through the brew group in reverse to flush out coffee oils. Machines with a three-way solenoid valve (most automatic models) benefit from weekly backflushing. If your machine doesn’t have a blind basket, you can buy one separately or skip it.
Why does my espresso taste sour or bitter after a few months?
Sour taste often comes from old coffee oils that have gone rancid. Bitter taste can come from scale buildup that makes the water too hot. Both are signs you need to clean the group head and descale.
Is it safe to use descaler in a machine with a built-in grinder?
Yes, as long as you run the descaling solution through the brew path and not the grinder. The grinder needs its own cleaning with tablets. Descaler is not for the burrs.
What to Do Next: Your Maintenance Schedule
Here’s the short version you can stick on your fridge:
- Daily: Flush group head, purge steam wand, empty drip tray.
- Weekly: Backflush with water, soak portafilter, wipe gasket.
- Monthly: Inspect water filter, clean grinder burrs.
- Every 3–4 months: Descale with a quality solution.
- Every 2–3 months: Replace water filter.
- If you notice issues: Check the troubleshooting guides before calling a repair tech.
- Use filtered water: It’s the single best thing you can do for your machine.
Maintenance isn’t glamorous, but it’s the difference between a machine that lasts 5 years and one that lasts 10. Your coffee will taste better, your wallet will thank you, and you’ll never have to drink a sour shot again.
Products related to this article
Sponsored / affiliate links. As an Amazon Associate I earn from qualifying purchases. I may earn additional commission from eligible campaigns.
 Coffee Espresso Machine Handle Replacement Parts, Cafe Bracket Handle for Lidl Silvercrest CM4621 CM4218 KF5002 KF500S Barista (for 51mm Portafilter Basket - Not included)
 Linnkyfloa Coffee Espresso Maker Handle Replacement for Stovetop Moka Pot or Percolator, Black Plastic for Spare Part Compatible with Italian(9-12 Cup)
 Commercial Meat Cutting Machine Stainless Steel Meat Cutter With Casters And Detachable 4.5mm Stainless Steel Cutting Blades 110V 750W 400KG/H for Institutional Kitchens Meat Retailers And Wholesalers