You bought an espresso machine with a milk frother because you wanted café-quality lattes at home. Then reality hit: the first shot ran too fast and tasted sour, the milk turned into a bubbly mess, and now the machine sits on the counter judging you. I’ve been there. Most home baristas give up after a few bad attempts, but the fix is usually simpler than you think.
This guide walks you through the entire process—grind size, dose, tamping, extraction time, and steaming milk to the right texture. You’ll also learn what to do when things go wrong, because they will. By the end, you’ll be able to pull a balanced shot and pour silky microfoam that actually mixes with the espresso instead of floating on top.

atatix
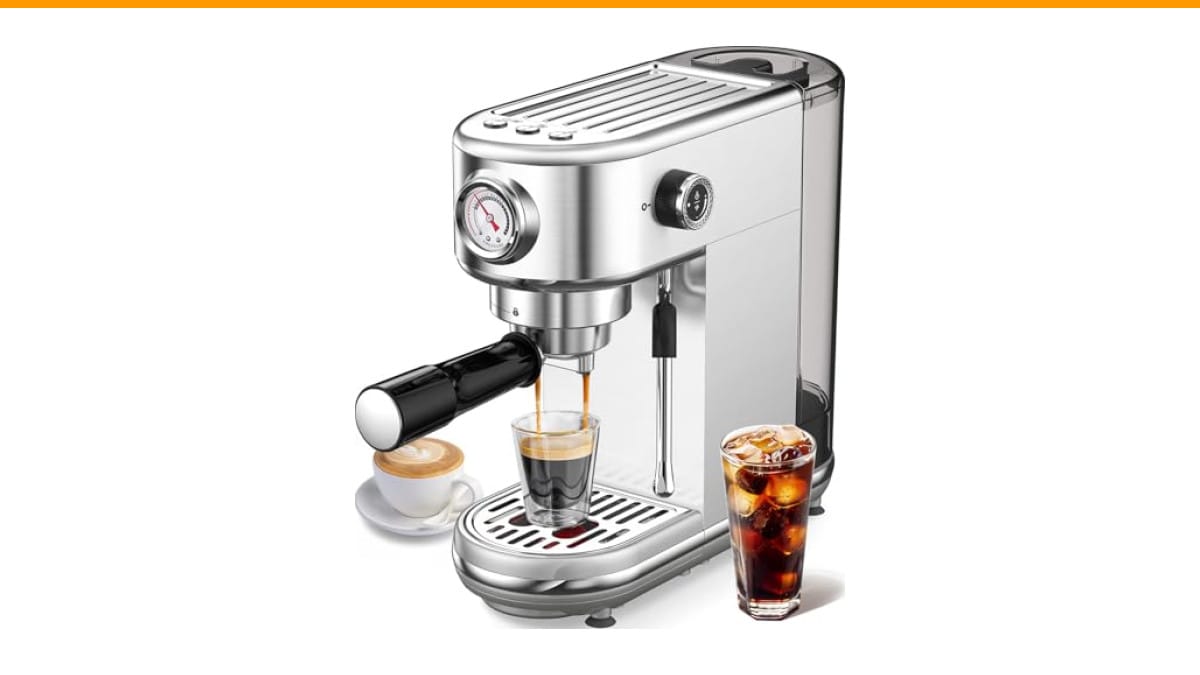
atatix Espresso Machine with Milk Frother, 20…
- 【Make Favorite Espresso Coffee by Yourself】The espresso machine with milk frother allows you to prepare all your favorite espresso…
- 【Professional 20 Bar Pressure System】The 20-bar system ensures optimal 9-10 bar pressure is maintained throughout the shot, fully…
- 【NTC Precision Temp Control Extract】 Solve inconsistent flavor for good. This espresso machine temperature control system locks on…
As an Amazon Associate I earn from qualifying purchases.
If you’re starting from scratch, a machine with a decent steam wand makes a big difference. The atatix Espresso Machine with Milk Frother is a solid option—it has a 20-bar pump that holds 9–10 bars during extraction, plus a steam wand that produces dry, focused steam. That combination gives you a real shot at making microfoam, not just hot froth.
Before You Pull a Shot: Setup and Heat Management
Most home machines need 15–20 minutes to fully heat up, not just the 30 seconds it takes for the indicator light to turn on. The metal group head and portafilter need to absorb heat too. If you start pulling shots on a cold group, your espresso will taste under-extracted no matter what you do.
Here’s the routine I use every time:
- Turn the machine on and let it heat for at least 10 minutes.
- Flush a blank shot (no coffee) through the portafilter to warm it up.
- Dry the portafilter completely before dosing.
- Grind your coffee right before brewing—stale grounds are the #1 reason home espresso tastes flat.
If your machine has a PID or temperature control (like the atatix model with NTC precision), set it between 90–96°C. Lighter roasts do better at the higher end; darker roasts at the lower end. That range is the sweet spot for balancing acidity and sweetness.
Pulling the Shot: Grind, Dose, Tamp, and Time
Espresso is a ratio game. Start with 18 grams of coffee in the double basket and aim for 36 grams of liquid out in 25–30 seconds. That 1:2 ratio is a safe baseline. If the shot runs faster than 25 seconds, grind finer. If it drips slowly and takes over 30 seconds, grind coarser. Change one variable at a time—don’t adjust grind and dose simultaneously or you won’t know what fixed it.
Tamping matters more than people think. Use firm, level pressure—about 30 pounds—and don’t twist the tamper at the end. A slight twist can crack the puck and cause channeling, where water finds a path through the coffee and leaves the rest dry. The result is a sour, weak shot with pale crema.
Your machine’s pre-set programs can help, but they’re not perfect. The atatix has an auto mode that runs 28 seconds for a single shot and 42 seconds for a double, which is a decent starting point. But manual mode gives you control—you can stop the shot when the scale hits your target weight, not when the timer says so. That’s the difference between good espresso and great espresso.
One thing I’ve learned: don’t judge the shot by color alone. Dark crema doesn’t mean it’s good. Weigh your output for the first few weeks until you can eyeball it. Digital scales are cheap and they’ll save you a lot of frustration.
Steaming Milk: Texture Over Temperature
Steaming milk is where most home users struggle. The goal is microfoam—tiny bubbles that make the milk glossy and pourable, not stiff peaks. The process is simple but requires attention.
Start with cold milk in a stainless steel pitcher. Fill it to about a third full—milk doubles in volume as it aerates. Purge the steam wand for two seconds before you start to clear condensation. Then submerge the tip just below the surface and open the steam valve fully.
Here’s the key: you want a gentle hissing sound, like paper tearing. That’s the air being incorporated. If it sounds like a gurgle, the tip is too deep—raise it slightly. If it sounds like a scream, it’s too shallow—lower it. Keep the tip near the surface for the first 5–10 seconds, then plunge it deeper to create a whirlpool. That vortex mixes the foam and heats the milk evenly.
Stop steaming when the pitcher is too hot to hold for more than a few seconds—around 60–65°C. Beyond that, the milk proteins break down and the foam falls flat. Tap the pitcher on the counter to pop large bubbles, then swirl it to combine. You should have a glossy, paint-like texture that pours smoothly.
If you’re using a machine with a weaker steam wand, like the atatix’s, the technique is the same but you may need to be more patient. The key is keeping the tip at the right depth—too deep and you get no foam, too shallow and you get big bubbles. Practice with water and a drop of dish soap to get the angle right before wasting milk.
Common Mistakes and How to Fix Them
Even after you’ve dialed in, things go wrong. Here’s the troubleshooting list I keep in my head:
- Sour, thin shot: Under-extracted. Grind finer or increase the dose.
- Bitter, burnt shot: Over-extracted. Grind coarser or shorten the shot time.
- Milk has big bubbles: The wand was too shallow. Submerge it deeper after the initial aeration.
- Milk is too hot: You stopped too late. Aim for 60°C—use a thermometer until you get a feel for it.
- Crema disappears fast: Old beans or a dirty group head. Use fresh coffee and clean your machine regularly.
Speaking of cleaning, a dirty steam wand ruins milk texture. Wipe it with a damp cloth after each use and purge it for two seconds to clear milk residue. Once a week, backflush with a cleaning tablet if your machine supports it. And don’t forget to descale every few months—hard water builds up and messes with temperature stability. For a full routine, check my coffee machine maintenance guide.
Comparing Frothing Methods: Steam Wand vs. Automatic Frothers vs. Manual
Not all milk frothers are equal. Here’s how the three main types stack up:
| Method | Texture Quality | Control | Learning Curve | Best For |
|---|---|---|---|---|
| Steam wand (integrated) | Excellent—real microfoam | Full control over aeration and temperature | Steep—takes practice | Latte art, cappuccinos, flat whites |
| Automatic frother (built-in or separate) | Good—thick foam but not as glossy | Minimal—press a button | None | Quick lattes, beginners, kids’ drinks |
| Manual frother (French press or handheld) | Variable—depends on technique | Some—you control speed and time | Moderate | Budget setups, travel, occasional use |
If you want to pour latte art, you need a steam wand. Automatic frothers produce foam that’s too stiff and separate from the milk. But if you’re just making a morning latte and don’t care about patterns, an automatic frother saves time. I’d still recommend learning the wand—it’s more satisfying and you’ll get better coffee.
One more thing: the type of milk matters. Whole milk steams best because of its fat content. Oat and soy milks are trickier—they need lower temperatures and gentler aeration. If you’re using plant-based milk, look for barista blends that are formulated to steam without splitting.
Frequently Asked Questions
How much milk should I use for one latte?
For a standard 8-ounce latte, start with 6 ounces of cold milk in the pitcher. That’s enough for a double shot and leaves room for foam. If you’re making a cappuccino, use the same amount but steam it longer to get more foam.
Why does my espresso machine’s steam wand sputter?
Sputtering happens when there’s water in the wand before you open the valve. Always purge the wand for 2–3 seconds into a towel or drip tray before steaming. Also, make sure the steam valve is fully open—partially open valves cause inconsistent pressure.
Can I use the steam wand to heat milk without frothing?
Yes, but it’s tricky. Submerge the tip fully below the surface and keep it there—no air incorporation. The milk will heat without adding foam. It’s a good technique for flat whites or if you want a smoother texture.
How often should I clean the steam wand?
After every use, wipe the wand with a damp cloth and purge it for two seconds. Once a week, soak the tip in hot water with a little detergent to remove milk residue. If the wand gets clogged, use a pin to clear the holes.
Why is my milk not getting frothy even though the wand is working?
Check the milk temperature first—cold milk froths better than warm. Then check the wand angle. The tip needs to be just below the surface to incorporate air. If it’s too deep, you’re just heating the milk. Also, make sure you’re using fresh milk—older milk has less protein and won’t foam well.
What I Wish I Knew When I Started
You don’t need a $2,000 machine to make good espresso at home. You need fresh beans, a decent grinder, and consistency. The atatix machine I mentioned earlier is a great starting point because it has a real steam wand and manual control—two things you’ll grow into rather than out of. I’ve used machines that cost twice as much with weaker steam wands.
Here are the takeaways I’d give to my past self:
- Heat the machine for at least 10 minutes before pulling a shot—the group head needs to be hot.
- Weigh your coffee and your output. Guessing leads to inconsistent shots.
- Adjust grind size first, not dose. It’s the easiest variable to control.
- Steam milk until the pitcher is uncomfortable to hold, not until it’s boiling.
- Purge the steam wand before and after every use—it’s non-negotiable.
- Practice steaming with water and a drop of dish soap to learn the technique without wasting milk.
- Clean your machine weekly and descale every 3–6 months. Hard water is the enemy of temperature stability.
If you run into issues with your machine’s performance, like loud noises or leaks, check out my troubleshooting guides on espresso machine noise and leaking water. Those problems are usually fixable at home.
Espresso is a skill, not a magic trick. The more you practice, the more you’ll notice the small details—the way the crema flows, the sound of the steam wand, the weight of the portafilter. That’s the fun part. You’ll get there.
Products related to this article
Sponsored / affiliate links. As an Amazon Associate I earn from qualifying purchases. I may earn additional commission from eligible campaigns.
 Coffee Espresso Machine Handle Replacement Parts, Cafe Bracket Handle for Lidl Silvercrest CM4621 CM4218 KF5002 KF500S Barista (for 51mm Portafilter Basket - Not included)
 Stainless Steel Moka Pot Pressed Powder Tool for 2 4 6 9 Cup Espresso Coffee Brewer(6 Cups)
 ATTITUDE Dish Soap, EWG Verified, Wildflowers, 33.8 fl oz