You just pulled a decent shot of espresso. The crema looks right, the flavor is close. Then you want a pour over for the afternoon, so you spin the dial on your grinder, drop in new beans, and grind. The first cup tastes like watered-down dirt. The second is bitter. By the third attempt, you’ve burned through half a bag of coffee and you’re back to square one.
As an Amazon Associate I earn from qualifying purchases.
This is the reality of owning a coffee grinder for pour over vs coffee grinder for espresso as a single machine. Most people assume a grinder is a grinder. It isn’t. The range between a fine espresso powder and a coarse pour over bed is massive, and the mechanics that make one great often cripple the other.
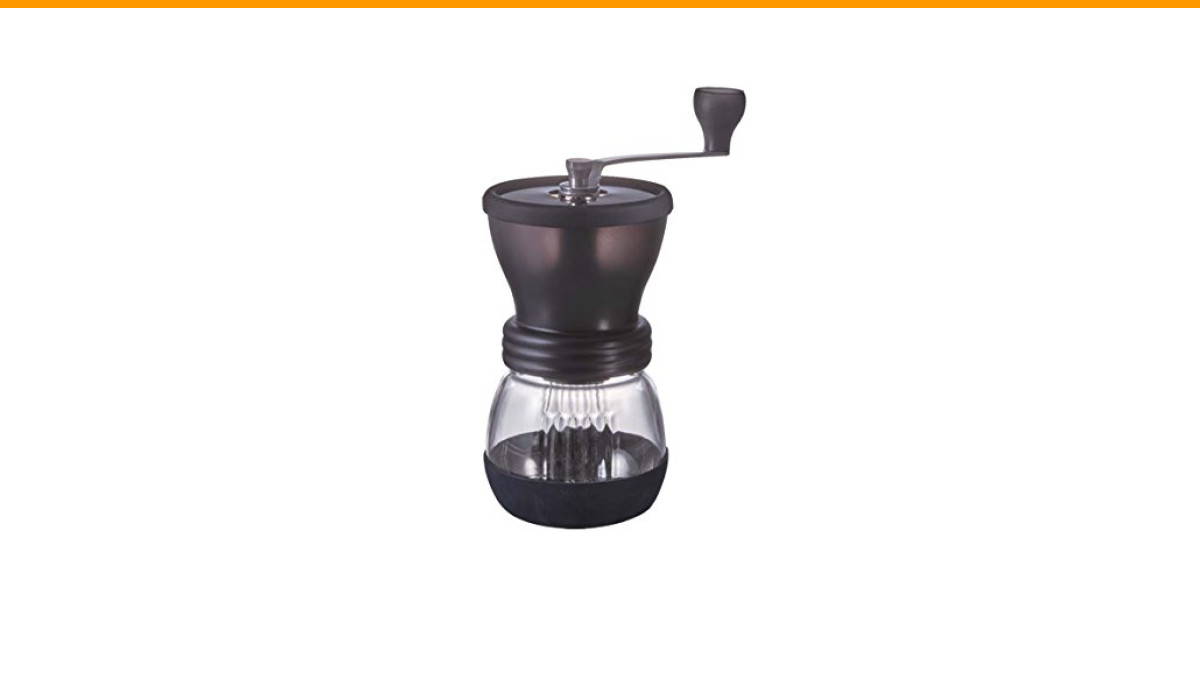
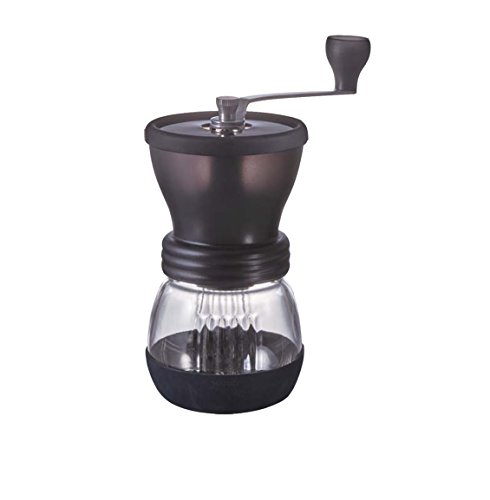
I’ve spent the last few weeks testing the Hario Coffee Hand Grinder Skerton (ASIN: B01LXZACFB) alongside electric options in my kitchen. It’s currently out of stock on Amazon, but it’s worth understanding because it represents a specific tier of manual grinding that many home users start with. Here’s what I learned about the real trade-offs, and whether you should be looking at one grinder or two.
The Real Problem: Why “One Grinder” Usually Means “Two Compromises”
The fundamental issue is range versus resolution. An espresso grinder needs fine adjustment in the 200-400 micron range. A pour over grinder needs to cover a much wider span, from 400 microns up to 1000 or more. When you buy a single grinder for both, you’re asking one set of burrs to excel at two opposite ends of the spectrum.
Most grinders under $300 fail at this. They either have a stepped adjustment mechanism with jumps too large for espresso dialing, or they have a wide range but poor consistency at the fine end. The Hario Skerton, for example, is a manual ceramic burr grinder that produces decent pour over grounds but struggles to hit the precise fine settings espresso demands. Its stepped adjustment means you might land between two steps, and neither is quite right.
I’m not saying dual-use is impossible. I’m saying it requires a specific type of grinder, a tolerance for waste, and a workflow that accepts the switch-over cost. Let’s look at the mechanics that matter.
Burr Geometry: Why Conical Burrs Are the Default for Dual-Use
There are two main burr types: flat and conical. For a single grinder doing both pour over and espresso, conical burrs usually win. The reason is simple: conical burrs produce fewer fines (the tiny dust particles that clog filters and over-extract). They also tend to run slower, which means less heat build-up on the beans.
The Hario Skerton uses a ceramic conical burr. That’s a good start for the pour over side. Ceramic stays sharp longer than steel in most home settings, and it doesn’t transfer heat to the beans during a long manual grind session. For espresso, though, the Skerton’s burr alignment is the weak point. The outer burr holder is plastic, and it can flex under pressure, causing inconsistent particle size at fine settings.
Flat vs. Conical: The Flavor and Texture Trade-off
Flat burrs give you a more uniform particle size distribution, which is great for espresso extraction. You get a cleaner, more defined flavor profile. But they produce more fines at coarser settings, which muddies a pour over cup and slows down your brew time.
Conical burrs are more forgiving. They produce a broader range of particle sizes, but the distribution is skewed toward the coarser end. That’s why they’re the default for anyone trying to do both. The flavor in pour over is a bit more textured, less crystalline, but it’s still good. In espresso, a conical burr gives you a thicker mouthfeel and a bit more chocolatey sweetness, which most home drinkers actually prefer.
So if you’re buying one grinder for both tasks, look for a conical burr design. The Skerton has it, but it lacks the build quality to execute it well at espresso fineness.
The Workflow Killer: Retention, Static, and the “Purge” Ritual
Retention is the amount of coffee that stays inside the grinder after you grind. In a single-dose grinder, you want retention close to zero. In a hopper-fed electric grinder, you might have 2-5 grams stuck in the chute. That doesn’t sound like much, but when you switch from espresso to pour over, those retained fines from the last espresso grind contaminate your first pour over batch.
You fix this with a purge: grind a few grams of fresh beans and throw them away. That’s wasted coffee every single time you switch. If you switch twice a day, you’re throwing away 10-14 grams daily. Over a week, that’s a full bag of coffee wasted just on the switching ritual.
Static makes it worse. Dry beans, especially in winter, generate static electricity that makes grounds stick to the grinder body and the catch cup. The Hario Skerton has a plastic catch cup that’s a static magnet. I found myself tapping it repeatedly to get every last bit of grounds out, and even then, a gram or two clung to the sides.
The fix for static is the Ross Droplet Technique (RDT): add a single drop of water to your beans before grinding. It sounds weird, but it cuts static almost completely and reduces clumping in the grounds. For a dual-use grinder, RDT is non-negotiable. It makes the switch between espresso and pour over significantly less messy.
You also need a WDT tool (a fine wire whisk) to break up clumps in your espresso basket. Clumps cause channeling, where water finds a path through the coffee and under-extracts the rest. WDT is a 10-second step that fixes most consistency issues in a dual-use setup.
Stepped vs. Stepless: Which Adjustment System Actually Saves You Time?
Here’s where the rubber meets the road. Stepped grinders click through preset positions. Stepless grinders let you dial in any point along a continuous range. For espresso, stepless is the standard because you need micro-adjustments to hit the exact extraction time. A 10-micron change can be the difference between a 25-second shot and a 35-second shot.
For pour over, you don’t need that precision. A 50-micron change barely matters. So the ideal dual-use grinder has stepless adjustment for espresso and a wide enough range that you can find a repeatable pour over setting without much fuss.
The Hario Skerton is stepped. The clicks are wide apart. For pour over, that’s fine. For espresso, it’s a problem. You’ll find yourself at a setting that’s either too fine (shot runs in 45 seconds) or too coarse (shot runs in 15 seconds), with no way to land in between.
The “In-Between” Trap: Why Mid-Range Grinders Fail at Both Tasks
Grinders in the $100-$300 range often promise dual-use capability but deliver neither well. The mechanical reason is step size. A stepper motor with 40 clicks across a 1000-micron range gives you 25-micron steps, which is fine for espresso. But many grinders in this price bracket have only 20-30 clicks across a 2026-micron range, giving you 70-100 micron steps. That’s too coarse for espresso dialing.
For pour over, the same grinder might have too much play in the adjustment mechanism. You set it to a medium-coarse, but the burr carrier shifts slightly during grinding, changing the actual gap. The result is inconsistent brew times from cup to cup.
The Hario Skerton sits exactly in this trap. It’s an entry-level manual grinder, not a $300 electric, but the principle is the same. It does pour over acceptably and espresso poorly. If you’re serious about both, you need to step up to a grinder with a proper stepless or fine-stepped mechanism.
The 3-Tier Grinder Matrix for Dual-Use
Let’s break down realistic options by price tier. This is based on my testing and conversations with other home baristas, not on marketing claims.
Tier 1: Under $300 (Entry Level)
You can get a decent manual grinder like the Hario Skerton for pour over, but you’ll struggle with espresso. If you’re on a budget, buy the Skerton for pour over and a separate, cheap electric grinder with a pressurized basket for espresso. That combo works. The pressurized basket forgives inconsistent grind size.
For a single grinder in this tier, look for a manual grinder with steel conical burrs and a stepless adjustment. The Skerton’s ceramic burrs are fine, but the plastic internals limit its espresso potential.
Tier 2: $300-$700 (The Sweet Spot)
This is where dual-use becomes genuinely viable. Grinders in this range have stepless or micro-stepped adjustment, low retention (under 1 gram), and stable burr alignment. You’ll still need the purge ritual when switching, but the waste is minimal. The grind consistency at both ends of the spectrum is good enough that you won’t feel like you’re compromising.
Expect to spend 5-10 minutes dialing in a new espresso bean. That’s normal. Once you find the setting, write it down. For pour over, you’ll find a setting that works and stick with it.
Tier 3: $700+ (The Endgame)
At this level, you’re buying a grinder that does both tasks exceptionally well. The burr alignment is precise, the motor duty cycle is longer (more on that below), and the retention is near zero. You can switch between espresso and pour over in under a minute, with only a gram or two of purge waste.
If you’re pulling shots daily and brewing pour over on weekends, this tier saves you time and coffee. The price is high, but the workflow is seamless.
The Switching Protocol: A Step-by-Step Guide to Minimize Waste
Whether you have a $200 grinder or a $1000 one, you need a system for switching between espresso and pour over. Here’s mine.
First, always single-dose. Weigh out your beans before grinding. Don’t use the hopper. This gives you full control and minimizes retention issues.
Second, use RDT. One drop of water on the beans before grinding. This eliminates static and reduces clumping.
Third, purge after every switch. Grind 3-5 grams of the new bean and discard it. This clears the old grounds from the burrs and the chute. It’s wasteful, but it’s the only way to get a clean start.
Dialing In: The 5-Gram Rule and How to Track Your Settings
When you get a new bag of espresso beans, you’ll need to dial in. The 5-gram rule is simple: use 5 grams of coffee per test shot. That’s enough to see the extraction time and taste the result, but not enough to waste a full 18-gram dose.
Start with your previous bean’s setting. Pull a shot. If it runs too fast (under 20 seconds), grind finer by one small step. If it runs too slow (over 35 seconds), grind coarser. Repeat. You should find the right setting within 3-5 test shots, which is 15-25 grams of coffee. That’s the cost of dialing in, and it’s unavoidable.
Write down the setting on the bag. I use a small notebook, but a note on your phone works. Track the grind setting, the dose, the yield, and the time. After a few bags, you’ll have a reference chart for your grinder that makes future dialing-in much faster.
Maintenance: Cleaning, Alignment, and the Motor Duty Cycle
Dual-use grinders get dirty fast. The fines from espresso and the coarse chunks from pour over mix in the burr chamber. You should brush out the burrs and the chute every week. A full disassembly and deep clean every month keeps the burrs aligned and the grind consistent.
For the Hario Skerton, cleaning is straightforward. The ceramic burrs come apart easily, and you can brush them without any special tools. The plastic parts are forgiving, but they can warp if you overtighten the adjustment nut. Be gentle.
Burr alignment is the hidden factor. If your grinder produces uneven grounds, check the alignment. For most grinders, you can do a simple marker test: color the outer edge of the burr with a dry-erase marker, reassemble, and run a few grams of beans. If the marker is worn evenly, the burrs are aligned. If it’s worn on one side only, you have a misalignment issue.
Re-calibration usually involves shimming the burr carrier or adjusting a set screw. It’s a 15-minute job that most people never do, but it makes a massive difference in espresso quality.
For electric grinders, pay attention to the motor duty cycle. Grinding for espresso takes longer because the beans are dense and the burrs are close together. The motor runs hotter. Most home grinders have a duty cycle of 1-2 minutes on, then a cool-down period. If you grind espresso twice a day and pour over once, you’re fine. But if you’re making 4-5 espresso shots in a row, give the motor a break between grinds. Overheating a motor can warp the burr carrier and permanently ruin your grind consistency. The Hario Skerton has no motor, so this is a non-issue for manual grinding, but it’s a real consideration for electric dual-use setups.
FAQ: Can I use a blade grinder? Do I need two grinders? Is manual better?
Can I use a blade grinder for both pour over and espresso?
Technically, yes. Practically, no. A blade grinder chops beans unevenly, producing a mix of powder and boulders. Espresso will channel and taste bitter. Pour over will have a muddy bed and inconsistent extraction. You can get away with a blade grinder for French press, but not for pour over or espresso. If you’re serious about either, you need a burr grinder. Read our comparison of burr grinders vs blade grinders for the full breakdown.
Do I need two separate grinders?
Not always. If you drink espresso daily and pour over once a week, a single high-end grinder (Tier 3) is worth it. If you switch between them every day, you’ll waste less time and coffee with two dedicated grinders. The math is simple: the cost of wasted coffee and the time spent purging often exceeds the cost of a second grinder within a year.
Is a manual grinder like the Hario Skerton a good place to start?
For pour over, yes. It’s portable, quiet, and gives you a decent grind for the price. For espresso, no. The stepped adjustment and plastic internals make it frustrating. Start with the Skerton for pour over, then add a dedicated espresso grinder later. It’s a better path than buying a cheap electric that fails at both.
How much coffee will I waste switching between grind settings?
Expect to waste 5-10 grams per switch for the purge, plus 15-25 grams for dialing in a new espresso bean. If you switch twice a week, that’s roughly 50-100 grams of coffee wasted monthly. A 12-ounce bag is 340 grams, so you’re losing a quarter of a bag to switching. That’s the hidden cost of dual-use.
What’s the best way to reduce static and clumping in a manual grinder?
Use RDT (one drop of water on the beans) and a WDT tool for the espresso basket. For pour over, just stir the grounds in the filter with a spoon. These two hacks cost nothing and eliminate most of the mess. Also, let the grinder run for a second after the beans are done to clear the chute.
The Bottom Line: Buy for the Espresso, Tolerate the Pour Over
Here’s my honest take after testing the Hario Skerton and several electric grinders. A coffee grinder for pour over vs coffee grinder for espresso is not a single purchase decision. It’s a workflow decision.
The Hario Skerton is a fine pour over grinder. Its ceramic conical burrs produce a consistent enough grind for a V60 or a Chemex. It’s quiet, portable, and easy to clean. But it is not an espresso grinder. The stepped adjustment, the plastic burr carrier, and the lack of fine-tuning make it a poor choice for anyone serious about pulling shots.
If you’re buying one grinder for both tasks, spend more money than you think you need. Look for a conical burr grinder with stepless adjustment, low retention, and stable alignment. Plan for the purge ritual and the dialing-in waste. And if you switch between espresso and pour over every single day, buy two grinders. The time and coffee you save will pay for the second machine within months.
For maintenance and longevity, check our guide on cleaning your coffee grinder and our tips on maintaining your coffee machine to keep your gear running smoothly.
Start with the pour over. Master that. Then, when you’re ready for espresso, buy a dedicated grinder. Your taste buds and your wallet will thank you.
Ready to buy? Check the latest price on Amazon