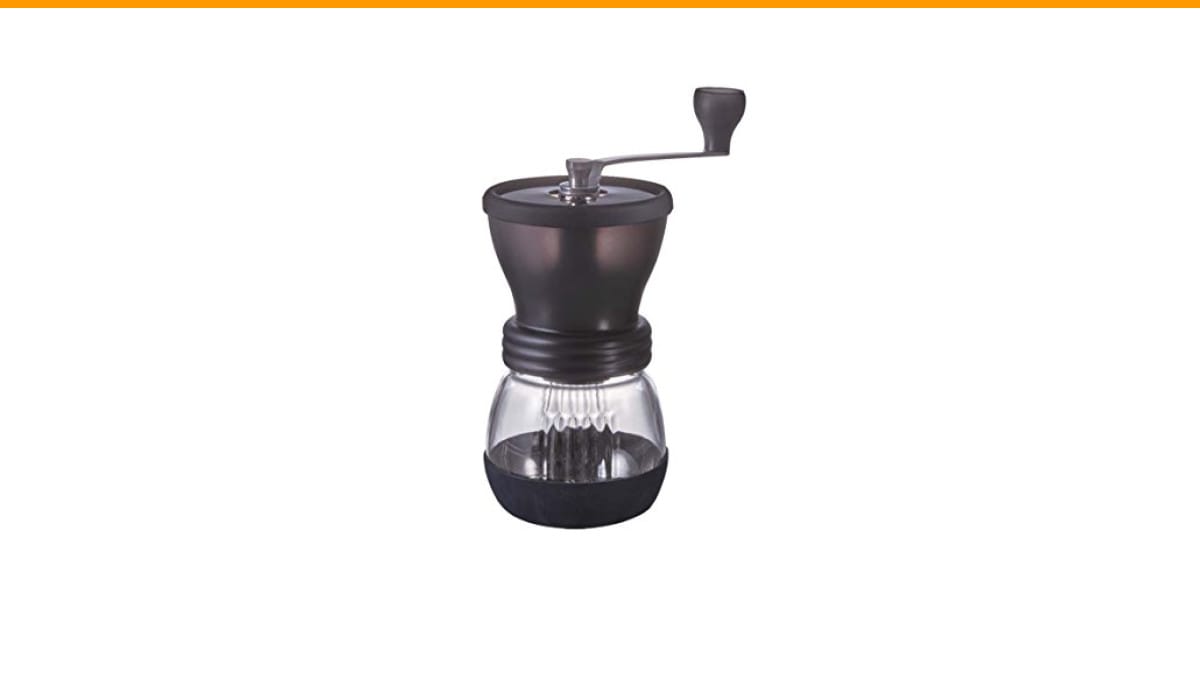
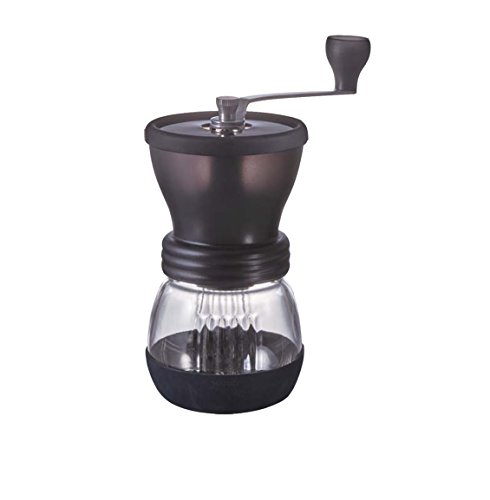
The short answer is: you can use one grinder for both, but you will pay for the convenience in coffee waste and time. Most home setups that try to split the difference end up with a machine that does neither job particularly well. The Hario Skerton (ASIN B01LXZACFB) is a classic example of a manual grinder that gets pulled into this dual-use fight, and understanding its limits helps you understand the whole category.
As an Amazon Associate I earn from qualifying purchases.
The real issue isn’t whether the burrs can crush beans at two different sizes. It’s whether the grinder can switch between a fine espresso setting and a coarse pour over setting without making you throw away half a bag of beans in the process. That’s the workflow problem nobody talks about in the spec sheets. For anyone weighing a coffee grinder for pour over vs coffee grinder for espresso, the decision comes down to how much waste you can tolerate on a Tuesday morning.
This guide treats the grinder as a piece of kitchen machinery with a job to do. We’ll look at burr geometry, adjustment systems, retention, and the actual cost of switching grind sizes. The goal is to help you decide if a single grinder makes sense for your routine, or if you’re better off with two dedicated units.
The Real Problem: Why One Grinder Usually Means Two Compromises
Espresso needs a fine, consistent grind that packs tightly under pressure. Pour over needs a coarser grind with a wider particle distribution to let water flow through at the right rate. These are opposite ends of the grind spectrum, and a grinder that nails one end often struggles at the other.
The Hario Skerton, for instance, uses a conical burr set that’s perfectly capable of producing a decent pour over grind. But push it down to espresso-fine, and the limitations appear. The adjustment mechanism on this model is a simple threaded collar, not a stepless system. That means you get discrete steps, and the steps might not land where you need them for proper espresso extraction.
Most grinders in the under-$300 range face the same fundamental issue. The mechanical parts that allow fine adjustment cost money to manufacture, and manufacturers put that money into burr quality instead. So you end up with a grinder that makes great coffee at one setting and frustrating coffee at the other.
The practical result is that switching between brew methods becomes a ritual of wasting coffee. Every time you change the grind setting, the first few grams that come out are a mix of the old grind size and the new one. That coffee is unusable for either method.
Burr Geometry: Why Conical Grinders Are the Default for Dual-Use
Conical burrs are the standard choice for dual-use grinders, and the Hario Skerton follows that pattern. The shape of the burrs matters because it affects how the coffee particles fall out of the grinding chamber.
Conical burrs grind slower than flat burrs, but they produce fewer fines at coarse settings. Fines are the tiny dust-like particles that clog up a pour over filter and make the brew taste bitter. For pour over, fewer fines is a clear win. For espresso, the slow grinding speed is actually a benefit because it prevents the burrs from heating up the coffee during grinding.
Flat burrs, by contrast, are the preference for serious espresso enthusiasts. They produce a more uniform particle size, which helps with even extraction under pressure. But flat burrs tend to create more fines at coarse settings, which hurts pour over performance. You can buy a grinder with flat burrs and use it for both, but you’ll be fighting the fines issue every time you brew a pour over.
Flat vs. Conical: The Flavor and Texture Trade-off
Conical burrs tend to produce a cup with more body and a rounder flavor profile. The less uniform particle distribution means some particles extract more and some less, which creates a wider range of flavors in the cup. Some people find this more interesting and complex.
Flat burrs give you a cleaner, more defined cup. The uniform particles extract evenly, which can make the coffee taste more precise but sometimes flatter. For espresso, that precision is often what you want. For pour over, the extra body from conical burrs can make the coffee taste richer.
There’s no universally correct answer here. It comes down to personal taste and how you take your coffee. But if you’re trying to do both methods with one grinder, conical burrs are the safer bet because they don’t ruin pour over the way flat burrs can.
The Workflow Killer: Retention, Static, and the Purge Ritual
Retention is the amount of coffee that stays inside the grinder after you finish grinding. In a manual grinder like the Hario Skerton, retention is usually low because you can tap the grinder to shake out the grounds. In electric grinders, retention can be several grams, which is a lot when you’re only grinding 18 grams for espresso.
Static is another issue. When coffee beans are ground, the friction creates static electricity that makes the grounds stick to the grinder’s chute and the catch cup. This is worse in dry climates and worse with certain bean roasts. The result is that you don’t get all the coffee you ground, and the grounds that do come out are clumpy.
For someone switching between pour over and espresso, retention and static mean you’re never quite sure how much coffee you actually ground. You might think you’ve got 18 grams in the portafilter, but it’s actually 17.5, and the missing half gram is stuck inside the grinder. That inconsistency makes dialing in nearly impossible.
The solution many home baristas use is the purge ritual. Before grinding for espresso, you grind a few grams of coffee and throw it away. This clears out the old grounds from the previous grind and warms up the burrs. It works, but it wastes coffee every single time.
If you’re using a manual grinder like the Skerton, the purge is less of an issue because you can disassemble it and brush it out. But that adds another two minutes to your workflow, which defeats the purpose of a quick morning cup.
Stepped vs. Stepless: Which Adjustment System Actually Saves You Time?
The adjustment system is the most critical part of a dual-use grinder. Stepped adjustment means the grind size changes in discrete increments, like clicking through gears on a bike. Stepless adjustment means you can set the grind size anywhere within the range, like turning a dial on a stereo.
Espresso is incredibly sensitive to grind size. A change of just 10 microns can mean the difference between a 25-second shot and a 40-second shot. Stepped grinders often have steps that are too large for espresso dialing in. You might find that one step gives you a shot that runs too fast, and the next step makes it run too slow, with no way to land in between.
The Hario Skerton’s adjustment mechanism is a classic example of this problem. The threaded collar moves the burr up and down, but the thread pitch is such that a full rotation changes the grind size significantly. Getting a precise espresso setting requires careful partial turns, and even then, the mechanism can shift slightly during grinding.
The In-Between Trap: Why 200-300 Micron Steps Fail Espresso
Mid-range grinders, typically priced under $300, often have stepped adjustments of 200 to 300 microns per click. That sounds small, but espresso extraction is sensitive to changes of 20 to 30 microns. So a 250-micron step is like trying to adjust the temperature of your oven in 50-degree increments when you need to hit 350 exactly.
You end up playing a game of compromise. One step is too coarse, the next is too fine, and you’re stuck choosing between a shot that gushes and a shot that drips. You can try to compensate by adjusting the dose or the tamp, but that only gets you so far.
Stepless grinders solve this problem by letting you dial in precisely. The trade-off is that they cost more, and they require you to remember where you set the dial for each brew method. If you’re switching between espresso and pour over daily, you’ll be turning the dial back and forth, and you’ll need a consistent way to return to your exact espresso setting.
Some grinders have numbered dials to help with this. Others require you to count clicks or use a marker to note the position. It’s manageable, but it’s another step in the workflow.
The 3-Tier Grinder Matrix for Dual-Use (Under $300, $300-$700, $700+)
Let’s be honest about what you get at different price points. The Hario Skerton sits firmly in the under-$30 tier, which makes it a budget option, not a serious dual-use tool.
Under $300: Grinders in this range, including the Skerton, are best for pour over and French press. They can produce a usable espresso grind, but dialing in will be frustrating. The steps are too large, the retention is too high, and the burrs aren’t aligned precisely enough for consistent shots. If you’re primarily a pour over drinker who occasionally wants espresso, this tier can work. But expect to waste coffee and patience.
$300-$700: This is the sweet spot for dual-use. Grinders in this range typically offer stepless or micro-stepped adjustment, better burr alignment, and lower retention. You’ll get a grinder that can genuinely do both methods, though you’ll still need to deal with the switching protocol (more on that below). The trade-off is cost and counter space.
$700+: At this level, you’re buying a grinder that excels at one thing. Dedicated espresso grinders in this range are superb, but their pour over performance isn’t necessarily better than a $300 grinder. You’re paying for precision and build quality, not versatility. If you have the budget, buying two dedicated grinders is the ideal setup. But for most home users, a $400-$600 grinder is the practical maximum.
The Switching Protocol: A Step-by-Step Guide to Minimize Waste
If you decide to use one grinder for both methods, you need a system. Here’s a protocol that minimizes waste and keeps your shots consistent.
Step 1: Grind a 5-gram purge. Before switching from pour over to espresso, grind about 5 grams of beans and discard them. This clears the chute and the burrs of the coarse pour over grounds. The purge also warms up the burrs, which helps with static.
Step 2: Dial in with the 5-gram rule. When you change grind settings, the first shot will almost certainly be off. Don’t waste a full 18-gram dose on it. Grind 5 grams, pull a quick shot, and see how it flows. Adjust the grind, and try again. This way, you’re only wasting 5 grams per attempt, not 18.
Step 3: Track your settings. Write down the grind setting for espresso and the setting for pour over. If your grinder has a numbered dial, this is easy. If not, use a permanent marker to make a small line on the adjustment collar. This eliminates the guesswork when switching back and forth.
Step 4: Use the RDT technique. The Ross Droplet Technique involves adding a single drop of water to your coffee beans before grinding. This reduces static and clumping, which means less retention and a more consistent dose. It sounds odd, but it works. One drop from a wet finger is enough.
Step 5: WDT for espresso. After grinding into your portafilter, use a small tool (a paperclip or a WDT tool) to stir the grounds and break up clumps. This ensures an even distribution, which is critical for espresso extraction. For pour over, a simple shake of the brew vessel is usually enough.
Dialing In: The 5-Gram Rule and How to Track Your Settings
The 5-gram rule is about minimizing the cost of error. When you change grind size, the coffee that comes out first is a blend of the old and new settings. Grinding 5 grams and discarding it means your next dose is pure. If you’re dialing in a new bag of beans, expect to waste 15-20 grams total before you find the right setting. That’s roughly one shot’s worth of coffee, which is acceptable.
Tracking your settings is the difference between a one-time dialing-in session and a daily struggle. A simple notebook or a note on your phone works. Write down the bean, the roast date, the grind setting, and the shot time. Over time, you’ll build a reference chart that lets you start close to the right setting instead of from scratch.
Maintenance: Cleaning, Alignment, and the Motor Duty Cycle
Dual-use grinders get dirty faster because they’re processing beans at two different grind sizes. The fines from espresso grinding accumulate in the burr chamber and can affect the grind consistency over time.
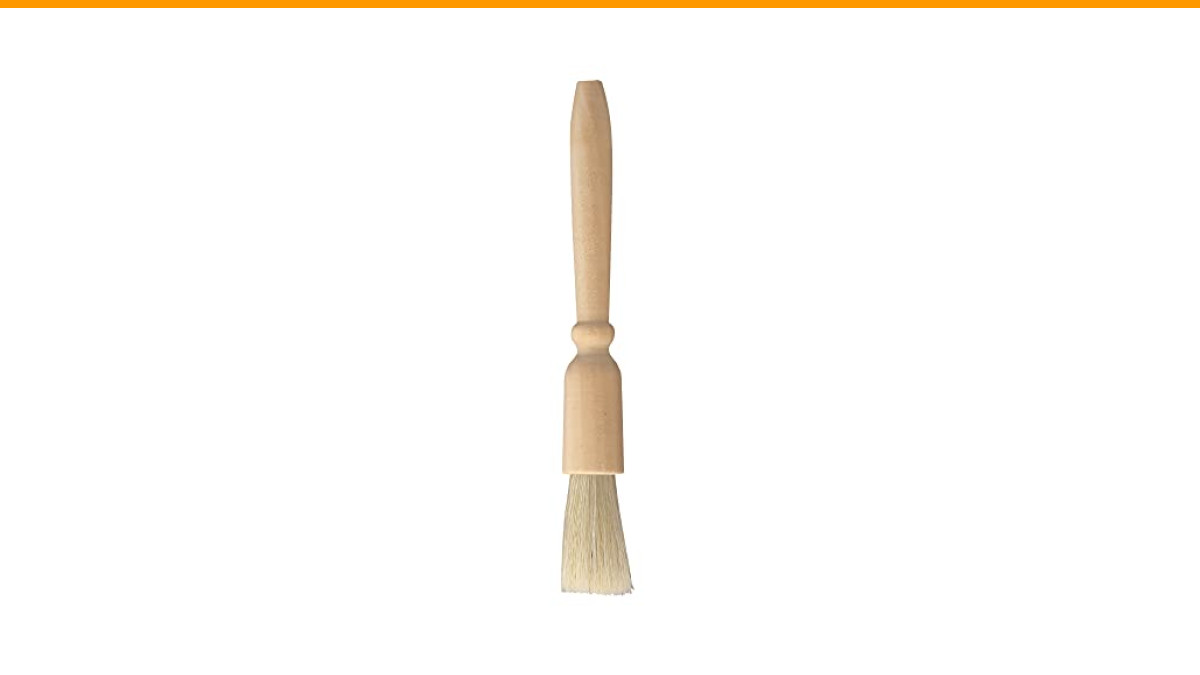
You should brush out your grinder at least once a week if you’re using it daily. A dedicated grinder brush reaches into the burr chamber and clears out the coffee dust. The Hario Skerton is easy to clean because it disassembles completely. Just be careful not to lose the small parts.
Burr alignment is a topic that gets ignored until something goes wrong. If your shots are inconsistent and you’ve ruled out other factors, check the burr alignment. You can do a simple test by grinding a few grams of coffee and looking at the grounds. If they’re uneven, the burrs may be misaligned. Some grinders have shims you can add to fix this. Others require professional service. For the Skerton, the alignment is fixed at the factory, and there’s not much you can do if it’s off.
For electric grinders, the motor duty cycle matters. Grinding for espresso is slow and dense, which puts more strain on the motor. Grinding for pour over is fast and light. If you’re switching between the two, you’re asking the motor to operate at very different loads. A motor that’s designed for intermittent use might overheat if you grind several espresso doses in a row. Check the duty cycle in the manual, and give the grinder a break if it feels warm to the touch.
Proper machine maintenance extends the life of your equipment, and grinders are no exception. A clean grinder produces better coffee and lasts longer.
FAQ: Can I use a blade grinder? Do I need two grinders? Is manual better?
Can I use a blade grinder for both pour over and espresso?
No. A blade grinder chops the beans into uneven pieces, producing a mix of fine powder and large chunks. This is bad for pour over, where you need uniform particles for even extraction, and it’s catastrophic for espresso, where the pressure will find the path of least resistance through the large chunks. The result is a bitter, sour, watery shot. If you’re serious about either method, skip the blade grinder entirely. You can read more about the difference between burr and blade grinders to understand why.
Do I need two grinders for pour over and espresso?
Not necessarily. If you’re willing to deal with the switching protocol and the waste, a single quality grinder can do both. The key is the adjustment system. A stepless grinder in the $300-$700 range is your best bet for dual-use. If you’re on a tight budget, you’re better off buying a dedicated pour over grinder and a separate espresso grinder, even if both are manual.
Is a manual grinder like the Hario Skerton better for dual-use than an electric one?
Manual grinders have lower retention and are easier to clean, which helps with switching. But the adjustment mechanism on the Skerton is not precise enough for espresso dialing in. You’ll get a usable espresso grind, but you won’t be able to fine-tune it. For pour over, it’s excellent. For espresso, it’s a compromise. If you’re considering a manual grinder specifically for dual-use, look for one with a stepless adjustment mechanism.
How much coffee will I waste switching between grind settings?
Expect to waste 5-10 grams per switch if you follow the purge protocol. That’s roughly one single shot of espresso or one small pour over. If you switch twice a day, that’s 10-20 grams of coffee wasted daily. Over a month, that adds up to a significant cost. This is the hidden tax of a dual-use grinder.
What is the Ross Droplet Technique and does it help?
RDT is a single drop of water added to the beans before grinding. It reduces static electricity, which means less retention and fewer clumps. It’s particularly helpful when grinding fine for espresso. It takes one second and makes a noticeable difference in the consistency of your dose. Give it a try.
The Bottom Line: Buy for the Espresso, Tolerate the Pour Over
Here’s the honest takeaway. If you’re buying one grinder for both methods, buy it based on its espresso performance. Espresso is the more demanding brew method, and it will expose every flaw in a grinder. Pour over is more forgiving, so a grinder that does espresso well will almost certainly do pour over acceptably.
The Hario Skerton is a fine pour over grinder. It’s affordable, portable, and easy to clean. But as a dual-use tool, it falls short because its adjustment mechanism isn’t precise enough for espresso. You can make espresso with it, but you’ll be stuck with whatever grind size the next step gives you, and that’s a recipe for frustration.
If you’re serious about espresso, save up for a grinder with stepless adjustment. If you’re mostly a pour over drinker, the Skerton will serve you well. And if you’re somewhere in between, consider whether the workflow of switching is worth the money you’ll save on a single grinder. Sometimes, two dedicated grinders are the better investment.
Whatever you choose, remember that regular cleaning keeps your grinder performing at its best. A clean grinder is a consistent grinder, and consistency is what makes great coffee.
Ready to buy? Check the latest price on Amazon
Sponsored / affiliate links. As an Amazon Associate I earn from qualifying purchases. I may earn additional commission from eligible campaigns.Products related to this article
 Coffee Espresso Machine Handle Replacement Parts, Cafe Bracket Handle for Lidl Silvercrest CM4621 CM4218 KF5002 KF500S Barista (for 51mm Portafilter Basket - Not included)
 Cup Warmer for Coffee 8 Temperature Setting Adjustment
 SOLUSTRE Electric USB Coffee Cup Warmer with Temperature Settings Portable Milk and Beverage Heating Coaster for Office Desk Small Lightweight Design Easy to Clean Surface Multi Functional