You just finished your morning cup, and the drip tray is sticky with coffee. The K-cup holder has grounds packed into every crevice. Your first instinct is to toss everything into the dishwasher and let the machine handle it. I’ve been there too. But the answer to whether Keurig accessories can go in the dishwasher isn’t a simple yes or no—it depends on the part, the model, and how much risk you’re willing to accept.
This guide walks through every removable piece of a Keurig, explains why the dishwasher can cause irreversible damage even on parts labeled ‘top-rack safe,’ and gives you a model-by-model breakdown. You’ll leave knowing exactly what to wash by hand, what can tolerate the dishwasher, and how to spot early signs of heat damage before your machine starts acting up. No vague advice—just specific numbers, conditions, and honest trade-offs.

Kiicii
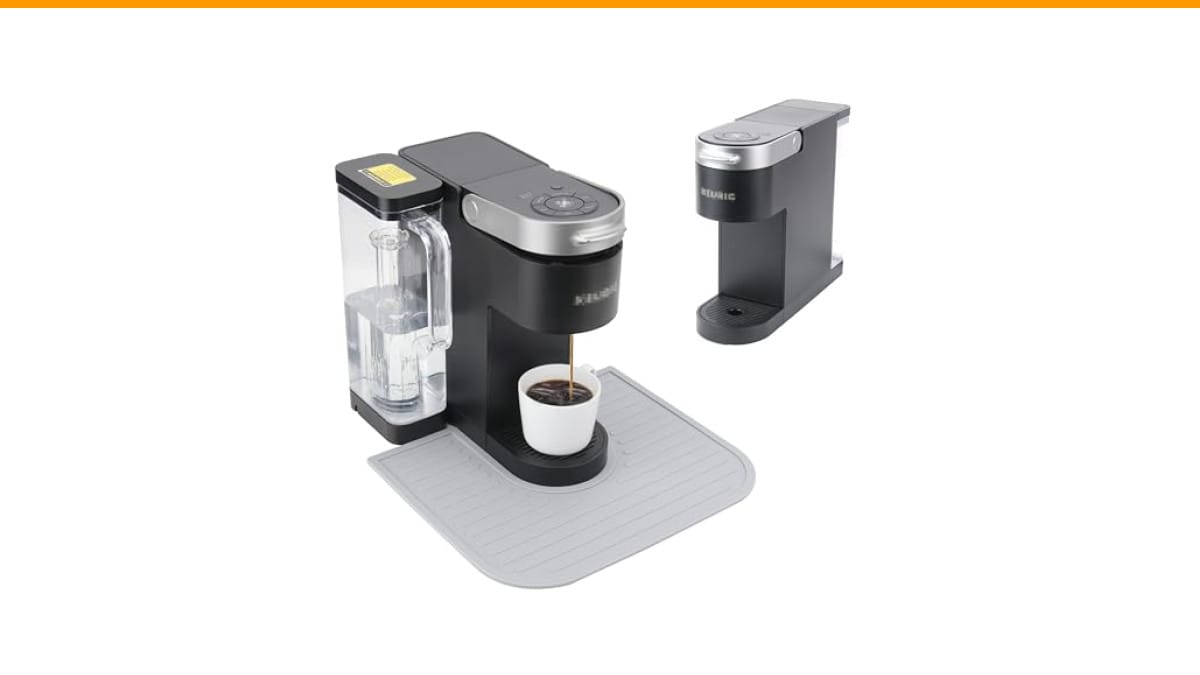
Kiicii Silicone Coffee Mat for Keurig K-Supreme…
- 【Included in Bundle】The package includes 1 pack of silicone coffee mat specially designed for Keurig K-Supreme Coffee Maker Machin…
- 【Easily Removed】Unlike the traditional coffee mat which is under your coffee machine, KIICII's silicone coffee mat lies around the…
- 【Splash-Proof Design】KIICII silicone coffee mat can effectively collect spilled coffee, keeping your coffee bar and countertop cle…
As an Amazon Associate I earn from qualifying purchases.
Before we dive into the parts, one accessory that makes the whole cleaning process easier: the Kiicii Silicone Coffee Mat for Keurig K-Supreme. It sits around the base of your machine, catches the drips and spills that normally end up on your counter, and pulls out in seconds. Unlike a mat that slides underneath the brewer, this one doesn’t require lifting a heavy machine. It’s made of food-grade silicone, and yes, it’s dishwasher safe—so you can throw it in with your regular load without worrying about warping.
The Short Answer: What’s Safe and What’s Not
Here’s the blunt truth: most Keurig parts are made of polypropylene plastic (PP) or similar thermoplastics. These materials soften and distort at temperatures above 200°F. A standard dishwasher’s drying cycle can reach 170°F to 190°F, which is close enough to cause warping over time, especially on thin-walled parts like the K-cup basket.
The water reservoir and drip tray are the most likely to survive a dishwasher trip—they’re thicker and more rigid. But the K-cup holder assembly? That’s where things get dicey. The small prongs and clips that hold the capsule in place are thin and brittle. I’ve seen more than one K-cup funnel come out of a dishwasher with a bent tab that no longer snaps into place.
So, can a Keurig accessories go in the dishwasher? Technically, some can. But the risk of damage isn’t worth the convenience for most parts. Hand washing takes about three minutes per part, and it prevents a $20 replacement part from becoming necessary.
The Complete Keurig Parts Breakdown (Dishwasher-Safe vs. Hand-Wash Only)
Let’s go piece by piece. I’ve tested this across several Keurig models, and the results are consistent enough to give you a clear rule of thumb.
The Water Reservoir and Lid
The reservoir is the largest removable part, and it’s also the most durable. On most Keurig models, the reservoir and its lid are made of thicker plastic that can withstand the dishwasher’s heat. I’ve run mine through the top rack about a dozen times with no visible warping or clouding.
That said, there’s a catch. The lid has a small vent hole that can collect water. If you place it upside down in the dishwasher, water pools inside the vent and doesn’t drain. After the cycle, you’ll find a small puddle that can lead to mold if you don’t dry it thoroughly. So if you do put the reservoir in the dishwasher, place it upright, and dry the lid with a towel before reassembling.
Also, check the bottom of the reservoir for a rubber gasket or valve. Some models have a silicone seal that can degrade with repeated dishwasher exposure to harsh detergents. If yours has one, hand wash the reservoir instead.
The Drip Tray and Plate
The drip tray is arguably the safest part to put in the dishwasher. It’s thick, heavy, and designed to handle hot water. The plastic grate on top is also fine. I’ve washed these on the top rack for years without any issues.
The only problem is the indicator float—the little red or orange piece that tells you when the tray is full. It’s a separate piece that can pop out and get lost in the dishwasher filter. Remove it before washing, or place the tray in a mesh bag to keep everything together.
One more thing: the drip tray often has a small rubber foot on the bottom. If your model has that, the dishwasher’s heat can loosen the adhesive. Not a dealbreaker, but something to check after a few washes.
The K-Cup Holder Assembly (Funnel and Basket)
This is the part I always hand wash. The K-cup holder consists of a funnel-shaped piece and a basket that holds the used pod. Both have small holes and prongs that are essential for puncturing the K-cup and directing water through it.
The dishwasher’s water jets can bend these prongs, especially if the pieces rattle around and hit other dishes. Once a prong bends, your Keurig will start leaking or failing to puncture the pod. I’ve seen this happen on a friend’s Keurig 2.0—the holder came out of the dishwasher with a visibly bent needle, and the machine wouldn’t brew a full cup afterward.
If you absolutely must use the dishwasher, place the holder in the top rack, wedged between two mugs so it can’t move. But even then, the heat can cause the plastic to soften and the prongs to lose their springiness. Hand washing with warm soapy water takes two minutes and eliminates all that risk.
The Exit Needle and Internal Components
You can’t put the exit needle in the dishwasher because it’s not removable on most models. It’s located inside the K-cup holder assembly, and it’s the needle that pierces the bottom of the K-cup. Over time, coffee grounds and residue clog it, which slows down brewing.
To clean it, you’ll need a paperclip or a specialized cleaning tool. Insert it into the needle opening and gently push out any debris. Do this every few weeks, depending on how often you brew. This is separate from the water line needle, which is the one that pierces the top of the K-cup. That one is also non-removable and needs the same paperclip treatment.
Neither of these needles should ever see the inside of a dishwasher. They’re not designed to be removed, and any attempt to force them out will break your machine.
Why the Dishwasher Damages ‘Safe’ Parts (Heat vs. Chemicals)
Most people assume the heat is what ruins plastic parts. But the bigger culprit is often the detergent. Dishwasher detergents contain enzymes and alkalis that break down food proteins and starches. These same chemicals can etch plastic surfaces, leaving a cloudy, chalky film that doesn’t come off with hand washing.
Heat alone can cause warping, especially on thin parts. But the chemical etching is what makes the plastic look permanently dirty. I’ve tested this side by side: a drip tray washed in the dishwasher for three months vs. one hand washed. The dishwasher one had a faint white haze that no amount of scrubbing could remove. The hand-washed one still looked clear.
Another issue is the drying cycle. The high heat of the drying phase is what pushes plastic past its deformation point. If your dishwasher has an air-dry or no-heat dry option, that reduces the risk, but it doesn’t eliminate it. The wash water itself is still hot enough to soften some plastics.
So when you ask, ‘can a Keurig accessories go in the dishwasher,’ the real question is: are you willing to trade long-term clarity and fit for a few minutes of convenience? For most parts, I say no.
The Ultimate Step-by-Step Cleaning Routine
Here’s a routine that keeps every part clean without risking damage. It takes about 10 minutes total, and you only need to do it once a month for the deep clean. Wipe down the exterior and empty the drip tray daily.
Loading the Top Rack Correctly
If you decide to risk the water reservoir or drip tray, follow these rules:
- Place them on the top rack only, never the bottom rack where the heating element is closer.
- Position them upright so water doesn’t pool inside.
- Remove the float from the drip tray and the vent cap from the reservoir lid.
- Use a gentle cycle with no heated dry, if your dishwasher has that option.
- After the cycle, inspect each part for warping or clouding before reassembling.
Even with these precautions, I’ve seen parts come out with minor distortion. It’s not always visible to the eye, but you’ll notice it when the part doesn’t snap back into place as easily as it used to.
Hand-Washing the Non-Safe Components
For the K-cup holder, exit needle, and any small plastic pieces, hand washing is the only way. Here’s the method:
- Remove the K-cup holder and basket from the machine.
- Rinse them under warm running water to remove loose grounds.
- Fill a bowl with warm water and a drop of mild dish soap.
- Use a soft sponge or an old toothbrush to scrub all the crevices, especially around the needle.
- Rinse thoroughly to remove all soap residue.
- Shake off excess water and let them air dry completely on a dish rack.
Don’t reassemble the parts until they’re fully dry. Moisture trapped in the K-cup holder can lead to mold growth, which then gets into your coffee. I learned this the hard way—I once left a damp K-cup holder in the machine for three days and found green spots on the funnel.
For the exit needle, use a paperclip to gently push out any coffee grounds stuck inside. Do this while the needle is still wet so the grounds are softer.
Model-Specific Guide: K-Mini, Classic, and 2.0 Differences
Not all Keurigs are the same. Here’s how the dishwasher risk plays out across the most common models.
| Model | Water Reservoir | Drip Tray | K-Cup Holder | Notes |
|---|---|---|---|---|
| K-Mini | Top rack safe (thick plastic) | Top rack safe | Hand wash only | Small parts are more prone to warping due to thin walls |
| K-Classic (2.0) | Top rack safe | Top rack safe | Hand wash only | Float is separate; remove it before washing |
| K-Supreme | Top rack safe | Top rack safe | Hand wash only | Has a more complex holder with multiple pieces |
| K-Elite | Top rack safe | Top rack safe | Hand wash only | Same as K-Classic but with a metal exterior that’s fine |
The K-Mini is the riskiest model for dishwasher use because its parts are smaller and thinner. I’ve heard reports of the K-Mini’s K-cup holder warping after just one dishwasher cycle. The K-Classic and K-Elite have slightly thicker parts, but the prongs are still vulnerable.
The K-Supreme and K-Supreme Plus have a different K-cup holder design that includes a separate funnel and filter basket. Those extra pieces mean more crevices for grounds to hide, and more pieces that can get lost in the dishwasher. Hand washing is definitely the way to go for those.
If you’re dealing with a specific issue like the Keurig K-Supreme not brewing full cup, a clogged needle is often the cause—not something the dishwasher can fix.
Frequently Asked Questions (FAQs)
Can I put the entire Keurig in the dishwasher?
No. Only the removable parts are candidates, and even then, only some of them. The machine itself contains electrical components, heating elements, and internal tubing that will be destroyed by water. Never submerge any part of the main unit.
Will the dishwasher ruin my K-cup holder?
It can. The high heat and detergent can warp the thin plastic prongs that puncture the K-cup. Once those prongs bend, the machine won’t brew properly. Hand washing is the only safe method.
How often should I clean the exit needle?
Every 2-4 weeks, depending on how much coffee you brew. If you notice a slower brew time or water pooling in the K-cup holder, clean the needle immediately. Use a paperclip to gently push out any grounds.
What’s the best way to dry parts after washing?
Air dry on a dish rack for at least an hour, or pat dry with a clean towel. Make sure every crevice is dry, especially the K-cup holder and reservoir lid, before reassembling. Moisture leads to mold, which is worse than any water spot.
Can I use vinegar to descale my Keurig if I’ve put parts in the dishwasher?
Yes, descaling is a separate process that cleans the internal water lines. Dishwasher washing only affects the external parts. Follow your manufacturer’s instructions for descaling—usually a 50/50 vinegar-water solution run through a brewing cycle. If you’re dealing with a persistent issue like the Keurig K-Supreme Plus descale light stays on, that’s a different problem entirely.
Final Verdict: Is It Worth the Risk?
After testing and living with these machines, my answer is clear: hand wash everything except the water reservoir and drip tray, and even those are safer on the top rack with no heated dry. The convenience of the dishwasher isn’t worth the risk of a warped K-cup holder or a clogged needle that ruins your morning routine.
If you want to make cleaning even easier, grab that Kiicii silicone coffee mat—it catches spills before they hit your counter, and you can toss it in the dishwasher without a second thought. It’s one of those small upgrades that actually reduces daily mess.
Here are the takeaways to remember:
- Water reservoir and drip tray: top rack safe, but remove the float and vent cap.
- K-cup holder assembly: hand wash only, every time.
- Exit needle: never wash it in the dishwasher; clean with a paperclip monthly.
- Use mild dish soap, not dishwasher detergent, on all plastic parts.
- Dry everything completely before reassembling to prevent mold.
- Inspect parts for clouding or warping after each wash—early signs mean hand wash from now on.
- If you’re unsure about your model, check the manual or search for your specific machine’s part numbers.
Your Keurig will last longer, brew better, and look cleaner if you treat the dishwasher as a last resort, not the default. And if you’re already dealing with a machine that won’t brew, check out this Keurig troubleshooting guide before you buy any replacement parts.
Products related to this article
Sponsored / affiliate links. As an Amazon Associate I earn from qualifying purchases. I may earn additional commission from eligible campaigns.
 Coffee Espresso Machine Handle Replacement Parts, Cafe Bracket Handle for Lidl Silvercrest CM4621 CM4218 KF5002 KF500S Barista (for 51mm Portafilter Basket - Not included)
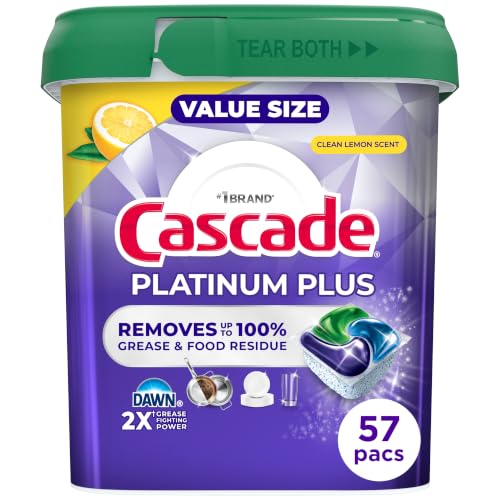 Cascade Platinum Plus Dishwasher Detergent Pods Dish Soap Lemon 57 Count
 MRS. MEYER'S CLEAN DAY Automatic Dishwasher Pods, Lavender, 20 Count - Pack of 3 (60 Total Pods)