It’s 6:40 AM. You’ve got the beans ground, the milk in the fridge, and you flip the switch on your espresso machine. Nothing. No lights, no pump hum, no heat. Just silence and the faint smell of your own disappointment. This is a common failure, and it’s rarely the end of your machine’s life. Most of the time, it’s a simple component you can fix in under an hour with basic tools.
This guide walks you up a diagnostic ladder. You’ll start with a 30-second visual check and climb through outlet testing, safety switches, and internal wiring. By the time you reach the top, you’ll either know exactly what’s broken or know precisely why it’s time to call a professional. You’ll also learn which repairs are genuinely safe for a home tinkerer and which ones can hurt you.

Rancilio
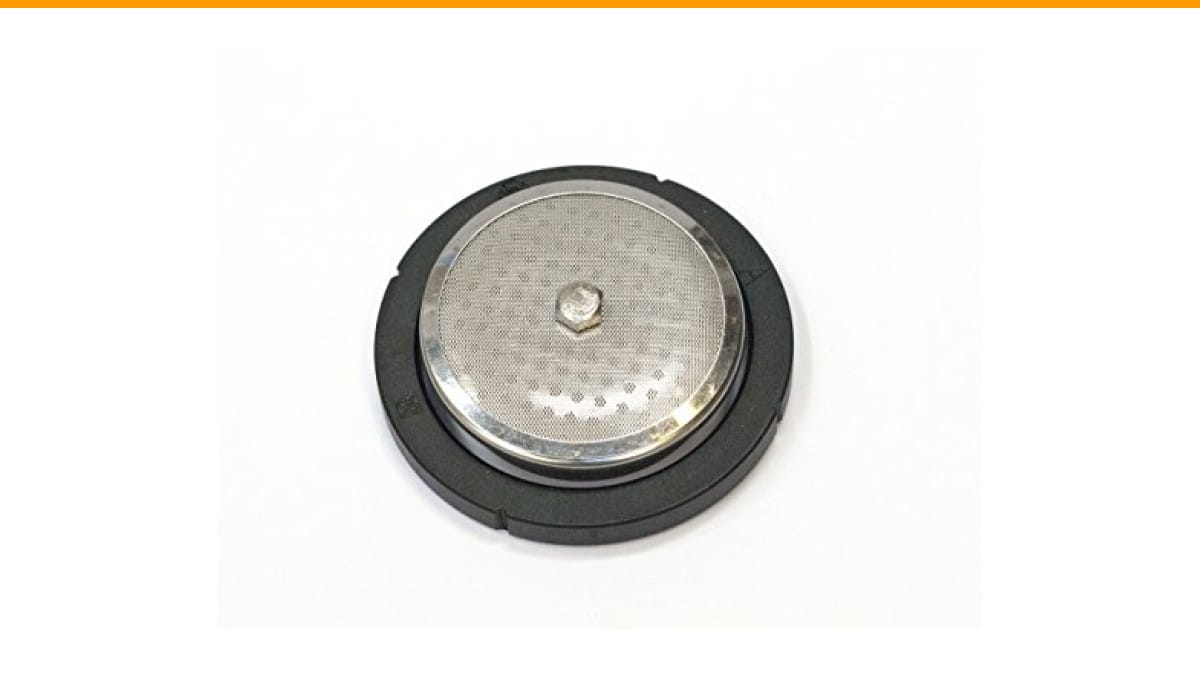
Rancilio Silvia Espresso Machine Repair Kit.
- This OEM repair kit can help you to fix some of the most common Rancilio Silvia problems.
- Water leaking around the portafilter: Usually the grouphead gasket needs to be replaced.
- Flow or no flow of water from grouphead. Your screen is probably clogged and needs to be replaced.
As an Amazon Associate I earn from qualifying purchases.
If you own a Rancilio Silvia, a common fix for flow issues and leaks is the Rancilio Silvia Espresso Machine Repair Kit. It includes the OEM grouphead gasket and screen, which solves the two most frequent problems: water leaking around the portafilter and weak or no flow from the grouphead.
Start Here: Is It Dead, Half-Dead, or Intermittent?
Before you unscrew anything, ask yourself one question: What exactly is the machine doing? Your answer determines which branch of the ladder you climb.
- Dead: No lights, no sound, no heat at all. This points to power delivery or the main thermal fuse.
- Half-dead: Lights work, but the pump doesn’t run, or the boiler doesn’t heat. This points to a specific component, like the brew switch or the pressure switch.
- Intermittent: It works sometimes, then stops randomly. This usually means a loose wire, a failing switch, or a tripped internal circuit breaker.
Write down your symptom. It’s easy to get lost in the wiring if you don’t have a clear target. For a dead machine, skip straight to the outlet check. For a half-dead or intermittent one, you can skim the outlet section and move faster.
Step 1: Verify the Outlet and Power Cord (Beyond the Obvious)
You’ve already tried another outlet, right? Good. But there’s a difference between an outlet that powers a lamp and an outlet that can handle a 1,200-watt heating element. A lamp draws 60 watts; your espresso machine draws twenty times that. A weak or failing outlet might run a lamp fine but trip under load.
Testing the outlet with a multimeter
Set your multimeter to AC voltage (V~). Insert the probes into the outlet’s hot (smaller slot) and neutral (larger slot). You should read between 110 and 120 volts in North America. Then check hot to ground (the round hole) — you should see a similar reading. If you get nothing, the outlet is dead, and the machine is fine. If you get 120V, the problem is inside the machine.
One more test: check the outlet’s ground pin. A missing ground won’t stop the machine from turning on, but it’s a safety hazard. If your outlet is a two-prong style, stop here and use a different circuit.
Inspecting the cord for invisible breaks
Power cords fail at the strain relief, right where the cord enters the machine. Bend the cord near that point while the machine is plugged in. If the lights flicker, you’ve found a broken wire inside the insulation. A visual inspection won’t catch this; you need to flex the cord. If it’s damaged, replace the entire cord, don’t splice it. Splicing a high-current cord creates a fire risk.
Step 2: The Machine’s Safety Switches and Thermostats
Espresso machines have multiple safety devices designed to kill power when something goes wrong. These are the most common culprits for a dead machine.
The thermal fuse: why it blows and how to test it
The thermal fuse is a one-time-use device. It sits on the boiler and physically breaks the circuit if the temperature exceeds its rating, usually around 150°C (302°F). It blows when the boiler runs dry, the thermostat sticks closed, or the machine overheats from scale buildup.
To test it, unplug the machine and remove the outer shell. Locate the fuse — it’s a small, white or black cylindrical component with two wires attached. Set your multimeter to continuity (the symbol that looks like a sound wave). Touch the probes to both terminals. If you get no beep, the fuse is blown. You can temporarily bypass it with a jumper wire to confirm the rest of the machine works, but never run the machine permanently without a thermal fuse. It’s your last line of defense against a boiler fire.
The pressure switch lockout (common on pump machines)
On machines with a vibratory pump, the pressure switch controls the boiler. When the pressure drops, it closes the circuit to heat the boiler. If the switch fails in the open position, the machine acts completely dead. Some switches have a small red reset button on the side. Press it once, then try the machine. If it trips again immediately, you have a wiring fault or a failing switch, not a simple reset issue.
Step 3: The Power Switch and Internal Wiring
If the outlet is fine and the thermal fuse tests good, the problem lives in the switch or the wires leading to it.
Continuity testing for the brew switch
The main power switch is a simple mechanical device. It can wear out after years of use. Unplug the machine, remove the switch from the panel, and set your multimeter to continuity. With the switch in the ‘on’ position, you should hear a beep across its terminals. No beep means the switch is dead. Replacing a switch is a $10 part and a 15-minute job on most machines. Make sure you buy the exact part for your brand; switch dimensions vary widely.
Checking for loose spade terminals
Vibration from the pump loosens spade connectors over time. Pull each connector off its terminal, inspect for corrosion or burn marks, and re-seat it firmly. A loose connection creates resistance, which generates heat and eventually melts the connector. If you see blackened plastic or a melted wire, that’s your problem. Replace the terminal or the entire wire harness if it’s badly damaged.
Step 4: The Control Board and Component Failure
Modern machines with digital displays have a control board that manages everything. These boards are more reliable than old mechanical switches, but they do fail. The telltale sign is a machine that’s completely dead with no lights at all, even though the outlet and power cord are fine.
Before you condemn the board, check the internal circuit breaker. Some machines have a resettable breaker, not a fuse. Look for a small button on the board itself. If it’s popped out, press it back in. If it trips again, there’s a short somewhere — likely a failed heating element or a pump that’s drawing too much current.
Testing a control board requires a multimeter and a wiring diagram. If you’re not comfortable tracing voltages on a live circuit, this is the point to stop. Control boards are expensive, and misdiagnosis is common. A new board might cost $150; a repair technician’s diagnostic fee is usually less than that.
Brand-Specific Reset Procedures
Different brands have different quirks. Here’s what to try before you tear anything apart.
| Brand | Common Failure | Reset Sequence |
|---|---|---|
| Breville (Barista Express, Bambino) | Machine won’t power on after descaling | Unplug for 60 seconds, hold the 1-cup and 2-cup buttons simultaneously while plugging back in, release after 2 seconds. The machine should beep. |
| DeLonghi (Dedica, Magnifica) | Thermal safety switch tripped | Unplug, wait 30 minutes for the boiler to cool, then press the small red reset button on the bottom of the machine. A paperclip works. |
| Gaggia (Classic Pro, Anima) | Pressure stat stuck open | Tap the pressure stat housing gently with a screwdriver handle. If the machine powers on, the switch is sticking and needs replacement. |
These resets only work if the underlying issue is a software lock or a mechanical sticking point. If the machine trips again right away, you’re dealing with a real hardware fault. Don’t keep resetting it; you’ll just stress the components further.
The Smell Test: Burnt Electronics vs. Blown Fuse
Your nose is a diagnostic tool. A blown thermal fuse smells like nothing. It’s a clean break, and there’s no odor. But a shorted control board or a melted wire smells like burnt plastic and electronics — acrid, sharp, and unmistakable.
If you smell that, stop. Unplug the machine and don’t power it on again. You have a serious electrical fault, and running it will only cause more damage. The smell of burnt electronics means a component has already failed catastrophically. It’s not a simple fuse job.
If there’s no smell, you’re likely dealing with a simple open circuit — a fuse, a switch, or a loose wire. These are all fixable.
Safety First: When to Stop and Call a Pro
Some repairs are beyond the home mechanic. Here’s the line you should not cross.
- Capacitor discharge risk: The control board has large capacitors that hold a lethal charge even after unplugging. If you see a swollen or leaking capacitor, don’t touch it. Discharge time can be minutes, not seconds.
- Water damage near the control board: If you see dried mineral deposits or corrosion on the board, the machine has been leaking internally. This is a death sentence for the electronics, and the leak needs fixing first. Don’t just replace the board.
- You’re using a multimeter on live circuits: If you’re not comfortable measuring voltage while the machine is plugged in, stop. A mistake here can shock you. It’s not worth the risk.
Call a local appliance repair shop that handles espresso machines. Ask if they work on your brand first. Many general repair shops won’t touch espresso machines because of the high boiler pressures involved.
FAQ: Quick Answers for Urgent Fixes
My machine has power, but the pump won’t run. What should I check?
First, check the water tank level sensor. Most machines won’t run the pump if the tank is empty or the sensor is dirty. Clean the sensor with a cotton swab and white vinegar. If that’s not it, test the brew switch for continuity. A dead switch means no signal to the pump.
Can I bypass the thermal fuse just to see if the machine works?
Yes, but only for a few seconds to confirm the diagnosis. Remove the fuse, connect the two wires with a jumper, and plug in the machine. If it heats up, the fuse was the problem. Then replace the fuse immediately. Running without it is a fire hazard.
Why does my machine trip the GFCI outlet every time?
A GFCI trips when it detects current leaking to ground. This usually means the heating element has cracked and is leaking current into the boiler. Test the element with a multimeter: check resistance between the element terminals and the boiler body. Any reading below 1 megohm means the element is leaking and needs replacement.
My Breville machine is dead after a power surge. What do I do?
Unplug it and leave it off for 10 minutes. The internal surge protector may have tripped. Plug it back in and try a different outlet. If it’s still dead, the surge likely fried the control board. Breville machines are sensitive to power surges; always use a surge protector.
Is it worth repairing an old espresso machine, or should I buy a new one?
It depends on the machine. A $200 DeLonghi with a dead control board is not worth fixing — the board costs more than the machine. But a $700 Rancilio Silvia with a blown fuse is absolutely worth repairing. The rule of thumb: if the repair costs more than half the machine’s replacement value, buy new. If it’s less, fix it.
The Bottom Line: Restoring Your Morning Ritual
You’ve climbed the ladder. You’ve checked the outlet, tested the fuse, inspected the wiring, and tried the brand reset. Here’s where you stand.
- Test the outlet with a multimeter before you touch the machine. It’s the most common false alarm.
- A dead machine with no smell is almost always a thermal fuse or a power switch. Both are cheap fixes.
- Intermittent failures mean loose connections. Re-seat every spade terminal you can find.
- Half-dead machines (lights on, no pump) point to the brew switch or the water tank sensor.
- Burnt electronics smell is a hard stop. Call a pro.
- Never bypass a thermal fuse permanently. It’s your machine’s last safety net.
- If the repair cost exceeds half the machine’s value, consider a new automatic machine instead.
Most home espresso machine failures are simple to fix. Take your time, work methodically, and you’ll be pulling shots again by the weekend. If you’re troubleshooting a related issue, check our guide on loud pump noises or water leaks — both are common after a repair.
Products related to this article
Sponsored / affiliate links. As an Amazon Associate I earn from qualifying purchases. I may earn additional commission from eligible campaigns.
 Coffee Espresso Machine Handle Replacement Parts, Cafe Bracket Handle for Lidl Silvercrest CM4621 CM4218 KF5002 KF500S Barista (for 51mm Portafilter Basket - Not included)
 Linnkyfloa Coffee Espresso Maker Handle Replacement for Stovetop Moka Pot or Percolator, Black Plastic for Spare Part Compatible with Italian(9-12 Cup)
 Quick Heating Cup Warmer, Three Temperature Settings, Splashproof and Portable, for Coffee, Milk, Lightweight ABS Material