You finish a perfect cup, pop out the puck, and rinse the chamber under the tap. That’s what most people call clean. But if you’ve ever pulled apart your AeroPress after weeks of that routine, you know the truth — the rubber seal looks stained, the filter cap has a thin film of coffee oil, and the chamber smells faintly of stale coffee even after a rinse.
That film isn’t just cosmetic. It affects how your AeroPress performs. A dirty seal loses grip, which makes plunging uneven. Coffee oils go rancid and add off-flavors to your next brew. The good news: cleaning AeroPress accessories takes about five minutes a week, and you don’t need special chemicals or tools.
JINYUANLIU
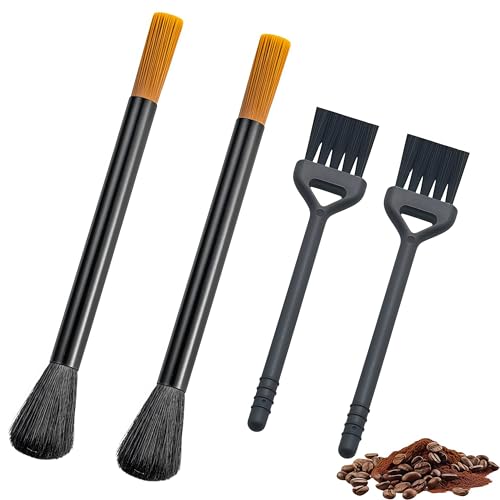
4 PCS Coffee Grinder Cleaning Brush, Espresso…
- Product introduction: 2 double-ended cleaning brushes and 2 crevice cleaning brushes, they can easily penetrate into all crevices…
- Double-ended cleaning brush: One end of the double-ended brush has stiff bristles for deep cleaning of coffee grounds remaining on…
- Gap cleaning brush: coffee cleaning brush, thick bristles that do not shed and are convenient for dust removal, and annular anti-s…
As an Amazon Associate I earn from qualifying purchases.
This guide covers the daily rinse, the weekly deep clean, how to descale with vinegar or baking soda, and the specific steps for the AeroPress Go. You’ll also learn when to replace parts and why a slow plunge is often a cleaning problem, not a mechanical one.
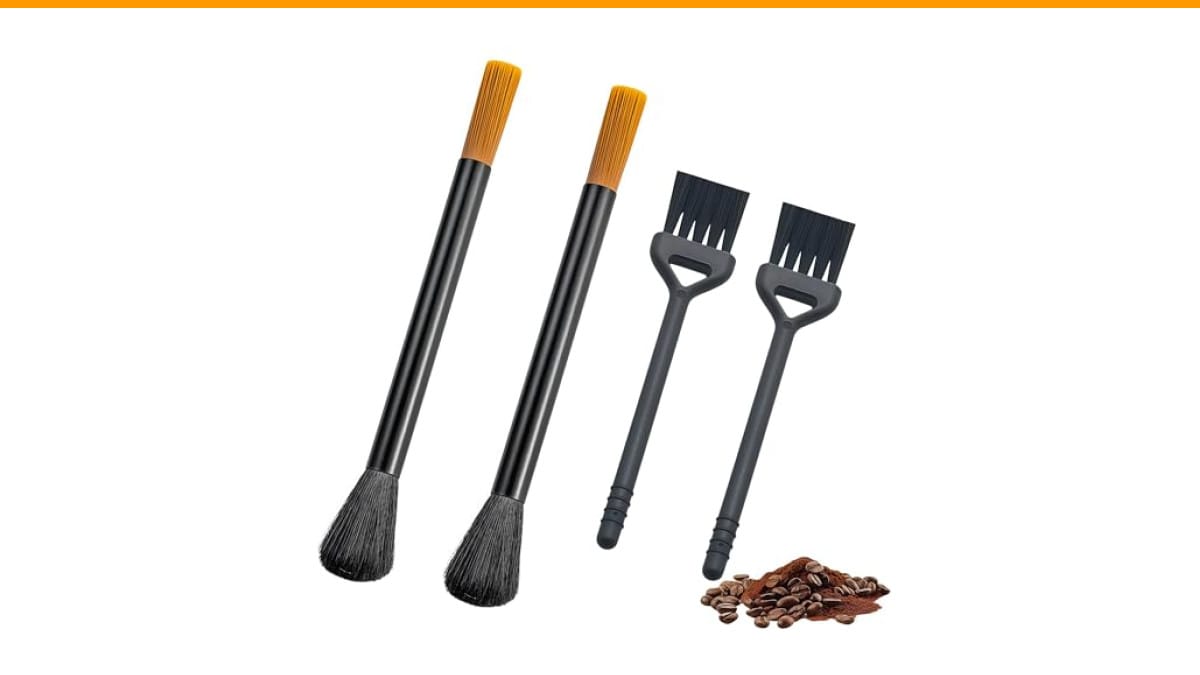
Before getting into the routine, a quick note on tools. A dedicated brush set makes the job easier, especially for the nooks in the filter cap and the plunger seal. The JINYUANLIU coffee grinder cleaning brush set includes two double-ended brushes and two crevice brushes — the stiff bristles handle dried grounds on the filter cap, while the soft end is gentle on the rubber seal. It’s not essential, but it beats using a toothpick and a paper towel.
Why Cleaning Your AeroPress Matters (More Than You Think)
Most people treat the AeroPress like a no-maintenance gadget. It’s plastic, it’s simple, and the paper filter catches the grounds. What could go wrong?
Plenty. Coffee beans contain about 15% oil by weight. Those oils don’t dissolve in water — they cling to plastic and rubber. Over time, they oxidize and turn rancid. That’s the stale, bitter smell you notice when you take off the plunger after a few days of use. Rinsing with water alone won’t remove the oil film; it just spreads it around.
The rubber seal is the most vulnerable part. It’s what creates the vacuum that makes the AeroPress work. When coffee oils build up on the seal, it gets slick and loses friction against the chamber wall. You’ll notice it as a faster, rougher plunge — or worse, a plunge that sticks halfway. Cleaning the seal restores its grip and extends its life.
There’s also the filter cap. The tiny holes in the cap can clog with fine coffee particles, especially if you use a metal filter. A clogged cap slows the flow and makes your brew over-extract, turning it bitter. You don’t need to see the clog — you’ll taste it.
So cleaning isn’t just about hygiene. It’s performance maintenance. A clean AeroPress plunges smoothly, extracts evenly, and makes coffee that tastes like the beans, not like last week’s leftovers.
Daily Cleaning Routine (The 30-Second Method)
You don’t need to do a full disassembly every day. A quick rinse after each use prevents most buildup. Here’s the routine I follow, and it takes less than 30 seconds.
- Pop out the coffee puck into the trash or compost.
- Rinse the filter cap under hot running water. Use your thumb to rub the inside surface where the paper filter sits — that’s where grounds get trapped.
- Rinse the inside of the chamber. Swirl a little water around to dislodge any loose grounds.
- Wipe the plunger seal with your fingers under the water. Run the seal around the rim of the chamber to push off any residue.
- Shake off excess water and set the parts on a drying rack, or reassemble and store.
That’s it. No soap needed for daily use — the paper filter catches most of the oils, and hot water handles the rest. But here’s the catch: this routine only works if you do it right after brewing. Let the AeroPress sit for a few hours and the oils dry into a sticky film that water won’t remove.
If you use a metal filter instead of paper, you’ll need to scrub the filter with a brush during the rinse. Paper filters are single-use and trap oils; metal filters let more oils through, which means more residue on the cap and in the chamber.
One tip: keep a dedicated brush near your coffee station. I use the crevice brush from the JINYUANLIU set to sweep the filter cap holes once a day. It takes five seconds and prevents the need for a deeper scrub later.
The Weekly Deep Clean: Disassembly and Soaking
Once a week — or every 10 to 14 days if you brew less often — give your AeroPress a proper deep clean. This means taking it apart completely and soaking the parts in warm soapy water.
Start by separating all components: the chamber, the plunger (which includes the rubber seal), the filter cap, and the paper filter (discard it). If you use a metal filter, remove it from the cap.
Fill a bowl or sink with warm water and a few drops of mild dish soap. Submerge the chamber, filter cap, and metal filter (if applicable). Do NOT submerge the plunger — more on that in a moment. Let everything soak for 10 to 15 minutes.
After soaking, use a soft sponge or a cleaning brush to wipe down each part. Pay attention to the inside of the chamber, where oils can form a thin film. Rinse everything thoroughly with hot water to remove any soap residue. Soap left behind will make your next cup taste like detergent — not a flavor note you want.
For the filter cap, use a crevice brush or a toothpick to gently poke out any grounds stuck in the holes. Don’t use anything metal — it can scratch the plastic and create rough spots where coffee builds up even faster.
Dry all parts with a clean microfiber cloth or let them air dry on a rack. Reassemble only when everything is completely dry. Storing a damp AeroPress invites mold, especially in the rubber seal area.
Cleaning the Rubber Plunger Seal
The rubber seal is the most neglected part of the AeroPress, and also the most important. It’s what creates the airtight seal that builds pressure during the plunge. When it’s dirty, you lose that seal and your coffee extracts unevenly.
To clean the seal, first remove it from the plunger. The seal is a flexible ring that sits in a groove at the bottom of the plunger. Gently roll it off — it should come off without much force. If it’s stuck, soak the plunger in warm soapy water for a few minutes to loosen the oils, then try again.
Once removed, inspect the seal. You’ll likely see a brownish film on the contact surface. Wash it with warm soapy water and your fingers, rubbing the surface to break up the oil. For stubborn residue, use a soft-bristled brush — the soft end of the double-ended brush from the JINYUANLIU set works well. Avoid anything abrasive that could scratch the rubber.
Rinse the seal thoroughly and dry it completely. Before reattaching, check that the seal hasn’t stretched out or cracked. A deformed seal won’t create a proper vacuum, and you’ll need to replace it.
One thing I learned the hard way: don’t put the rubber seal in the dishwasher. The heat and harsh detergents degrade the rubber, making it lose its elasticity. Hand wash only.
Cleaning the Filter Cap and Basket
The filter cap looks simple, but it has a lot of small holes that collect coffee grounds. If you use paper filters, most grounds get caught, but fine particles still sneak through and lodge in the holes. Over time, these particles compact and slow down your brew.
To clean the filter cap, remove the paper filter (or metal filter) and rinse the cap under hot water. Use a crevice brush or a toothpick to gently remove any visible grounds from the holes. You don’t need to poke each hole — just run the brush across the surface to dislodge loose particles.
For a deeper clean, soak the cap in a solution of warm water and a drop of dish soap for 10 minutes. Then scrub with a soft brush and rinse thoroughly. Dry the cap completely before storing.
If you use a metal filter, it needs extra attention. Metal filters have fine mesh that traps oils and micro-grounds. Rinse it immediately after each use, and once a week, soak it in a solution of warm water and a bit of baking soda to break down oils. A soft toothbrush works well for scrubbing the mesh without damaging it.
Don’t use a dishwasher for the filter cap either — the high heat can warp the plastic, affecting the fit with the chamber.
The Vinegar and Baking Soda Descale Method
Over time, minerals from your water — especially if you use hard tap water — can build up inside the chamber and filter cap. This scale is invisible but can affect the taste of your coffee and make the plunger feel gritty. A monthly descale keeps things smooth.
You have two options: white vinegar or baking soda. Both are natural, cheap, and safe for the plastic (unlike harsh chemical descalers that can degrade the material).
Vinegar method: Mix one part white vinegar with three parts water in a bowl. Submerge the chamber, filter cap, and plunger seal (removed) for 20 minutes. The acetic acid dissolves mineral scale and breaks down coffee oils. After soaking, scrub with a soft brush, rinse thoroughly with hot water, and air dry. A vinegar smell may linger — rinse again if needed.
Baking soda method: Make a paste of 2 tablespoons baking soda and a little water. Apply it to the inside of the chamber and the filter cap with a soft cloth or brush. Let it sit for 5 minutes, then scrub gently. Baking soda is mildly abrasive, so it lifts oils and scale without scratching the plastic. Rinse thoroughly.
Which one should you use? Vinegar is better for mineral scale; baking soda is better for coffee oil buildup. If you have hard water, use vinegar monthly. If you brew daily and notice a film, use baking soda every few weeks. I keep both on hand — they cost pennies and work better than any commercial cleaner I’ve tried.
One caution: never mix vinegar and baking soda in the same cleaning session. They neutralize each other, and you end up with salty water that does nothing. Choose one method per cleaning.
How to Clean an AeroPress Go (Key Differences)
The AeroPress Go is the travel version, and it has a few design differences that affect cleaning. The chamber is shorter, the plunger has a different cap, and the whole thing fits into a travel mug that doubles as a carrying case. The mug itself is a new cleaning responsibility.
The disassembly process is the same — remove the plunger, filter cap, and seal. But the Go’s chamber is thicker and has a wider rim, which means more surface area for oils to cling to. Pay extra attention to the rim area where the plunger seal meets the chamber.
The travel mug is dishwasher safe (check your model — most are), but the chamber and plunger are not. Hand wash the mug with warm soapy water and dry it upside down to prevent moisture buildup.
Another difference: the Go’s filter cap is slightly smaller and has a different thread pattern. When cleaning, be careful not to cross-thread the cap when reassembling — a common issue that leads to leaks. Also, the Go’s plunger seal is the same rubber material, so treat it the same way: hand wash, no dishwasher.
If you travel with your Go, clean it as soon as you get back. Coffee residue left in a closed travel mug for days develops mold — trust me, you don’t want to discover that on your next trip.
Drying and Storage: Preventing Mold and Odors
You’ve cleaned your AeroPress. Now the last step matters just as much: drying and storage. A damp AeroPress is a breeding ground for mold, especially in the rubber seal and the bottom of the chamber. Mold spores are invisible, and you won’t notice them until your coffee tastes musty.
After washing, shake off excess water and place all parts on a drying rack or a clean towel. Make sure the chamber is upside down so water drains out. The plunger seal should be dried separately — water can get trapped in the groove and cause the rubber to degrade.
Once everything is dry, reassemble the AeroPress. Store it with the plunger slightly pulled back — not fully pushed in. A fully compressed plunger puts constant pressure on the seal, which can deform it over time. If you have the Go, store the chamber and plunger separately inside the travel mug, with the lid slightly ajar to allow airflow.
For long-term storage (more than a week), add a small packet of silica gel or a few grains of uncooked rice inside the chamber to absorb any residual moisture. It’s a cheap trick that prevents musty odors.
When to Replace Parts (Seal, Filters, Chamber)
Cleaning extends the life of your AeroPress, but nothing lasts forever. Here’s how to know when to replace parts.
Rubber seal: Replace every 3 to 6 months with regular use, or sooner if you notice any of these signs: the seal is cracked, stretched, or deformed; the plunger sticks or slips during use; or you see a gap between the seal and the chamber wall. A worn seal costs a few dollars and makes a huge difference in plunging smoothness.
Paper filters: These are single-use — replace after each brew. If you use a metal filter, replace it when the mesh becomes bent, torn, or clogged beyond cleaning (usually after 6 to 12 months).
Chamber: The plastic chamber is durable, but it can crack if you drop it or overtighten the filter cap. Inspect for hairline cracks, especially around the threads. A cracked chamber will leak and affect pressure. Replace it if you see any damage.
Replacement parts are widely available on Amazon and from the AeroPress website. It’s worth keeping a spare seal and a pack of filters on hand — they’re cheap and save you from a broken coffee routine.
Frequently Asked Questions
Is the AeroPress dishwasher safe?
No. The AeroPress is not dishwasher safe. The high heat and harsh detergents will warp the plastic chamber and degrade the rubber seal. The only exception is the travel mug from the AeroPress Go, which is dishwasher safe on the top rack. Hand wash all other parts with warm soapy water.
How do I fix a slow plunging AeroPress?
A slow plunge is almost always a dirty filter cap or a worn rubber seal. First, clean the filter cap holes thoroughly — clogged holes restrict water flow. Next, check the seal: if it’s coated in coffee oils, it loses grip and creates an uneven seal, which slows the plunge. Clean the seal with warm soapy water, and if that doesn’t fix it, replace the seal. Another common cause is using too fine a coffee grind — but if you’ve used the same grind before without issues, it’s a cleaning problem.
How often should I deep clean my AeroPress?
Once a week if you brew daily. If you brew less often, every 10 to 14 days. The daily rinse handles immediate residue; the weekly soak removes the oil film that builds up over time. If you notice a stale smell or a slow plunge, deep clean immediately — those are signs of buildup.
Can I use vinegar to clean the rubber seal?
Yes, but dilute it. A 1:3 vinegar-to-water solution is safe for the rubber. Soak the seal for 10-15 minutes, then rinse thoroughly. Don’t soak for longer — prolonged exposure to acid can break down the rubber. For regular cleaning, warm soapy water is enough.
Why does my AeroPress smell like stale coffee even after cleaning?
That smell is oxidized coffee oil. A quick rinse doesn’t remove it — you need a deep clean with soap or baking soda. If the smell persists after a deep clean, check the rubber seal. The seal absorbs oils and can hold onto odors. Replace the seal if it still smells after cleaning, as the odor will transfer to your coffee.
What to Remember (The Short Version)
- Rinse your AeroPress immediately after each use — don’t let coffee dry on it.
- Deep clean weekly: disassemble, soak in warm soapy water, scrub the filter cap holes.
- Clean the rubber seal separately — it’s the most important part for plunging performance.
- Descale monthly with vinegar (for hard water) or baking soda (for oil buildup).
- Never put the AeroPress in the dishwasher — hand wash only.
- Dry all parts completely before storing to prevent mold.
- Replace the seal every 3-6 months or when you notice plunging issues.
Cleaning your AeroPress takes less time than brewing a cup, and the payoff is real — smoother plunges, better-tasting coffee, and a gadget that lasts for years. If you’re also maintaining other gear, check our guides on steam wand cleaning and grinder cleaning — the same principles apply.
Products related to this article
Sponsored / affiliate links. As an Amazon Associate I earn from qualifying purchases. I may earn additional commission from eligible campaigns.
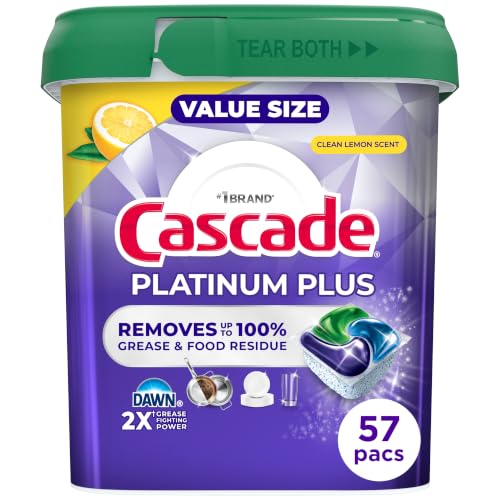 Cascade Platinum Plus Dishwasher Detergent Pods Dish Soap Lemon 57 Count
 Coffee Espresso Machine Handle Replacement Parts, Cafe Bracket Handle for Lidl Silvercrest CM4621 CM4218 KF5002 KF500S Barista (for 51mm Portafilter Basket - Not included)
 Unomor 3Pcs Long Handle Wooden Coffee Spoon Set Small Wooden Stirring Spoons for Coffee Tea Honey and Dessert Mixing Natural Material