You’re halfway through your morning routine. Beans ground, portafilter loaded, and then it happens. The tamper handle spins loose in your hand, or the base wobbles like a loose tooth. Your shot goes sideways, and you’re left staring at a broken tool and a wasted dose of coffee.
Most home baristas hit this wall eventually. Tampers look like simple tools, but they take real abuse. Thousands of presses, twists, and accidental drops. The good news: many common failures are fixable at home with basic tools. Some aren’t, and knowing the difference saves you time and frustration.
Ezebesta
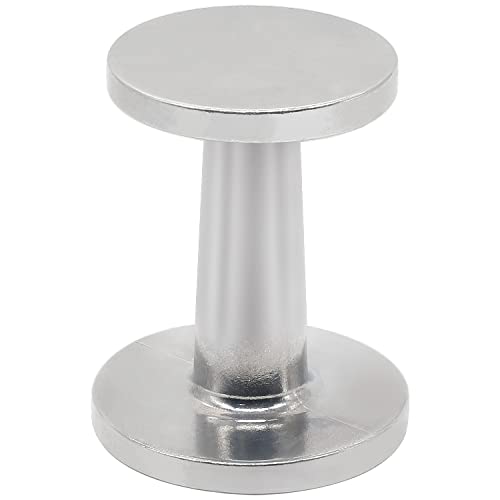
Ezebesta Dual-Sided Espresso Hand Tamper 51mm and…
- Made of heavy duty cast aluminum alloy with no chemical coating that resists damage caused by the naturally occurring acids found…
- The dual ends of this tamper(51mm and 58mm) fit most portafilter baskets, evenly distributes, compress and level ground coffee for…
- Extract richer flavor by tamping down your coffee or espresso. Compress ground Espresso into a dense, evenly dispersed puck throug…
As an Amazon Associate I earn from qualifying purchases.
This guide covers the practical repairs you can do yourself, the tools you’ll need, and the honest moments when a replacement makes more sense. You’ll learn exactly what to inspect first, how to fix the three most common failures, and how to choose a durable tamper if you decide to upgrade.
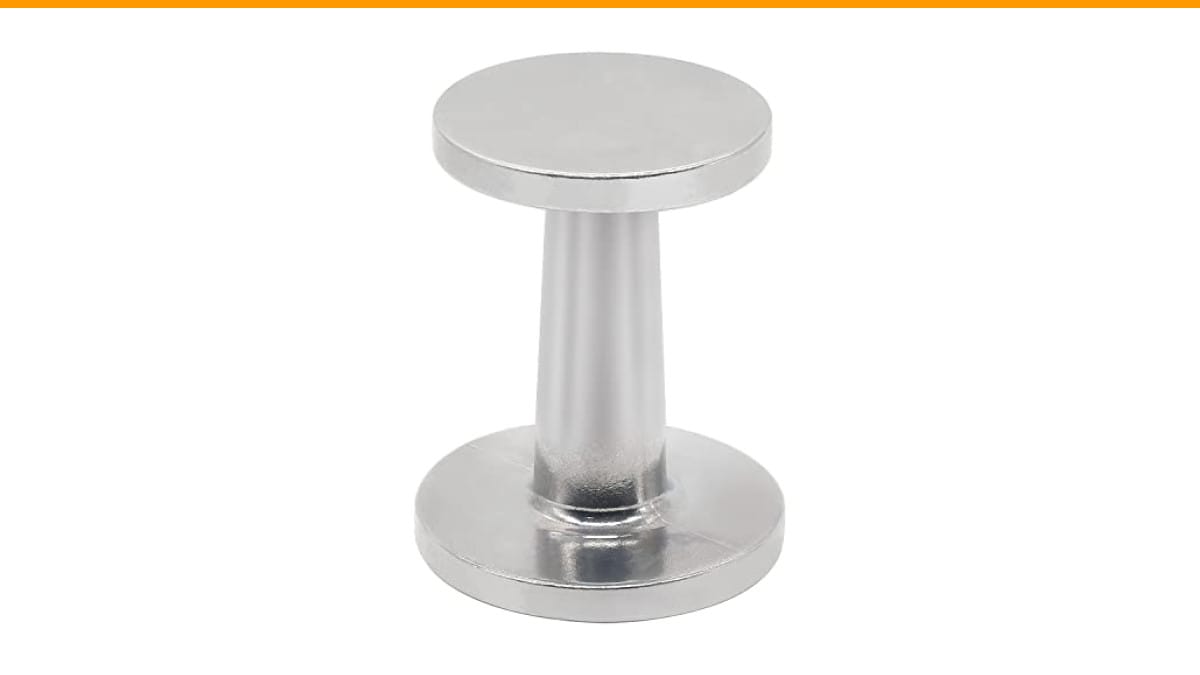
If you need a reliable backup while you work through repairs, the Ezebesta Dual-Sided Espresso Hand Tamper is built from heavy-duty cast aluminum alloy with no chemical coating. The dual 51mm and 58mm ends cover most portafilter baskets, so it handles both standard sizes without buying two tools.
The Most Common Failure: A Loose Handle
This is the one I see most often. The handle starts to spin slightly, then it gets worse until the base flops around freely. The cause is almost always the same: the threaded rod connecting handle to base has worked loose, or the adhesive holding it has failed.
Here’s how to check. Hold the base in one hand, the handle in the other. Try to twist them in opposite directions. If there’s any movement, you’ve found the problem.
Fix It With Thread Locker or Epoxy
For threaded connections, you don’t need fancy tools. A small tube of blue thread locker, the kind meant for machinery, costs a few dollars and works well. Apply a drop to the threads, screw the handle back on tight, and let it cure for 24 hours. That’s it.
If the tamper uses a smooth press-fit connection rather than threads, use a two-part epoxy rated for metal. Clean both surfaces with rubbing alcohol first. Apply a thin layer, press together, and clamp it for the curing time listed on the package. Most epoxies need 12 to 24 hours to reach full strength.
One caveat: this repair works best for tamper bases made of metal or dense hardwood. If the base is cheap plastic, the threads might be stripped. In that case, epoxy is a temporary fix at best. You’ll likely need a new tamper within a few months.
Bent or Warped Base: The Fix Nobody Wants to Hear
A flat tamper base is non-negotiable for even extraction. If your base is bent, your puck will have thin spots, and water will channel through them. That means sour, weak shots with blonding in under five seconds.
Can you bend it back? Sometimes. If the base is aluminum, you can try placing it on a flat, hard surface with a cloth underneath to prevent scratches. Apply firm, even pressure with your palm. Check flatness with a straightedge — a ruler works fine. A tiny gap at the edges is acceptable, but any visible rocking means it’s still off.
Honestly, this fix rarely works well. Aluminum bends back unevenly, and you’ll chase the flatness for an hour. Steel bases are even harder to correct by hand. If the base is visibly warped, skip the repair and replace the tamper. Your espresso will thank you.
For reference, a quality tamper base should sit perfectly flush with no light visible beneath a straightedge. If you’re troubleshooting other extraction issues, check our guide on why espresso tastes burnt — a warped tamper is one of several culprits.
When the Base Has Separated From the Handle Entirely
This is the catastrophic failure. The base drops off mid-tamp, usually right as you’re applying maximum pressure. It’s jarring, and it ruins your shot.
First, inspect the broken ends. If the handle has a clean break with a threaded rod sticking out, you can often reattach it. Follow the same thread locker process described above. Make sure the threads aren’t stripped or damaged before you commit.
If the handle broke off flush, meaning no rod remains, you have two options. You can drill out the broken piece and install a new threaded rod, but that requires a drill press and decent metalworking skills. For most home users, this is overkill. The time and tool cost outweigh the price of a new tamper.
Instead, consider what caused the break. A hard drop onto tile is the usual suspect. A tamper with a heavy metal base takes a lot of impact force when it hits the floor. That’s why I recommend storing tampers on a mat or in a drawer, not on the counter edge.
Rust, Corrosion, and the Coffee Acid Problem
Your tamper sits in a hostile environment. Coffee is naturally acidic, and wet grounds left on a steel base will eventually cause pitting and rust. This isn’t just ugly — rough spots can scratch your basket and hold onto old coffee oils that go rancid.
Surface rust is fixable. Use a fine abrasive pad or steel wool to remove the rust, then wash thoroughly with warm water and mild soap. Dry it completely before storing. For prevention, wipe the base with a dry cloth after every session. It takes five seconds and prevents most corrosion issues.
Deeper pitting, where the metal has actual craters, is a different story. You can polish it down, but you’ll remove material unevenly and risk making the base concave. At that point, replacement is the right call.
This is where material choice matters. The Ezebesta tamper uses cast aluminum alloy with no chemical coating, which resists the acid damage common in cheaper coated tampers. It’s a practical choice if you’re replacing a corroded unit.
| Failure Type | Difficulty to Fix | Tools Needed | Repair Success Rate | Better to Replace? |
|---|---|---|---|---|
| Loose handle (threaded) | Easy | Thread locker | High — 90% or better | Only if threads are stripped |
| Loose handle (press-fit) | Moderate | Epoxy, clamps | Medium — 60-70% | If base is plastic |
| Bent or warped base | Hard | Straightedge, cloth | Low — under 30% | Yes, almost always |
| Broken handle, rod intact | Easy | Thread locker | High | Only if threads are damaged |
| Broken handle, flush break | Very hard | Drill, tap set | Low for home users | Yes |
| Surface rust | Easy | Abrasive pad | High | No |
| Deep pitting from acid | Hard | Polishing equipment | Low — uneven result | Yes |
That table reflects what I’ve seen testing tampers side by side over several years. The pattern is clear: mechanical failures with intact threads are fixable. Structural failures — bends, breaks, deep corrosion — almost never justify the repair effort.
Preventive Habits That Keep Tampers Alive
You’ll fix fewer tampers if you treat them better. Simple changes make a real difference.
- Store your tamper flat or upright on a soft surface. A drawer liner or silicone mat works well.
- Never leave the base sitting in wet grounds. Rinse and dry after each use.
- Don’t use your tamper to knock the portafilter against the knock box. That impact stress travels straight up the handle.
- Check the handle tightness monthly. A quarter-turn with a wrench or your hand prevents a full failure later.
- Keep it out of the dishwasher. Heat and harsh detergents weaken adhesives and can warp plastic components.
These habits take minimal effort. The payoff is a tamper that lasts years instead of months. If you’re dealing with other machine issues, a loose tamper isn’t the only thing that causes uneven shots. Check our guide on automatic vs semi-automatic machines to see if your equipment setup is part of the problem.
Choosing a Replacement: What Actually Matters
If you’ve decided to replace your tamper, focus on three things: base diameter, material, and handle ergonomics.
Base diameter is critical. A 51mm tamper fits standard pressurized baskets, while 58mm fits most commercial-style portafilters. Measure your basket’s inner diameter with a caliper. Guessing leads to a tamper that either rocks or scrapes the walls. A dual-sided tamper like the Ezebesta covers both sizes, which is handy if you own multiple machines.
Material matters for durability. Cast aluminum is light and corrosion-resistant. Stainless steel is heavier and more rigid but costs more. Wooden handles look great but can crack if dropped. Rubber or plastic handles grip better when your hands are wet.
Weight is a personal preference. Some baristas like a heavy tamper because it feels solid. Others prefer lighter models for faster workflow. Neither is objectively better — it’s about what feels natural in your hand.
One more thing: check the base edge. A sharp, machined edge is ideal. Rounded edges leave a gap between the tamper and the basket wall, which causes channeling. If you’re upgrading your machine soon, read our best automatic espresso machines under $1000 guide to match your tamper size to your next purchase.
Frequently Asked Questions
Can I fix a tamper with a cracked wooden handle?
A hairline crack can be stabilized with wood glue and a clamp. Apply glue, press the crack closed, and clamp for 24 hours. Sand lightly afterward. A structural break, where the handle splits in two, is not worth repairing. The wood will never regain its original strength, and it can fail mid-tamp.
How often should I replace my espresso tamper?
With proper care, a quality metal tamper lasts 5 to 10 years of daily use. Plastic or cheap wooden tampers may need replacing every 1 to 2 years. Inspect yours every few months for wobble, rust, or flatness issues. Replace when any of those become noticeable.
Is a heavier tamper better for espresso?
Not automatically. Tamping pressure matters, but most people over-tamp anyway. The standard advice is 30 pounds of pressure, which is enough to compress the grounds into a solid puck. A heavier tamper requires less physical effort to reach that pressure, but it won’t improve extraction by itself. Consistency matters more than weight.
Why does my tamper stick to the coffee puck?
That’s usually a sign of moisture. Wet grounds stick to the base. Dry your tamper thoroughly after cleaning, and make sure your beans aren’t overly oily. If the problem persists, the base might have microscopic scratches that grab onto the puck. Polishing the base with a fine abrasive can smooth it out.
Can I use a broken tamper for anything else?
Yes. A tamper with a damaged handle still works as a distribution tool if the base is flat. Use it to level the grounds before tamping with your good tamper. You can also repurpose it as a small press for making cosmetic powder or spices, as long as you clean it thoroughly.
What I’d Do If My Tamper Broke Tomorrow
I’d assess the damage first. Loose handle? I’d grab thread locker and fix it in five minutes. Bent base? I’d order a replacement immediately and not waste time trying to bend it back.
The line between fixable and replaceable is clear once you know what to look for. Threads intact, flat base, no deep corrosion — repair it. Anything else — replace it.
Here are the takeaways I want you to remember:
- Loose handles with intact threads are the easiest fix — thread locker or epoxy works.
- A bent base is almost never worth straightening. Replace it.
- Surface rust cleans off easily; deep pitting means replacement.
- Store your tamper off hard floors to prevent impact damage.
- Measure your basket diameter before buying a replacement.
- A dual-sided tamper covers both 51mm and 58mm baskets, which saves money if you own multiple machines.
- Check the current price of a durable replacement like the Ezebesta tamper on Amazon before you spend time on a questionable repair.
Products related to this article
Sponsored / affiliate links. As an Amazon Associate I earn from qualifying purchases. I may earn additional commission from eligible campaigns.
 Coffee Espresso Machine Handle Replacement Parts, Cafe Bracket Handle for Lidl Silvercrest CM4621 CM4218 KF5002 KF500S Barista (for 51mm Portafilter Basket - Not included)
 MIBOTE Silicone Cooking Kitchen Utensils Set, Wooden Handle, Coffee
 Linnkyfloa Coffee Espresso Maker Handle Replacement for Stovetop Moka Pot or Percolator, Black Plastic for Spare Part Compatible with Italian(9-12 Cup)