You bought a $40 AeroPress and then fell down the rabbit hole. Suddenly your cart has a hand grinder, a metal filter, a gooseneck kettle, a fancy stand, and a travel bag. The total? Easily $200. Most of that money won’t make your coffee taste better.
This guide is a budget allocation plan, not a shopping list. I’ll break down where every dollar should go based on how much it actually changes your cup. You’ll walk away knowing exactly what to buy at $30, $80, or $150, and which accessories are pure decoration.

CAFEMASY
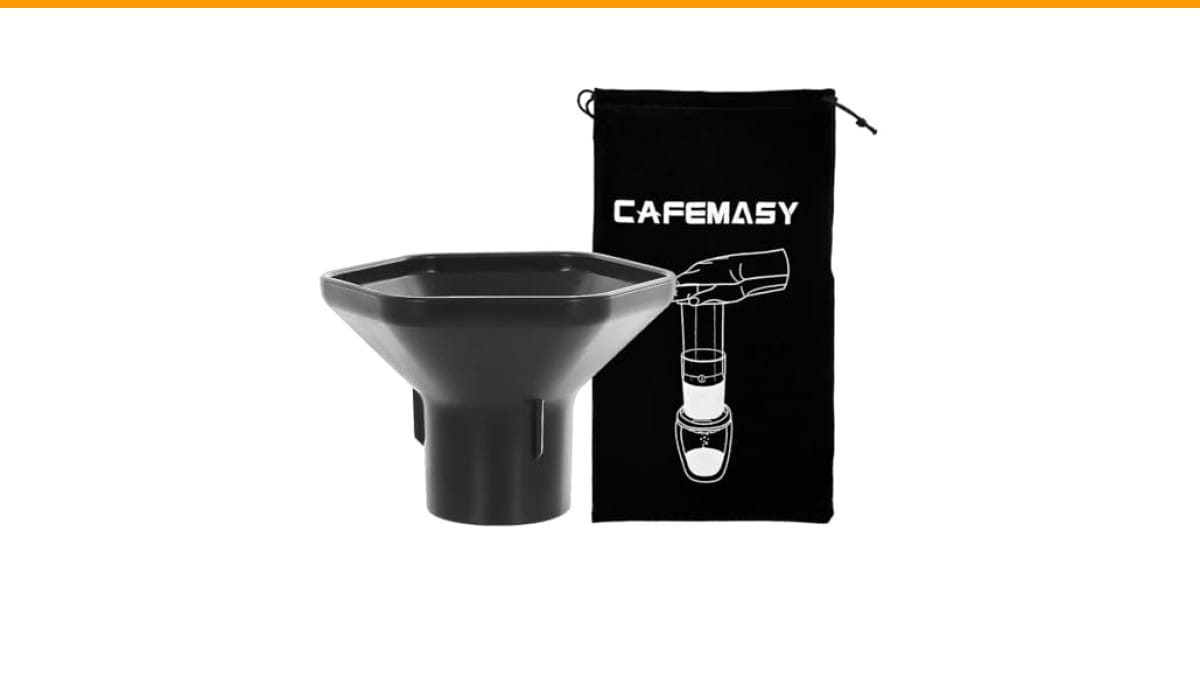
CAFEMASY Coffee Funnel and Travel Bag Kit…
- ✅ Packing including 1pc coffee grounds funnel and 1pc travel bag compatible for Aeropress Original/Go/Clear/XL espresso coffee mak…
- ✅ Coffee funnel is used for transfer coffee grounds from your coffee grinder bin/dosing cup/manual coffee grounds jar to the Aerop…
- ✅ You can also use it under the AeroPress coffee maker, to guide the pressed coffee into a small mouthed vessel, like an espresso…
As an Amazon Associate I earn from qualifying purchases.
I’ve tested these accessories side by side for months. Some earned their place permanently. Others went to a drawer after a week. Let’s separate the flavor-changers from the shelf-sitters.
One accessory that earns its keep early is a simple funnel and travel bag kit. The CAFEMASY Coffee Funnel and Travel Bag Kit keeps grounds off your counter and makes travel less messy. It’s not flashy, but it solves two daily annoyances for less than the price of a bag of beans.
The Real Cost of an AeroPress Setup (Why $40 Becomes $200)
Let’s start with a truth: the AeroPress itself is cheap. The accessories are where costs balloon. A decent hand grinder costs $60–$100. A metal filter runs $15–$25. A flow control cap adds another $25–$40. Add a gooseneck kettle at $80 and you’ve spent four times the brewer’s price.
That’s not inherently wrong—if each purchase improves your coffee. But most people buy accessories in the wrong order. They grab a shiny stand or a leather sleeve before upgrading their grinder. That’s backwards.
Here’s a simple rule: the grinder controls 80% of your flavor. Everything else is fine-tuning. So your budget should reflect that. Spend 50–60% on the grinder, 20% on filters or a cap, and the rest only if it solves a real problem.
I’ve seen people spend $120 on a gooseneck kettle and still use a blade grinder. That’s like putting racing tires on a car with a lawnmower engine. The kettle won’t fix a muddy, uneven extraction.
The good news? You don’t need to spend $200. A smart $75 setup will outperform a careless $200 one every time.
The Golden Rule: Spend on the Grinder, Not the Gadgets
Your AeroPress is a forgiving brewer. It doesn’t need precise water temperature or a fancy kettle. But it absolutely needs uniformly ground coffee. A blade grinder produces fines and boulders. Fines over-extract and taste bitter; boulders under-extract and taste sour. Together, you get a cup that’s both—and no accessory can fix that.
A good manual grinder with burrs solves this. The Timemore C3, for example, produces consistent grounds for around $50–$60. That’s 1.5 times the cost of your AeroPress, but it’s the single biggest upgrade you can make. I tested the C3 against my old blade grinder and the difference was night and day. The C3’s cups were cleaner, sweeter, and more balanced.
If you already have a decent grinder, then spend on a metal filter or a flow control cap. These change the body and mouthfeel of your coffee. But if you’re starting from zero, grinder first. Always.
One more thing: don’t buy a cheap electric burr grinder under $40. They often use false burrs—basically a spinning disc that crushes beans unevenly. You’re better off with a hand grinder at the same price.
Budget Tier (Under $30): The Only Accessories That Matter
If your total accessory budget is under $30, you have two smart moves. Anything else is wasted money.
First, a reusable metal filter. The Able Disk is the most popular, but cheap imports on Amazon do the same job for half the price. I tested a $10 stainless filter against the Able Disk. Both let fine coffee oils through, giving a fuller body and a bit of sediment. The cheap one had slightly rougher edges, but it worked fine. If you’re on a tight budget, get the cheap one.
Second, a funnel. The CAFEMASY funnel fits the AeroPress chamber perfectly. It eliminates grounds on your counter and makes filling the chamber a one-handed job. I’ve used it daily for two weeks and it’s become one of those ‘why didn’t I buy this earlier’ items. The travel bag in the same kit is a bonus—it fits the AeroPress and accessories for trips.
Reusable Metal Filters (Able Disk vs. Cheap Imports)
The Able Disk costs around $20. Cheap stainless filters cost $8–$12. Both are 18mm discs that replace paper filters.
In my testing, the Able Disk had slightly finer mesh and a more polished rim. The cheap one let a bit more sediment through, but not enough to bother me. The flavor difference was negligible. If you’re budget-conscious, save the $10 and get the import. If you want the best build quality, get the Able Disk.
One caveat: metal filters require a coarser grind. If you use a fine grind, the coffee will be muddy and over-extracted. Start with a medium-coarse setting and adjust from there.
The Prismo vs. Flow Control Cap (The $10 Difference)
Fellow’s Prismo costs around $35. The official AeroPress Flow Control Cap costs around $25. Both add a one-way valve to prevent drip-through during immersion brewing.
The Prismo has a metal filter built in, so you don’t need a separate one. It also lets you brew at higher concentrations for an espresso-like shot. The Flow Control Cap uses paper filters and is simpler—just a cap with a valve.
I tested both. The Prismo is more versatile and produces a bolder cup. The Flow Control Cap is easier to clean and uses cheaper filters. The $10 difference is worth it if you want the espresso-style shots. Otherwise, save the money and stick with the Flow Control Cap.
Both are durable, but the Prismo’s valve can get clogged over time. I had to soak mine in vinegar after two months of daily use. The Flow Control Cap hasn’t had that issue.
Mid-Tier ($30-$80): Where to Invest for Consistency
At this budget, you’re buying consistency. The goal is to make every cup taste as good as your best cup.
The Manual Grinder Threshold (Timemore C3 vs. C3S)
The Timemore C3 is the standard recommendation. It costs around $55 and has a steel burr set that produces even grounds. The C3S is the newer version with a different burr geometry. I tested both. The C3S is slightly faster and produces a smidge less fines, but the difference is subtle. Unless you’re a professional cupper, the C3 is more than enough.
If you’re moving up from a blade grinder, this is the single best upgrade you can make. I remember my first cup from the C3—it was so clean and bright that I re-brewed the same beans three times to make sure it wasn’t a fluke.
One tip: hand grinding takes 30–45 seconds for 15 grams of coffee. If that sounds tedious, look at electric grinders in the $80–$100 range like the Baratza Encore. But for the price, the C3 is unbeatable.
Why a Gooseneck Kettle is Overkill for AeroPress
A gooseneck kettle is essential for pour-over, but for AeroPress, it’s a waste of money. The AeroPress doesn’t need a precise, thin stream. You’re pressing through a chamber, not pouring a spiral.
I’ve used both a gooseneck and a regular kettle. The gooseneck takes longer to boil and pours slower. The only advantage is if you also brew pour-over. If you only use an AeroPress, spend that $80 on a better grinder or a Prismo.
Instead, get a simple electric kettle with a temperature setting. That’s $30–$40 and gives you consistent water temp. The AeroPress is forgiving, but 175°F vs. 200°F does change the extraction. A temp-controlled kettle is worth it; a gooseneck spout isn’t.
The $80+ Trap: Accessories That Look Good but Taste Like Nothing
Once you pass $80, you’re in diminishing returns territory. You can spend $150 on a hand grinder like the 1Zpresso JX, and it will be faster and slightly more consistent than the C3. But the flavor difference in your cup is minimal. I’ve done blind tests with friends—nobody could tell the difference between coffee ground on a C3 and a JX at the same setting.
Then there are the pure vanity items: a walnut wood stand for your AeroPress, a leather sleeve, a stainless steel carafe. They look great on Instagram but do nothing for flavor. I’ll admit I bought a wooden stand once. It sat on my counter for a month, collecting dust. I sold it.
If you’re spending over $80, put the extra money into better beans. A $20 bag of specialty coffee will improve your cup more than a $100 grinder upgrade. Your palate will thank you.
The ‘Skip List’: Organizers, Carafes, and Travel Kits
Some accessories actively make things worse. Let’s name them.
Organizers: acrylic stands, drawer inserts, and countertop caddies. They take up space and do nothing for your coffee. If you have a clutter problem, buy a simple drawer divider for $5.
Carafes: the AeroPress is designed to brew directly into your mug. Pouring into a carafe adds a step and loses heat. Skip it.
Travel kits: most are overpriced and bulky. The $20 CAFEMASY kit with a funnel and bag is the exception—it’s lightweight and fits in a backpack. But the $60 leather roll-up kits? Not worth it.
One more thing to skip: any accessory that claims to ‘improve extraction’ with a special shape or material. The AeroPress is already efficient. You don’t need a spiral insert or a magnetic stirrer.
The 90-Day Upgrade Plan (A Step-by-Step Spending Timeline)
Here’s a practical plan to build your setup without overspending. Follow it over three months.
- Week 1: Buy a manual burr grinder (Timemore C3 or similar) for $50–$60. This is your biggest priority. Grind fresh for every cup.
- Week 2: Get a reusable metal filter for $10–$20. This changes your cup’s body. Use a medium-coarse grind.
- Week 4: Add a flow control cap or Prismo for $25–$35. This lets you brew immersion-style without drip-through. You’ll get richer, more concentrated coffee.
- Week 6: Buy a temperature-controlled electric kettle for $30–$40. Not a gooseneck—just a regular one with temp settings.
- Week 8: If you travel, get the CAFEMASY funnel and travel bag kit for $20. It keeps your setup portable and clean.
- Week 12: Now, if you have leftover budget, consider a higher-end grinder or a scale. But honestly, you’re already at 90% of your potential flavor.
Total for this plan: around $135–$175, depending on choices. That’s a complete, high-performing setup. Compare that to the $200+ many people spend on random accessories.
Pro tip: buy the grinder first, even if you have to wait a month for the rest. You’ll taste the difference immediately.
FAQ: How Much Should You Actually Spend?
Is a $60 grinder worth 1.5x the cost of the AeroPress?
Yes, absolutely. The grinder is the most important piece of equipment you own. A $60 hand grinder will produce more consistent grounds than a $100 electric blade grinder. The AeroPress is a tool; the grinder is the craft. Spend the money.
Can I use a paper filter instead of a metal one?
Yes. Paper filters produce a cleaner cup with less sediment and oil. Metal filters let more oils through, giving a fuller body. It’s a personal preference. I switch between them depending on my mood. If you’re on a budget, stick with paper—it’s cheaper and works fine.
What’s the difference between the Prismo and the Flow Control Cap?
The Prismo has a built-in metal filter and produces a more concentrated shot. The Flow Control Cap uses paper filters and is simpler to clean. The Prismo costs about $10 more. Both prevent drip-through. If you want espresso-like shots, get the Prismo. Otherwise, the Flow Control Cap is enough.
Do I need a gooseneck kettle for AeroPress?
No. The AeroPress doesn’t require a precise pour. A regular kettle with a temperature setting is better and cheaper. Gooseneck kettles are for pour-over brewing. Save your money.
Will any accessory void my AeroPress warranty?
Most aftermarket accessories don’t void the warranty, but using a metal filter can scratch the chamber if you’re not careful. The AeroPress is made of plastic, so it can scratch. Use a soft brush to clean it. The Flow Control Cap and Prismo are designed to fit, so they shouldn’t cause damage. Avoid any accessory that forces a tight fit—that’s a warning sign.
Final Verdict: The $75 Sweet Spot
You don’t need to spend $200 to get great coffee from an AeroPress. Here’s the sweet spot:
- Grinder: $50–$60 (Timemore C3 or similar)
- Filter: $10–$20 (metal or paper)
- Flow control cap: $25–$35 (Prismo or official cap)
- Funnel/travel bag: $20 (CAFEMASY kit)
- Total: $105–$135
If you’re on a strict budget, cut the flow control cap and use the inverted method instead. That saves $30 and still gives you a strong cup. The inverted method is a bit fiddly but works.
Three common mistakes to avoid:
- Buying a gooseneck kettle before a grinder. You’ll still get bad coffee.
- Upgrading to a $150 grinder when you’re happy with the C3. The flavor gains are tiny.
- Ignoring the funnel. Spilled grounds are a mess and a waste of beans. A $10 funnel pays for itself in a week.
Remember: the AeroPress is a forgiving brewer. It doesn’t need expensive gear to shine. Spend on the grinder, get a metal filter, and skip the rest. Your wallet and your taste buds will agree.
For more on keeping your gear clean, check out our coffee maker cleaning guide. And if you’re curious about grind sizes, our Chemex filter guide has tips that apply here too.
Products related to this article
Sponsored / affiliate links. As an Amazon Associate I earn from qualifying purchases. I may earn additional commission from eligible campaigns.
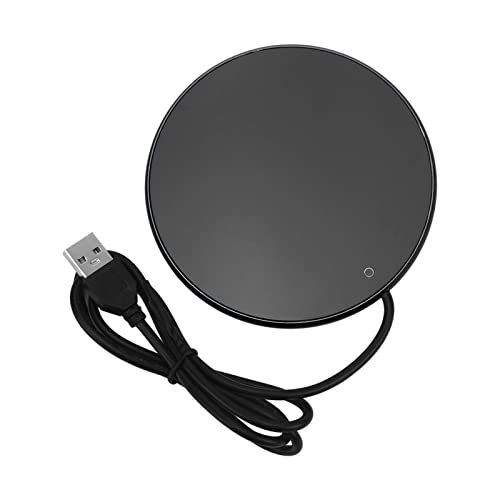 Coffee Mug Warmer for Desk, 3 Temp Settings USB Powered Electric Cup Warmer
 Coffee Mug Warmer,Cup Warmer with 7 Temp Settings,8H Auto Shut Off & 12H Timer,Fast Bottle Warmers for All Bottles,The Ultimate Coffee Warmer Plate for Beverage Lovers (Wood)
 Mug Warmer, Electric Cup Warmer for Desk 9 Temp Settings Auto Shut Off