You bought the AeroPress because you heard it makes a clean, rich cup without the fuss of a big machine. Then your first brew tasted sour. Your second one was bitter. Your third one was weak and watery. You checked the recipe, you used the scoop, you pressed until it made that hissing noise. Still inconsistent.
Most people assume the problem is the coffee or the technique. In my experience testing these brewers side by side, the actual problem is usually a handful of small accessory and workflow mistakes that are easy to fix. This guide walks through the seven most common AeroPress accessories mistakes beginners make, maps each one to the specific symptom in your cup, and ends with a starter recipe that works every time.

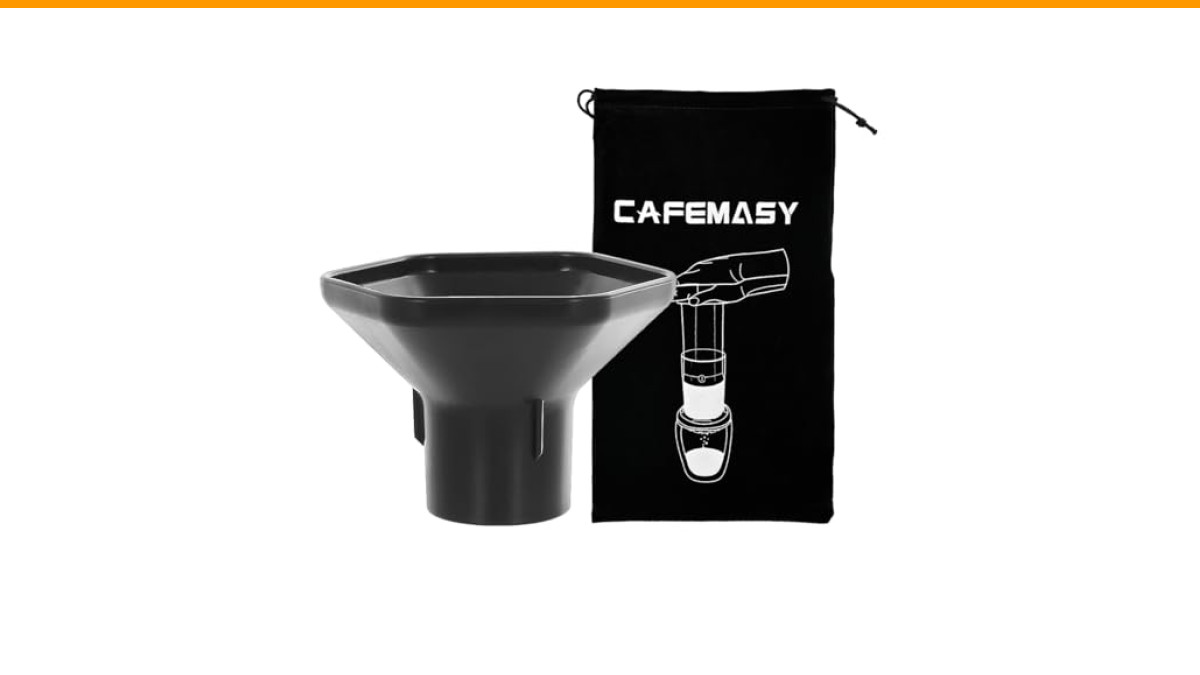
CAFEMASY
CAFEMASY Coffee Funnel and Travel Bag Kit…
- ✅ Packing including 1pc coffee grounds funnel and 1pc travel bag compatible for Aeropress Original/Go/Clear/XL espresso coffee mak…
- ✅ Coffee funnel is used for transfer coffee grounds from your coffee grinder bin/dosing cup/manual coffee grounds jar to the Aerop…
- ✅ You can also use it under the AeroPress coffee maker, to guide the pressed coffee into a small mouthed vessel, like an espresso…
As an Amazon Associate I earn from qualifying purchases.
You’ll walk away knowing exactly which part of your routine is hurting the brew and what to change. No vague advice, just specific numbers and conditions you can test this afternoon.
One accessory that solves a lot of mess-related frustration is a dosing funnel. The CAFEMASY Coffee Funnel and Travel Bag Kit fits the Original, Go, Clear, and XL models. It guides grounds into the chamber without spilling, and it doubles as a funnel for pouring the pressed coffee into a narrow travel mug. It won’t change your extraction, but it removes the mess that makes beginners rush the process.
Why Beginners Fail (It’s Not the Coffee)
Here is the uncomfortable truth: the AeroPress is forgiving, but it punishes inconsistency. A bad cup almost always comes down to one of three variables being off. Grind size, water temperature, or time. When you change one variable without understanding the other two, you chase your tail.
Think of it like debugging code. The symptom tells you the bug. A sour cup means under-extraction. A bitter cup means over-extraction. A weak cup means the ratio is wrong or you created bypass. Once you learn to read the symptom, the fix becomes obvious.
Let’s start with the most common culprit.
Mistake #1: Grinding Too Fine (and Clogging the Press)
If your press requires real muscle, you ground too fine. This is the classic beginner move because fine grounds look like what you see in commercial espresso machines. But the AeroPress uses pressure from your arms, not a pump. It needs a medium-fine grind, similar to table salt.
When you grind too fine, the paper filter clogs. The press stalls. You push harder, and then you get a sudden release of pressure that shoots coffee everywhere. Worse, the water takes longer to pass through the fines, which over-extracts the coffee and pulls out bitter tannins.
Here is a simple test. Your grind should offer moderate resistance during the plunge. If it feels like pushing a piston through wet sand, you are too fine. If it feels like pushing through water, you are too coarse. Aim for the middle. For reference, a standard burr grinder setting between 2.5 and 3.5 on a Baratza Encore works for most beans.
If you are using a blade grinder, stop. The inconsistent particle sizes cause both sour and bitter notes in the same cup. A cheap hand grinder with steel burrs is a massive upgrade over a blade grinder.
Mistake #2: Using Boiling Water (and Burning the Beans)
Water straight off the boil is around 212°F. That is too hot for most coffees. It scorches the grounds, which creates a burnt, ashy flavor that you cannot fix with any other variable.
The ideal range is 195°F to 205°F. If you do not have a thermometer, use the 30-second rule. After the kettle clicks off, wait 30 to 45 seconds before pouring. That usually drops the temperature into the right zone. For darker roasts, wait a full minute. Light roasts can handle the hotter end of the range.
I have tested this side by side with the same beans. The difference between 212°F and 200°F is night and day. The cooler brew has clarity and sweetness. The hotter one tastes flat and smoky. If your cup tastes burnt, check your water temperature before blaming the roast.
Mistake #3: The Wrong Coffee-to-Water Ratio (Eyeballing It)
Using the scoop that comes with the AeroPress is fine, but eyeballing the water level is not. The ratio matters more than most beginners think. A 1:15 ratio (coffee to water) is a good starting point. For the AeroPress chamber, that means roughly 15 grams of coffee to 225 grams of water.
Without a scale, you are guessing. And guessing leads to inconsistency. One day you use a heaping scoop, the next day a level one. The result is a cup that varies wildly in strength.
A cheap digital scale that reads to 0.1 grams costs less than a bag of specialty beans. Put the chamber on the scale, zero it, add the grounds, then zero it again and pour water until you hit the target weight. This single change will do more for your consistency than any other upgrade.
If you refuse to buy a scale, at least use the same scoop every time and fill the water to the same number on the chamber. But know that you are leaving quality on the table.
Mistake #4: Pressing Too Fast or Too Slow (The Bypass Trap)
Here is where most beginners ruin a good brew. The press should take 20 to 30 seconds, not 5 and not 60. Pressing too fast forces water through the coffee unevenly. This is called bypass. The water finds the path of least resistance through the puck, leaving the rest of the grounds under-extracted. The result is a sour, weak cup that tastes thin.
Pressing too slowly is just as bad. When you stall the plunge, the slurry cools down and the coffee continues to extract. That extended contact time pulls out bitter compounds. You end up with a cup that is both bitter and lukewarm.
The fix is simple. Aim for a steady, even press that lasts about 25 seconds. Do not stop halfway. Do not pause to take a photo. Commit to the motion. If you hit resistance, that is a grind size problem, not a reason to push harder.
One more thing about the steep time versus press time distinction. The 1 to 2 minutes you let the coffee steep before pressing is the extraction time. The 25 seconds of pressing is just the transfer time. Beginners often confuse the two and end up extending the total contact time without realizing it.
Mistake #5: Ignoring the Inverted Method (and the Leak Risk)
The standard method has the coffee dripping through the filter while it steeps. That drip continues during the steep, which means the extraction is happening at different rates for the coffee at the bottom versus the top. The inverted method solves this by flipping the brewer upside down so no coffee drips until you are ready.
Many beginners avoid the inverted method because it looks scary. The risk of tipping the whole thing over is real. But the consistency payoff is worth learning it. Here is the safe way to do it.
Place the plunger in the chamber upside down. Add the coffee and water. Stir and steep. Then cap it with the filter, flip it onto your mug, and press. The key is to keep the filter cap hand tight and to flip it in one smooth motion over the sink the first few times.
If you use the inverted method, you need a stable base. The funnel from the CAFEMASY kit helps here too, because it gives you a wider target when pouring water into the upside-down chamber. Less spillage means less stress.
Mistake #6: Forgetting the Filter (Paper vs. Metal vs. Reusable)
The filter you use changes the body of the cup significantly. Paper filters absorb the natural oils, producing a clean, tea-like cup. Metal filters let those oils through, giving you a fuller-bodied brew with more sediment. Neither is wrong, but using the wrong one for your taste is a mistake.
If you bought a metal filter because you read it was better, but you actually prefer a clean cup, switch back. If you are using paper filters and reusing them (which some people do), stop. A used paper filter holds old coffee oils that turn rancid and ruin the fresh brew.
Rinse the paper filter with hot water before brewing. This removes the papery taste and preheats the chamber. It takes five seconds and makes a noticeable difference.
For reusable filters, clean them immediately after brewing. Coffee oils harden quickly and are hard to scrub off once dry. A quick rinse under running water is enough if you do it right away.
Mistake #7: Not Cleaning the Plunger Seal
The rubber seal on the plunger is the most neglected part of the AeroPress. Coffee oils and grounds get stuck in the ridges. Over time, that buildup hardens and prevents the seal from making proper contact with the chamber walls. The result is a leaky press and a loss of pressure.
This is a slow failure. It does not break all at once. Instead, the press gets gradually easier, and the coffee gets gradually weaker because water bypasses the grounds and slips past the seal. Most people blame the grind or the beans when the real issue is a dirty seal.
Fix it by popping the plunger out of the chamber and washing the seal with warm soapy water. Do this after every few brews, not once a month. If the seal is cracked or stretched out, replace it. They are cheap and widely available.
For a deeper clean, check out our guide on cleaning coffee makers for a routine that keeps all your gear fresh.
The Simple No-Fail Starter Recipe
Stop reading recipes and just use this one. It is forgiving, balanced, and gives you a baseline. Once you nail this, you can experiment with ratios and steep times.
- Grind 15 grams of coffee medium-fine (like table salt).
- Heat water to 200°F (wait 30 seconds after boil).
- Place a paper filter in the cap and rinse it with hot water.
- Add coffee to the chamber. Pour in 225 grams of water.
- Stir gently for 5 seconds.
- Steep for 90 seconds.
- Press steadily for 25 seconds.
That is it. If the cup is too strong, use 14 grams next time. Too weak, use 16 grams. Do not change two variables at once. Change the grind or the ratio, but not both.
Comparing Brewing Methods: Standard vs. Inverted vs. Bypass
Here is a quick comparison of the three main ways to brew with the AeroPress. Each has trade-offs.
| Method | Best For | Risk | Result |
|---|---|---|---|
| Standard (Upright) | Beginners, speed | Dripping during steep | Clean, slightly lighter body |
| Inverted | Full extraction, body | Leak risk when flipping | Richer, more even extraction |
| Bypass (Add Water After) | Iced coffee, dilution | Watery if over-diluted | Customizable strength |
The bypass method is worth mentioning because it is a great trick. Brew a concentrated batch with a 1:10 ratio, then add hot or cold water to dilute it to your taste. This gives you more control over the final strength than trying to brew a perfect 1:15 ratio every time.
Frequently Asked Questions
Why is my AeroPress coffee sour?
Sourness means under-extraction. The water did not pull enough flavor out of the grounds. Fix it by grinding finer, using hotter water, or steeping longer. Change one variable at a time. Most likely, your grind is too coarse.
Why is my AeroPress coffee bitter?
Bitterness means over-extraction. You pulled too much out of the grounds. Fix it by grinding coarser, using cooler water, or pressing faster. Also check that you are not pressing for more than 30 seconds. A slow press extends the contact time.
Can I use the AeroPress for espresso?
No. The AeroPress makes a concentrated coffee that resembles espresso, but it lacks the 9 bars of pressure needed for true espresso. The crema you get is from air trapped in the coffee, not pressure. It is a great substitute for milk drinks, but it is not espresso.
How often should I replace the rubber seal?
It depends on use. For daily brewing, inspect the seal every few months. If you see cracks, or if the press leaks around the plunger, replace it. A worn seal ruins the brew because it lets water bypass the grounds. It is a cheap fix.
Is the AeroPress dishwasher safe?
The plastic chamber and cap are technically dishwasher safe on the top rack, but the heat can warp the chamber over time. Hand washing is safer and extends the life of the rubber seal. For more details, read our article on AeroPress dishwasher safety.
What to Change Tomorrow Morning
You do not need to fix everything at once. Pick the one mistake that matches your worst symptom and address it tomorrow.
- Sour cup? Grind finer or use hotter water.
- Bitter cup? Grind coarser or press faster.
- Weak cup? Check your ratio and use a scale.
- Leaking press? Clean or replace the rubber seal.
- Messy counter? Get a dosing funnel to keep grounds contained.
- Inconsistent results? Stick to the starter recipe for a week.
The AeroPress is a capable brewer. It is not the tool that is failing you. It is a small, fixable mistake in your routine. Diagnose the symptom, apply the fix, and you will get a good cup every single time. And if you are still troubleshooting your other coffee gear, our guide on cleaning schedules covers the rest of your setup.
Products related to this article
Sponsored / affiliate links. As an Amazon Associate I earn from qualifying purchases. I may earn additional commission from eligible campaigns.
 Quick Heating Cup Warmer, Three Temperature Settings, Splashproof and Portable, for Coffee, Milk, Lightweight ABS Material
 Coffee Mug Warmer & You are Awesome Mug Set, Electric Cup Warmer for Desk
 Luxylei Coffee Mug Warmer for Desk, Cup Warmer Temperature Settings, Electric Beverage Tea Water Milk Warmer for All Cups Mugs