You finally cleared the countertop, tucked the coffee maker into a cabinet, and pulled it out three months later to find a musty smell, a film of dust, and a few stubborn coffee stains that took two rounds of vinegar to fix. That’s the classic small coffee maker storage failure. It happens because most people just unplug the machine and shove it somewhere, skipping the prep that actually matters.
This guide walks you through the exact steps to store a small coffee maker properly, whether it’s going into a closet for a few weeks, into a suitcase for a trip, or onto a shelf for the season. You’ll learn what to clean, how to dry it so mold doesn’t grow, and how to protect it from dust, scratches, and accidental bumps. No fluff, just the stuff that works.
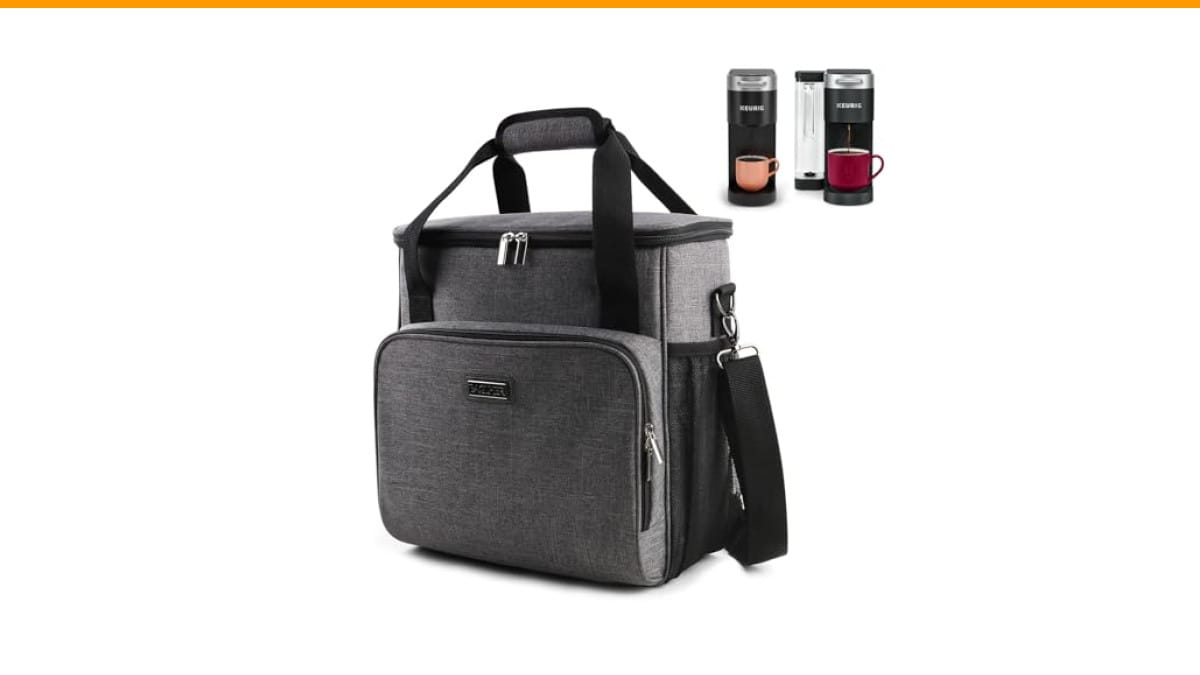
If you’re planning to travel with your coffee maker, a dedicated carrying case makes a real difference. The BAGLHER Coffee Maker Travel Bag is a padded, multi-pocket case designed for machines like the Keurig K-Slim, K-Supreme, and Nespresso Vertuo. It’s a solid option if you want to keep your machine and all its accessories in one place without worrying about scratches or spills.
Step 1: Clean Everything Before You Store It
This is the step people skip, and it’s the one that causes the most problems. Coffee oils, milk residue, and mineral scale don’t just sit there—they go rancid, grow mold, and leave odors that are nearly impossible to remove once they set in.
- Empty the water reservoir. Pour out any remaining water. Don’t just leave it to evaporate—standing water is a breeding ground for bacteria.
- Run a cleaning cycle. If your machine has a self-cleaning mode, use it. Otherwise, run a brew cycle with a 50/50 mix of white vinegar and water. That breaks down coffee oils and mineral scale. Follow with two cycles of plain water to rinse.
- Remove and wash all removable parts. The drip tray, filter basket, carafe, and K-cup holder should be washed with warm, soapy water. Rinse thoroughly and let them air dry completely.
- Wipe down the exterior. Use a damp cloth with a mild cleaner to remove fingerprints and coffee splatter. Pay attention to the area around the spout where coffee drips.
- Dry every single component. This is non-negotiable. Any moisture left inside the machine or on the parts will create a musty environment. Let everything air dry for at least 24 hours, or use a clean, dry towel to speed things up.
For a deep clean, check out our guide on proper coffee maker cleaning—it covers every nook and cranny, including the parts people forget.
One thing I’ve learned the hard way: don’t store the carafe with the lid sealed shut. Leave it slightly ajar so air can circulate. A sealed carafe traps moisture and smells like a wet sponge after a week.
Step 2: Choose the Right Storage Spot
Where you store the machine matters almost as much as how you clean it. A small coffee maker can go in a cabinet, on a shelf, or in a closet, but the conditions have to be right.
- Keep it dry. Humidity is the enemy. Avoid storing the machine under a sink, near a dishwasher, or in a damp basement. If you live in a humid climate, toss a silica gel packet inside the water reservoir or inside the machine’s cavity to absorb moisture.
- Keep it cool. Extreme heat can warp plastic parts and damage internal seals. Don’t store it near a stove, radiator, or in a hot garage.
- Keep it dust-free. A cabinet with a door is ideal. If you’re storing it on an open shelf, cover it with a cloth or a plastic bag to keep dust off the exterior and out of the water intake.
- Keep it accessible. You’re more likely to use the machine if it’s easy to reach. Store it at waist height, not on a high shelf where you’ll need a step stool.
If you’re putting the machine back on the counter after a break, make sure the area is clean and dry first. Wipe down the counter to remove any grease or dust that could transfer to the machine.
Step 3: Protect It During Transport or Long-Term Storage
For short-term countertop breaks, a simple cover works fine. But for travel or long-term storage, you need actual protection.
The BAGLHER travel bag mentioned earlier is a good choice because it has padded sidewalls, a padded bottom, and a front pocket for accessories. It also comes in three sizes, so you can match it to your machine’s dimensions. The medium size (16 x 6 x 13.5 inches) fits most standard small coffee makers, but measure yours first to be safe.
If you’re not using a dedicated case, here are a few alternatives:
- Original box. If you kept it, this is the best protection. The molded inserts hold the machine snugly and prevent movement.
- Moving blankets or towels. Wrap the machine in a thick towel or a small moving blanket, then secure it with rubber bands or tape. This works for short moves or storing in a closet.
- Plastic storage bin with a lid. A hard-sided bin protects against bumps and keeps dust out. Add bubble wrap or packing paper around the machine to prevent shifting.
One thing to watch: never store the machine with the power cord wrapped tightly around the base. It can put stress on the cord and damage the insulation. Instead, coil the cord loosely and tuck it beside the machine, or use a Velcro strap to keep it tidy.
Storage Methods Compared
| Method | Best For | Protection Level | Space Needed | Cost |
|---|---|---|---|---|
| Dedicated travel case (like BAGLHER) | Travel, frequent moves | High – padded, multi-pocket | Moderate | Check current price |
| Original box | Long-term storage, moving | High – custom fit | Large | Free |
| Plastic bin with padding | Garage, basement, closet | Medium – protects from dust and bumps | Large | Low |
| Towel wrap | Short-term, quick moves | Low – minimal impact protection | Small | Free |
| Open shelf with cover | Countertop breaks, daily use | Low – dust protection only | Small | Free |
Your choice depends on how long you’re storing the machine and how much space you have. For a few weeks, a towel wrap on a shelf is fine. For a cross-country move, spend the money on a real case.
Common Mistakes to Avoid
Even after reading the steps, people make the same three mistakes. Here’s how to avoid them:
- Storing it wet. You think you dried it, but the water reservoir has a hidden pocket or the drip tray has a lip that holds water. Double-check every crevice. Use a cotton swab to get into tight corners.
- Forgetting the descaling. If you store a machine with mineral scale inside, it hardens and becomes nearly impossible to remove. Always descale before storage, not after.
- Not labeling the box or bag. If you store multiple appliances, you’ll end up digging through boxes to find the right one. Write the model number and ‘coffee maker’ on the outside of the storage container with a marker.
If you’re dealing with a clogged machine when you pull it out, read our guide on clearing a clogged coffee maker before you panic.
Frequently Asked Questions
How long can I store a coffee maker without using it?
You can store a clean, dry coffee maker for years without issues. The main risks are moisture and dust. As long as the machine is completely dry and sealed in a plastic bag or bin, it’ll be fine. If you store it in a humid area, check it every few months for condensation.
Do I need to remove the water filter before storage?
Yes, if your machine has a water filter, remove it and store it separately in a sealed plastic bag. A wet filter can grow mold and bacteria. If the filter is old, just replace it when you take the machine out of storage.
Can I store a coffee maker in the garage?
Only if the garage is temperature-controlled and dry. Garages often have extreme temperature swings and high humidity, which can damage plastic parts and promote mold. If you have no choice, wrap the machine in plastic and add a desiccant pack.
How do I get the musty smell out of a stored coffee maker?
Run a vinegar cycle (1 part vinegar to 2 parts water) followed by two plain water cycles. If the smell persists, leave a bowl of baking soda inside the machine overnight. Wipe down the exterior with a vinegar-water solution. If the smell is really bad, you may need to replace the water reservoir or other plastic parts.
Is it better to store the coffee maker upright or on its side?
Always store it upright. Laying it on its side can cause water to leak into internal components, and it puts stress on the water reservoir seal. If you’re packing it in a suitcase, place it upright and pad around it with clothes.
What to Do When You Pull It Out
Don’t just plug it in and brew. Give it a quick rinse cycle with plain water to clear out any dust or lingering odors. Check the water reservoir for any debris. If you stored it with a desiccant pack, remove it.
If the machine was stored for more than a few months, run a descaling cycle before your first brew. That’ll remove any mineral buildup that happened while it sat. You’ll taste the difference immediately.
One more tip: if you’re storing the machine because you’re switching to a different one, consider selling or donating the old one instead. Storing a coffee maker you’ll never use again just wastes space. But if you’re keeping it for a vacation home or seasonal use, follow the steps above and it’ll be ready when you are.
Regular cleaning between uses makes storage easier. Check out our guide on why regular cleaning matters to keep your machine in top shape year-round.
Final Storage Checklist
- Always clean and dry every part before storing.
- Descale before storage, not after.
- Remove the water filter and store it separately.
- Choose a dry, cool, dust-free spot.
- Use a padded case for travel or long-term storage.
- Coil the cord loosely, never tightly wrapped.
- Label your storage container so you don’t have to guess.
- When you pull it out, run a rinse cycle and descale if needed.
Storing a small coffee maker takes ten minutes of prep, but it saves you hours of scrubbing and the disappointment of a ruined machine. Do it right, and your coffee maker will be ready whenever you are.
Products related to this article
Sponsored / affiliate links. As an Amazon Associate I earn from qualifying purchases. I may earn additional commission from eligible campaigns.
 HomeBeyond Espresso Coffee Maker 12 Cups, Classic Stovetop Espresso Maker, 600ml / 20oz Coffeemaker for Gas & Ceramic Stovetops (Silver)
 Belly Moka Coffee Maker Stovetop Espresso Maker 9 Cup Aluminum Moka Pot Percolator 15oz 450ml Easy Brewing for Electric Ceramic Stoves Home Camping Italian Cuban Café Classic Black
 Belly Moka Coffee Maker Stovetop Espresso Maker 6 Cup Aluminum Moka Pot Percolator 10oz 300ml Easy Brewing for Electric Ceramic Stoves Home Camping Italian Cuban Café Classic Silver