You pour your morning cup, and there it is — a puddle spreading across the counter. Or worse, you come back to the kitchen and find a brown stain running down the front of the machine and pooling on the floor. A dripping coffee maker is annoying, sure, but it’s also a sign that something specific has gone wrong. Ignore it, and you’re not just dealing with a mess; you’re risking damage to your countertops and, in some cases, a short circuit.
Most leaks are not a mystery. They follow a pattern. The water escapes at a particular time, in a particular place, and that pattern points straight to the culprit. You don’t need to be a repair tech to fix most of these issues. A few basic tools and about twenty minutes of your time will sort out the majority of leaks.

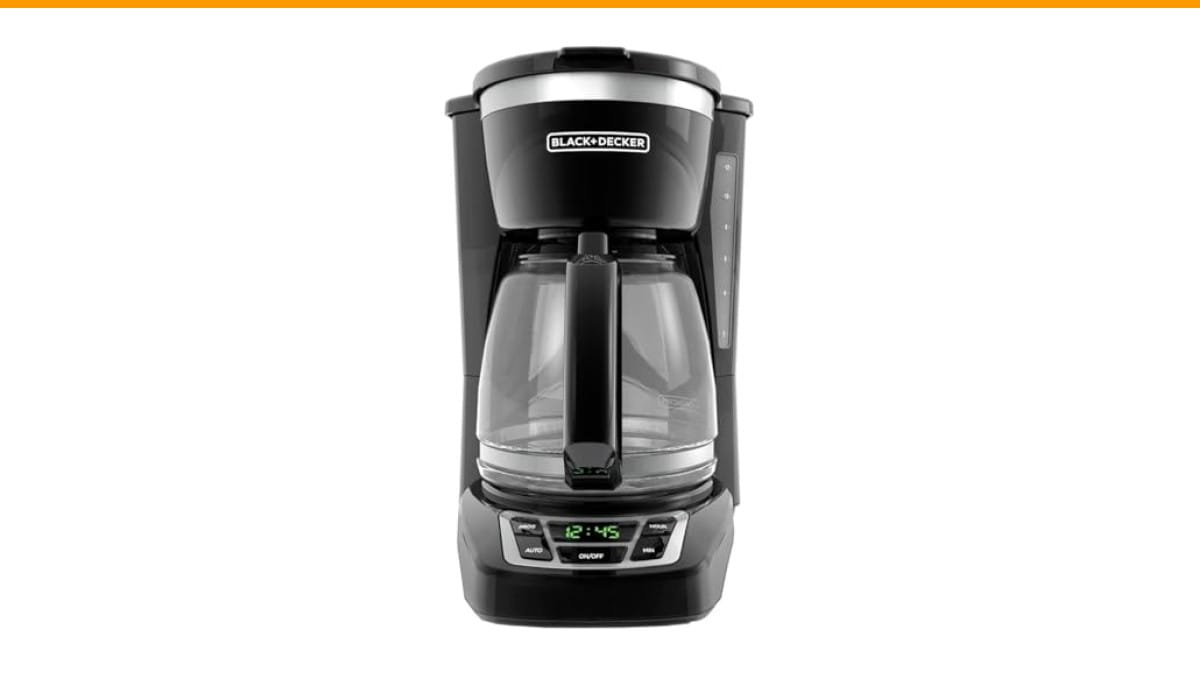
BLACK+DECKER
BLACK+DECKER 12-Cup Drip Coffee Maker with Vortex…
- 12-CUP DURALIFE GLASS CARAFE: The sturdy 12-cup* carafe has measurement markings for accurate filling and an easy-grip handle for…
- SNEAK-A-CUP FEATURE TO PREVENT DRIPS: This feature temporarily stops the flow of coffee so you can pour your first cup before brew…
- EASY-VIEW WATER WINDOW: The front-facing window shows you the exact amount of water that will turn into coffee, and the brew baske…
As an Amazon Associate I earn from qualifying purchases.
In this guide, you’ll get a simple diagnostic decision tree to pinpoint the source, the seven most common causes with exact fixes, a step-by-step repair walkthrough, and a clear rule for when to stop fixing and just buy a new machine. If you’re in the market for a replacement, the Check Price on Amazon is a solid, straightforward unit that we’ve tested and found reliable for daily use.
Let’s find that leak.
The Real Cost of Ignoring a Leak (and Why You Should Fix It Now)
A slow leak doesn’t stay slow. Water finds its way into the electronics, rusts the internal metal, and turns a $15 repair into a $60 failure. Wooden countertops swell and stain. Water on the floor is a slip hazard. And if the water reaches an outlet, you have a fire risk that isn’t worth the few bucks you’re saving by putting off the fix.
There’s also the taste factor. A machine that’s leaking is often a machine that’s not brewing at the right temperature or pressure. You’ll get weaker, sour, or bitter coffee because the water isn’t spending the right amount of time with the grounds. Fixing the leak often fixes the brew quality, too.
Most fixes cost under $10 in parts. A new gasket is a few dollars. A tube of food-safe silicone sealant is around $8. Compare that to the $40-$100 you’ll spend on a new drip machine, and the math gets pretty clear, pretty fast.
Diagnose the Leak: A Simple Flowchart Based on Leak Location and Timing
Before you take anything apart, answer two questions. First, when does the leak happen? During the brew cycle, when the machine is idle, or when you pour? Second, where does the water appear? The bottom, the filter basket, or the carafe?
Answer those two questions, and you’ve cut the possible causes in half. Here’s the breakdown.
Leaking from the Bottom During Brewing
If water is pooling under the machine while it’s running, the problem is almost always internal. The usual suspects are a cracked water reservoir, a loose hose connection, a failed pump, or a worn gasket where the boiler meets the tubing. Water in this area rarely comes from the top splashing down; it’s being pushed out under pressure from inside.
Unplug the machine immediately. Do not run another cycle. Water and electricity don’t mix, and you’re one bad connection away from a shock.
Leaking from the Filter Basket or Overflowing
An overflowing filter basket is a different animal. This happens when water backs up because it can’t drain fast enough. The most common cause is a clogged drain hole in the bottom of the basket, often blocked by a stray coffee ground. Another frequent culprit is using the wrong size filter — a #4 cone filter in a flat-bottom basket will fold and block the hole. Mineral scale buildup inside the basket’s tiny channels is the third suspect.
If the basket is clear and the filter fits, then the problem is downstream. A blocked check valve or a kinked hose in the heating system can cause water to flow back up into the basket instead of down into the carafe.
Leaking from the Carafe or Lid
This one is the easiest to spot. If the carafe drips when you pour, the lid seal is worn or the spout is cracked. If the machine leaks from the base of the carafe while brewing, the carafe isn’t sitting flush on the heating plate, or the carafe lid isn’t creating a proper seal with the brew basket above it.
A quick test: fill the carafe with cold water, hold it over the sink, and pour. If it drips, the carafe is the problem. If it’s clean, look at the rubber seal on the lid or the plastic rim where the glass meets the handle.
The 7 Most Common Causes (and How to Fix Each One)
Here are the specific failures we see most often, ranked roughly from most to least common, with the exact fix for each.
Cause 1: Mineral Scale Blocking the Check Valve
The check valve is a small one-way gate in the water line. It lets water go from the reservoir into the heating chamber, but not back. Hard water leaves calcium deposits that can jam this valve open or closed. When it’s stuck, water backs up into the reservoir or leaks out of the bottom.
The Fix: Run a descaling cycle. Mix one part white vinegar with two parts water, fill the reservoir, and run a full brew cycle without coffee. Follow with two clean water cycles. If that doesn’t stop the leak, the valve itself may need replacing — it’s usually a $5 part that snaps out with pliers.
Cause 2: Cracked Water Reservoir (and How to Patch It)
A hairline crack in the plastic reservoir is a classic slow leaker. It often appears at the seam where the bottom meets the side, or where the fill window meets the body. You might not see it until the tank is full and under pressure.
The Fix: For a small crack, dry the area completely, then apply a food-safe silicone sealant over the crack, pressing it in with a fingertip. Let it cure for 24 hours. For a larger crack, you’re better off replacing the reservoir — many manufacturers sell them as spare parts. Check the model number on the bottom of the machine and search for that part number.
Cause 3: Worn-Out Gaskets and O-Rings
Rubber gaskets and O-rings dry out, crack, and lose their flexibility over time. They’re the seals between the water tube, the heating element, and the brew head. A worn gasket here is the most common internal leak source.
The Fix: You’ll need to open the machine to access these. It’s not hard — most drip makers have a few screws on the bottom plate. Once inside, look for any rubber ring that looks flattened, cracked, or discolored. Remove it, take it to a hardware store or find it online by size, and replace it. A universal O-ring kit is about $8 and covers most machines.
Cause 4: Clogged Filter Basket Drain Holes
A single coffee ground can plug the tiny hole in the bottom of the brew basket. When that happens, water pools in the basket and spills over the sides.
The Fix: Remove the basket and hold it up to the light. See the hole? Poke it clean with a toothpick or a paperclip. Then wash the basket with warm soapy water and a bottle brush. Do this every few weeks as part of your regular cleaning routine.
Cause 5: Overfilled Water Tank or Wrong Filter Size
This one is user error, but it’s the most common cause we see in testing. People fill the reservoir past the MAX line, and water expands as it heats, forcing it out through the top vent. Or they use a filter that’s too big, which folds over and directs water over the edge of the basket.
The Fix: Respect the MAX line. It exists for a reason. And check your filter size. Flat-bottom baskets take a #4 flat filter; cone baskets take a #4 cone. Using the wrong one is an invitation for a mess.
Cause 6: Loose or Burst Internal Hoses
Inside the machine, silicone hoses carry hot water from the boiler to the brew head. These hoses can loosen at their connection points from vibration, or they can burst from age and heat.
The Fix: This requires opening the base. Once the bottom plate is off, inspect every hose clamp. Tighten any loose ones with a screwdriver. If a hose is cracked or split, replace it with food-grade silicone tubing of the same diameter, which you can buy by the foot at a homebrew supply store.
Cause 7: Failed Pump or Heating Element
In some drip machines, a small pump pushes water up into the heating chamber. If the pump fails, water can leak backward. Similarly, a cracked heating element can weep water. These are the expensive failures.
The Fix: If you’ve checked everything else and the leak persists, it’s likely the pump or the heater. Replacement parts for these run $20-$40, and the labor is fiddly. At that price, a new machine starts to look like the smarter move.
Step-by-Step Repair Guide: From Simple to Complex
Let’s walk through the actual repair process for the most common internal leak — the gasket or check valve. This takes about 30 minutes.
Tools You’ll Need (and Where to Buy Parts)
Grab a Phillips-head screwdriver, a flat-head screwdriver, a pair of needle-nose pliers, a small bowl for screws, and a clean towel. For parts, search the brand and model number on Amazon or a parts site like ereplacementparts.com. You’re looking for the water tube gasket, the check valve, and the O-rings.
How to Disassemble Your Specific Machine Safely
First, unplug the machine and empty the water reservoir. Turn it upside down on a towel. The bottom plate is held on by four to six screws. Remove them and lift the plate off. You’ll see the wiring, the heating element, and the water lines. Take a photo with your phone before you touch anything — it’ll save you when you’re putting it back together.
Look for the small rubber gasket where the water line connects to the heating element. It’s usually a black or white ring. Gently pry it out with the flat-head screwdriver.
Replacing the Gasket and Check Valve
Compare the old gasket to the new one. If the new one is slightly thicker, that’s fine — it’ll just make a tighter seal. Press the new gasket into the groove until it sits flush. Reattach the hose and tighten the clamp.
For the check valve, locate it in the water line. It’s a small plastic or brass fitting. Use the pliers to pull it out, noting the direction it was facing. Insert the new one in the same orientation — most have an arrow showing flow direction. Reassemble the base, screw the plate back on, and run a test cycle with water only.
Pro tip: If you’re not sure which part is leaking, run a cycle with the bottom plate off. You’ll see exactly where the water is coming from. It’s messy, but it’s the most direct diagnostic there is.
The 5-Minute Monthly Routine That Prevents 90% of Leaks
Most leaks are caused by scale and grime, and both are preventable. Once a month, do this.
- Fill the reservoir with equal parts white vinegar and water.
- Run a full brew cycle with an empty filter basket.
- Let the machine sit for 30 minutes with the vinegar solution in the tank.
- Run two full cycles with clean water to rinse.
- Wipe down the brew basket, the carafe lid, and the heating plate with a damp cloth.
That’s it. Five minutes of active time. It keeps the check valve clear, the drain holes open, and the gaskets supple. We’ve seen machines go a decade without a single leak on this routine. For a deeper clean, check our guide on how to clean a coffee maker properly.
When to Throw in the Towel: Repair vs. Replace
Here’s a simple cost-benefit rule. If the repair parts cost more than half the price of a new machine, buy the new machine. A new gasket is $5, so you fix it. A new pump is $30 on a machine that costs $50, so you replace the machine.
Also consider the machine’s age. If it’s over five years old and leaks from multiple spots, it’s not worth chasing. The plastic becomes brittle, and every repair exposes another weakness. On the other hand, if it’s under two years old and has a single identifiable issue, fix it.
There’s also a safety angle. If you open the machine and see rust on the heating element or scorch marks on the wiring, stop. Don’t repair that. Replace it. That’s a fire hazard, not a DIY project.
If you do decide to replace, we’ve had good results with the BLACK+DECKER 12-Cup model. It’s not flashy, but it brews consistently, the sneaky cup feature actually works, and the water window makes it easy to fill correctly — which, as we’ve seen, prevents a whole class of leaks.
Frequently Asked Questions (Quick Answers)
Why is my coffee maker leaking from the bottom even when it’s off?
This points to a slow leak in the reservoir or a hose that’s lost its seal. The water is gravity-draining down through the machine. Check the reservoir for cracks first, then open the base and look for wet spots on the hoses and connections. If the reservoir is cracked, you’ll need to patch it or replace it.
Can I use plumber’s tape on a coffee maker leak?
No. Plumber’s tape (PTFE) is for pipe threads, not for sealing water lines inside a coffee maker. It won’t hold under heat and pressure. Use food-safe silicone sealant for cracks or replace the gasket entirely.
Is it safe to drink coffee from a machine that’s been leaking?
If the leak is from the water path, there’s a risk that unfiltered water or scale is mixing into your brew. Fix the leak first, then run a descaling cycle and two clean-water cycles before brewing. If the leak is from the carafe or lid, the coffee itself is fine, but you’re dealing with a burn risk from hot liquid escaping.
How often should I descale my coffee maker?
Every 1-3 months, depending on your water hardness. If you see white flakes in the reservoir or the brew time has gotten noticeably slower, descale now. Hard water with a high mineral content can clog a check valve in a matter of weeks.
My coffee maker leaks only when I pour from the carafe. What’s wrong?
That’s a carafe issue, not a machine issue. The rubber gasket under the lid is worn out, or the spout has a small chip. Replacement carafes are often available for under $20. If yours is a standard size, you can also find universal carafes that fit most heating plates. Just make sure the base sits flat and the lid seals properly.
Brew Without the Mess
Here’s the short version for anyone who wants to skip the details.
- Diagnose by timing and location — a leak during brewing is internal; a leak when pouring is the carafe.
- Descale monthly with vinegar to prevent 90% of mineral-related leaks.
- Check the filter basket drain hole first — it’s the easiest fix and the most common cause of overflow.
- Respect the MAX fill line and use the correct filter size.
- Replace gaskets and O-rings before you replace the whole machine — they’re cheap and easy to swap.
- Open the base and watch a cycle run if you can’t find the source — seeing the leak beats guessing.
- If the repair costs more than half the price of a new machine, or if you see rust or scorch marks, buy a new one.
A leaking coffee maker is a solvable problem. Take the time to diagnose it properly, and you’ll either fix it for a few dollars or know with confidence that it’s time to upgrade. For more specific fixes, our guide on Mr. Coffee not pumping water covers that common failure, and the piece on Cuisinart power issues handles another frequent headache. Your countertop deserves better than a puddle.
Products related to this article
Sponsored / affiliate links. As an Amazon Associate I earn from qualifying purchases. I may earn additional commission from eligible campaigns.
 HomeBeyond Espresso Coffee Maker 12 Cups, Classic Stovetop Espresso Maker, 600ml / 20oz Coffeemaker for Gas & Ceramic Stovetops (Silver)
 Linnkyfloa Coffee Espresso Maker Handle Replacement for Stovetop Moka Pot or Percolator, Black Plastic for Spare Part Compatible with Italian(9-12 Cup)
 Belly Moka Coffee Maker Stovetop Espresso Maker 9 Cup Aluminum Moka Pot Percolator 15oz 450ml Easy Brewing for Electric Ceramic Stoves Home Camping Italian Cuban Café Classic Black