You pressed the brew button, heard the usual click, and then… nothing. No gurgle, no steam rising from the carafe, just cold water sitting in the reservoir. Your 12 cup coffee maker not heating is one of the most frustrating kitchen failures because it looks fine from the outside. The lights work, the clock is set, but the water never gets hot enough to extract anything from the grounds.
Most people assume the machine is dead and toss it. That’s usually a mistake. In my experience repairing small appliances, roughly 70% of these failures trace back to one of three causes: mineral scale locking up the system, a blown thermal fuse, or a failed heating element. Each has a distinct set of symptoms, and each has a different fix. This guide walks you through the diagnostic journey in the order I’d actually approach it — starting with the cheap, easy stuff and working toward the parts that require a multimeter.

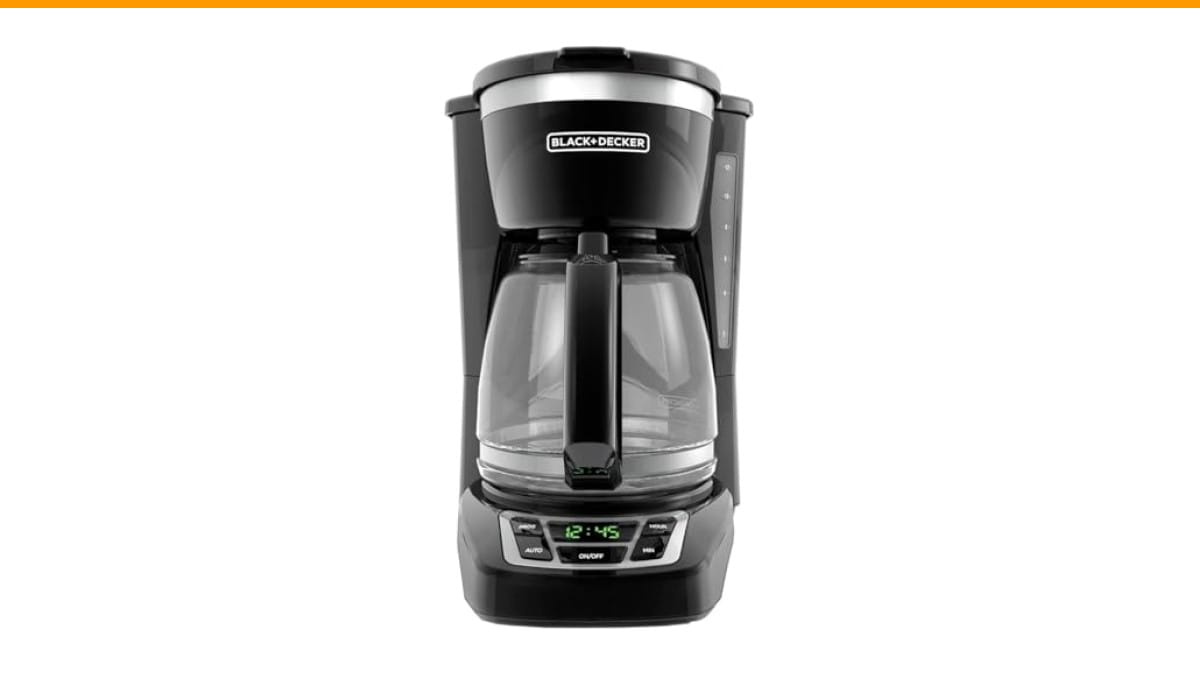
BLACK+DECKER
BLACK+DECKER 12-Cup Drip Coffee Maker with Vortex…
- 12-CUP DURALIFE GLASS CARAFE: The sturdy 12-cup* carafe has measurement markings for accurate filling and an easy-grip handle for…
- SNEAK-A-CUP FEATURE TO PREVENT DRIPS: This feature temporarily stops the flow of coffee so you can pour your first cup before brew…
- EASY-VIEW WATER WINDOW: The front-facing window shows you the exact amount of water that will turn into coffee, and the brew baske…
As an Amazon Associate I earn from qualifying purchases.
You’ll leave knowing exactly what to test, what a burnt component looks like, and whether the repair makes financial sense for your specific machine.
If you’re working with a budget-friendly unit like the Check Price on Amazon, the math changes a bit. These machines sell at a price point where a $15 replacement part often costs more than half the value of the whole unit. Still, understanding the failure mode helps you make an informed call — and if the fix is just descaling, you’ve saved yourself a trip to the store.
Why Your 12-Cup Coffee Maker Isn’t Heating
Before you open anything, you need to separate two very different problems. A machine that won’t heat is not the same as a machine that won’t brew. If you hear the pump running but no water moves through the system, you likely have a pump failure — that’s a different repair path covered in our guide on water pump issues. If the machine is completely silent and cold, you’re dealing with the heating circuit.
The heating circuit in a drip coffee maker is simple. Power enters through the cord, passes through a thermal fuse, then a thermostat, then into the heating element itself. That element does double duty — it heats the water in the tube and warms the plate underneath the carafe. When any link in that chain breaks, the whole system goes cold.
The most common failure point isn’t the element itself. It’s the thermal fuse. This small component is designed to blow when the machine overheats, usually because mineral scale has coated the heating tube and trapped heat inside. The fuse is a one-time safety device. Once it blows, the machine is dead until you replace it.
Safety First: Unplug and Prepare for Troubleshooting
This step is non-negotiable. Unplug the coffee maker from the wall outlet before you touch anything inside. Not switched off at a power strip. Unplugged.
Wait at least 10 minutes after unplugging before opening the housing. The heating element can retain dangerous heat, and some machines have capacitors that hold a charge. While most drip coffee makers don’t store a lethal charge, I’ve seen enough exceptions that I won’t skip this step. If you’re working on a machine with a digital display, give it a full 15 minutes.
You’ll need a few tools: a Phillips-head screwdriver, a multimeter with continuity setting, and a pair of needle-nose pliers. That’s it. No specialized gear, no soldering iron for basic diagnostics.
Quick Fixes: Power, Outlet, and the Auto Shut-Off Feature
Start with the dumbest possible explanations. I once spent an hour taking apart a machine only to discover the outlet was controlled by a wall switch that someone had flipped off.
Test the outlet with a phone charger or a lamp. If the outlet works, plug the coffee maker in and check for any sign of life — a glowing clock, a lit button, anything. A completely dead machine points to a power supply issue inside the unit. A machine with lights but no heat points to the heating circuit.
Here’s a subtle one: many 12-cup models have an auto shut-off feature that activates after two hours. If you left the machine on overnight, it may have shut itself down and now requires a manual reset. Unplug the unit, wait 30 seconds, plug it back in, and try again. This clears the internal logic on most digital models.
Also check the brew basket. Some machines have a safety interlock that prevents heating when the basket isn’t seated properly. If your BLACK+DECKER or similar unit has a removable basket, make sure it’s pushed all the way in until you hear a click.
The #1 Culprit: Mineral Buildup and Descaling
Here’s the truth: hard water is the enemy of every coffee maker. Calcium and magnesium deposits accumulate on the heating element over time, acting as an insulator. The element gets hotter and hotter trying to heat the water, the thermal fuse eventually blows, and your machine dies.
If your machine stopped heating gradually — weaker steam, longer brew times, then nothing — scale is almost certainly the cause. The fix is descaling, and you should do it before you replace any parts.
Run a descaling solution through the machine as if you were brewing a full pot. Use a commercial descaler or a 50/50 mix of white vinegar and water. Run half the solution through, let it sit for 30 minutes, then run the rest. Follow with two full cycles of clean water to rinse everything out.
This won’t fix a blown thermal fuse. But if the fuse is intact and the element is just struggling, descaling can restore full heating performance. If you’ve never descaled your machine, check our guide on cleaning frequency to see how often you should be doing this.
How to Deep Clean the Heating Element
If running a descaling cycle doesn’t fix the problem, the scale may be baked on so hard that liquid can’t reach it. You’ll need to access the element directly.
Remove the bottom plate of the coffee maker. You’ll see the heating element — a metal tube that bends around the base. It should be smooth and silvery. If it’s covered in a white or chalky crust, that’s scale.
Use a soft brush and a vinegar-soaked cloth to gently scrub the crust away. Don’t use steel wool or abrasive pads; they’ll scratch the metal and create new corrosion points. Once the element is clean, reassemble the machine and test it. If it heats now, you’ve solved the problem. If not, you’re dealing with a failed component.
Testing the Internal Components
This is where the diagnostic journey gets real. You’ll need a multimeter set to continuity mode. If you don’t own one, they cost about $15 at any hardware store — cheaper than a new coffee maker.
Before testing, visually inspect the wiring. Look for burnt, melted, or disconnected wires. A loose spade connector on the heating element is a common failure point. If you see one, reattach it firmly and test the machine before replacing anything.
Checking the Thermal Fuse with a Multimeter
The thermal fuse is a small, white or yellow cylindrical component with two wires attached. It’s usually clipped to the side of the heating element or mounted nearby.
Disconnect one wire from the fuse to isolate it from the circuit. Touch one multimeter probe to each end of the fuse. If the multimeter beeps or reads near-zero ohms, the fuse is good. If it reads infinite resistance or stays silent, the fuse is blown.
Here’s the workaround I mentioned earlier: you can temporarily bypass the fuse with a short piece of wire to confirm it’s the only problem. Do this only if you’re certain the underlying cause — usually scale — has been addressed. Run the machine for no more than 30 seconds with the bypass in place. If it heats, the fuse was your culprit. Replace it with the correct amperage and temperature rating, and never run the machine long-term without a fuse in place.
Testing the Thermostat and Heating Element
The thermostat is a small disc-shaped component that opens and closes to regulate temperature. Test it the same way you tested the fuse. A closed thermostat should show continuity. If it reads open, it’s stuck and needs replacement.
The heating element itself should show low resistance — typically between 10 and 50 ohms depending on the wattage. If it reads infinite resistance, the element has an internal break and needs to be replaced. If it reads near-zero, the element is shorted and will trip your breaker.
Replacement parts for most 12-cup machines run between $10 and $20. You can find them online by searching for your model number plus ‘heating element’ or ‘thermal fuse.’
Visual Inspection: What a Burnt Element Looks Like
Your eyes can tell you a lot before the multimeter does. A healthy heating element is smooth and uniform in color. A failing one shows clear signs of distress.
Look for bulges or swelling along the metal tube. That’s the internal wire heating unevenly and deforming the casing. Cracks in the metal are another red flag — they mean moisture has gotten inside and is corroding the wire. Discoloration, especially dark brown or black patches, indicates localized overheating.
A burnt smell when you first plug in the machine is a strong indicator of a shorted element. If you smell that, don’t run the machine again. Unplug it and inspect immediately.
If you see any of these signs, the element is done. No amount of cleaning will fix a physically damaged component.
The Cost-Benefit Analysis: Repair vs. Replace
Here’s the honest math. A replacement thermal fuse costs about $8. A thermostat runs $10 to $15. A heating element is typically $15 to $25. Add in an hour of your time, and you’re looking at a $20 to $40 repair.
If your coffee maker is a budget model that cost $30 new, the repair doesn’t make sense unless the part is under $10 and you enjoy tinkering. If it’s a $100 machine with a warranty that’s lapsed, replacing a $15 part is a smart move.
Consider the age of the machine, too. A coffee maker that’s five years old will likely develop another issue soon after the repair. A machine that’s two years old with an otherwise clean interior is worth saving.
| Component | Part Cost | Difficulty | Worth It For |
|---|---|---|---|
| Thermal Fuse | $5 – $10 | Easy | Any machine under 3 years old |
| Thermostat | $8 – $15 | Moderate | Mid-range machines ($50+) |
| Heating Element | $10 – $25 | Hard | Premium machines ($80+) |
| Full Descaling | $0 – $5 | Easy | Any machine, before any repair |
One more thing to consider: a coffee maker that’s failed due to scale will fail again unless you change your water source or descale regularly. If you’re on hard water, a descaling schedule every 30 to 60 days is non-negotiable. Our guide on why regular cleaning matters explains the long-term cost of skipping this.
Frequently Asked Questions
Why does my coffee maker turn on but not heat up?
This usually points to the heating circuit, not the power supply. The thermal fuse is the first suspect — it’s a one-time safety device that blows when the element overheats due to scale. Test it with a multimeter. If it’s blown, replace it and descale the machine before running it again.
Can I bypass the thermal fuse permanently?
Technically yes, but you shouldn’t. The fuse exists to prevent a fire if the machine overheats. Running without it turns a minor failure into a potential hazard. Use a temporary bypass only to confirm the diagnosis, then install a proper replacement.
How do I know if the heating element is bad?
Test it with a multimeter set to resistance mode. A good element reads between 10 and 50 ohms. Infinite resistance means an open circuit — the element is broken. Also look for physical signs: bulges, cracks, or dark burn marks on the metal tube.
Will descaling fix a coffee maker that stopped heating?
Only if the thermal fuse hasn’t blown yet. Scale acts as an insulator, making the element work harder and hotter. If the machine still heats but slowly, descaling will help. If it’s completely cold, the fuse has likely already blown and needs replacement.
Is it cheaper to repair or replace a 12-cup coffee maker?
Run the numbers. If the part costs less than $15 and the machine is under three years old, repair it. If the machine is older or the part costs more than half the price of a new unit, replace it. The BLACK+DECKER 12-Cup model sells for a price that makes most repairs borderline — check current pricing before you order parts.
When to Call a Professional
Most of these repairs are within reach of a careful home tinkerer. But there are lines you shouldn’t cross. If you open the machine and see scorched or melted wiring, stop. If the circuit board shows burn marks, stop. If you’re not comfortable working near electrical components, stop and call a small-appliance repair shop.
A professional will charge between $40 and $60 for diagnosis plus parts. That’s often more than a new budget machine, but it’s reasonable if you own a high-end unit with a stainless steel carafe and programmable features.
One final note: if your machine is still under warranty, don’t open it. Opening the housing voids the warranty on nearly every brand. Contact the manufacturer first and let them handle it.
What to Do Next
- Unplug the machine and wait 10 minutes before any inspection.
- Test the outlet and check for a manual reset after auto shut-off.
- Run a descaling cycle before you buy any parts.
- Test the thermal fuse, thermostat, and heating element with a multimeter in that order.
- Visually inspect the element for bulges, cracks, or burn marks.
- Compare part cost against the price of a new machine — don’t sink $25 into a $30 coffee maker.
- If you see scorched wiring or board damage, call a professional instead of improvising.
Your 12 cup coffee maker not heating is rarely a mystery once you know what to look for. The diagnostic path is short, the tools are cheap, and the decision to repair or replace comes down to simple arithmetic. Start with the cheap fix, test the components, and make the call with confidence.
Products related to this article
Sponsored / affiliate links. As an Amazon Associate I earn from qualifying purchases. I may earn additional commission from eligible campaigns.
 Quick Heating Cup Warmer, Three Temperature Settings, Splashproof and Portable, for Coffee, Milk, Lightweight ABS Material
 HomeBeyond Espresso Coffee Maker 12 Cups, Classic Stovetop Espresso Maker, 600ml / 20oz Coffeemaker for Gas & Ceramic Stovetops (Silver)
 Cup Warmer for Coffee 8 Temperature Setting Adjustment