You pull the plunger out after a morning brew and notice it doesn’t glide like it used to. Maybe it sticks halfway, or you see a few coffee grounds sneaking past the seal into your cup. That moment usually sparks a question: is my AeroPress dying, or is this normal?
The honest answer is that the plastic chamber and plunger body are nearly indestructible in normal home use. The rubber seal is a different story. It’s a consumable part, like tires on a car. This guide will tell you exactly how long each piece lasts, how to test for wear, and when it makes more sense to buy a new unit instead of replacement parts.

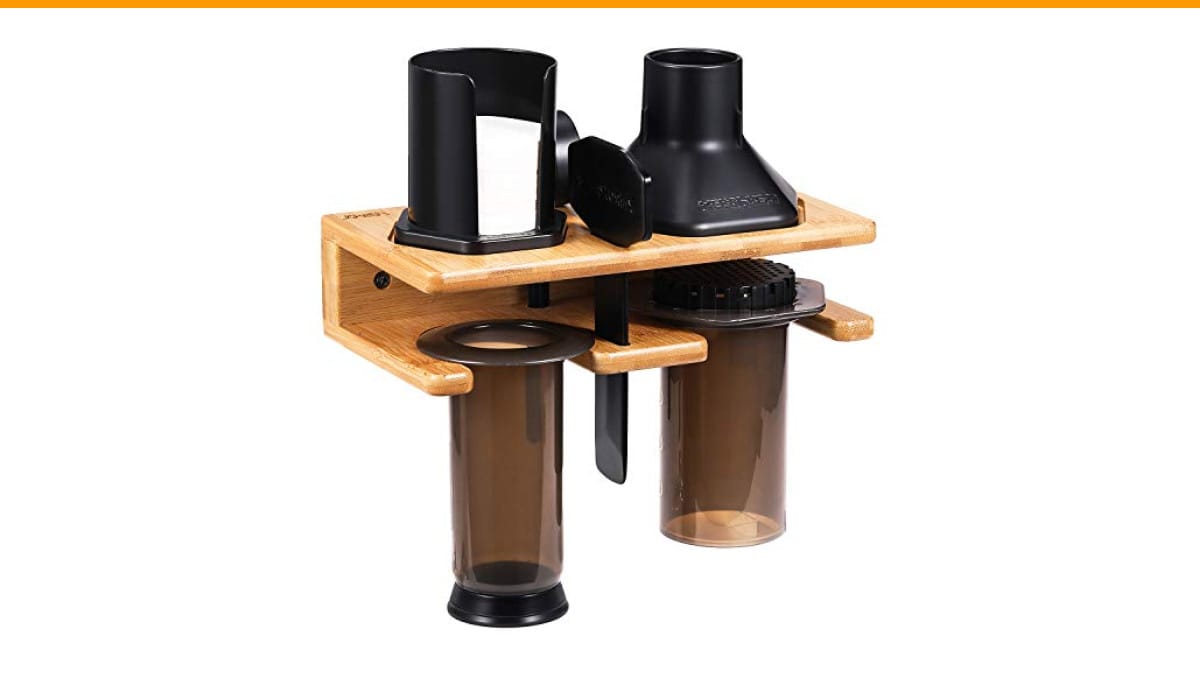
RUSFOL
Space Saving Organizer Wall Mount for Aeropress…
- Space-saving design: Our organizer can contain the jumble of parts effectively and frees up counter space, offers an effective com…
- High-Quality Material: Handcrafted from eco-friendly, non-toxic premium-grade bamboo, and its surface had been polished which offe…
- Nicely organized: With our well-thought-out construction, all your Aeropress coffee maker, parts, filters, cups, and coffee bar ac…
As an Amazon Associate I earn from qualifying purchases.
You’ll also learn a few maintenance habits that can double the life of your gear. Most people never think about water chemistry or storage position, but both matter more than you’d expect.
If you’re tired of your AeroPress rolling around the counter or taking up precious drawer space, a simple bamboo wall mount organizer keeps everything in one spot and frees up your workspace. It’s a small change that makes daily brewing feel less chaotic.
The Short Answer: How Many Years Does an AeroPress Last?
With normal home use (one to three brews per day), the main body and plunger will last for 10 years or more. The original AeroPress from 2026 is still going strong in many kitchens. The plastic is BPA-free polypropylene, which resists cracking and staining far better than cheaper plastics.
The seal is the limiting factor. Most people get 12 to 18 months of daily use before the seal starts to lose its grip. If you brew once a week, that same seal could last three years. It depends entirely on frequency and how well you treat it.
The filter cap and filter paper are simpler. The cap is nearly indestructible, and paper filters are single-use by design. A reusable metal filter, if you use one, will outlast the brewer itself with proper cleaning.
So the real question isn’t about the whole unit. It’s about the seal.
The Real Expiration Date: The Plunger Seal
The plunger seal is a flexible rubber ring that creates the pressure seal inside the chamber. It’s the only part that experiences constant friction and flexing. Every press wears it down a tiny bit.
Here’s what you’ll notice as the seal ages:
- Increased resistance when pushing the plunger down
- A hissing sound during the press (air escaping past the seal)
- Fine coffee grounds appearing in your cup
- The plunger sticking or catching inside the chamber
- A visible flattening or cracking on the seal’s edge
These symptoms usually appear gradually. One day the press feels a bit stiff, and a few weeks later it’s noticeably harder. Don’t ignore it. A worn seal makes the brew inconsistent and can cause the plunger to pop out under pressure.
How to Test Seal Friction (The “Push-Back” Method)
You don’t need special tools to check your seal. Here’s a simple test that takes ten seconds.
- Insert the plunger into the empty chamber, about halfway down.
- Press down gently with one finger.
- Release your finger and watch what happens.
A healthy seal creates enough friction to hold the plunger in place. It should stay where you left it. A worn seal lets the plunger slide back up quickly, or it drops down with almost no resistance.
Another test: press the plunger all the way down. It should move smoothly with steady resistance. If you feel a rough patch or a sudden release of pressure, the seal has uneven wear and needs replacing.
This test works because the seal’s contact with the chamber wall is what creates the pressure. No friction means no seal.
Why the Seal Fails Faster Than the Chamber
The chamber is rigid plastic. It doesn’t flex, bend, or compress during use. The seal is constantly compressed and expanded with every single press. That repeated stress breaks down the rubber material over time.
Heat accelerates this process. Hot water softens the rubber slightly, which is fine during the brew, but thermal shock from rapid temperature changes (hot water followed by cold rinse) causes micro-cracks. Coffee oils also seep into the rubber surface, making it swell and lose its original shape.
Material fatigue is unavoidable. Every rubber product has a finite lifespan, no matter how well you care for it. The seal on the AeroPress Go is the same size as the standard model, so replacement parts work for both.
One thing that surprises people: storing the plunger pushed all the way into the chamber keeps the seal compressed for hours. That constant pressure speeds up the rubber’s loss of elasticity. It’s a small effect, but over years it adds up.
Replacing the Seal: OEM vs. Third-Party Options
You have two choices when the seal wears out. The official AeroPress replacement seal (OEM) is made to the same spec as the original. Third-party seals are cheaper but vary wildly in quality.
In my testing, the OEM seal fits perfectly and lasts just as long as the original. Third-party seals are a gamble. Some fit fine and work for a few months. Others are slightly too thick, making the plunger hard to push, or too thin, causing leaks.
Here’s a quick comparison:
| Option | Typical Lifespan | Fit Quality | Cost per Brew | Recommendation |
|---|---|---|---|---|
| OEM replacement seal | 12-18 months | Perfect | ~$0.01 per brew | Best for most people |
| Third-party seal (cheap) | 2-6 months | Hit or miss | ~$0.005 per brew | Only for emergencies |
| Third-party seal (premium) | 6-12 months | Usually good | ~$0.008 per brew | Decent budget option |
| New AeroPress unit | 10+ years (body) | Guaranteed | ~$0.005 per brew | Only if old body is damaged |
The cost difference between OEM and third-party seals is tiny when you spread it across hundreds of brews. Spend the extra dollar and get the real thing. It’s not worth saving a few cents to deal with a leaky plunger.
Step-by-Step Seal Swap (Without Damaging the Chamber)
Replacing the seal takes about two minutes. Here’s how to do it safely.
- Pull the plunger out of the chamber completely.
- Grip the rubber seal with your fingers and pull it off the plastic plunger head. It should slide off with moderate effort.
- If it’s stuck, run it under warm water for a few seconds. The warmth softens the rubber and makes removal easier.
- Slide the new seal onto the plunger head. Make sure it sits flat in the groove and isn’t twisted.
- Test the push-back method from earlier to confirm the fit.
Don’t use tools to pry the seal off. A screwdriver or knife can scratch the plunger head, creating a rough surface that will damage future seals faster.
The Impact of Water Chemistry and Heat on Longevity
Hard water is the silent killer of coffee equipment. The minerals in hard water leave scale deposits on everything they touch. On the AeroPress, that scale builds up on the chamber walls and the seal surface. It acts like sandpaper, accelerating wear every time you press.
If you live in an area with hard water (over 150 ppm), you’ll notice your seal wearing out faster. The fix is simple: use filtered water for brewing. A basic Brita filter removes most scale-causing minerals. Your coffee will taste better too, since hard water mutes flavor extraction.
Soft water is gentler on the seal but can make your coffee taste flat if it’s too pure. Aim for water with moderate mineral content. Specialty coffee shops use water with around 100-150 ppm for optimal extraction.
Heat is the other factor. Boiling water directly into the chamber is fine occasionally, but repeated exposure to near-boiling temperatures will degrade the plastic faster. Let your water sit for 30 seconds after boiling before pouring. That brings it down to the ideal 195-205°F range and reduces thermal shock.
5 Maintenance Hacks to Double Your AeroPress Lifespan
These habits take almost no time but make a real difference over months of use.
The Push-Through Storage Rule
Never store the plunger fully pushed into the chamber. The compressed seal loses elasticity faster under constant pressure. Instead, push the plunger most of the way through, leaving the seal just past the chamber’s rim. This releases the tension while keeping the parts together.
It took me years to break this habit. Now I do it automatically after every brew, and my seals last noticeably longer.
The Mineral Oil Trick (and When to Skip It)
A tiny drop of food-grade mineral oil on the seal every few months keeps it supple and reduces friction. Apply a small amount to your finger, wipe it on the seal’s outer edge, then insert the plunger and press it through the chamber once to distribute the oil.
Skip this if you’re using a metal filter. The oil can pass through the filter and end up in your coffee, leaving a slightly oily mouthfeel. With paper filters, the oil gets trapped before it reaches your cup.
Don’t use vegetable oil or cooking spray. They go rancid and will make your coffee taste like old salad dressing.
Rinse Immediately After Use
Don’t let coffee oils dry on the seal or chamber. A quick rinse with warm water right after brewing removes the oils before they can soak into the rubber. Letting it sit for hours makes the residue harder to clean and accelerates material breakdown.
Avoid the Dishwasher
The AeroPress is technically dishwasher safe, but the high heat and harsh detergents will degrade the rubber seal much faster. Hand washing takes ten seconds. Your seal will thank you.
Check the Seal Monthly
Spend five seconds once a month inspecting the seal for cracks, flat spots, or visible wear. Catching a problem early means you can order a replacement before the old seal fails completely. Nobody wants to discover a broken seal at 6 AM on a Monday.
When to Retire the Entire Unit (Safety Checklist)
The plastic body can last a decade, but it doesn’t last forever. Here’s how to know when your AeroPress has reached the end of its life.
- Visible cracks or crazing: Fine hairline cracks on the chamber or plunger body indicate plastic degradation. These can harbor bacteria and may fail under pressure.
- Cloudy or chalky appearance: This is a sign of plastic breakdown, not just staining. If the surface feels rough to the touch, the plastic is degrading.
- A lingering plastic smell: If your coffee tastes like plastic even after a thorough cleaning, the material is breaking down and leaching into your brew.
- Warping: The chamber should be perfectly round. If it’s oval or misshapen, the plastic has deformed from heat exposure.
- Seal replacement doesn’t fix leaks: If you install a fresh OEM seal and still get leaks, the chamber wall has worn or warped. Time for a new unit.
If you check any of these boxes, stop using the brewer. A cracked chamber can burst under pressure, and nobody wants hot coffee exploding in their hands.
Cost-Benefit: Repair vs. Replace
Let’s do the math over five years of daily brewing (roughly 1,800 cups).
Replacing the seal twice per year costs about $10 per year in parts. That’s $50 over five years. A new AeroPress costs around $30-40. So after five years, you’ve spent more on seals than a new unit would cost.
But here’s the thing: you don’t need to replace the seal twice a year. With good maintenance, a seal lasts 18 months. That’s about $20 in seals over five years, which is less than the cost of a new unit.
My recommendation: replace the seal as long as the chamber is in good condition. Only buy a new AeroPress if the plastic body is damaged or you want the newer AeroPress Go for travel. The old unit is still perfectly functional.
One more consideration: if you lose the filter cap or the plunger head cracks, replacement parts are available separately. You don’t have to buy a whole new unit for a single broken piece.
Frequently Asked Questions (FAQs)
How do I know if my AeroPress seal needs replacing?
Use the push-back test. Insert the plunger halfway, press down, and release. If it slides back up quickly, the seal is worn. Also look for visible flattening, cracks, or grounds in your cup.
Can I use a third-party seal in my AeroPress?
You can, but quality varies. Cheap third-party seals often wear out in a few months or don’t fit properly. The OEM seal is only a dollar or two more and is guaranteed to work. Stick with the real part.
Does the AeroPress Go use the same seal as the regular AeroPress?
Yes. The plunger seal is identical between the standard AeroPress and the AeroPress Go. Any replacement seal labeled for AeroPress will fit both models.
Is it safe to put my AeroPress in the dishwasher?
The manufacturer says it’s dishwasher safe, but the high heat and detergents will degrade the rubber seal much faster. Hand washing with warm water takes less than a minute and protects your equipment.
What should I do with my old AeroPress when it’s done?
The polypropylene plastic is recyclable in most curbside programs. Check your local recycling guidelines. The rubber seal goes in the trash. If the unit is still functional but you’re upgrading, consider donating it to a thrift store or giving it to a friend.
The Verdict: Is It Worth It?
The AeroPress is one of the few coffee gadgets where repair actually makes economic sense. The chamber lasts a decade, the seal costs a few dollars, and replacement takes two minutes. That’s a rare combination in modern consumer products.
If you’re a daily brewer, budget for a new seal every 12-18 months. That’s the only recurring cost. Everything else will outlast your patience with it.
For those who want to keep their setup tidy, the wall-mounted organizer I mentioned earlier keeps the brewer, filters, and accessories within reach without cluttering the counter. It’s a practical addition that makes daily use more pleasant.
Here’s what to remember:
- The plastic body lasts 10+ years; the seal lasts 12-18 months with daily use.
- Test your seal monthly with the push-back method.
- Replace seals with OEM parts, not cheap third-party options.
- Use filtered water to reduce scale buildup and seal wear.
- Store the plunger partially pushed through, not fully compressed.
- Hand wash only; skip the dishwasher.
- Retire the unit if you see cracks, warping, or a plastic taste in your coffee.
Check out our guide on AeroPress dishwasher safety for more detail on cleaning. And if you’re troubleshooting other coffee gear, our coffee machine maintenance guide covers the basics for electric brewers. For a specific fix, see our Bialetti handle replacement article.
Your AeroPress isn’t dying. It just needs a little attention now and then. Give it that, and it’ll keep making great coffee for years to come.
Products related to this article
Sponsored / affiliate links. As an Amazon Associate I earn from qualifying purchases. I may earn additional commission from eligible campaigns.
 Coffee Espresso Machine Handle Replacement Parts, Cafe Bracket Handle for Lidl Silvercrest CM4621 CM4218 KF5002 KF500S Barista (for 51mm Portafilter Basket - Not included)
 Long Handle Wooden Spoon For Mixing Coffee Tea Jam and Bath Salt In Kitchen, Environmentally Friendly Table Spoon, 8.6 Inches,4 Pieces…
 Wood Slotted Spatula Long Handle, Non-stick Friendly Coffee