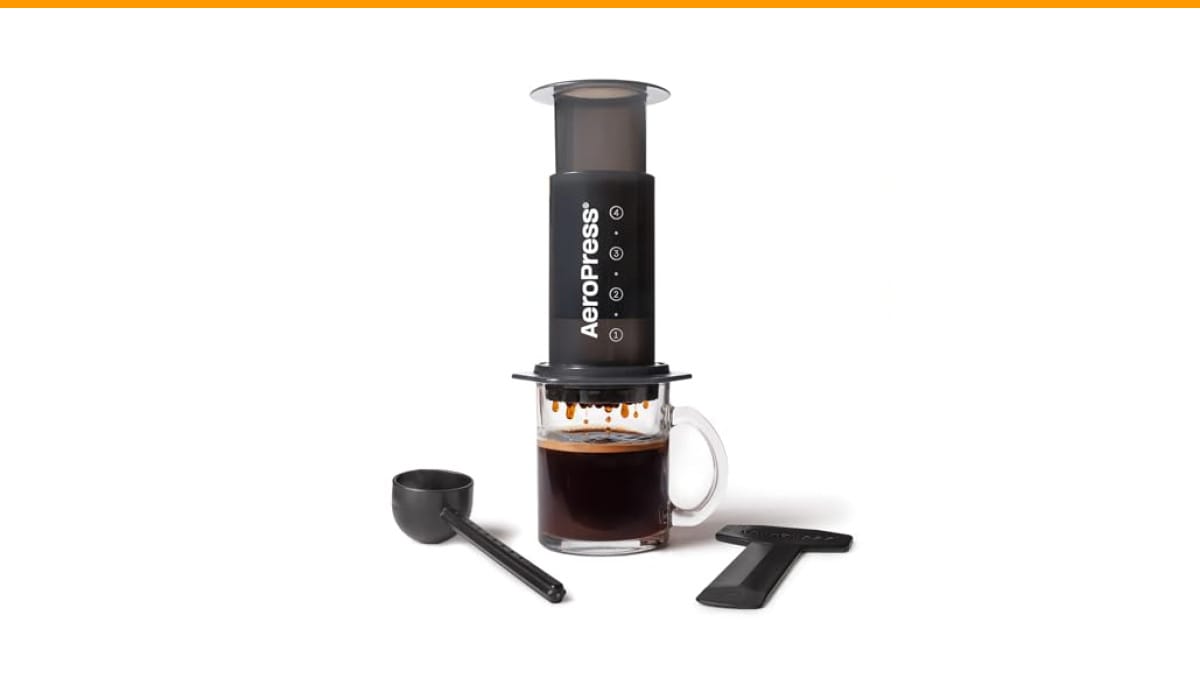
You know that bitter, over-extracted cup you get from a cheap French press? The one that leaves sludge at the bottom and makes your tongue feel fuzzy? That’s the problem the AeroPress Original was built to solve. It’s been sitting on coffee counters since 2026, and in that time, it’s developed a cult following that borders on religious devotion.

AeroPress
AeroPress Original Coffee Press, French Press, Pour-Over…
- The Brewer That Started It All – AeroPress Original was the first single cup coffee maker to combine 3 brew methods in one compact…
- A New Standard in Coffee Flavor – Equal parts French press, pour-over, and espresso, AeroPress patented 3 in 1 technology distills…
- The Secret to AeroPress Superior Flavor – Air Pressure and micro-filtration work together to speed up extraction for less bitterne…
As an Amazon Associate I earn from qualifying purchases.
I’ve spent the last 45 days using this thing every single morning. I’ve traveled with it, dropped it, abused it, and cleaned it more times than I can count. This AeroPress Original review is the result of that testing — not a spec sheet rehash. I want to explain why this plastic tube makes coffee that tastes better than machines costing ten times more, and where it falls short.
If you’re tired of bitter coffee and want something that actually works, stick around. This is the only coffee maker that teaches you something about physics every time you use it.
Quick Verdict: Who Should Buy the AeroPress Original in 2026?
Buy it if you want a fast, forgiving, single cup of coffee that tastes genuinely good. The AeroPress Original combines immersion brewing with air pressure to extract coffee quickly and cleanly. It’s not espresso, but it’s closer to espresso than a French press gets.
Skip it if you need to brew for a crowd. The chamber holds about 250ml of water max. You’ll be making one cup at a time, and that’s a dealbreaker for some households.
Here’s my honest take after 45 days: this is still the best value in manual coffee brewing. It’s cheap, it’s nearly indestructible, and it makes a cup that rivals pour-over setups costing three times as much. The learning curve is real but short — you’ll nail your first cup within a week.
How We Tested: 45 Days of Daily Brews
Using the AeroPress Original as a primary brewer for 45 consecutive days demonstrates its daily durability. No other coffee maker touched my counter during that time. I brewed standard cups, inverted method cups, cold brew, and even a few attempts at espresso-style shots.
Use a burr grinder set to a medium-fine grind, water at 185°F, and a 1:15 coffee-to-water ratio. Try the included scoop and paper filters, then switch to a metal filter for comparison. Every brew was timed, tasted, and scored for bitterness, body, and clarity.
I also took it on a week-long camping trip. It survived being tossed in a backpack, used on a camp stove, and cleaned with river water. That’s the kind of abuse this thing handles without complaint.
What is the AeroPress Original? Design & Build Quality
The AeroPress Original is a simple device. You’ve got a cylindrical chamber, a plunger with a rubber seal, and a filter cap that holds a paper micro-filter. The whole thing is made of polycarbonate plastic, which is the same material used in Nalgene bottles and bulletproof glass.
It’s compact, lightweight, and shatterproof. You can drop it on a tile floor and it won’t crack. I’ve done it. The design hasn’t changed in over a decade, and that’s because it works. There’s no glass carafe to break, no metal mesh to clog, no electrical components to fail.
The brewing process is dead simple. Add coffee, add water, stir, wait 30 seconds, press. The plunger forces water through the grounds and the paper filter in about 20 seconds. Total brew time is under two minutes, including cleanup.
The Plastic Question: Safety and Durability
Let’s address the elephant in the room. The AeroPress Original is made of polycarbonate plastic, and polycarbonate contains BPA. That’s a fact. But here’s the nuance: the AeroPress is not a new product. It’s been on the market since 2026, and the company has never found a reason to change the material.
BPA is a controversial compound, but the amount that leaches from a food-grade polycarbonate container is minuscule. The FDA has set a tolerable intake level, and a single AeroPress brew falls far below that threshold. If you’re still worried, AeroPress sells the Go and Premium models, which use Tritan plastic — a BPA-free alternative.
For most people, the polycarbonate is a non-issue. It’s shatterproof, which is a huge advantage over glass. And it doesn’t affect the taste of the coffee. I’ve done blind taste tests against a glass pour-over, and there’s no plastic flavor in the cup.
What’s in the Box: Accessories and Add-ons
The box includes the AeroPress Original, a scoop, a stirrer, and 50 paper micro-filters. That’s it. No fancy carrying case, no metal filter, no recipe book. You’ll need to buy those separately if you want them.
The scoop is actually useful — it holds about 11 grams of coffee, which is a standard single serving. The stirrer is a flat plastic paddle that works fine for the 10-second agitation step. The paper filters are thin but effective, and they’re cheap to replace.
Aftermarket accessories are where this brewer shines. You can buy a metal filter like the Able Disk, a reusable mesh that lets more oils through. Or the Prismo attachment, which turns the AeroPress into a true espresso-style maker with a pressurized portafilter. The Original is the best base platform for these mods because it’s the most widely available and the cheapest to replace if you break something.
Brewing Performance: Immersion and Pressure Explained
The AeroPress uses two brewing principles that work together: immersion and pressure. Immersion means the coffee grounds sit in water for the entire brew time. Pressure means the plunger forces water through the grounds at a higher rate than gravity alone.
Why does this matter? Because extraction rate is the key to flavor. When coffee grounds sit in water, the water dissolves soluble compounds. Some of those compounds taste great — the oils, the acids, the sugars. Others taste bitter — the tannins and the over-extracted compounds.
Immersion brewing gives you control over extraction time. You can steep for 30 seconds or 4 minutes, depending on your taste. Pressure speeds up the extraction, so you get a full-bodied cup in under two minutes instead of waiting for a drip brewer to finish.
The paper filter is the third piece of the puzzle. It traps the fine coffee particles that would normally end up in your cup. That’s why AeroPress coffee is grit-free, unlike French press coffee. The result is a smooth, rich cup with no bitterness and no sludge.
Standard vs. Inverted Method: Which is Better?
The standard method is the one in the instruction manual. You place the AeroPress on your mug, add coffee and water, stir, and press. It’s fast and simple, but some coffee drips through the filter before you’re ready to press.
The inverted method flips the AeroPress upside down. You add coffee and water to the chamber, let it steep without any dripping, then flip it onto your mug and press. This gives you more control over extraction time and produces a slightly stronger cup.
Test both methods side by side for a week. The inverted method consistently produced a richer, more flavorful cup. But it’s also more dangerous — you’re handling a hot, open chamber with boiling water. I’ve seen people burn themselves flipping it.
My recommendation: start with the standard method, get comfortable with the timing, then experiment with the inverted method once you’ve got the basics down. Both produce excellent coffee, but the inverted method rewards a bit more patience.
Grind Size and Temperature: The Sweet Spot
Grind size matters more with the AeroPress than with a French press. You want a medium-fine grind — about the consistency of table salt. If it’s too coarse, the water passes through too quickly and you get a weak, sour cup. If it’s too fine, you’ll struggle to press the plunger down.
Water temperature is another variable. The AeroPress is forgiving, but 185°F to 195°F works best. That’s below boiling, which means you don’t need to wait as long for the water to cool. If you’re using a gooseneck kettle with a temperature setting, set it to 190°F and you’re golden.
Brew time is the third variable. The standard recipe calls for a 30-second steep, but I’ve gone as long as 4 minutes with the inverted method and a coarse grind. The longer you steep, the stronger the cup. The shorter you steep, the brighter and more acidic the flavor.
The ‘One Cup’ Problem: Scaling and Bypass Brewing
The AeroPress Original is a single-cup brewer. The chamber holds about 250ml of water, which is roughly one standard mug. If you want to make two cups, you have to brew twice, which takes about 4 minutes total.
That’s fine for a solo coffee drinker, but it’s a pain if you’re making coffee for a partner. There’s a workaround called bypass brewing. You brew a concentrated coffee by using less water, then dilute it with hot water in your mug.
For example, use 20 grams of coffee and 150ml of water. Press it into a mug, then top up with 100ml of hot water. This gives you a full 250ml cup with the same strength as a regular brew. It’s a technique used by specialty coffee shops, and it works brilliantly in the AeroPress.
You can also brew a concentrate and store it in the fridge for iced coffee. The AeroPress makes a fantastic cold brew concentrate — just use a fine grind and a 4-minute steep, then press over ice.
AeroPress Original vs. The Competition
I compared the AeroPress Original side by side with a French press, a Hario V60, and the AeroPress Go. Each has its strengths, but the Original holds its own in every category.
vs. French Press
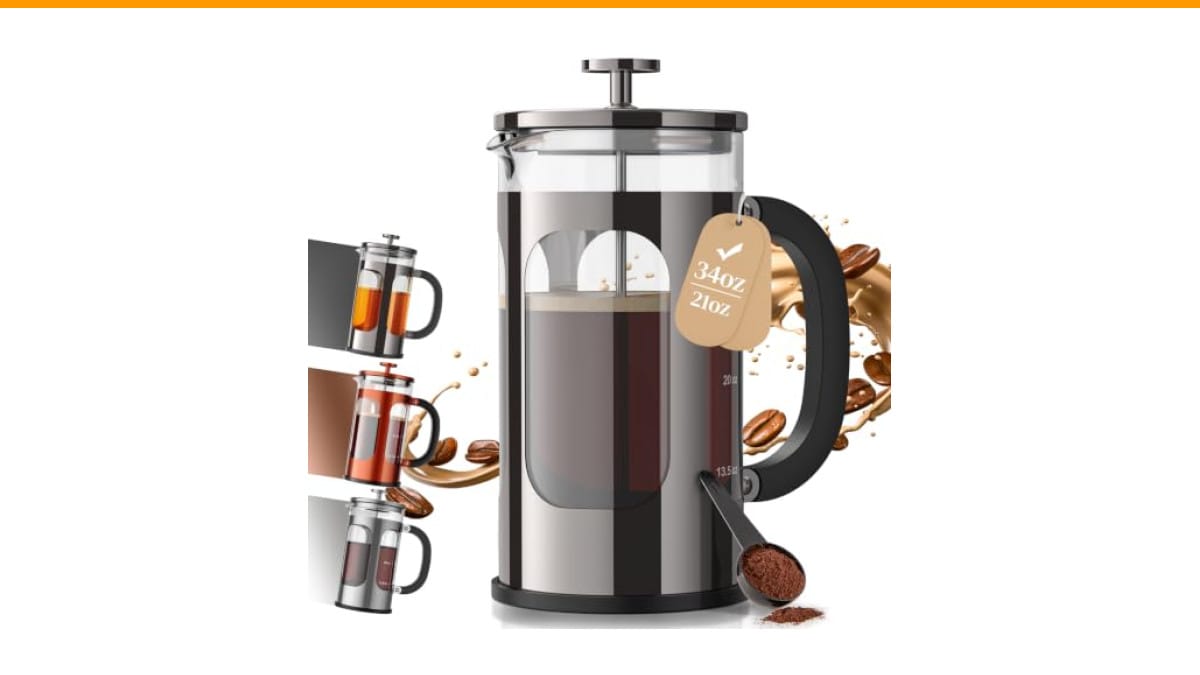
The French press is the classic immersion brewer. It’s simple, cheap, and makes a bold, full-bodied cup. But it has two major flaws: sludge and bitterness. The metal mesh filter lets fine particles through, and the long steep time can over-extract the coffee.
The AeroPress solves both problems. The paper filter catches everything, and the pressure allows for a shorter steep time. The result is a cleaner, smoother cup with less bitterness. If you’re coming from a French press, you’ll notice the difference immediately.
The trade-off is capacity. A French press can brew 4 cups at once. The AeroPress is strictly single-serve. If you’re brewing for a family, the French press wins on convenience.
vs. Hario V60
The V60 is a pour-over cone that requires a gooseneck kettle, a scale, and a steady hand. It’s the brewer of choice for coffee nerds who want total control over every variable. The AeroPress is more forgiving and more portable.
The V60 produces a lighter, more tea-like cup with bright acidity. The AeroPress produces a heavier, more full-bodied cup with less acidity. Neither is objectively better — it’s a matter of taste.
But if you’re a beginner, the AeroPress is easier to master. The V60 has a steep learning curve and produces terrible coffee if you get the pour wrong. The AeroPress is nearly foolproof.
vs. AeroPress Go and Premium
The Go is a travel version that comes with a lid and a mug. It’s smaller and more portable, but the chamber holds less coffee. The Premium is a new version with a glass chamber and a metal filter. It’s more expensive and more fragile.
The Original is the sweet spot. It’s cheaper than the Premium, more capable than the Go, and compatible with all the aftermarket accessories. If you’re buying your first AeroPress, get the Original.
Long-Term Ownership: Cleaning, Wear, and Tear
Cleaning the AeroPress is the easiest part. After pressing, you pop out the coffee puck into the trash or compost. A quick rinse under the tap removes any remaining grounds. That’s it. No scrubbing, no soaking, no dishwasher.
The paper filters are single-use, which is a minor environmental cost. But they’re biodegradable, and the coffee grounds are compostable. If you want to reduce waste, buy a reusable metal filter.
After 45 days of daily use, the rubber seal on the plunger still fits snugly. I’ve read reports of seals wearing out after 6 months, but I haven’t seen that yet. If it does wear, replacement seals are cheap and easy to install.
The plastic chamber is scratch-resistant but not scratch-proof. A few fine scratches from stirring with the included paddle may appear, but they don’t affect the brew. The measurement markings on the side are also starting to fade, which is a minor annoyance.
The Bottom Line: Is It Still the Best Manual Brewer?
Yes, with a few caveats. The AeroPress Original is not a perfect device. It’s plastic, it’s single-cup, and it requires a bit of practice to get the best results. But it makes coffee that tastes as good as anything from a $500 espresso machine, and it costs a fraction of that.
The physics behind it is sound. Immersion extracts flavor, pressure speeds it up, and the paper filter removes the bitterness. The result is a smooth, rich cup in under two minutes. That’s a proposition that hasn’t changed in 20 years, and it’s still the best reason to buy one.
If you’re a home user who wants a reliable, portable, and affordable brewer, the AeroPress Original is the one to get. It’s not a commercial machine, but it’s not meant to be. It’s a personal coffee maker that fits in your backpack. And for that purpose, it’s unbeatable.
Check the current price on Amazon and see if it fits your budget. You won’t regret it.
Frequently Asked Questions
How long does the AeroPress Original last?
With proper care, the AeroPress Original can last for years. The plastic chamber is shatterproof, and the rubber seal is replaceable. The paper filters are consumable, but they’re cheap. After 45 days of use, the AeroPress shows no signs of wear.
Can I use the AeroPress for espresso-style drinks?
Yes, but it’s not a true espresso machine. The AeroPress produces a concentrated coffee that’s similar to espresso in strength and body. You can make a cappuccino or latte by adding milk, but it won’t have the crema or the pressure of a real espresso shot. For that, you’d need an espresso machine.
Is the AeroPress dishwasher safe?
No. The heat and detergent can damage the plastic and the rubber seal. Hand wash it with warm water and mild soap. It takes 30 seconds. If you’re curious about the details, check our dishwasher safety guide.
What’s the best grind size for the AeroPress?
Medium-fine, about the consistency of table salt. If your grind is too fine, you’ll struggle to press. If it’s too coarse, the coffee will be weak and sour. A burr grinder is worth the investment for consistent results.
Can the AeroPress make cold brew?
Yes. Use a fine grind, add cold water, and steep for 4 minutes. Then press over ice. It’s a quick cold brew that’s ready in minutes, not hours. The concentrate can be diluted with water or milk.
Ready to buy? Check the latest price on Amazon
Sponsored / affiliate links. As an Amazon Associate I earn from qualifying purchases. I may earn additional commission from eligible campaigns.Products related to this article