You just packed up your kitchen for a move, or maybe you’re stashing the Keurig in the garage because the countertop got crowded. Either way, you’re about to make a mistake that ruins coffee makers: storing it wet. I’ve pulled enough moldy machines out of storage to know the drill. A single serve coffee maker that goes into a box with water in the line will come out smelling like a swamp.
This guide covers the exact process for storing a single serve coffee maker for a week, a month, or a year. You’ll learn the cleaning steps, the drying tricks, and the packing methods that keep your machine working when you pull it out again. No vague advice here, just what works.

BAGLHER
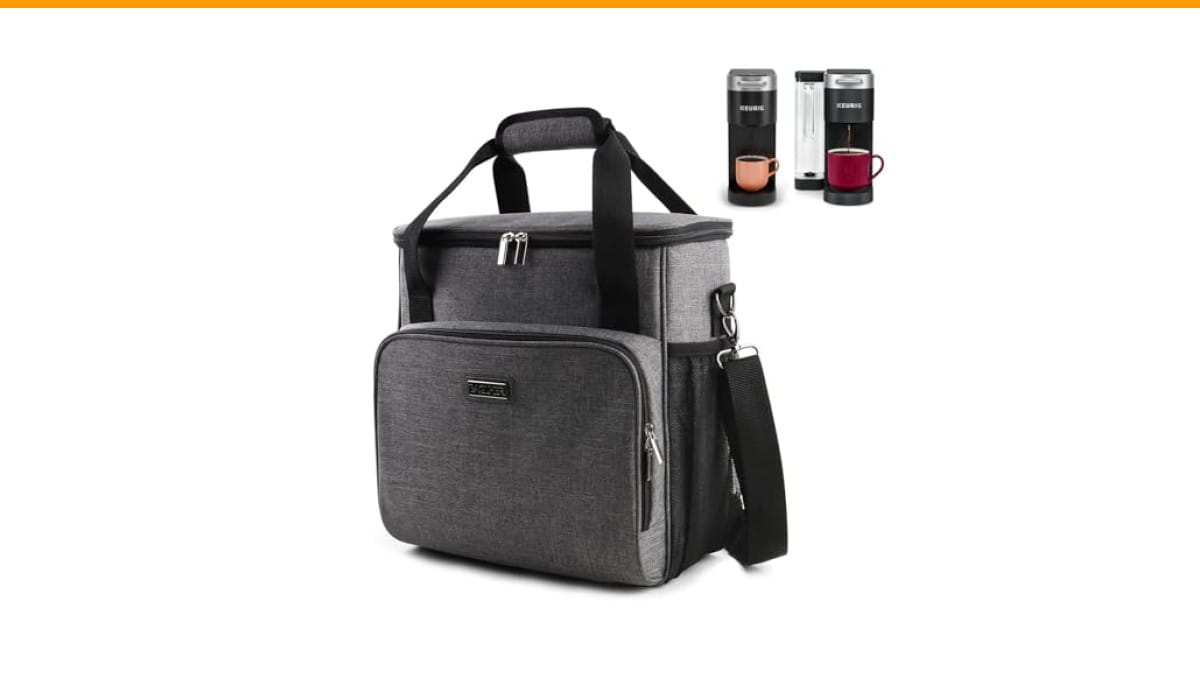
BAGLHER Coffee Maker Travel Bag Compatible with…
- 【Size Description】A cup of coffee away, talk about traveling. Small size: 13 x 5.5 x 13 inches, Medium size: 16 x 6 x 13.5 inches,…
- 【Applicable Model Description】Compatible and widely adapted: designed for a wide range of coffee machines.Compatible with Keurig K…
- 【Multi-Pocket Design】Coffee maker carrying bag has side pockets for K-Cups or travel mugs; a front pocket for coffee capsules, sug…
As an Amazon Associate I earn from qualifying purchases.
If you travel with your machine regularly, you’ll also want a proper carrier. The BAGLHER Coffee Maker Travel Bag is a padded case built for Keurig K-Slim and K-Supreme models, with side pockets for K-Cups and a front pocket for creamer. It turns a clumsy box into something you can sling over your shoulder.
Why Most People Store Their Coffee Maker Wrong
The biggest mistake is skipping the drying phase. People clean the machine, dump the water reservoir, and call it done. That’s not enough. Water sits in the internal lines, the needle, and the pump. Over two weeks, that water grows bacteria and mold. You’ll taste it in your first cup after storage.
The second mistake is storing it with the pod holder closed. Any residual moisture gets trapped against the needle. That’s a recipe for a clogged needle, which is a common reason coffee makers stop brewing. I’ve seen this happen to perfectly good machines that just sat for a month.
Third, people ignore the water reservoir lid. If you store the reservoir with the lid sealed, condensation forms inside. That’s fine for a day, but not for months. You want everything bone dry before it goes into a dark cabinet.
The Complete Storage Process, Step by Step
Here’s the sequence I use for every machine I test or store. It takes about 30 minutes of active time, plus a day of drying.
- Run a cleaning cycle. Fill the reservoir with a 50/50 mix of white vinegar and water. Run a brew cycle without a pod. Let it sit for 30 minutes, then run two more cycles with plain water. This clears mineral scale and any coffee oils.
- Empty everything. Pour out the reservoir, dump the drip tray, and remove the pod holder. Wash these parts in warm soapy water. Rinse well.
- Dry the small parts. Use a microfiber cloth on the pod holder and drip tray. Let them air dry on a dish rack for a few hours. Don’t put them back on the machine until they’re completely dry.
- Dry the internal lines. This is the step most people miss. Run a brew cycle with an empty reservoir (no water). The pump will push out any remaining drops. Do this twice. Then leave the reservoir off the machine and prop the machine at a slight angle so any trapped water drains forward.
- Wipe the exterior. Use a damp cloth on the outside, then dry it. Pay attention to the area around the pod holder and the drip tray base, where moisture hides.
- Leave it open. Store the machine with the pod holder open and the reservoir off. This lets air circulate and prevents moisture buildup.
If you’re storing the machine for more than a month, consider running a descaling cycle before you store it, not after. Descaling solution left in the lines can corrode internal seals over time. Clean water is safer.
Choosing the Right Storage Location and Container
Where you store the machine matters more than you’d think. Heat and humidity are the enemies. A garage that hits 100°F in summer can warp plastic parts. A damp basement invites mold. The ideal spot is a climate-controlled closet or cabinet, away from direct sunlight.
For the container, you have a few options. A cardboard box works for a short move, but it offers zero padding and can crush the water reservoir. A plastic tote with a lid keeps dust out but traps moisture if the machine isn’t fully dry. The best option is a padded travel bag designed for coffee makers.
The BAGLHER travel bag I mentioned earlier has padded sidewalls and a padded bottom, which protects the machine from bumps during transport. It comes in three sizes, so you can match it to your machine’s dimensions. The medium size (16 x 6 x 13.5 inches) fits most K-Slim and K-Supreme models. It also has a shoulder strap, which makes carrying a coffee maker through an airport much less awkward.
Whatever you use, add a silica gel packet inside the bag or box. These absorb residual moisture and cost almost nothing. One packet is enough for a single serve machine.
How to Store Accessories Without Losing Them
K-Cups, filters, and the water reservoir always get separated from the machine. You’ll find the reservoir in one box and the pods in a drawer three months later. Here’s how to keep everything together.
Store the water reservoir upside down on top of the machine, but only if it’s completely dry. If you’re using a travel bag, check if it has a dedicated compartment. The BAGLHER bag has side pockets that fit K-Cups and a front pocket for capsules or sugar. That’s a practical design because it keeps the pods with the machine, not in a separate bag.
For loose K-Cups, use a zippered pouch or a small plastic container. Don’t leave them loose in a tote, they’ll roll around and some will crack. If you’re storing the machine for a long time, consider removing the pods from their boxes and putting them in an airtight container. This keeps them fresh and protects them from moisture.
Comparison: Storage Methods for Different Durations
Not every storage situation is the same. A weekend trip requires less prep than a six-month deployment. Here’s a quick breakdown of what you actually need to do.
| Storage Duration | Cleaning Needed | Drying Needed | Container Type | Extra Steps |
|---|---|---|---|---|
| 1-3 days (weekend trip) | None, just empty the reservoir | Air dry the drip tray | Padded travel bag or tote | None |
| 1-4 weeks | Rinse with water, no vinegar | Full dry, including internal lines | Padded travel bag or cardboard box | Silica gel packet |
| 1-6 months | Full vinegar cleaning cycle | Full dry, leave pod holder open | Padded travel bag with rigid sides | Silica gel, remove reservoir |
| 6+ months | Full descale, then clean water rinse | Full dry, store at slight angle | Hard case or padded bag in climate control | Check every 2 months for moisture |
The main takeaway is that drying time matters more than cleaning time for short storage. For long storage, cleaning matters more because old coffee oils go rancid.
Bringing the Machine Back After Storage
When you pull the machine out, don’t just plug it in and brew. Run two water-only cycles first. This flushes out any dust or stale water that might be in the lines. Then brew a cup and smell it. If it smells musty, run another cycle with vinegar, followed by two water cycles.
Check the needle for clogs. If the water flow is weak, use a paperclip to gently clear the needle opening. This is a common issue after storage because dried coffee grounds can harden in the needle. If you’re having trouble with a clogged machine, this guide on cleaning a clogged coffee maker walks through the process in detail.
Also inspect the water reservoir for cracks. Plastic can become brittle if it was stored in a hot garage. If you see any hairline cracks, replace the reservoir before using the machine. A cracked reservoir will leak water into the base, which is an electrical hazard.
Frequently Asked Questions
Can I store my Keurig on its side?
No. Store it upright. Laying it on its side can push water into the pump or the electrical components. Even if it’s dry, the internal parts aren’t designed to rest sideways. If you must lay it down for transport, wrap it in a towel and keep it in a box, but plan to dry it out again when you arrive.
How long can I leave water in the reservoir?
For daily use, change the water every 2-3 days. For storage, empty it completely. Stagnant water grows bacteria within a week. If you’re storing the machine for more than a week, the reservoir must be dry, not just empty.
Is it safe to store a coffee maker in a garage?
Only if the garage is insulated and stays between 50°F and 80°F. Extreme heat warps plastic, and freezing temperatures can crack the water reservoir. If your garage gets hot in summer or cold in winter, keep the machine inside the house.
Do I need to descale before or after storage?
Before. Descaling removes mineral scale that can corrode internal parts while the machine sits. Run the descaling solution, then follow with two clean water cycles to flush it out. Never store a machine with descaling solution still in the lines.
What’s the best way to store K-Cups with the machine?
Keep them in an airtight container separate from the machine, but store both in the same bag or box. The BAGLHER bag has side pockets for this. Don’t leave K-Cups loose in a tote, they’ll get crushed or cracked. If you’re storing for months, put the pods in a ziplock bag to keep them fresh.
What to Do Before You Pack It Away
You’ve cleaned it, dried it, and picked a container. Before you close the box, do a final check.
- Confirm the pod holder is open and dry.
- Confirm the reservoir is off and stored separately.
- Confirm the drip tray is dry and placed in the bag’s side pocket.
- Add one silica gel packet inside the bag.
- Label the box or bag with the date and the model name.
- Take a photo of the setup so you remember how it goes back together.
That last tip sounds silly, but I’ve lost count of how many people forget which way the drip tray slides in. A photo saves you five minutes of fiddling later.
Storing a single serve coffee maker isn’t complicated, but it does require patience. The drying step is the one that matters. Skip it and you’ll be cleaning mold out of the needle when you unpack. Follow the process here, and the machine will brew like it was never put away.
If you want to keep the machine in good shape during regular use, check out this guide on how often to clean a coffee maker. And if you notice any weird lights or error messages after storage, this article on flashing lights on a coffee maker might help you troubleshoot.
Products related to this article
Sponsored / affiliate links. As an Amazon Associate I earn from qualifying purchases. I may earn additional commission from eligible campaigns.
 HomeBeyond Espresso Coffee Maker 12 Cups, Classic Stovetop Espresso Maker, 600ml / 20oz Coffeemaker for Gas & Ceramic Stovetops (Silver)
 Belly Moka Coffee Maker Stovetop Espresso Maker 9 Cup Aluminum Moka Pot Percolator 15oz 450ml Easy Brewing for Electric Ceramic Stoves Home Camping Italian Cuban Café Classic Black
 Belly Moka Coffee Maker Stovetop Espresso Maker 6 Cup Aluminum Moka Pot Percolator 10oz 300ml Easy Brewing for Electric Ceramic Stoves Home Camping Italian Cuban Café Classic Silver