You press the brew button, the pump kicks in, and water dribbles out cold. The milk frother sputters lukewarm foam. Your super automatic espresso machine not heating turns your morning ritual into a frustrating puzzle. Before you call a service tech or start shopping for a replacement, there’s a short list of likely culprits. Most of them you can diagnose in ten minutes with basic tools.
This guide walks through the actual failure points in order of likelihood. You’ll learn what each symptom means, how to test the parts yourself, and when a $40 part beats a $400 repair bill. I’ve repaired enough machines to know the difference between a bad thermoblock and a loose wire. By the end, you’ll know exactly what to check and whether to fix it or replace it.

MacMaxe
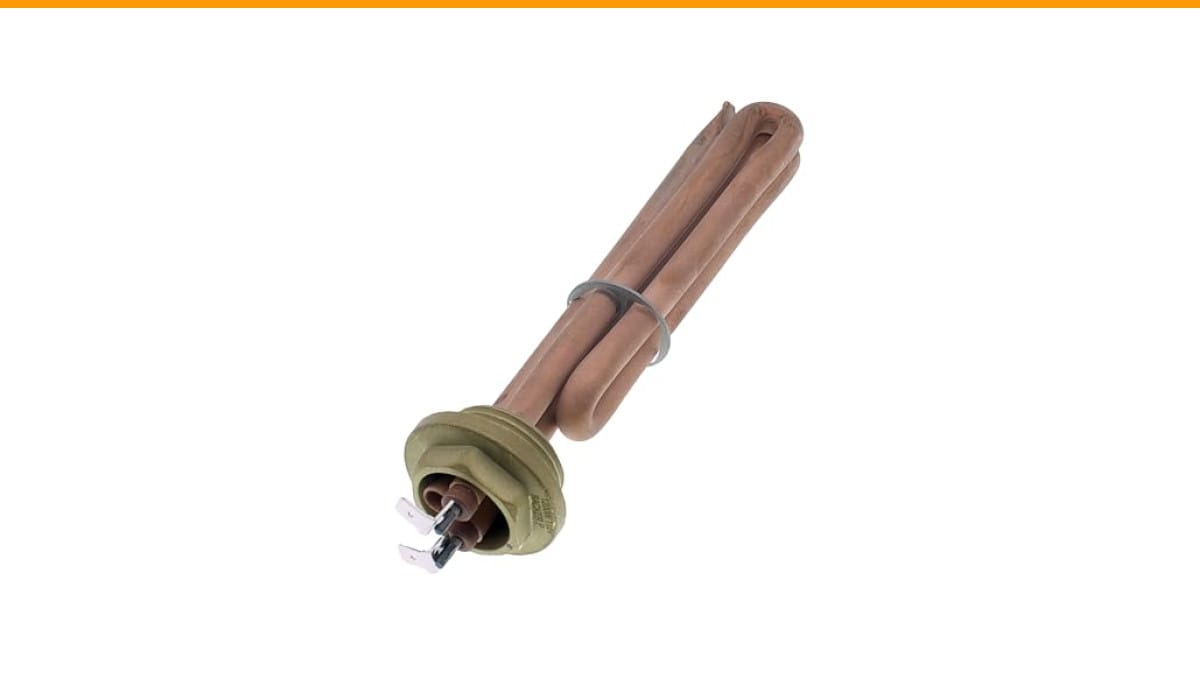
MacMaxe Heating Element for Oscar & Musica…
- Perfect Fit for Oscar & Musica Machines – Engineered for seamless compatibility.
- Reliable Heating Performance – Maintains consistent water temperature for optimal espresso extraction.
- Premium Quality Replacement – Durable and efficient for long-term use.
As an Amazon Associate I earn from qualifying purchases.
One warning before we start: unplug the machine and let it cool completely before touching anything inside. Boilers hold hot water under pressure, and the heating element can deliver a shock even when the machine is off. Safety first, coffee second.
If your diagnosis lands on a failed heating element, the replacement part for many Oscar and Musica models is the MacMaxe heating element. It’s a 1200W, 115V unit engineered for those machines, and swapping it restores proper brew temperature without replacing the whole espresso machine.
Why Your Machine Goes Cold: The Three Likely Culprits
Super automatic espresso machines fail to heat for three main reasons. The thermostat trips, the heating element burns out, or the control board stops sending power. Each one has a distinct set of symptoms.
A tripped thermostat usually happens after a dry-fire or a sudden power surge. The machine turns on, the pump works, but the water never warms. The thermostat is a safety device, so it’s doing its job. Resetting it might fix the problem permanently if the cause was a one-time event.
A burned-out heating element is more serious. You’ll often smell a burnt odor the first time it fails, or you might notice the machine tripping your circuit breaker. The element itself has a finite lifespan, typically 5 to 8 years with daily use. Hard water accelerates the failure because mineral scale insulates the element and causes it to overheat.
Control board failures are rarer but happen. The machine acts completely dead on the heating front, but the display and pump still work. This usually requires a multimeter to confirm, and often a new board to fix.
Diagnose It in Order: What to Check First
Grab a multimeter. You’ll need it for most of these tests. If you don’t own one, a basic digital model costs less than a single café visit and pays for itself on the first repair.
- Check the power cord and outlet. Sounds obvious, but a loose connection or a tripped GFCI outlet mimics a dead machine. Plug something else into the same outlet to confirm it works.
- Listen for the pump. If you hear the pump running but no heat, the problem is in the heating circuit. If the pump doesn’t run at all, it’s a power or control issue.
- Feel the warming tray. After 10 minutes, the top of the machine should feel warm. Cold top means no heat is reaching the boiler.
- Test the thermal fuse. This is a small component often attached to the boiler. Set your multimeter to continuity mode. A blown fuse reads as infinite resistance. Replace it if it’s open.
- Test the heating element. Disconnect the wires and measure resistance across the terminals. A healthy 1200W element at 115V should read around 11 ohms. Infinite resistance means it’s dead.
Most people stop at the thermal fuse because it’s the cheapest fix. But if the fuse blew, something caused it to overheat. Check the element and the thermostat before you assume the fuse was the problem.
Comparing Your Repair Options
Once you know the faulty part, you have three paths: DIY repair, professional service, or replacement. Here’s how they stack up in practice.
| Option | Cost Range | Time | Skill Level | Best For |
|---|---|---|---|---|
| DIY part replacement | $20–$60 for parts | 1–2 hours | Comfortable with a screwdriver and multimeter | Tripped thermostat, blown fuse, simple element swap |
| Professional repair | $150–$300 including labor | 3–7 days turnaround | None required | Control board failures, complex disassembly, warranty concerns |
| New machine | $500–$2,500 | Immediate if you buy local | None required | Machines over 8 years old, repeated failures, water damage |
I lean toward DIY repair for anything under $100 in parts. The learning curve is real, but the payoff is a machine you understand. If you’re not handy with electronics, professional service is the safer bet. A botched repair can turn a $50 fix into a $500 replacement.
For machines older than a decade, do the math honestly. A $250 repair on a 12-year-old machine keeps it running for maybe two more years. A new automatic espresso machine under $1000 comes with a warranty and modern features. Sometimes the smart move is letting go.
The Heating Element: The Most Common Failure Point
In my experience, the heating element itself fails more often than people expect. The thermostat trips, sure, but a tripped thermostat resets and you move on. A dead element is final.
Here’s what kills them: mineral scale. Hard water leaves calcium deposits on the element surface. Those deposits act as insulation, so the element works harder to heat the same amount of water. The extra heat stress eventually cracks the element or burns out the internal wire.
The fix is straightforward. Drain the boiler, remove the old element, clean the mounting surface, and install the replacement. The MacMaxe heating element fits Oscar and Musica machines specifically, and it’s rated for 1200W at 115V, which matches the original spec. Torque the bolts evenly to avoid warping the gasket, then refill and test.
Prevention matters more than repair. Use filtered water or a descaling schedule. Most manufacturers recommend descaling every 3 to 6 months, depending on your water hardness. A $10 descaling solution is cheaper than a $50 element and a Saturday morning of work.
What About the Thermostat and Thermal Fuse?
These two components work together as a safety system. The thermostat regulates normal operating temperature. The thermal fuse is a one-time emergency cutoff that blows if the temperature exceeds a dangerous threshold, like 200°C.
If your machine heats for a few minutes then stops, the thermostat is likely faulty. It’s opening the circuit too early. Test it with your multimeter set to continuity. At room temperature, a normally closed thermostat should read near zero ohms. If it reads open, replace it.
The thermal fuse is simpler. It’s either intact or blown. There’s no reset. If it’s blown, something serious happened. Check the element, the thermostat, and the wiring for shorts before replacing the fuse, or you’ll blow the new one too.
Both parts are cheap, usually under $15 each. The challenge is finding the exact match for your machine’s model. Take photos of the old parts and their wire connections before you remove anything. Trust me, the photos save you an hour of confusion during reassembly.
When the Machine Is Dead Completely: Control Board Issues
If the display lights up but nothing else responds, or if the machine shows no signs of life at all, suspect the control board. This is the least DIY-friendly repair on the list.
Control boards fail from power surges, water leaks, or just age. A surge protector is cheap insurance. If you live in an area with frequent outages, plug your machine into one.
Testing the board requires a multimeter and a wiring diagram. You’re checking for voltage at the board’s output terminals when the machine calls for heat. If the board sends power but the element doesn’t heat, the board is fine. If no power leaves the board, the board is likely dead.
Replacing a control board runs $100 to $250 for the part alone, plus labor if you hire someone. At that price, compare against a new machine. A board replacement on an older machine is often not worth it. Check the difference between automatic and semi-automatic machines if you’re considering an upgrade anyway.
Frequently Asked Questions
Why is my espresso machine running but not heating water?
The pump running means you have power and a functioning motor. The lack of heat points to the heating circuit. Test the thermal fuse first, then the heating element. One of them is open. In rare cases, the control board fails to send power to the element, but the fuse and element are the usual suspects.
How do I reset the thermostat on my super automatic espresso machine?
Most thermostats reset automatically once they cool down. If yours has a manual reset button, it’s usually a small red or black button on the thermostat body. Press it firmly until it clicks. If the machine trips again, you have a deeper problem like a shorted element or a stuck relay on the control board.
Can I use a heating element from a different brand?
Only if the wattage, voltage, and physical dimensions match exactly. A mismatched element can overheat, underperform, or not fit the boiler. For Oscar and Musica machines, the MacMaxe replacement element is built to spec. For other brands, order the OEM part or a verified cross-reference.
How often should I descale my super automatic espresso machine?
Every 3 to 6 months, depending on water hardness. If you use tap water, lean closer to 3 months. If you use filtered or bottled water, 6 months is fine. Scale buildup is the leading cause of heating element failure, so this is the single best preventive step you can take.
Is it worth repairing an espresso machine that’s 10 years old?
It depends on the repair cost and the machine’s condition. A $50 heating element swap on a machine that’s otherwise solid is worth it. A $300 control board replacement on a decade-old machine is not. Set a budget at 50% of a comparable new machine’s cost. If the repair exceeds that, start shopping.
What to Do Next: A Straightforward Action Plan
You don’t need to be a technician to fix a cold espresso machine. You need a methodical approach and the right parts. Here’s the short version of everything above.
- Unplug the machine and let it cool fully before any inspection.
- Check the outlet, the power cord, and the GFCI before opening anything.
- Use a multimeter to test the thermal fuse and heating element in that order.
- Replace a blown fuse only after confirming the element and thermostat are sound.
- Swap a dead element with a matching replacement like the MacMaxe unit for Oscar and Musica machines.
- Descale every 3 to 6 months to extend the life of the new parts.
- Set a repair budget at half the cost of a new machine, and stick to it.
If the machine is leaking water alongside the heating problem, check our guide on automatic espresso machine leaking water before you tear it apart. A leaking boiler can short out the heating circuit and cause the exact symptoms you’re seeing. And if you hear unusual noises, our loud noise troubleshooting guide covers the pump and grinder issues that often accompany heating failures.
One last thought: a cold espresso machine is annoying, but it’s rarely the end of the road. Most repairs take an afternoon and cost less than a tank of gas. The satisfaction of pulling a hot shot from a machine you fixed yourself is worth the effort.
Products related to this article
Sponsored / affiliate links. As an Amazon Associate I earn from qualifying purchases. I may earn additional commission from eligible campaigns.
 Coffee Espresso Machine Handle Replacement Parts, Cafe Bracket Handle for Lidl Silvercrest CM4621 CM4218 KF5002 KF500S Barista (for 51mm Portafilter Basket - Not included)
 Quick Heating Cup Warmer, Three Temperature Settings, Splashproof and Portable, for Coffee, Milk, Lightweight ABS Material
 USB Temperature Coffee Mug Warmer, Heating Coaster