You packed the portafilter, flipped the switch, and nothing. No hum, no indicator light, no hot water. The machine sits there like a brick. Most people assume the worst and start pricing a replacement. That’s usually a mistake.
Compact espresso machines fail in predictable ways. Nine times out of ten, the problem is a tripped safety switch, a dead thermal fuse, or something as simple as a GFCI outlet that popped. This guide walks you through a tiered diagnostic tree: zero-risk external checks first, then internal testing, and finally a clear line where you stop and call a professional. You’ll learn exactly what to test, what readings to expect, and when to quit.

Rancilio
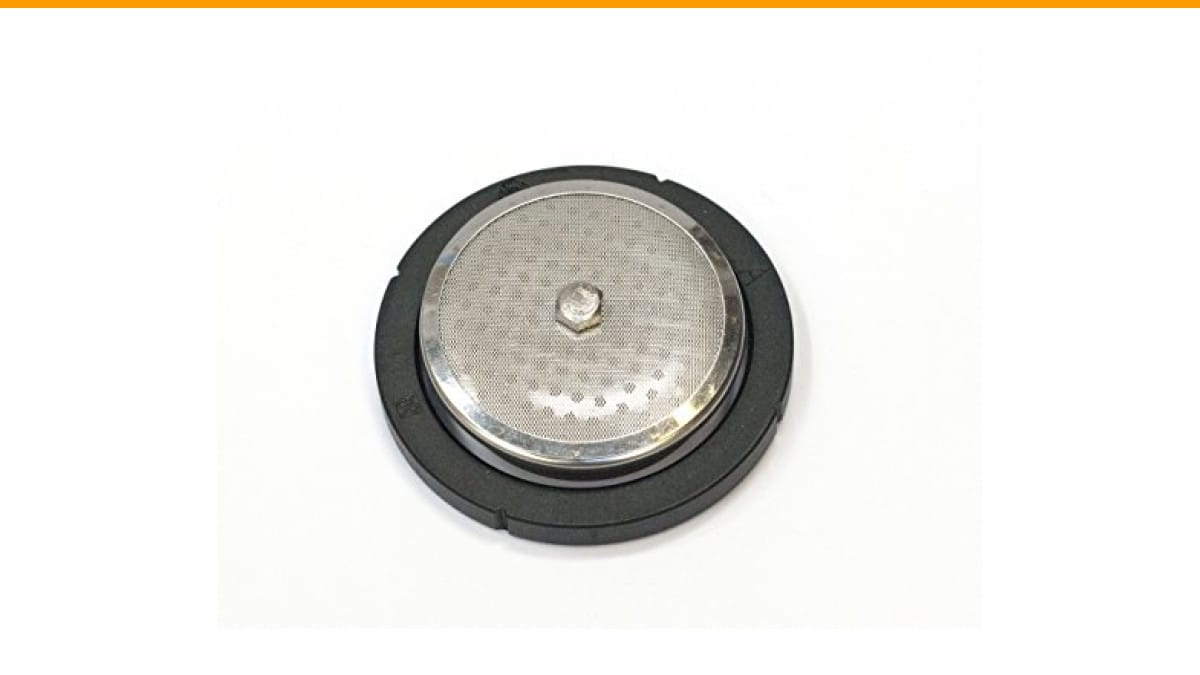
Rancilio Silvia Espresso Machine Repair Kit.
- This OEM repair kit can help you to fix some of the most common Rancilio Silvia problems.
- Water leaking around the portafilter: Usually the grouphead gasket needs to be replaced.
- Flow or no flow of water from grouphead. Your screen is probably clogged and needs to be replaced.
As an Amazon Associate I earn from qualifying purchases.
If your troubleshooting ends with a confirmed internal part failure, the Rancilio Silvia repair kit covers the most common mechanical culprits like a worn grouphead gasket or clogged screen. That kit won’t fix electrical issues, but it’s worth having on hand once you’ve cleared the power side of things.
Immediate Safety Checks Before You Touch Anything
Stop. Unplug the machine. Do this before you poke at anything. A compact espresso machine draws anywhere from 800 to 1500 watts, and the capacitors inside can hold a charge long after unplugging.
Look at the power cord first. Run your fingers along the full length, especially near the strain relief where the cord enters the machine. A chewed cord, a kink that feels hot, or exposed wire means you’re done. Replace the cord or the machine, full stop. Don’t tape it.
Check the outlet you’re using. Is it a GFCI (ground fault circuit interrupter)? Those have test and reset buttons. Press the reset button firmly. If it clicks, you found your problem. Bathrooms, kitchens, and garages often have GFCI outlets, and they trip for reasons unrelated to your espresso machine, like a hair dryer on the same circuit.
One more thing: check the breaker panel. A tripped breaker is easy to miss because the switch sits in the middle position, not fully off. Flip it all the way off, then on. If it trips again immediately, you have a short somewhere in the machine or the circuit. Don’t keep resetting it.
Verify the Outlet and Power Cord (The 5-Minute Test)
You need to know the outlet actually delivers power. A phone charger tells you nothing useful because it draws almost no current. Use something with a real load, like a hair dryer or a space heater. Plug it into the same outlet. If it runs, the outlet is fine.
For a more precise test, grab a multimeter. Set it to AC voltage (V~). Stick the probes into the outlet slots. You should read between 110 and 125 volts in North America. Anything below 105 volts and the machine’s control board may not even wake up. That’s a known issue with older wiring in apartments.
Now test the machine’s power cord itself. Unplug it from the wall, set the multimeter to continuity (the symbol that looks like a wifi icon), and touch one probe to each prong of the plug. You want a reading near zero ohms. If you get infinite resistance, the cord is internally broken. This happens more than you’d think, especially on machines that get yanked around on a counter.
The Power Cycle and Hard Reset Sequence
Sometimes the machine’s control board gets stuck in a bad state. A power cycle clears it. Unplug the machine, wait a full 60 seconds, then plug it back in. That’s not a magic trick; it lets the capacitors discharge and the board fully reset.
Some machines have a standby mode that looks like a dead machine. If your unit has a power button with a small LED, press and hold it for 10 seconds. That forces a shutdown. Then press it again normally. I’ve seen machines come back from this when nothing else worked.
If your machine has a PID controller or a digital display, look for an error code. A code like Er1 or E02 points to a specific sensor or relay. Write the code down. It’s not the same as a total power failure, and the fix is often a specific part, not the whole board. Check your manual’s error code table.
Internal Safety Switches: Thermal Fuse and Pressure Lockout
Here’s where things get interesting. Compact machines hide safety devices inside the chassis. The most common is the thermal fuse. It’s a small, white or black cylindrical component with two wires attached. It sits near the boiler or heating element. Its job is simple: if the boiler overheats past a set temperature (usually around 185°C or 365°F), the fuse blows and cuts power permanently. It’s a one-time device. You can’t reset it.
Why would it blow? Usually a failed pressurestat or a stuck relay that keeps the heating element on. The boiler gets hot enough to trip the fuse. Replacing the fuse without fixing the root cause means it’ll blow again.
There’s also a pressure lockout switch on some machines. This is a normally-open switch that closes when the boiler pressure drops to a safe level. If it fails, the machine thinks pressure is still high and refuses to power the heating element. You’d see no lights at all, or a light that comes on but the pump never runs.
How to Test the Thermal Fuse with a Multimeter
You’ll need a multimeter and a screwdriver. Unplug the machine first. Remove the top or side panel (usually 4 to 6 screws). Locate the thermal fuse near the boiler. It’s often clamped to the boiler wall.
Set your multimeter to continuity. Touch one probe to each terminal of the fuse. A good fuse reads near zero ohms. A blown fuse reads infinite resistance (OL on the display). That’s your answer.
If the fuse is blown, you have two options. Replace the fuse itself, but only after you’ve confirmed the pressurestat or relay isn’t stuck. Or replace the whole control board if the relay is the culprit. A new thermal fuse costs a few dollars. A new board costs a lot more. Test the relay before you buy anything.
Control Board, Capacitor, and Relay Failure Signs
The control board is the brain. When it dies, the machine is usually silent. But before you blame the board, check the two components that fail more often: the capacitor and the relay.
The capacitor stores a small charge to help the pump motor start. A failing capacitor won’t stop the lights from working, but the pump may hum and refuse to spin. If you hear a low hum but see no lights, suspect the capacitor first. It’s a small cylindrical component on the board. A multimeter with a capacitance setting can test it, but the reading is often unreliable in-circuit. If it looks swollen or leaked, replace it.
The relay is an electromechanical switch on the board. It clicks when the machine calls for heat. If you hear a click but the boiler never heats, the relay contacts are likely welded shut or burned open. A bad relay can also cause the thermal fuse to blow, as mentioned earlier. Testing a relay requires the board powered up and a voltage check on the load side. That’s beyond most home users. If you’re not comfortable with live circuit testing, this is your stopping point.
Visual Troubleshooting Guide (What to Look For)
Open the machine and look before you test. Burn marks on the board, a swollen capacitor, or a discolored section of the heating element all tell a story. A burnt smell near the boiler means the element failed. That’s usually a replacement part, not a repair.
Check the wiring harness. A loose spade connector on the thermal fuse or the pressurestat can cause intermittent power loss. Push each connector firmly. I’ve fixed machines that simply had a connector that vibrated loose over years of use.
Look at the water tank and drip tray sensors. Many compact machines refuse to power on if the water tank isn’t seated correctly. The sensor is a magnetic reed switch. If the float in the tank is stuck, the machine thinks the tank is empty. Clean the tank and the sensor area. Same for the drip tray on some models; a full drip tray can trigger a safety lockout.
When It’s Not Power: Locked Pump vs. Dead Machine
You plug the machine in, flip the switch, and hear a hum. But no lights, no heating. That’s not a power failure; that’s a locked pump or motor. The pump is trying to spin but can’t. This often happens after descaling when a bit of scale lodges in the pump’s impeller.
Try this: with the machine unplugged, remove the water tank and look inside the pump inlet. Sometimes you can see the blockage. Use a toothpick to gently dislodge it. Don’t use anything metal.
If the pump is clear but still hums, the capacitor is the likely suspect, as discussed. A dead machine, by contrast, is completely silent. No hum, no click, no light. That points to the thermal fuse, the power switch itself, or the control board.
Mistakes That Void Your Warranty (And What to Avoid)
Opening the case isn’t automatically a warranty violation, but it often is. Check your manual. Most manufacturers allow basic maintenance like cleaning, but they draw the line at removing the chassis or touching the control board. If your machine is under warranty, stop at the external checks and call support.
Don’t use a power strip with a surge protector that’s old. Most surge protectors wear out after a few years and stop protecting anything. A dedicated 15-amp circuit for your espresso machine is the right call. A kitchen counter circuit shared with a toaster and a kettle is asking for trouble.
Never run the machine with an empty boiler. That’s the fastest way to blow the thermal fuse. If you’ve just descaled and forgot to refill, you’ll likely hear a sizzle and then silence. That’s the fuse doing its job.
When to Call a Pro vs. When to Replace the Unit
Here’s a practical decision path. If you’ve tested the outlet, the cord, and the thermal fuse, and everything checks out, you’re looking at a control board issue. Control board replacement on a compact machine often costs as much as a new unit. Compare the repair quote against the machine’s age. If it’s over five years old, replacement usually wins.
Call a professional if you’re not comfortable working with live voltage. A service center will charge $50 to $100 for diagnosis, which is often applied to the repair. That’s a fair price for peace of mind.
Replace the machine if the boiler is leaking, the heating element is shorted, or the control board is fried and the machine is out of warranty. Those repairs can exceed the value of the machine.
Maintenance Habits That Prevent Power Failures
Most power failures trace back to heat and scale. Descale your machine every 2 to 3 months if you use it daily. Scale buildup on the heating element makes it work harder and run hotter, which stresses the thermal fuse. Use a proper descaling solution, not vinegar. Vinegar can leave residue that causes more problems.
Plug your machine into a surge protector that you replace every two years, or better yet, a dedicated wall outlet. A nearby lightning strike or a power surge from the grid can kill a control board instantly. That’s the most expensive single part on the machine.
Let the machine cool down completely before you move it or store it. Moving a hot machine can crack the boiler or the heating element flange. A crack there means water on the electronics, which means a short.
Frequently Asked Questions
Why does my espresso machine have power but the pump won’t start?
That’s usually a locked pump or a failed capacitor. Unplug the machine, remove the water tank, and check the pump inlet for scale or debris. If it’s clear, test the capacitor with a multimeter. A humming pump with no spin points straight at the capacitor.
Can a GFCI outlet cause my espresso machine to not turn on?
Yes. GFCI outlets trip for many reasons, and the reset button can be popped without you noticing. Press the reset button. If it clicks, you’ve found the issue. Test the outlet with a hair dryer to confirm it delivers power under load.
How do I know if the thermal fuse is blown?
Use a multimeter set to continuity. A good fuse reads near zero ohms. A blown fuse reads infinite resistance. The fuse is located near the boiler, usually clamped to the side. Unplug the machine before testing.
Is it worth replacing the control board on an old espresso machine?
Usually not. A control board for a compact machine can cost $100 to $200, plus labor. If the machine is more than five years old, you’re better off putting that money toward a new unit. If the machine is under warranty, let the manufacturer handle it.
Why does my machine turn on but immediately trips the breaker?
That’s a short circuit. The heating element is the most common culprit. It can crack and leak water onto the wiring. A failed heating element often reads low resistance to ground. This is not a DIY repair for most people. Call a professional.
Final Verdict
You’ve walked the full tree. You know the external checks, the internal safety components, and the line where you stop. Here’s the short version:
- Always unplug before touching anything inside the machine.
- Test the outlet with a real load, not a phone charger.
- Press the GFCI reset button and check the breaker panel first.
- A blown thermal fuse reads infinite resistance on a multimeter.
- A humming pump with no lights points to a capacitor or locked pump.
- Don’t replace a control board on a machine older than five years.
- Use a surge protector and replace it every two years.
If you’ve done all this and the machine still won’t wake up, you’ve done the due diligence. A service center visit or a new machine is the honest answer. But you’ll walk in knowing exactly which part failed, and that’s worth more than the diagnosis fee.
Products related to this article
Sponsored / affiliate links. As an Amazon Associate I earn from qualifying purchases. I may earn additional commission from eligible campaigns.
 Coffee Espresso Machine Handle Replacement Parts, Cafe Bracket Handle for Lidl Silvercrest CM4621 CM4218 KF5002 KF500S Barista (for 51mm Portafilter Basket - Not included)
 Linnkyfloa Coffee Espresso Maker Handle Replacement for Stovetop Moka Pot or Percolator, Black Plastic for Spare Part Compatible with Italian(9-12 Cup)
 Wrenmor Replacement Handle For Coffee Espresso Moka Stove Pot, Black Plastic Accessory Compatible With 1/3/6/9/12 Cup Sizes For Easy Installation And Long-Lasting Use(1 Cup)