You press the brew button, walk away for a minute, and come back to a half-empty carafe and a machine that sounds like it’s gargling rocks. Or worse, nothing happens at all. The light turns on, but the pump stays silent. Most people assume the whole unit is dead and start shopping for a replacement. That’s often a mistake.
In my time testing and repairing these machines, I’ve found that most small coffee maker problems come down to a handful of recurring failures. You’re looking at mineral buildup, a blown thermal fuse, a stuck check valve, or a bad temperature sensor. Each one has a distinct set of symptoms. This guide walks you through the diagnosis first, then the fix. You’ll learn what to check, what to replace, and when it’s smarter to just buy a new machine.
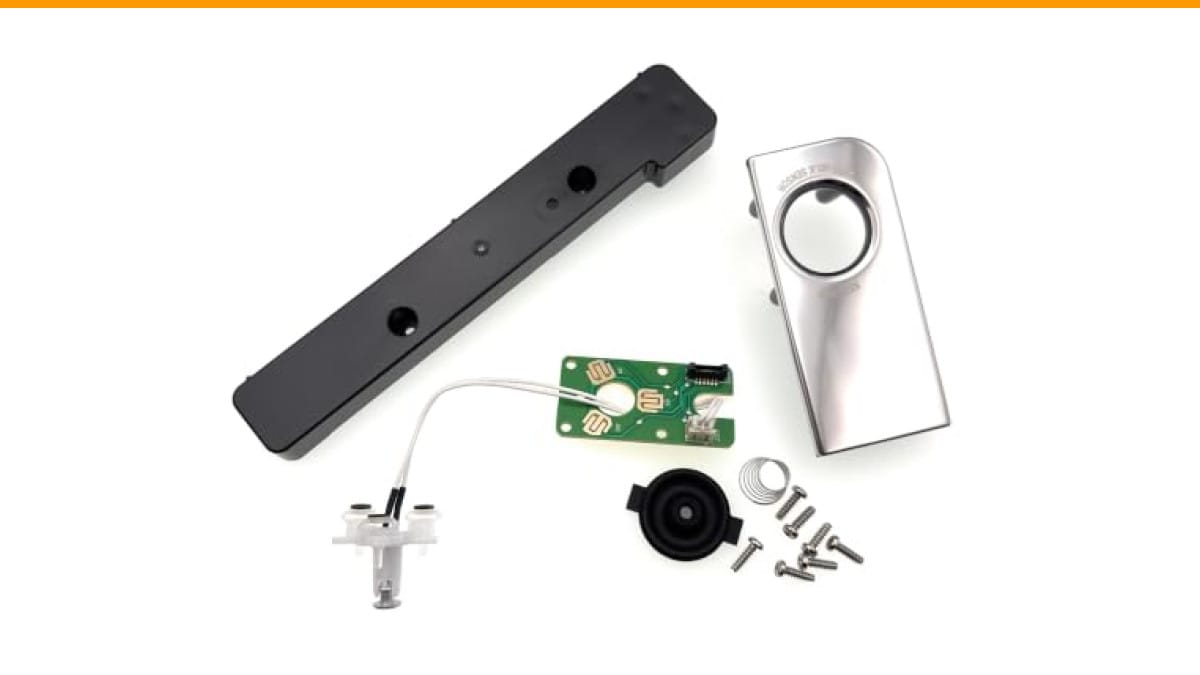
For owners of the Breville Barista Touch BES880, one specific failure deserves a mention. If you see an E05 error or the milk frother heats inconsistently, the NTC base assembly is a likely culprit. The MacMaxe NTC Base Assembly Kit replaces part SP0102952 and includes the PCB board, protective cover, spring, and mounting screws. It’s a complete service kit for that particular repair.
The 5 Most Common Coffee Maker Failures (And How to Diagnose Yours)
Before you unscrew anything, you need a clear diagnosis. Guessing wastes time. Here’s a quick decision tree based on what I see most often.
- Machine won’t turn on or brew: Check the power outlet first, then the thermal fuse inside the unit. A blown fuse is the most common cause of total power loss.
- Slow brewing or no water flow: This is almost always mineral buildup in the boiler or water lines. You need to descale, not replace parts.
- Leaking from the bottom: Look for a cracked water reservoir, a worn seal around the boiler, or a faulty check valve that lets water drain where it shouldn’t.
- Weak, cold, or bitter coffee: The brew temperature is off, or the water isn’t spending enough time with the grounds. Check the heating element and your grind size.
- Strange noises or sputtering: Steam is getting trapped in the system. A stuck check valve or a clogged steam wand tip is your prime suspect.
- Empty the water reservoir and remove the paper filter and old grounds.
- Mix a descaling solution according to the package instructions, or use a 1:1 ratio of white vinegar and water. Don’t use more vinegar; it doesn’t work faster, it just smells worse.
- Pour the solution into the reservoir and run a brew cycle without coffee. Stop halfway through and let it sit for 30 minutes to soak the scale.
- Finish the cycle, then empty the carafe.
- Run two or three full cycles with fresh water to flush out all remaining solution and loosened scale.
- Total failure of the heating element: Replace the machine. The part alone is often $30-$50, and you’ll spend an hour installing it.
- Failed thermal fuse on a budget machine: Replace the machine. The fuse is $5, but the disassembly is a pain, and other components are likely worn too.
- Failed temperature sensor on a premium machine (like the Breville BES880): Repair it. The replacement sensor kit is affordable compared to the $500+ cost of a new unit.
- Stuck check valve or worn seal: Repair it. These parts cost under $10 and take 15 minutes to swap.
- Cracked water reservoir: Repair it if you can find the part. It’s usually a snap-in replacement.
- Unplug the machine and test the outlet before opening anything.
- Use a multimeter to test the thermal fuse and heating element for continuity.
- Descale every 90 days, or more often with hard water, to prevent the most common failures.
- Clean the steam wand and brew basket after every use to avoid clogs.
- Replace worn seals and check valves promptly; they’re cheap and easy to swap.
- Apply the 50% rule: if the repair part costs over half the price of a new machine, buy new.
- For Breville BES880 owners with an E05 error, the NTC base assembly kit is the specific part you need.
Your machine’s age matters too. A unit under two years old with these symptoms likely has a manufacturing defect or a simple clog. A machine over five years old with hard water usage probably has scale buildup that’s killing the heating element. Keep that timeline in mind as you work through the fixes below.
Safety First: Unplug and Prep Before You Fix
I’ll say this once, and it’s not optional. Unplug the coffee maker before you touch anything inside. I’ve seen people skip this step and blow the board or, worse, get a nasty shock. The capacitor inside the power supply can hold a charge even after unplugging. Give it five minutes to discharge before you start poking around.
You also want a clean, dry workspace. Lay down a towel, get a small screwdriver set with magnetic bits, and have a multimeter ready if you’re testing electrical components. For most fixes, you’ll need a Phillips head screwdriver and maybe a flathead for prying clips. Keep the screws organized. I use a muffin tin or a magnetic dish so nothing rolls away.
One more thing: take photos as you disassemble. Phones are great for this. When you’re putting the machine back together, those photos save you from guessing which wire goes where. It takes ten seconds and prevents a lot of frustration.
If you smell burning plastic or see scorch marks on the circuit board, stop. That’s a short circuit, not a simple clog. Replacing a board on a budget machine often costs as much as a new unit. Call it quits and recycle it.
Problem #1: The Machine Won’t Turn On or Brew (Power & Thermal Fuse)
Your machine is completely dead. No lights, no sounds, no response. First, test the outlet with another device. I’ve had two service calls where the problem was a tripped GFCI outlet, not the coffee maker. If the outlet works, the issue is inside the machine.
The thermal fuse is the usual suspect. It’s a small white or metal component with two wires attached, usually clipped to the boiler or the heating element. Its job is to cut power if the machine overheats. Once it blows, it’s dead forever. You can’t reset it. You test it with a multimeter set to continuity. If you get no beep, the fuse is blown.
Replacing it is straightforward. Order the exact same fuse rating (often 240°F or 115°C, but check the printed number). Solder or crimp the new one into place, but only after you figure out why it blew. A thermal fuse doesn’t fail on its own. It fails because the boiler got too hot, usually from scale buildup or a stuck thermostat. If you just swap the fuse without descaling, you’ll be back inside the machine in a month.
Pro tip: check the power switch too. A failed switch can mimic a dead machine. Test it with the multimeter in the same circuit. If the fuse is good and the switch clicks, you’re looking at a bad board or a loose connection. Inspect all wire harnesses for corrosion or a disconnected plug before you order anything.
Problem #2: Slow Brewing or No Water Flow (Descaling the Mineral Buildup)
This is the most common issue I encounter. The pump runs, you hear it working, but only a trickle of coffee comes out. Or nothing at all. The water path is restricted by scale. Hard water leaves calcium and magnesium deposits inside the boiler and the narrow tubes. Over time, those deposits narrow the passage until the flow stops.
The math is simple. If your water is 150 ppm hardness (moderately hard), a machine used daily will accumulate significant scale within six months. By the one-year mark, you’re losing flow rate. By two years, you’re risking a burnt-out heating element because the scale insulates it. That’s why descaling isn’t optional maintenance; it’s the single most important thing you can do for your machine.
Here’s how to descale a standard drip machine:
If your machine has a cleaning cycle function, use that instead of a manual brew. It’s designed to pulse the water and agitate the scale loose. Check your manual for the specific sequence.
The Vinegar vs. Descaler Debate
Vinegar works, but it’s not perfect. It’s cheap and effective at dissolving calcium carbonate. The downside is the smell and the fact that it can degrade rubber seals over time if you use it constantly. Commercial descalers (usually citric acid or sulfamic acid based) are faster, unscented, and gentler on the machine’s internals.
My rule: use a commercial descaler every three months as your standard maintenance. Use vinegar in a pinch if you’re out of descaler and the machine is clearly clogged. Just make sure you flush thoroughly afterward. Residual vinegar in the boiler will make your coffee taste sour for days.
Problem #3: Leaks from the Bottom or Top (Check Valves & Seals)
A puddle under the machine is alarming, but it’s rarely a cracked boiler. Start by checking the obvious: the water reservoir. Hairline cracks in the plastic happen, especially if you’ve dropped it. Fill it with water outside the machine and look for drips.
If the reservoir is fine, the leak is likely a worn seal or a stuck check valve. The check valve is a one-way gate that lets water flow from the reservoir into the boiler but not back. When it gets stuck open, water can drain backward and spill out the bottom of the machine. You’ll often hear a gurgling sound after brewing stops.
To access the valve and seals, you’ll need to remove the bottom plate. Look for the rubber gasket around the boiler inlet and the small plastic valve housing. The seals are cheap and easy to replace. The valve itself might just be clogged with scale; soak it in descaling solution for an hour and see if it frees up. If not, order a replacement part specific to your model.
One thing I’ve learned: don’t over-tighten the screws when you reassemble. The plastic threads strip easily. Hand-tighten them snug, then stop. A stripped screw hole turns a minor leak fix into a full housing replacement.
Problem #4: Weak, Cold, or Bitter Coffee (Temperature & Extraction)
Your machine works, but the coffee tastes wrong. If it’s lukewarm, the heating element isn’t reaching temperature. You can test this with a thermometer in the carafe right after brewing. The water should be between 195°F and 205°F. Below 190°F, you’re under-extracting, which produces weak, sour coffee.
A failing heating element is one cause, but a more common one is a faulty thermostat or temperature sensor. On many machines, the sensor is a small probe attached to the boiler. If it reads the temperature wrong, the controller won’t energize the heater enough. This is where the NTC base assembly on the Breville BES880 comes into play. NTC stands for negative temperature coefficient; these sensors change resistance with temperature. When they fail, the machine throws an E05 error or just behaves erratically with milk temperature. If you have that model and the frother isn’t heating milk properly, the NTC base replacement kit is the right path.
The Grind Size and Water Ratio Connection
Before you blame the machine, look at your coffee prep. Bitter coffee often means you’re grinding too fine or using too much coffee. The water takes too long to pass through the grounds, over-extracting the bitter compounds. Conversely, weak coffee might mean your grind is too coarse and the water rushes through without pulling enough flavor.
For a standard drip machine, use a medium grind and a ratio of about 1 to 2 tablespoons of coffee per 6 ounces of water. Adjust from there. If your machine has a shower head that distributes water unevenly, that’s another cause of weak extraction in spots. Clean the spray head with a pin to clear any clogged holes.
Also, check your water quality. If you’re using heavily filtered or distilled water, the machine’s sensors might not read correctly, and the coffee will taste flat. You need some minerals in the water for proper extraction. Use tap water that’s been through a basic carbon filter.
Problem #5: Strange Noises and Sputtering (The Steam Trap)
A coffee maker that hisses, sputters, or makes a loud gurgling noise is telling you something. Steam is building up where it shouldn’t be. The most common cause is a clogged steam wand or a blocked vent tube. On machines with a frother, milk residue can dry and clog the tip, causing pressure to build and release erratically.
Clean the steam wand immediately after each use. Purge it for a second into a towel to clear any milk residue. If it’s already clogged, soak the tip in hot water with a drop of dish soap, then use a pin to clear the hole.
The other culprit is scale in the boiler. When scale builds up, it creates rough surfaces where steam bubbles form and collapse violently. That’s the sputtering you hear. A thorough descaling usually silences it. If the noise persists after descaling, check the pressure relief valve. It might be stuck or weak, allowing pressure to fluctuate.
Don’t ignore these noises. A machine that keeps sputtering is a machine that’s slowly cooking its own heating element. The fix is cheap now; the replacement is not.
The 30/60/90 Day Preventative Maintenance Calendar
You can avoid most of these problems with a simple schedule. I follow this routine, and it keeps machines running for years past their expected lifespan.
| Timeframe | Maintenance Task | Why It Matters |
|---|---|---|
| Every 30 days | Run a cleaning cycle with a mild detergent tablet or a vinegar solution. Wipe down the carafe and basket. | Removes coffee oils and residue that go rancid and affect taste. |
| Every 60 days | Deep clean the brew basket, shower head, and any removable parts. Soak them in warm soapy water. | Prevents clogged spray holes and ensures even water distribution. |
| Every 90 days | Full descale with a commercial descaler. Check and replace the water filter if your machine has one. | Removes mineral buildup before it narrows the water lines and strains the heating element. |
If you live in an area with hard water (over 180 ppm), cut those intervals in half. Descaling every 45 days is not overkill; it’s necessary. You can buy a cheap water hardness test strip to know where you stand. That single data point tells you exactly how aggressive your maintenance schedule needs to be.
When to Call It Quits: Repair vs. Replace Calculator
Not every coffee maker deserves a repair. I use a simple rule of thumb: if the cost of the replacement part plus shipping is more than 50% of the price of a new comparable machine, buy the new machine. Labor is free if you’re doing it yourself, but your time isn’t worthless. A three-hour repair on a $40 drip machine is a bad trade.
Here’s how to make the call:
Also, consider the machine’s age. If it’s over five years old and needs a major component, the rest of the machine isn’t far behind. The pump, the switches, the wiring are all aging. Put your money toward a new unit with a fresh warranty.
FAQ: Quick Answers to Urgent Coffee Maker Problems
Why is my coffee maker leaking water from the bottom?
Check the water reservoir for cracks first. If that’s fine, the leak is likely a worn seal around the boiler or a stuck check valve allowing water to drain backward. You’ll need to open the bottom panel to inspect the gaskets and valve. Replace any that look deformed or feel hard.
How often should I descale my coffee maker?
Every three months is a good baseline for average tap water. If you have hard water, do it every six weeks. If you use softened or filtered water, you can stretch it to four or five months. The machine will tell you if you wait too long; the brew time will increase noticeably.
Can I use vinegar to descale my coffee maker?
Yes, in a pinch. Use a 1:1 ratio of white vinegar and water, run a brew cycle, let it sit for 30 minutes, then flush with two or three full cycles of fresh water. It works, but it leaves a smell and can degrade rubber seals over time. A commercial descaler is gentler and faster. For more on this, check our guide on cleaning your coffee maker.
Why is my coffee maker making a loud noise?
Usually, it’s steam trapped in the system. A clogged steam wand or a blocked vent tube is the first suspect. Clean the wand tip with a pin and purge it after every use. If the noise persists, descale the machine to remove scale that’s causing erratic boiling.
What does the E05 error mean on my Breville Barista Touch?
The E05 error typically points to a fault in the NTC temperature sensor circuit, which is part of the base assembly. This sensor monitors milk temperature for the auto-frothing feature. If it fails, the machine can’t regulate temperature properly. Replacing the NTC base assembly is the standard fix.
Fixes Worth Trying Before You Call It Dead
You don’t need to be a technician to save a coffee maker. Most repairs are simple parts swaps that take under an hour. The key is diagnosing the actual failure instead of guessing. A blown fuse, a clogged line, and a dead sensor all look similar from the outside, but they require completely different fixes.
For more detailed troubleshooting on specific brands, take a look at our guides on Braun brew failures and Cuisinart power issues. And if you’re wondering about the best cleaning schedule, our article on cleaning frequency covers the specifics. A little routine care goes a long way toward keeping your morning ritual intact.
Products related to this article
Sponsored / affiliate links. As an Amazon Associate I earn from qualifying purchases. I may earn additional commission from eligible campaigns.
 HomeBeyond Espresso Coffee Maker 12 Cups, Classic Stovetop Espresso Maker, 600ml / 20oz Coffeemaker for Gas & Ceramic Stovetops (Silver)
 Linnkyfloa Coffee Espresso Maker Handle Replacement for Stovetop Moka Pot or Percolator, Black Plastic for Spare Part Compatible with Italian(9-12 Cup)
 Belly Moka Coffee Maker Stovetop Espresso Maker 9 Cup Aluminum Moka Pot Percolator 15oz 450ml Easy Brewing for Electric Ceramic Stoves Home Camping Italian Cuban Café Classic Black