It’s 6:40 AM. You’re standing in the kitchen, bleary-eyed, and your drip coffee maker is dead. No lights, no heating element sounds, no nothing. You’ve already pressed the power button three times, which is the universal fix for everything, and it still won’t cooperate. Before you toss it in the trash and spend money on a new one, let’s run through a proper triage system. You’ll learn exactly what to check, in what order, and how to tell if this is a 30-second fix or a replacement situation.
Most people assume a dead coffee maker means a dead machine. That’s often wrong. The problem could be as simple as a tripped GFCI outlet or a locked heating element that needs a reset. This guide walks you through every step, from zero-risk checks to advanced multimeter testing, so you can get your brew back without wasting cash on unnecessary parts or a new unit.

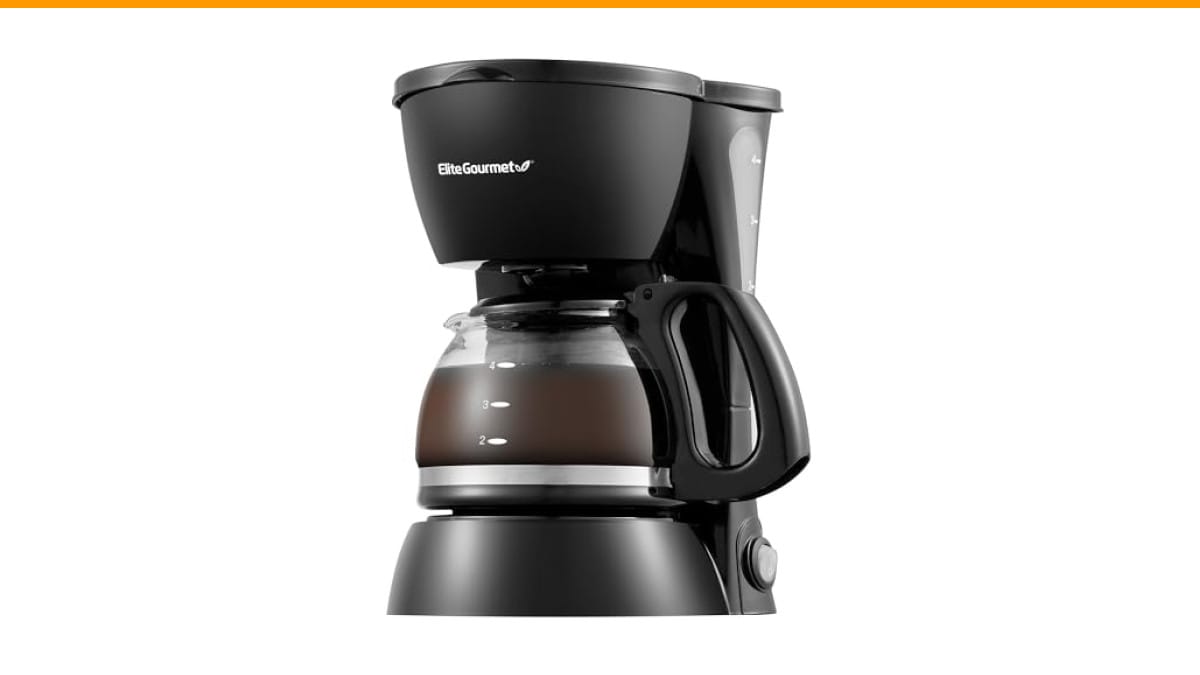
Elite Gourmet
Elite Gourmet EHC4128 Automatic 4-Cup Drip Coffee…
- SEMI-TRANSPARENT WATER RESERVOIR holds up to 4 cups of water capacity with a level indicator to always ensure you have enough wate…
- 4 CUP GLASS CARAFE for brewing the perfect quantity of hot fresh coffee for an individual or a small group of people.
- PAUSE 'N SERVE allows a quick pour of fresh coffee in the middle of the brewing cycle if you're running low on time or just need a…
As an Amazon Associate I earn from qualifying purchases.
If you’re in the market for a replacement while you troubleshoot, the Elite Gourmet EHC4128 is a solid, no-nonsense 4-cup machine with a semi-transparent water reservoir and a keep-warm function that kicks in automatically. It’s a good backup option to have on hand, especially if your current machine is older.
Before You Panic: 3 Quick Checks (Outlet, GFCI, and Power Cord)
Start with the cheapest and easiest possible cause. Check the outlet first. Plug your phone charger or a lamp into the same socket. If the lamp doesn’t turn on, the outlet is dead. Move the coffee maker to a different outlet and try again. This sounds obvious, but you’d be surprised how many people skip it.
Next, look at the GFCI. In kitchens and bathrooms, outlets are often wired to a ground fault circuit interrupter. These have small buttons labeled ‘Test’ and ‘Reset’. If the GFCI tripped, the outlet looks normal but has no power. Press the ‘Reset’ button firmly. You should feel it click. If it clicks, you’ve likely solved the problem.
Finally, inspect the power cord. Look for chew marks, kinks, or exposed wires. If the cord is damaged, don’t use the machine. A frayed cord is a fire hazard, and it’s not worth the risk. If the cord looks fine but the machine still won’t turn on, move to the next step.
If you’ve confirmed the outlet works and the cord is intact, the problem is inside the machine. But before you start disassembling anything, try the reset trick below.
The 30-Second Reset Trick That Fixes Most Machines
Many drip coffee makers have a hidden thermal cutoff switch. This is a safety device that trips when the machine overheats, either from running dry or from a buildup of mineral scale. Once it trips, the machine acts dead. The fix is often unplugging the unit and letting it sit for 15 to 30 minutes.
Here’s the exact procedure: Unplug the coffee maker from the wall. Wait 30 minutes. Plug it back in. Press the power button. In many cases, this resets the internal thermostat and the machine will start normally. It works because the thermal fuse cools down and reconnects.
Some brands have a physical reset button. Check the bottom of the machine or behind the water reservoir. If you see a small red or black button, press it with a paperclip or a pen tip. This is common on some Mr. Coffee and Hamilton Beach models. If you don’t see a button, the unplug-and-wait method is your best bet.
If the machine still doesn’t respond, you’re dealing with a more serious issue. It could be a blown thermal fuse, a faulty thermostat, or a clogged water line that’s triggering a safety shut-off. Let’s tackle the dirty machine problem next, because it’s more common than you think.
Why a Dirty Machine Refuses to Turn On (And How to Deep Clean It)
Mineral scale from hard water is a silent killer of coffee makers. When calcium and lime build up inside the water lines and on the heating element, the machine has to work harder. Eventually, the heating element overheats, and the thermal fuse blows or the thermostat trips. The machine won’t turn on because the safety mechanism is doing its job.
The fix isn’t disassembly. It’s descaling. Run a cycle with a 50/50 solution of white vinegar and water. Pour it into the reservoir, start the brew cycle, and let it sit for 30 minutes after the cycle finishes. Then run two full cycles with plain water to flush out the vinegar. This clears the mineral deposits and can restore the machine’s function.
If your machine has a stuck brew valve or a clogged water line, the same descaling process often clears it. The vinegar breaks down the scale that’s jamming the valve. In testing, I’ve revived machines that were completely dead with two rounds of descaling. It’s not guaranteed, but it’s worth trying before you spend money on parts.
For a more thorough clean, remove the filter basket and wash it with warm soapy water. Check the water reservoir for any debris. A clean machine is a happy machine, and it’s also a safer one. If you’re wondering how often you should do this, check out our guide on coffee maker cleaning frequency.
If descaling doesn’t bring it back to life, the issue is likely electrical. You’ll need to test the internal components.
Testing the Thermal Fuse and Thermostat with a Multimeter
This is the advanced stage. You’re opening the machine to test the safety components. Before you do anything, unplug the machine. Seriously. Unplug it and wait at least 10 minutes. There are capacitors inside that can hold a charge, and you don’t want to get zapped.
How to Access the Internal Components Safely
Flip the machine upside down. You’ll see a base plate held on by screws. Use a Phillips head screwdriver to remove them. Keep the screws in a small dish so you don’t lose them. Once the plate is off, you’ll see the wiring, the heating element, and the thermal fuse. It’s usually a small white or metal cylinder attached to the heating element or the bottom of the tank.
Before you touch anything, use a screwdriver with an insulated handle to discharge any capacitors. Touch the metal terminals of the large capacitors to short them out. This is a safety step you should never skip. The shock from a capacitor can be painful and dangerous.
What Resistance Readings Mean (And When to Replace)
Set your multimeter to the resistance setting (ohms, Ω). Touch the two probes to the two terminals of the thermal fuse. A good fuse will read close to zero ohms (continuity). If the multimeter shows ‘OL’ or a very high reading, the fuse is blown. You’ll need to replace it.
The thermostat works similarly. It’s often a small disc with two wires. At room temperature, it should also show continuity. If it shows no continuity, it’s faulty. These parts are cheap, usually under $10, and available online or at appliance parts stores. Replacing them is a simple matter of unscrewing the old part and screwing in the new one.
If both the fuse and the thermostat test fine, the problem could be the power switch or the control board. These are harder to diagnose and replace. At this point, you need to weigh the cost of repair against the cost of a new machine.
Brand-Specific Reset and Troubleshooting Hacks
Different brands have different quirks. Here’s what I’ve learned from testing and repairing various machines.
Mr. Coffee: Many Mr. Coffee models have a reset button on the bottom. If you can’t find it, unplug the machine for 30 minutes. This resets the internal breaker. If it still won’t turn on, check the water reservoir. Some models have a safety switch that prevents operation if the reservoir isn’t seated properly.
Cuisinart: Cuisinart machines often have a ‘Clean’ or ‘Descale’ cycle that can get stuck. If the machine won’t turn on, try pressing and holding the ‘Clean’ button for 5 seconds. This sometimes resets the control board. We have a detailed guide on Cuisinart models that won’t power on if you need more help.
Hamilton Beach: These machines frequently have a thermal fuse that trips. The unplug-and-wait method works most of the time. If not, test the fuse with a multimeter. They’re known for blowing fuses if you run the pot dry.
Ninja: Ninja machines have a more complex control board. If the machine is dead, check the outlet first, then try a factory reset by unplugging for 60 seconds and holding the power button for 10 seconds. If that fails, it’s likely a board issue. See our guide on Ninja brew button problems for more specifics.
When to Call It Quits: Repair vs. Replace Cost Analysis
You’ve tested everything. The thermal fuse is blown. You can buy a new fuse for $8, but you need to figure out if it’s worth your time. Here’s a simple decision matrix based on the machine’s age and the cost of parts.
| Machine Age | Part Cost (Fuse/Thermostat) | Repair Time | Recommendation |
|---|---|---|---|
| Under 1 year | Under $10 | 30 minutes | Repair it. It’s under warranty, so contact the manufacturer first. If they replace it, great. If not, a $10 part is worth it. |
| 1-3 years | $10-$20 | 1 hour | Repair if you’re handy. You’ll save $30-$50 compared to a new mid-range machine. |
| 3-5 years | $20+ | 1+ hours | Consider replacing. The machine has had a good life. A new unit will have a fresh heating element and better efficiency. |
| 5+ years | Any | Any | Replace it. The other internal components are likely worn out too. You’re just delaying the inevitable. |
If the heating element itself is burned out, which you can test by checking for resistance (it should read between 10-50 ohms), the repair cost doubles. At that point, a new machine makes more sense. A budget 4-cup machine like the Elite Gourmet EHC4128 costs less than most repair kits and comes with a warranty. Check the current price on Amazon if you’re leaning that way.
Frequently Asked Questions
Why is my coffee maker dead even though the outlet works?
This points to an internal failure. The most common culprits are a tripped thermal fuse, a blown thermostat, or a faulty power switch. Start with the 30-minute unplug reset. If that fails, you’ll need to test the internal components with a multimeter.
Can a clogged water line cause the machine to not turn on?
Yes. A severe clog can cause the heating element to overheat, which trips the thermal fuse. The machine shuts off to prevent a fire. Descaling with vinegar often clears the clog and resets the safety mechanism.
How do I know if the thermal fuse is blown?
You need a multimeter. Set it to the resistance (ohms) setting. Touch the probes to the fuse terminals. A reading of zero or near zero means the fuse is good. A reading of ‘OL’ (open line) or infinite means the fuse is blown and needs replacement.
Is it safe to open my coffee maker and test the components?
It’s safe if you follow the rules. Unplug the machine first. Wait at least 10 minutes for the capacitors to discharge. Then use a screwdriver with an insulated handle to short the capacitor terminals. If you’re not comfortable with basic electrical work, skip this step and call a professional.
What’s the average lifespan of a drip coffee maker?
Most budget to mid-range drip machines last 3 to 5 years with regular use. High-end machines can last longer, but they also have more complex parts that can fail. If your machine is past the 5-year mark and dies, replacing it is almost always the smarter financial move.
Bottom Line: Get Your Brew Back Faster
You don’t need to be an electrician to fix a dead coffee maker. You just need a logical process. Here’s the short version of everything above.
- Test the outlet with another device before blaming the machine.
- Press the GFCI reset button and inspect the power cord for damage.
- Unplug the machine for 30 minutes to reset the internal thermal cutoff.
- Descale with vinegar if you suspect mineral buildup from hard water.
- Use a multimeter to test the thermal fuse and thermostat for continuity.
- Replace cheap parts (under $20) if the machine is less than 3 years old.
- Replace the whole unit if it’s older than 5 years or the heating element is dead.
Most of these fixes cost nothing and take less than an hour. You’ll either save a machine or confidently know it’s time to shop for a new one. And if you do end up replacing it, a simple 4-cup model with a pause-and-serve feature will get you back to your morning routine without any fuss.
Products related to this article
Sponsored / affiliate links. As an Amazon Associate I earn from qualifying purchases. I may earn additional commission from eligible campaigns.
 Belly Moka Coffee Maker Stovetop Espresso Maker 9 Cup Aluminum Moka Pot Percolator 15oz 450ml Easy Brewing for Electric Ceramic Stoves Home Camping Italian Cuban Café Classic Black
 Belly Moka Coffee Maker Stovetop Espresso Maker 6 Cup Aluminum Moka Pot Percolator 10oz 300ml Easy Brewing for Electric Ceramic Stoves Home Camping Italian Cuban Café Classic Silver
 HomeBeyond Espresso Coffee Maker 12 Cups, Classic Stovetop Espresso Maker, 600ml / 20oz Coffeemaker for Gas & Ceramic Stovetops (Silver)