You pull a shot, and it sprays everywhere. The crema is paper-thin. The espresso tastes sour one day and burnt the next. You’ve adjusted the grind, checked the water temperature, and cleaned the machine—but the problem keeps coming back. Chances are, the issue isn’t your machine. It’s your tamping.
Most beginners don’t realize that tamping is the least forgiving step in espresso prep. A three-degree tilt, a rushed motion, or a basket that’s slightly too small can ruin an otherwise perfect dose. The good news? Every tamping mistake leaves physical evidence in your spent puck. Once you learn to read that evidence, you can fix your technique permanently.

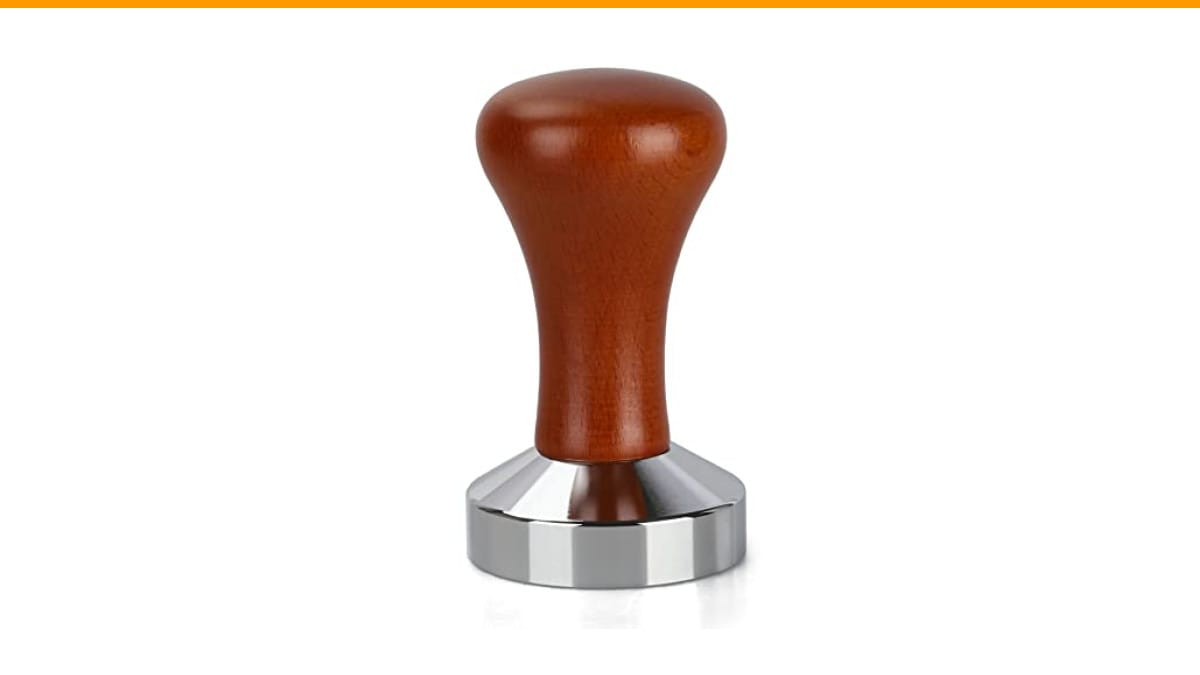
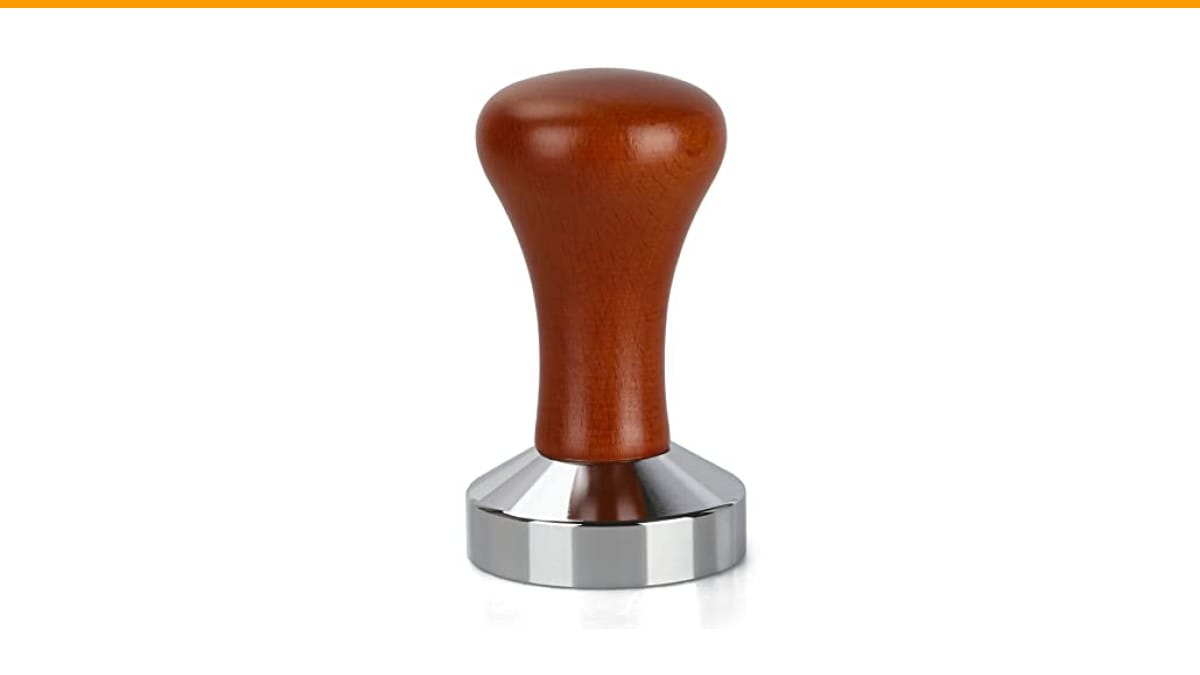
WYLOSUA
51mm Espresso Tamper-Premium Barista Coffee Tamper Coffee…
- THE DIAMETER OF THIS TAMPER IS 51MM - please check that this will fit your filter basket before purchasing.Fits all 51mm Commercia…
- UNIQUE DESIGN - The tamper has an exquisite appearance, Stainless steel design, the handles were ergonomically designed to ensure…
- PROFESSIONAL HANDMADE - Due to the high quality of the steel espresso control, the tamper has an ideal size and weight, because of…
As an Amazon Associate I earn from qualifying purchases.
This article walks through the five most common espresso tamper mistakes beginners make, how to diagnose each one by looking at your spent puck, and a simple ritual to build consistency. You’ll also learn when your tamper—not your technique—is the real problem.
If you’re using a 51mm portafilter (common on many home machines like Delonghi and Breville), a properly sized tamper makes a world of difference. The Check Price on Amazon has a stainless steel flat base and a solid wood handle. It’s designed to distribute pressure evenly, which eliminates two of the biggest beginner mistakes: tilted tamping and uneven pressure. It’s not a magic wand, but it’s a solid tool that removes variables.
Why Tamping Mistakes Ruin Your Shot (More Than You Think)
Tamping does two jobs. It compresses the coffee into a uniform puck, and it creates a flat surface for water to hit evenly. When either job fails, water finds the path of least resistance. That causes channeling—where water blasts through one weak spot instead of saturating all the grounds.
Channeling is the root of most bad espresso. It leads to under-extraction (sour, thin shots) or over-extraction (bitter, harsh shots) depending on where the water goes. And here’s the kicker: you can’t see channeling while it happens. You only see the result in the cup and the spent puck.
Beginners often blame the grinder or the beans when the real culprit is a tilted tamper or a rushed distribution. The grinder might be fine. The beans might be great. The tamp is where everything falls apart.
Let’s look at each mistake in detail, starting with the one that happens before you even touch the tamper.
Mistake #1: Skipping Distribution (Tamping Uneven Grounds)
You dump ground coffee into the basket, pick up the tamper, and press. That’s the most common beginner move—and it’s wrong.
Freshly ground coffee doesn’t sit level in the basket. It forms a mound in the center and gaps around the edges. If you tamp that mound, you create a puck that’s denser in the middle and looser at the rim. Water will rush through the loose edges, leaving the center under-extracted.
The fix is distribution: leveling the grounds before tamping. You don’t need a fancy tool. A toothpick, a paperclip, or a thin needle works. Stir the grounds in the basket to break up clumps and create a flat, even surface. This is called the WDT method (Weiss Distribution Technique), and it’s the single biggest upgrade you can make for under $1.
The WDT tool hack for beginners
Take a wine cork and push three or four thin needles through it. Use that to stir the grounds in a circular motion, then tap the basket gently to settle them. It takes ten seconds and makes a noticeable difference in extraction.
If you’re using a 51mm basket, distribution matters even more because the smaller diameter makes the mound more pronounced. The WDT hack works regardless of tamper size.
Once the grounds are level, you can tamp confidently. But level grounds don’t help if your tamper hits at an angle.
Mistake #2: The Tilted Tamper (And How to Check Your Wrist Angle)
You think you’re tamping straight, but your wrist naturally angles slightly. It’s not intentional—it’s just how the human hand works when applying downward force.
A tilted tamp means one side of the puck is denser than the other. Water will favor the loose side, causing uneven extraction. The shot will taste sour and bitter at the same time, which is confusing for beginners.
How do you check? Look at the puck after you tamp, before you lock the portafilter. If one side is lower than the other, you tilted. You can also feel it: a straight tamp should press evenly, with no wobble.
The fix is to use your other hand to guide the tamper. Place your index and middle fingers on the rim of the basket, then press with your palm. That gives you a physical reference point for levelness. You can also buy a tamper with a leveling ring (some models include one), but the finger-guide method works.
If your wrist still tilts, practice in front of a mirror. Tamp, check, re-tamp. It takes a few days to build muscle memory.
Now, about pressure—there’s a lot of misinformation out there.
Mistake #3: Obsessing Over Pressure (Consistency > Force)
You’ve heard the 30-pounds-of-pressure rule. So you push down as hard as you can, thinking harder equals better espresso. That’s not how it works.
Once coffee grounds are compressed to a certain point, additional pressure does nothing. The puck doesn’t get denser; it just resists. The real variable is consistency—tamping with the same pressure every single time.
Think about it: if you tamp at 15 pounds one day and 40 pounds the next, your extraction time will change. The grinder setting that worked yesterday won’t work today. But if you tamp at roughly 25 pounds every time, you can dial in your grind and know it’ll stay consistent.
The 30-pound number is a myth in the sense that it’s not a magic threshold. Some baristas tamp at 20 pounds, some at 40. The key is repetition.
So stop pushing so hard. Aim for a firm, even press that takes about two seconds. You don’t need a calibrated tamper unless you struggle with consistency—and even then, a simple routine works better than a gadget.
Mistake #4: Twisting the Tamper (The ‘Polish’ Myth)
You finish your press and give the tamper a twist, thinking it polishes the puck. That’s a habit many beginners pick up from watching old videos. It doesn’t help—it hurts.
Twisting the tamper after the press creates a shear force that can crack the puck’s surface. Those cracks become channels for water. The result is a shot that sprays or runs too fast.
If you want a smooth surface, tamp straight down and lift the tamper without twisting. That’s it. No polish, no spin.
Some tamper bases have a curved edge specifically to avoid this problem—they let you press without catching the puck. But the technique is more important than the base design.
Now, let’s talk about the tool itself.
Mistake #5: Ignoring Tamper Size and Basket Fit
You bought a tamper that’s too small for your basket. It fits, but there’s a small gap around the edges. That gap is a problem.
When the tamper is smaller than the basket, the coffee at the edges doesn’t get compressed. You end up with a puck that’s dense in the center and loose at the rim—same problem as a tilted tamp, but caused by the tool, not your hand.
Standard sizes are 58mm for most commercial machines, 54mm for Breville, and 51mm for Delonghi and some others. If you’re not sure, measure the inside diameter of your basket with a ruler. A tamper that’s 1mm too small is noticeable. A tamper that’s 2mm too small is a disaster.
The WYLOSUA 51mm tamper is designed specifically for 51mm baskets, so it fills the basket edge to edge. That’s the kind of fit you need for even pressure distribution. If you have a 54mm or 58mm basket, look for a tamper that matches that size exactly.
Also check the tamper base shape. Flat bases are standard and fine. Convex bases (curved) are a preference for some, but they’re harder to use correctly. Stick with flat until you understand why you’d want curved.
Now that you know the mistakes, let’s learn how to read the evidence.
How to Read Your Spent Puck to Diagnose Errors
After you pull a shot, knock the puck out and look at it. It tells you exactly what went wrong.
Cracks on the surface: You twisted the tamper or tamped too hard. The cracks are channels that formed during extraction.
Soft spots or muddiness: The puck is wet and mushy in one area. That’s where water channeled. You likely have a tilted tamp or uneven distribution.
Puck sticks to the tamper: You’re not tamping hard enough, or the grounds are too dry. A firm, consistent press should release cleanly.
One side darker than the other: That side extracted more. Uneven tamp again.
Puck is loose and falls apart: Under-tamping. You didn’t compress enough, so water rushed through.
Here’s a quick reference table for symptoms and their likely tamping cause:
| Symptom in Cup | Likely Tamping Mistake | What to Fix |
|---|---|---|
| Sour, thin shot | Under-tamping (too little pressure) | Tamp firmer, but consistently |
| Bitter, harsh shot | Over-tamping or channeling from a twist | Reduce pressure, stop twisting |
| Spraying from the portafilter | Channeling from a tilted tamper | Level your wrist, use the finger-guide method |
| Shot runs too fast (gushing) | Uneven distribution or tamper too small | Use WDT, check tamper size |
| Shot runs too slow (dripping) | Over-tamping or too fine a grind | Reduce pressure, adjust grind |
That table is a starting point. The puck tells the real story, so make it a habit to inspect it every time.
Quick Fix: The 5-Step Tamping Ritual for Beginners
Here’s a simple routine to eliminate most tamping mistakes. Do it the same way every shot, and you’ll build consistency fast.
- Distribute: Stir the grounds with a needle or toothpick to break clumps, then tap the basket to level.
- Place the tamper: Rest it on the grounds, making sure it’s flat. Use your other hand’s fingers on the basket rim as a guide.
- Press straight down: Apply firm, even pressure for about 2 seconds. Don’t push as hard as you can—aim for a consistent press.
- Lift without twisting: Pull the tamper straight up. No spin, no polish.
- Check the puck: Look for evenness. If it’s tilted, re-tamp (you can re-tamp once, but it’s better to start over).
That’s it. Five steps, ten seconds. The ritual matters more than any tool.
If you’re still getting bad shots after a week of this, the problem might be your grinder, not your tamp. Check out our guide on why espresso tastes burnt for grinder-related issues. And if your machine is making loud noises, that’s a separate problem—see our troubleshooting guide.
FAQ: Tamping Pressure, Tools, and Upgrades
How much pressure should I use when tamping?
Aim for about 20-30 pounds of force, but the exact number doesn’t matter. What matters is using the same pressure every time. You don’t need to measure it—just be consistent.
Do I need a calibrated tamper?
No. Calibrated tampers click at a set pressure, which is nice, but they’re expensive and don’t solve the consistency problem if your distribution is bad. A regular tamper with a good routine works just as well.
Why does my espresso spray when I pull the shot?
Spraying is almost always channeling. Water is forcing through a weak spot in the puck. Check your distribution and tamp levelness first. If those are fine, your grind might be too coarse.
Can I re-tamp after the first press?
Yes, but it’s not ideal. Re-tamping can create layers in the puck that cause channeling. Better to do it right the first time. If you notice a tilt, knock the puck out and start over.
When should I upgrade my tamper?
If your tamper is the wrong size for your basket, upgrade immediately. If it’s the right size but feels flimsy (plastic or cheap metal), a heavier stainless steel tamper like the WYLOSUA gives you better feedback and a more even press. But if your technique is solid and your shots are good, don’t fix what isn’t broken.
Your Next Steps
- Start using the WDT method with a toothpick or homemade tool—it’s free and effective.
- Check your tamper size against your basket’s inner diameter. Measure it.
- Stop twisting the tamper after pressing. Lift straight up.
- Build a 5-step ritual and repeat it every shot.
- Inspect your spent puck after every shot. It’s your feedback loop.
- If your shots still miss, look at your grinder, not your tamper.
Tamping isn’t hard. It just requires attention. Fix these mistakes, and you’ll pull shots you’re actually proud of.
Products related to this article
Sponsored / affiliate links. As an Amazon Associate I earn from qualifying purchases. I may earn additional commission from eligible campaigns.
 Coffee Espresso Machine Handle Replacement Parts, Cafe Bracket Handle for Lidl Silvercrest CM4621 CM4218 KF5002 KF500S Barista (for 51mm Portafilter Basket - Not included)
 Linnkyfloa Coffee Espresso Maker Handle Replacement for Stovetop Moka Pot or Percolator, Black Plastic for Spare Part Compatible with Italian(9-12 Cup)
 Wrenmor Replacement Handle For Coffee Espresso Moka Stove Pot, Black Plastic Accessory Compatible With 1/3/6/9/12 Cup Sizes For Easy Installation And Long-Lasting Use(1 Cup)