You wake up, hit brew, and pour a cup that tastes… flat. Or bitter. Or vaguely like the inside of an old sponge. You blame the beans. You blame the water. Most of the time, the real culprit is hiding inside the machine: a layer of mineral scale and oxidized coffee oil that builds up quietly until it ruins everything.
I’ve tested dozens of drip machines over the years, and I can tell you this: the difference between a brewer that lasts five years and one that dies at eighteen months is almost always maintenance. Not brand. Not price. Not fancy features. The good news is that cleaning a drip coffee maker takes about ten minutes if you do it on a schedule. This guide gives you that schedule, explains why water hardness changes everything, and walks you through the exact steps to fix a machine that already tastes off.

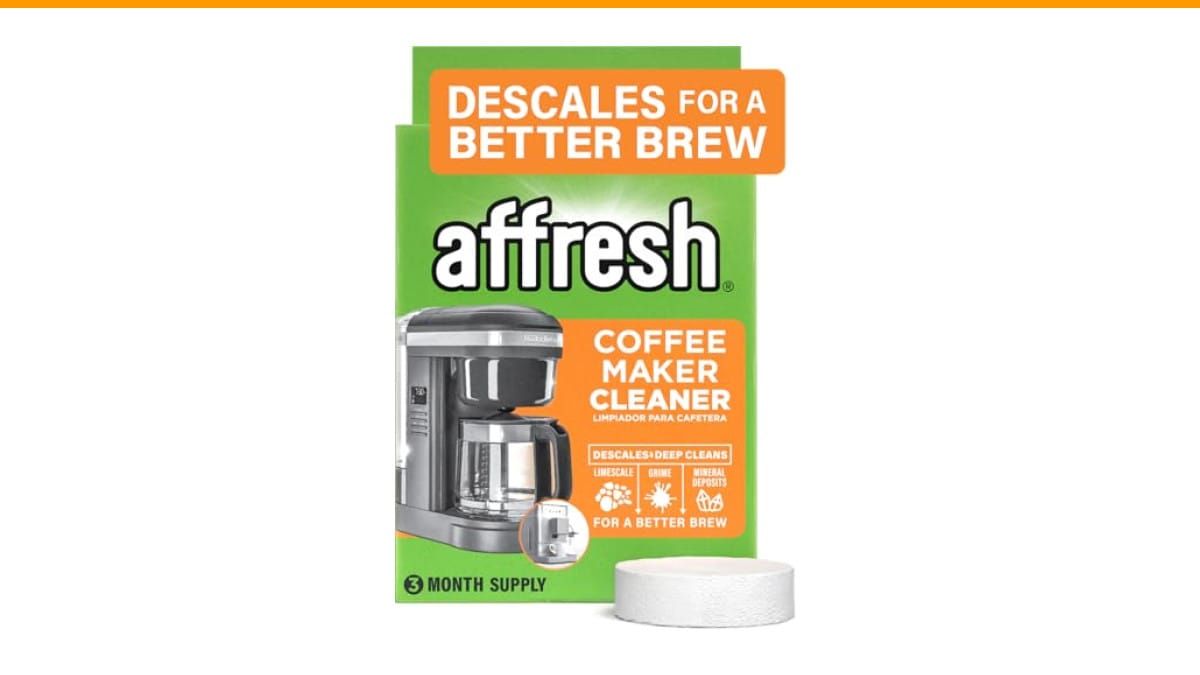
Affresh
Affresh Coffee Maker Cleaner, Unscented, Descales &…
- Descales your coffee maker, fighting hard water deposits and mineral buildup for a better tasting brew
- Deep cleans without the odor of vinegar
- Compatible with multi-cup and single-serve coffee makers
As an Amazon Associate I earn from qualifying purchases.
You’ll walk away knowing exactly what to do daily, weekly, and monthly—and what happens if you skip it.
If you hate the smell of vinegar (I do), a commercial descaler like the Affresh Coffee Maker Cleaner does the job without stinking up your kitchen. It’s unscented, dissolves mineral buildup, and works in both single-serve and multi-cup machines. I keep a box in my pantry for the monthly deep clean.
The Short Answer: Your Cleaning Cheat Sheet
Here is the schedule I recommend after years of testing and repairing brewers. Print it. Stick it on your fridge.
| Frequency | What To Do | Time Needed |
|---|---|---|
| After every brew | Rinse the carafe and brew basket with hot water. Toss the old filter. | 1 minute |
| Daily | Wipe the hotplate and exterior. Empty the drip tray if you have one. | 2 minutes |
| Weekly | Wash the carafe and brew basket with dish soap and a soft sponge. Air dry fully. | 5 minutes |
| Monthly | Run a full descaling cycle with a commercial descaler or vinegar solution. | 30–45 minutes |
| Quarterly | Deep clean the internal water line and check the one-way valve (details below). | 15 minutes |
This is the baseline. If you have hard water or brew more than four cups a day, move the descaling cycle to every two weeks. More on that next.
Why Skipping Cleanings Ruins Your Coffee (and Your Machine)
Two enemies build up inside a drip brewer: scale and oil. Scale is the white or yellowish crust from calcium and magnesium in hard water. It coats the heating element and the internal water tube. That coating acts like insulation, so the machine has to work harder and hotter to heat the same amount of water. The result is burnt-tasting coffee and a shorter lifespan for the brewer.
Coffee oil is the second problem. Every bean releases oils during brewing. Those oils stick to the brew basket, the carafe, and the internal lines. Once they turn rancid, they add a bitter, musty flavor to every fresh pot. You cannot rinse this away with water alone—it requires soap and a proper cleaning cycle.
There’s also the bacterial growth angle. A damp, dark brew basket is a perfect breeding ground for mold and bacteria. If you’ve ever seen pink or black specks in your water reservoir, that’s biofilm. You’re brewing coffee through it. The fix isn’t a new machine; it’s a regular cleaning routine.
In my experience, most machines that stop brewing or start leaking are victims of scale, not mechanical failure. The pump gets clogged, the valve sticks, and the water backs up. Cleaning won’t fix a machine that’s already broken, but it will prevent most of these failures from happening in the first place.
How Often to Clean Based on Your Water Hardness
This is the variable most guides ignore. Your water supply determines how fast scale builds up, and that should drive your descaling schedule.
If you’re on municipal water that’s soft or moderately hard, monthly descaling is fine. If you’re on well water or live in a region with hard water (the Midwest and Southwest are notorious), you should descale every two weeks. You can check your water hardness with a simple test strip from a hardware store—it costs about five dollars and takes thirty seconds.
Here’s how to read the results:
- Soft water (0–60 ppm): Descaling every 6–8 weeks is plenty.
- Moderate hardness (60–120 ppm): Stick with the monthly schedule.
- Hard water (120–180 ppm): Descale every 2–3 weeks.
- Very hard water (180+ ppm): Descale weekly, or switch to filtered water for brewing.
Using filtered water reduces scale buildup significantly. I use a simple pitcher filter for my brewing water, and my machine’s heating element stays clean for months. It’s not perfect—filtered water still contains some minerals—but it stretches the time between descaling cycles.
One honest caveat: descaling more often than necessary isn’t harmful, but it does waste product and time. Match the frequency to your actual water, not to a generic calendar.
Daily & Weekly Maintenance (The 2-Minute Rule)
The daily routine is simple: after you finish your last cup, rinse the carafe and brew basket with hot water. That’s it. Two minutes. This prevents coffee oils from drying onto the surfaces, which makes the weekly wash much easier.
Once a week, do a proper wash. Use warm, soapy water and a soft sponge. Avoid abrasive scrubbers—they scratch the plastic and create tiny grooves where bacteria hide. Rinse everything thoroughly and let it air dry completely before reassembling. Moisture trapped in the brew basket is what causes that musty smell.
Don’t forget the drip tray. If your machine has one, it collects overflow and stray drips. Pull it out, dump it, and wipe it with a damp cloth. Coffee residue in the drip tray attracts fruit flies and grows mold faster than you’d think.
For the hotplate, wait until the machine is cool, then wipe it with a damp cloth. If you have a glass carafe, check the heating element underneath—spilled coffee burns onto it and creates a terrible smell that transfers to your next brew.
One detail I learned the hard way: never put the carafe or brew basket in the dishwasher unless the manufacturer says it’s safe. The high heat and harsh detergents can warp plastic parts and dull the glass.
The Monthly Deep Clean: Step-by-Step Descaling
This is the core of the maintenance schedule. Descaling removes the mineral scale that hot water alone cannot touch. Here’s the exact process I use on every machine I test:
- Empty the machine. Remove the filter and any leftover coffee. Rinse the carafe.
- Fill the reservoir with a descaling solution. For a commercial descaler like Affresh, follow the package directions. For vinegar, mix one part white vinegar with two parts water. Use enough to fill the reservoir to its max line.
- Start a brew cycle with no coffee grounds. Let half the solution run through, then turn the machine off. Let it sit for 30 minutes. This soak is what dissolves the scale inside the heating element.
- Restart the brew cycle and let the rest of the solution run through.
- Run two full cycles with fresh, clean water to rinse out all remaining solution. If you can still smell vinegar, run a third rinse cycle.
- Wipe down the exterior and the carafe with a damp cloth.
Pro tip: do this before bed. The machine sits overnight, and any lingering vinegar smell dissipates by morning.
If your machine has a dedicated cleaning cycle button (many newer models do), use that instead of the manual process. It automates the soak and rinse steps.
Vinegar vs. Commercial Descaler: Pros, Cons, and Warranty Risks
The vinegar debate is a tired one, but it deserves a straight answer. Vinegar works. It’s cheap, available everywhere, and dissolves scale effectively. The downsides are the smell, the taste it can leave behind if you don’t rinse thoroughly, and the fact that it can damage rubber seals and gaskets over time. Acetic acid is harsher on plastics than citric acid or sulfamic acid, which are the active ingredients in most commercial descalers.
Commercial descalers like the Affresh tablets are formulated to be gentle on machine parts. They’re unscented, so no lingering vinegar odor, and they dissolve faster than a liquid solution. The cost is higher per use—roughly a dollar per cleaning cycle versus pennies for vinegar. But consider this: if a vinegar cleaning voids your warranty or damages a seal, the savings disappear quickly.
Check your manufacturer’s instructions. Many warranties explicitly state that using vinegar can void coverage. Some brands require a specific descaler. I’ve seen warranties denied for exactly this reason. If your machine is still under warranty, use the recommended product. It’s not worth risking a $150 brewer to save a dollar.
How to Clean a Glass Carafe vs. a Thermal Carafe
These two carafe types require different care, and using the wrong method will ruin them.
Glass carafes are straightforward. Wash with warm, soapy water and a soft sponge. For stubborn coffee stains, fill the carafe with warm water and drop in a denture tablet or a teaspoon of baking soda. Let it sit for 15 minutes, then scrub gently. Avoid abrasive pads—they scratch the glass and create spots where coffee residue clings.
Thermal carafes (the insulated stainless steel ones) are trickier. You cannot put them in the dishwasher—the heat destroys the vacuum seal. You also shouldn’t use harsh chemicals or abrasive scrubbers, as they scratch the interior lining. The best method is to fill the carafe with warm water and a drop of mild dish soap, put the lid on, and shake vigorously. Rinse thoroughly and air dry with the lid off.
For stubborn coffee oil in a thermal carafe, use a mixture of warm water and a teaspoon of baking soda. Let it soak for 30 minutes, then shake and rinse. Never use vinegar in a thermal carafe—the acid can corrode the stainless steel over time.
One thing I see constantly: people put a thermal carafe on a hotplate to keep coffee warm. That’s a mistake. The heat damages the vacuum seal and ruins the insulation. Use the carafe’s own lid to keep coffee hot, not the machine’s hotplate.
The ‘Hidden’ Parts You Forgot to Clean (Valves and Internal Lines)
Most cleaning guides stop at the carafe and brew basket. They ignore the parts you can’t see, which are often the source of the worst problems.
The one-way valve is a small rubber or plastic piece located where the water line enters the brew basket. It prevents water from flowing back into the reservoir. Over time, coffee oils and mineral scale can clog it. A clogged valve causes slow brewing, sputtering, or water backing up into the filter basket.
To clean it: unplug the machine, remove the brew basket, and locate the valve (it’s usually a small nub or opening at the top of the water tube). Use a cotton swab dipped in white vinegar to gently wipe the opening. Don’t push anything inside—you could break the valve. If it’s severely clogged, you might need to replace the part entirely, but a monthly swab usually prevents that.
The internal water line is harder to reach, but you can flush it during the descaling process. The descaling solution travels through the line and dissolves scale along the way. If you want a deeper clean, run a cycle with just water and a tablespoon of citric acid powder, which is gentler than vinegar and leaves no smell.
Another overlooked spot is the water reservoir itself. If it’s removable, wash it with soap and water weekly. If it’s fixed, wipe the inside with a damp cloth. Check for any black or pink spots—that’s mold, and it means you’re not letting the machine dry out between uses.
Finally, the spray head. This is the small nozzle inside the top of the machine where water comes out. It has tiny holes that can clog with scale. Use a pin or paperclip to gently clear the holes during your monthly clean.
Troubleshooting: What Your Coffee is Trying to Tell You
Your machine gives you signals. Here’s how to read them:
- Bitter, burnt taste: Scale buildup on the heating element is overheating the water. Descale immediately.
- Metallic or sour taste: Rancid coffee oils in the brew basket and lines. Run a deep clean with a descaler, then wash all removable parts with soap.
- Slow brewing: A clogged one-way valve or a scale-blocked water line. Clean the valve and descale.
- Water pooling in the filter basket: The drain hole is blocked by coffee grounds or oil. Remove the brew basket and clean the hole with a pin.
- White or yellow crust on the hotplate: Hard water residue from spills. Wipe it off with a vinegar-dampened cloth.
- Machine shuts off mid-cycle: The heating element is overheating due to scale. This is a serious sign—descaling might fix it, but it could also mean the element is damaged.
If you’ve tried cleaning and the problem persists, it might be time to replace the machine. A brewer that’s been neglected for years often has permanent scale damage to the heating element, and no amount of cleaning will restore it.
Frequently Asked Questions
Can I use vinegar instead of a commercial descaler?
Yes, vinegar works for removing scale. Mix one part white vinegar with two parts water and run a brew cycle. The downside is the smell and the potential for vinegar to degrade rubber seals over time. If you use vinegar, always run at least two rinse cycles with fresh water afterward.
How do I know if my coffee maker needs descaling?
Signs include a slower brew time, a burnt or bitter taste, visible white scale in the reservoir, or the machine making louder noises than usual. If you brew daily with hard water and haven’t cleaned in a month, it needs descaling.
Will descaling fix a machine that’s already clogged?
Sometimes. If the clog is scale, a strong descaling solution will dissolve it. If the clog is a physical blockage (coffee grounds in the valve), you’ll need to clean the valve manually. If the machine won’t brew at all, it’s often a failed pump or heating element, which descaling won’t fix.
How often should I clean a single-serve coffee maker?
Single-serve machines like Keurig models need the same descaling frequency as drip machines—monthly for standard water, every two weeks for hard water. The removable parts (drip tray, water reservoir, pod holder) should be washed weekly.
Can I clean my coffee maker with lemon juice?
Lemon juice contains citric acid, which is an effective descaler. It works similarly to commercial products and leaves a milder smell than vinegar. Use a 50/50 mix of lemon juice and water. Rinse thoroughly afterward. It’s a decent option if you’re out of commercial cleaner, but it’s not as gentle on internal parts as a formulated descaler.
Final Verdict
Here’s what to remember from this guide:
- Rinse the carafe and brew basket after every brew—it takes one minute.
- Wash removable parts with soap and water weekly.
- Descale monthly if you have soft or moderate water; every two weeks if you have hard water.
- Use a commercial descaler if your machine is under warranty—vinegar can void it.
- Clean the one-way valve and spray head quarterly to prevent clogs.
- Never put a thermal carafe in the dishwasher or on a hotplate.
- If your coffee tastes bitter or metallic, clean the machine before blaming the beans.
The best cleaning schedule is the one you actually follow. Pick a day of the month—the first Saturday, your payday, whatever—and make it your descaling day. Set a reminder on your phone. Your coffee will taste better, and your machine will last years longer than it would otherwise.
Products related to this article
Sponsored / affiliate links. As an Amazon Associate I earn from qualifying purchases. I may earn additional commission from eligible campaigns.
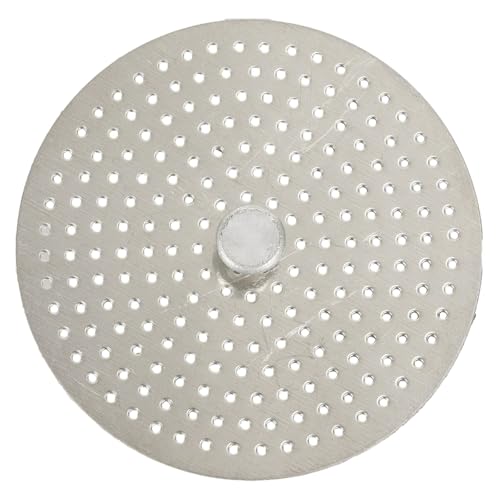 Stainless Steel Moka Pot Coffee Filter Disc for Espresso Brewing, Coffee Maker Replacement Filter Plate for Home Office Coffee Bar Cafe (FOR 4 Cups)
 HomeBeyond Espresso Coffee Maker 12 Cups, Classic Stovetop Espresso Maker, 600ml / 20oz Coffeemaker for Gas & Ceramic Stovetops (Silver)
 Belly Moka Coffee Maker Stovetop Espresso Maker 9 Cup Aluminum Moka Pot Percolator 15oz 450ml Easy Brewing for Electric Ceramic Stoves Home Camping Italian Cuban Café Classic Black