You drop your favorite insulated mug on the kitchen tile and hear that sickening crack. Or the lid slips and the slider snaps off. Or maybe you notice your coffee went cold in two hours instead of six. A broken insulated mug is annoying, but it’s not always the end of the road. Some problems you can fix in five minutes with a replacement part. Others need a bit more work. And a few are truly done.
In this guide, I’ll walk you through the most common failures on insulated mugs—lid damage, dented bodies, lost vacuum seal, and broken gaskets—and tell you exactly what to do for each. You’ll know when to repair, when to replace a part, and when to toss the whole thing. I’ve repaired dozens of mugs over the years, and I’ll share what actually works versus what’s a waste of time.

AICMEI
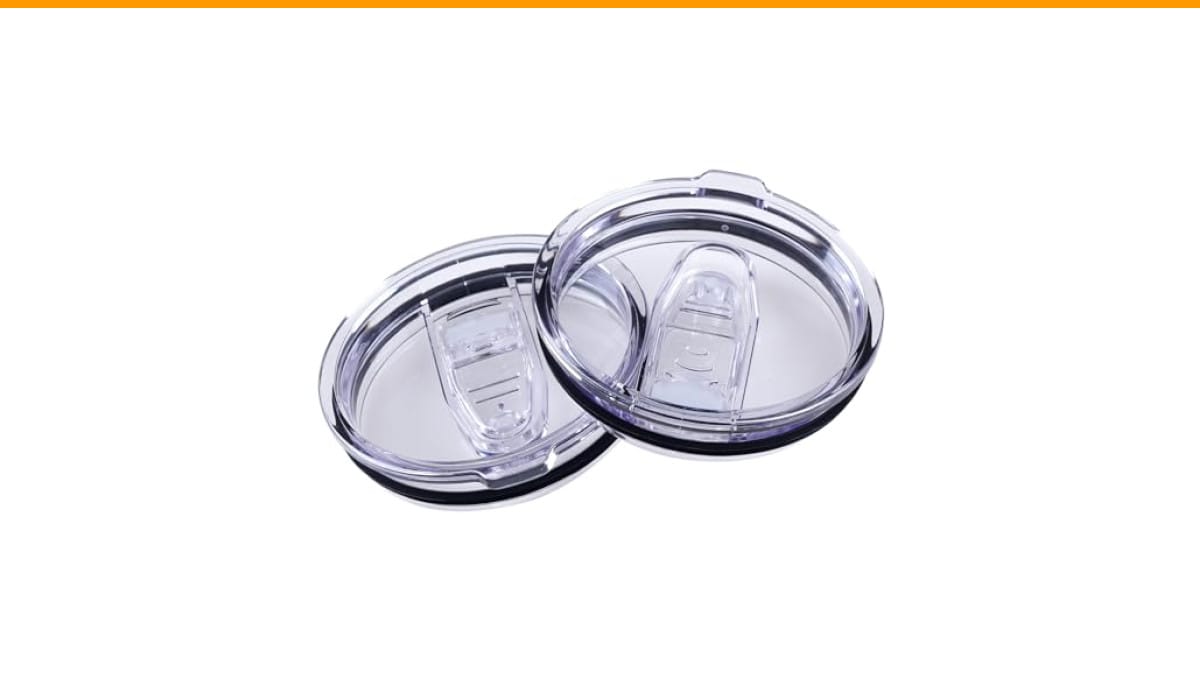
AICMEI 2 Replacement Lids for 20oz Stainless…
- Caution! The size of the lid has a top diameter of 8.6cm/3.4 inches and a bottom diameter of 8.2cm/3.23 inches, please understand…
- The LIDS are not universal. Please check whether the size of your old lid is the same as the size of the LIDS we sell before purch…
- SPLASH-PROOF:Our pack of 2 non-flip lids features a leak and spill proof design, the flat bottom lid is lined with a silicone gask…
As an Amazon Associate I earn from qualifying purchases.
If the problem is a cracked or missing lid, the easiest fix is often a direct replacement. The AICMEI replacement lid set fits 20 oz tumblers with a top diameter of 3.4 inches and a bottom diameter of 3.23 inches. It comes with two lids, each with a sliding closure and a silicone gasket. Before ordering, measure your old lid—these are not universal, and a wrong size will just be another broken part.
Diagnose the Problem First
Before you start fixing anything, figure out what’s actually broken. Not every issue is visible. A mug that used to keep coffee hot for six hours but now only lasts one hour has lost its vacuum seal—that’s not something you can patch. But a lid that leaks is usually a simple gasket swap.
Here’s a quick checklist to run through:
- Lid cracks or chips – Look for hairline fractures, especially around the drinking spout or the slider track. Cracks harbor bacteria and can worsen over time.
- Slider mechanism broken – The sliding piece might be stuck, snapped, or missing. This is a common failure point on many tumblers.
- Gasket worn out – The silicone ring around the lid edge or under the slider may be flattened, torn, or missing. This causes leaks.
- Dents or dings in the body – A dented mug might still hold temperature if the inner wall isn’t compromised, but deep dents can crush the vacuum layer.
- Mug sweats on the outside – Condensation on the exterior with cold drinks means the vacuum seal is broken.
- Hot liquid on the exterior – If the outside of the mug feels hot when filled with boiling water, the insulation is gone.
Once you know the problem, you can pick the right fix. Let’s go through each one.
Fix a Broken Lid: Repair or Replace
Lids are the most fragile part of any insulated mug. They get dropped, chewed by dogs, and slammed in car doors. The good news: most lid issues are fixable or replaceable without buying a new mug.
Repair the Slider Mechanism
If the slider is stuck, it might just have coffee residue or sugar buildup under it. Soak the lid in warm, soapy water for 15 minutes, then work the slider back and forth. Use an old toothbrush to scrub the track. That clears most jams.
If the slider is snapped or missing a hinge, you can’t easily glue it back. The plastic is under constant tension, and superglue won’t hold. You’ll need a replacement lid. Check if your mug brand sells spare lids. Many do, but they can be pricey. Generic replacements like the AICMEI 2-pack work well if the diameter matches your mug. Measure the top and bottom of your old lid with a caliper or ruler. The AICMEI fits 3.4-inch top, 3.23-inch bottom—that’s a common size for 20 oz tumblers.
Replace a Worn Gasket
The silicone gasket that creates the seal can wear out after months of dishwasher cycles and repeated opening. If you see a flat spot or a tear, the leak will only get worse. You can find replacement gaskets for popular brands like Yeti and Stanley. For generic mugs, you might need to buy a new lid.
One tip: always hand-wash the lid. The dishwasher’s heat and detergent degrade silicone faster than hand washing. That one habit can double the life of your gasket.
When to Just Buy a New Lid
If the lid has a crack, a missing piece, or a deformed seal surface, don’t bother repairing. Cracks can’t be sealed food-safe, and a deformed lid won’t seat properly no matter what you do. A new lid costs less than a new mug and restores full functionality. Look for a lid that matches your mug’s diameter, not the brand name. Many generic lids fit popular mugs if the measurements line up.
Fix a Dented or Dinged Body
Dents are cosmetic most of the time, but they can become structural. A small dent on the side of a stainless steel mug doesn’t hurt insulation. The vacuum layer is between the inner and outer walls, and a shallow dent won’t crush that gap. But a deep dent—one that leaves a noticeable crease—can compress the vacuum space and reduce insulation performance.
If the dent is shallow (less than 1/8 inch deep), you can often pop it out. Here’s a method that works for stainless steel mugs:
- Boil some water and pour it inside the mug. Let it sit for two minutes.
- Quickly dump the water and plunge the mug into a bowl of ice water.
- Repeat if needed. The rapid temperature change can make the metal flex and pop the dent back out.
That trick works for small, smooth dents. For creased or sharp dents, it won’t help. If the dent is near the bottom rim, it might affect the mug’s stability. Sand down any sharp edges with fine grit sandpaper to avoid cutting your hand.
If the dent has broken the vacuum seal, you’ll know. The mug will no longer keep drinks hot or cold, and it might sweat. That’s not fixable. The vacuum layer is sealed at the factory, and there’s no way to re-seal it at home. At that point, the mug is a glorified paper cup.
When the Vacuum Seal Fails
The vacuum seal is what makes an insulated mug insulated. It’s a space between two stainless steel walls with the air pumped out. When that seal breaks, heat transfers straight through the metal. Your coffee goes cold fast, and your iced drink sweats.
Can you fix a broken vacuum seal? No. Not at home. The seal is created during manufacturing with specialized equipment. There’s no DIY method to re-evacuate the air. I’ve seen people try to fill the gap with expanding foam or silicone, but that doesn’t restore insulation—it just adds mass. The thermal performance stays poor.
Your only option is to replace the mug. But before you do, check if it’s still under warranty. Many reputable brands offer a lifetime warranty on their vacuum-insulated products. If you bought it recently, contact the manufacturer. They might send a replacement for free.
Compare Your Options: Repair vs. Replace
Not sure whether to fix or toss? Here’s a breakdown of common problems and the best path forward.
| Problem | Repair Feasibility | Estimated Cost | Best Action |
|---|---|---|---|
| Dirty or stuck slider | Easy – clean with soapy water | $0 | Clean the lid |
| Worn gasket | Moderate – need replacement gasket | $3–$8 | Replace gasket |
| Cracked lid | Not repairable | $10–$20 for new lid | Buy a replacement lid |
| Broken slider hinge | Not repairable | $10–$20 for new lid | Buy a replacement lid |
| Shallow dent (cosmetic) | Possible – heat and cold method | $0 | Try to pop it out |
| Deep dent (structural) | Not repairable | $25–$40 for new mug | Replace the mug |
| Broken vacuum seal | Not repairable | $25–$40 for new mug | Replace the mug or use warranty |
That table covers the most common scenarios. If you’re not sure which category your mug falls into, test it. Fill it with boiling water, wait 30 minutes, and feel the exterior. If it’s warm to the touch, the insulation is gone.
Prevent Future Breakage
You can’t prevent every drop, but you can reduce the risk. Lids break when they hit hard surfaces, so avoid dropping the mug. That sounds obvious, but a silicone boot on the bottom can absorb impact and protect the rim. Many mugs come with a boot, or you can buy one separately for a few dollars.
Hand-washing the lid and gasket extends their life. The dishwasher’s heat and detergents break down silicone and plastic over time. If you must use the dishwasher, put the lid on the top rack and skip the heated dry cycle.
Don’t overtighten the lid. Screw-on lids can crack at the threads if you crank them down. Turn until snug, then stop.
Finally, check the lid regularly for wear. A small crack today is a big leak tomorrow. Catching it early means you only need a new lid, not a new mug.
Frequently Asked Questions
Can I use superglue to fix a cracked lid?
No. Superglue isn’t food-safe, and it won’t hold under the stress of opening and closing. The crack will likely reopen, and you’ll risk glue particles in your drink. Replace the lid instead.
Will a dent affect my mug’s insulation?
Only if the dent is deep enough to compress the vacuum layer. A shallow dent—less than 1/8 inch—is cosmetic. A deep crease can reduce insulation performance. Test the mug by filling it with hot water and feeling the exterior after 30 minutes.
My mug leaks from the lid. Is it the gasket or the lid itself?
Most leaks come from a worn or misaligned gasket. Remove the gasket, wash it, and re-seat it. If it’s flattened or torn, replace it. If the leak persists, the lid’s sealing surface is warped or cracked, and you need a new lid.
Can I fix a broken vacuum seal at home?
No. The vacuum is created during manufacturing with specialized equipment. There’s no DIY method to re-evacuate the air between the walls. Once the seal is broken, the mug loses its insulation permanently.
How do I know if my mug is still under warranty?
Check the brand’s website or the original product listing. Many premium brands offer a lifetime warranty on their vacuum-insulated mugs. You’ll typically need proof of purchase, so keep your order confirmation or receipt.
What to Do Next
Now you know what’s fixable and what’s not. Here’s a quick recap:
- Diagnose the problem before buying anything—clean the lid first if the slider is stuck.
- Replace worn gaskets and broken lids—measure your mug’s diameter to find a matching replacement.
- Try the heat-and-cold method for shallow dents; skip it for deep creases.
- If the vacuum seal is broken, the mug is done—check for warranty or buy a new one.
- Hand-wash lids and gaskets to extend their life.
- Don’t overtighten screw-on lids—cracks happen at the threads.
- Keep a spare lid on hand; they’re the first thing to break.
A broken insulated mug doesn’t have to end up in the trash. With a little diagnosis and the right replacement part, you can get years more use out of it. And if it’s truly beyond repair, at least you’ll know for sure before you spend money on a fix that won’t work.
Products related to this article
Sponsored / affiliate links. As an Amazon Associate I earn from qualifying purchases. I may earn additional commission from eligible campaigns.