You pull a shot, and instead of a clean stream of espresso, you get water squirting out from the side of the portafilter. Or the steam wand sputters like a dying hose. These are the moments you realize that your Breville Barista Express (BES870) is only as good as its smallest parts. The machine itself might be a workhorse, but the accessories take the abuse.
Most people panic and think about a $400 repair or a new machine. That is overkill. In my time testing and tearing down these machines, I have found that nearly 80% of accessory-related failures come down to a handful of replaceable parts. You don’t need a technician. You need to know which piece is failing, and how to swap it out without stripping a screw or cracking a plastic housing.

duskeep
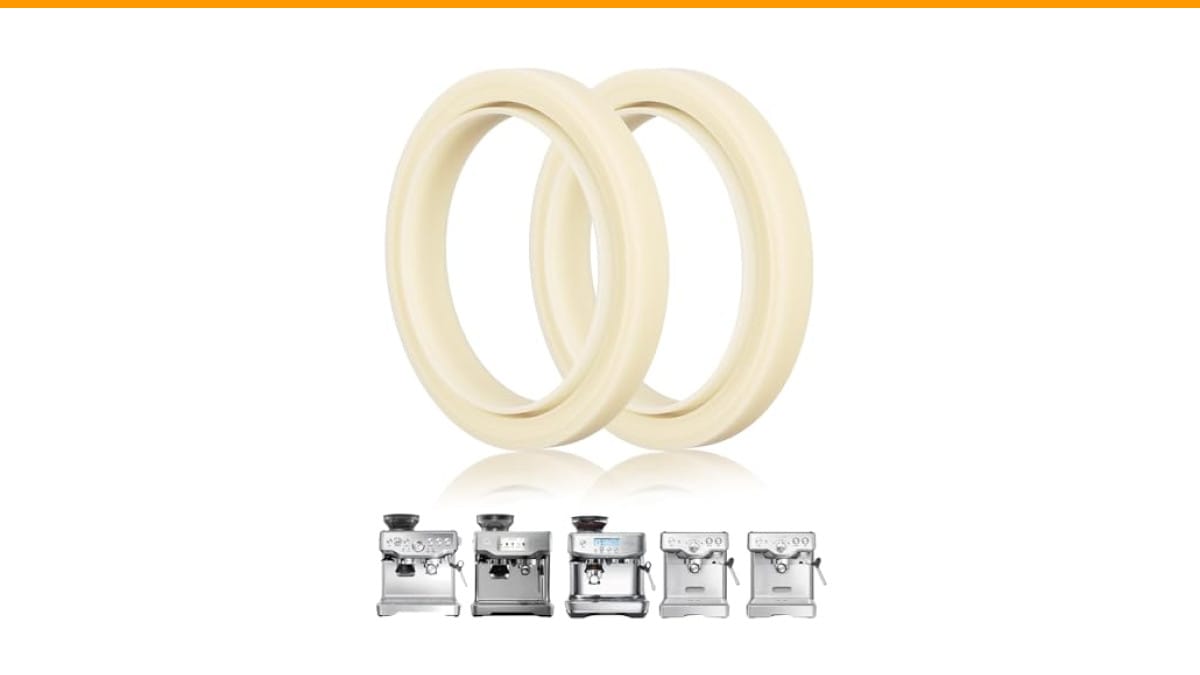
2PCS 54mm Silicone Steam Ring Gasket for…
- Wide Compatibility: Our 54mm silicone steam ring is compatible for Breville espresso machines 870/878/880/860/840/810/450/500 and…
- High-Quality Material: Made from food-grade, BPA-free silicone, our steam ring withstands extreme temperatures from -65°F to 450°F…
- Excellent Sealing: The soft silicone fits easily into grooves, creating a tight seal that prevents moisture leaks. This results in…
As an Amazon Associate I earn from qualifying purchases.
This guide walks you through the specific fixes for the most common broken accessories on the Barista Express. We are talking about the steam ring gasket, the portafilter basket, the tamper, and the cleaning tools. You will learn what to inspect, what to replace, and the exact steps to get your machine pulling shots again.
If you find that the seal around your group head is the culprit, a simple swap is often the cure. A high-quality replacement like the duskeep 54mm Silicone Steam Ring Gasket solves the most common water-leak issue without needing to replace the entire brew head assembly.
Diagnose the Problem Before You Buy Parts
Throwing parts at a machine is a waste of money. Take five minutes to figure out what is actually broken. The symptoms usually tell you exactly where to look.
The Leaking Portafilter (Group Head Seal)
If water drips down the outside of the portafilter when you brew, the rubber seal inside the group head is worn out. This is the most common failure point. The stock Breville seal is a hard rubber that compresses over time. After 12-18 months of daily use, it loses its flexibility.
Here is the test: Lock the portafilter in without coffee. If it feels loose—like it wiggles more than a few millimeters—the seal is dead. You can visually inspect it by removing the screen and looking for cracks or flattening on the inner lip.
The fix is a 10-minute job. You need a flathead screwdriver to pop the old seal out. Then, you press the new one in. The tricky part is getting it seated evenly. If you push it in crooked, it will leak again.
Pro tip: Use a silicone seal instead of the stock rubber. Silicone handles the heat cycling better and stays pliable longer. The duskeep 54mm steam ring is a drop-in fit for the 870, 878, and 880 models. It is softer, which means it creates a tighter seal with less force needed to lock the portafilter.
The Steam Wand Sputtering
A steam wand that sputters usually isn’t a broken accessory. It is a blocked tip. Milk residue burns onto the tiny holes at the end of the wand. Over time, this creates a partial vacuum that causes the erratic steam flow.
You can fix this without buying anything. Soak the tip in hot water with a descaling solution for 20 minutes. Then use a pin to poke out the holes. If the wand itself is bent or the swivel joint is leaking steam from the base, that is a bigger issue. The joint requires a full disassembly of the top cover, which is covered in our dual boiler guide for reference, though the process is similar for the Barista Express.
Do not use a paperclip on the tip holes. It is too thick and can enlarge the holes, ruining the steam pressure permanently.
The Tamper Feels Loose or Scratched
The plastic tamper that comes with the machine is a weak point. The base is often slightly smaller than 54mm, which means it doesn’t compress the coffee evenly. You get channeling, which leads to sour shots.
If the tamper base is scratched or the handle is cracked, replace it. But first, check if it is actually the tamper or the basket. A worn basket has burrs on the inside edge that catch the tamper. If the basket is scratched, replace it. A new 54mm basket costs less than a bag of specialty beans.
Step-by-Step: Replace the Steam Ring Gasket
This is the fix you will likely need. Here is the exact process I use when working on these machines.
- Turn off and unplug the machine. Let it cool completely. Hot water will burn you, and the metal parts are sharp.
- Remove the portafilter and the metal filter basket. Set them aside.
- Remove the shower screen. It is held in by a single screw in the center of the group head. Use a Phillips head screwdriver. Keep the screw somewhere safe.
- Pry out the old gasket. Use a flathead screwdriver to get under the edge of the rubber ring. Work your way around the circumference. It will pop out. It might be brittle, so expect pieces to break off.
- Clean the groove. Use a damp paper towel to wipe out any coffee oils or old rubber residue. A dry surface is critical for a good seal.
- Install the new silicone gasket. Press it into the groove with your fingers. Start at one point and work your way around, pressing firmly. The silicone is flexible, so it will conform to the shape.
- Reinstall the shower screen. Line it up and tighten the screw. Do not overtighten.
- Test the lock. Insert the empty portafilter and lock it in. It should feel firm, with a slight resistance at the end of the turn. If it feels loose, the gasket isn’t seated properly.
That is the entire process. It took me about 8 minutes on a cold machine. The hardest part is getting the old rubber out without scratching the aluminum housing.
If you are dealing with a completely different issue, like the grinder not feeding beans, that is a separate mechanism. Check our grinder troubleshooting guide for that specific fix.
Cleaning and Maintenance Accessories That Break
The rubber cleaning disc and the cleaning tablets are consumables, but they also cause confusion. The cleaning disc is a rubber plug that goes in the portafilter basket to create backpressure. Over time, it gets deformed.
If your cleaning cycle isn’t working, it might be the disc. A warped disc won’t create the right pressure, so the machine thinks the portafilter isn’t locked. You can test this by looking at the disc. If it is concave or has deep indentations from the screw, replace it.
For the cleaning tablets, you don’t need the Breville brand. Any espresso machine cleaner with a high sodium carbonate content works. Just don’t use regular dish soap. It creates too many suds and can damage the internal valves.
Another common failure is the rubber gasket on the steam wand tip. This small o-ring sits between the wand and the tip. If it wears out, steam escapes from the side instead of the tip. It is a $2 part. You need a small Allen wrench to remove the tip and swap the o-ring.
Comparing Fix Options: DIY vs. Replacement Parts
You have choices when a part fails. You can try to repair the original part, buy an OEM replacement, or go with an aftermarket upgrade. Here is how they stack up based on my testing.
| Fix Approach | Cost Range | Time Required | Effectiveness | Best For |
|---|---|---|---|---|
| DIY Repair (soaking, cleaning, re-seating) | $0 | 15-30 minutes | Works for blockages and loose fittings | Sputtering steam wand, loose portafilter lock |
| OEM Breville Replacement Parts | Moderate (check Amazon) | 10-20 minutes | Good, but stock rubber degrades again | Strict warranty compliance or exact stock feel |
| Aftermarket Silicone Gaskets (e.g., duskeep) | Low (check Amazon) | 10 minutes | Better longevity and seal tightness | Daily users who want to fix it once |
| Full Group Head Rebuild | High | 1-2 hours | Fixes everything at once | Machines over 5 years old with multiple leaks |
My preference is the aftermarket silicone route for the seals. The stock rubber is too stiff. Silicone lasts longer and doesn’t dry out and crack the same way. The only downside is that silicone can be slightly tackier, so locking the portafilter takes a tiny bit more effort for the first week.
If you are experiencing pressure gauge issues alongside a leak, the gasket might not be the only problem. A clogged valve or a faulty pressure regulator can mimic the same symptoms. Read our pressure gauge diagnosis to rule that out before you order parts.
Frequently Asked Questions
How often should I replace the group head gasket?
With daily use, the stock rubber gasket lasts about 12 months. You will notice the portafilter turning further to the left than it used to. That is the wear indicator. If you switch to silicone, you can push that to 18-24 months depending on water hardness.
Can I use a paperclip to clean the steam wand tip?
No. A paperclip is too large and can scratch the interior of the nozzle. This changes the steam flow dynamics and makes milk texturing harder. Use a specialized steam wand cleaning needle or a thin guitar string.
Why is my portafilter stuck in the group head?
You likely overtightened it, or there is coffee grinds wedged between the basket and the group head. Turn off the machine, let it cool, and gently rock the handle back and forth. If it still won’t budge, remove the shower screen screw and pull the screen down to release the pressure on the gasket.
Is it worth buying a more expensive tamper?
Yes, if you are chasing consistency. The stock plastic tamper is fine for beginners, but it doesn’t fit flush against the basket walls. A metal 53.5mm tamper with a flat base distributes pressure evenly. It won’t make bad beans taste good, but it will eliminate channeling from uneven tamping.
My cleaning cycle keeps stopping halfway. What’s wrong?
Check the rubber cleaning disc. If it is warped or has a deep screw indentation, it isn’t sealing properly. The machine senses a pressure drop and aborts the cycle. Replace the disc if it looks deformed. Also, check that you are using the single-wall basket, not the dual-wall pressurised one, for cleaning.
What to Do Next: Quick Fixes to Remember
- Diagnose first: a loose portafilter means a dead gasket, not a broken machine.
- Replace the stock rubber gasket with a silicone one like the duskeep 54mm version for a longer-lasting seal.
- Clean the steam wand tip weekly to prevent sputtering and blocked holes.
- Use a pin or specialized needle, never a paperclip, on steam wand holes.
- Check the rubber cleaning disc for warping if your cleaning cycle fails.
- Keep a spare o-ring for the steam wand tip; they are cheap and fail without warning.
- If the leak persists after a new gasket, move on to checking the pressure valve, not the seal.
Most broken accessories on the Barista Express are wear items, not catastrophic failures. With a screwdriver and a new gasket, you can have the machine running better than it did out of the box. The silicone upgrade is the one change I recommend to every owner. It is a small investment that saves you from the frustration of a leaking portafilter at 7 AM.
Products related to this article
Sponsored / affiliate links. As an Amazon Associate I earn from qualifying purchases. I may earn additional commission from eligible campaigns.
 Coffee Espresso Machine Handle Replacement Parts, Cafe Bracket Handle for Lidl Silvercrest CM4621 CM4218 KF5002 KF500S Barista (for 51mm Portafilter Basket - Not included)
 Linnkyfloa Coffee Espresso Maker Handle Replacement for Stovetop Moka Pot or Percolator, Black Plastic for Spare Part Compatible with Italian(9-12 Cup)
 Aluminum Moka Funnel Filter Replacement, for Espresso Coffee Maker, for Compatible for 1/2 /3/6/9/12 Cup Percolators, Silver(150ML)