You’re three minutes into your morning routine, and the grinder just stops. The handle spins free, or worse, it won’t turn at all. You shake it, tap it, maybe curse at it a little. Sound familiar? Manual grinders are simple machines, but they have their own quirks. Most problems aren’t broken parts — they’re small issues you can fix in under ten minutes with nothing but your hands and maybe a brush.
This guide walks you through the most common failures, what causes them, and exactly how to fix each one. You’ll learn the difference between a real defect and a simple cleaning issue, when to tighten versus when to replace, and how to keep your grinder running smooth for years. No guesswork, no jargon — just practical steps you can follow right now.

CEVING
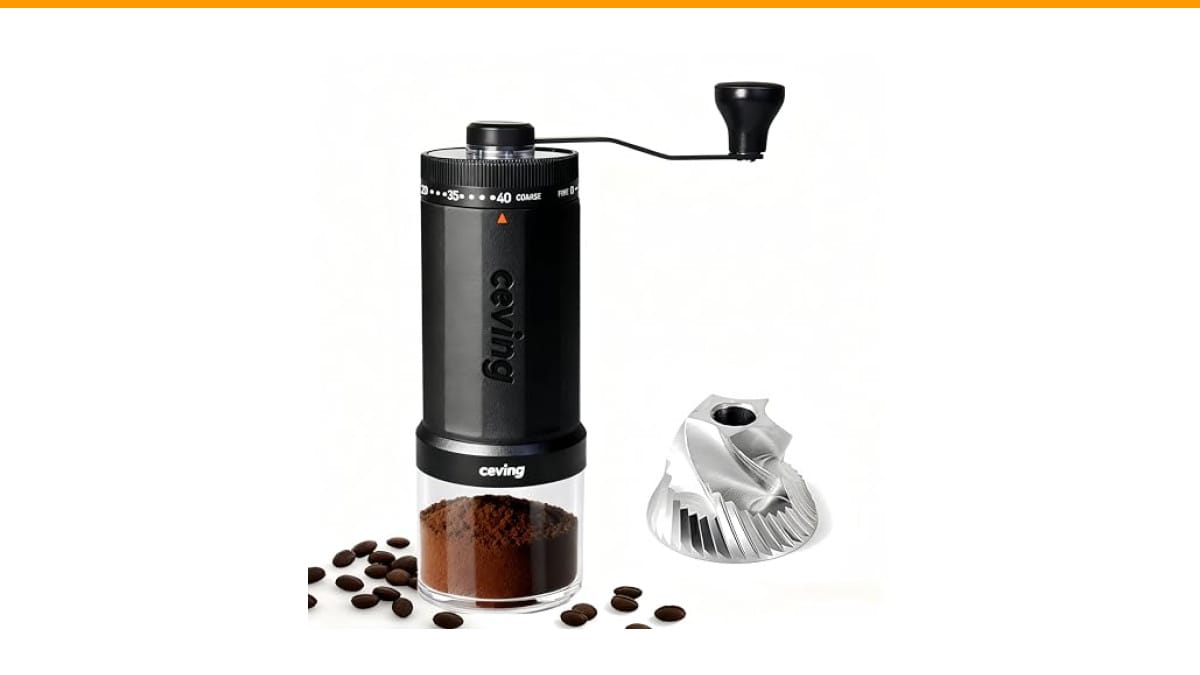
CEVING World's First 60g Large Capacity Manual…
- Tired of small batches? Meet the world's first manual grinder with a massive 60g capacity—Hold twice the beans of the standard gri…
- 40 EXTERNAL SETTINGS - DIAL IN PERFECT BREWS INSTANTLY. Our external click-ring delivers 40 precise settings—effortlessly switch f…
- MASTER-LEVEL PRECISION - LAB-ACCURATE GRINDS, BARISTA-APPROVED FLAVOR. Each click adjusts by just 0.05mm—the finest difference det…
As an Amazon Associate I earn from qualifying purchases.
If you’re in the market for a new grinder because yours is beyond repair, the CEVING 60g manual coffee grinder is worth a look. Its large capacity and external adjustment ring eliminate two of the most common complaints we’ll cover below — tiny batches and fiddly internal settings.
Start With the Obvious: Disassembly and Inspection
Before you do anything else, take the grinder apart. Most manual grinders have the same basic anatomy: a top handle, a central shaft, a burr set (either conical or flat), and a collection cup or jar. If you’ve never taken yours apart, now’s the time to learn — it’s the foundation of every fix that follows.
Here’s the standard disassembly order for most models:
- Remove the handle by unscrewing the knob or pulling it straight off.
- Unscrew the top nut that holds the adjusting ring or dial in place.
- Lift out the inner burr (the cone or disc that rotates).
- Pull the shaft out from the body.
- Separate the outer burr from the body if it’s removable.
- Empty all remaining beans and grounds into a bowl.
Lay everything out on a clean towel. Look at each piece. Check for cracks, bent shafts, or worn burr edges. Burrs should feel sharp — if they feel smooth or polished, they’re dull and need replacing. A bent shaft is rare but happens from drops; you’ll see it wobble when you spin it by hand.
Pro tip: take a photo of the disassembled parts with your phone. It makes reassembly far easier, especially for grinders with small washers or springs that love to roll off the table.
Fix 1: Handle Spins Freely But No Grinding Happens
This is the most common complaint. The handle turns with zero resistance, but no grounds come out. The cause is almost always one of three things: the drive pin isn’t engaging, the inner burr has come loose from the shaft, or the burrs are so clogged they’re just spinning against packed coffee.
The Drive Pin Problem
On many grinders, the handle shaft has a small metal pin or notch that slots into a groove on the inner burr. If that pin shears off or the burr slips off it, the shaft spins but the burr stays still. Inspect the pin and the burr’s slot. If the pin is broken, you’ll need a replacement part — contact the manufacturer or check if the brand sells spare shafts.
Loose Inner Burr
Some grinders thread the inner burr directly onto the shaft. Over time, vibration can loosen it. Simply screw it back on clockwise until snug. Don’t over-tighten — hand-tight is enough. If it keeps loosening, a tiny drop of thread-locker (blue, not red) on the threads will hold it without making future removal impossible.
Packed Coffee Buildup
Old, oily coffee can cement itself between the burrs. When that happens, the burrs can’t grip new beans. You’ll feel a smooth, slippery resistance instead of the usual crunch. Fix: brush out loose grounds, then run a few dry rice grains through the grinder. Rice is harder than stale coffee but softer than steel — it scrubs the burrs clean without damaging them. Follow with a full disassembly and brush-down.
Fix 2: Handle Won’t Turn at All
If the handle locks up completely, something is physically blocking the burrs. Don’t force it — that’s how you strip gears or snap the shaft. Here’s what to check in order.
Foreign Objects and Stones
One small pebble in your beans can jam the burrs solid. Open the grinder and look between the burrs. If you find a stone, pick it out with tweezers. This is also a reminder to inspect your beans before grinding — cheap coffee sometimes contains debris.
Burrs Too Tight
If you set the grind finer than the burrs can physically go, they’ll lock together. This happens most often with new grinders where the burrs haven’t been seasoned yet. Turn the adjustment ring coarser (a full revolution or two) and try again. If it still won’t turn, disassemble and reseat the burrs — they may be misaligned.
Rust or Corrosion
Leaving the grinder wet or storing it in a humid cabinet can cause rust on the shaft or burrs. Rust adds friction and can seize the mechanism. Disassemble, scrub rust with a fine steel wool or a rust eraser, and coat the shaft with food-grade mineral oil before reassembly. If the burrs themselves are rusted badly, replace them — rusted burrs won’t grind evenly and can flake into your coffee.
Fix 3: Inconsistent Grind Size
You’re getting coffee dust mixed with boulders. This is frustrating because the grinder seems to work, but the brew tastes off. The cause is usually one of three issues.
Worn Burrs
Burrs have a lifespan. For a home user grinding daily, expect 500 to 1,000 pounds of coffee before they dull noticeably. If your grinder is old or second-hand, dull burrs are the prime suspect. You can’t sharpen them at home — replacement burrs are the only real fix. Check the manufacturer’s site for compatible parts.
Loose Adjustment Mechanism
On grinders with a threaded adjustment collar, the collar can back off during grinding. You’ll see the setting mark move as you crank. Tighten the collar fully, then set your desired grind. If it keeps slipping, a small rubber O-ring under the collar adds friction and stops the drift.
Bean Size and Density
Different beans grind differently. A light roast is denser and shatters more uniformly than a brittle dark roast. If you switch beans and suddenly get more fines, that’s normal, not a defect. Also, beans that are wildly different sizes in the same bag (common with cheap blends) will produce an uneven particle distribution. Stick to one bean type for consistent results.
Fix 4: Grinder Is Slow or Feels Stiff
Your grinder works, but every session feels like a workout. This usually points to friction, not a mechanical failure.
Dry Shaft and Bearings
Most manual grinders have a metal shaft rotating inside a plastic or metal bushing. Without lubrication, that contact point gets gritty. Apply a tiny drop of food-grade mineral oil (not cooking oil, which goes rancid) to the shaft where it enters the body. Spin it a few times, then wipe off any excess. You’ll notice the difference immediately.
Overfilled Chamber
If you cram too many beans in at once, the outer burr can’t push grounds out fast enough. The chamber backs up, and you’re grinding against a packed mass. For most grinders, that’s about two-thirds full. The CEVING 60g model handles a full 60 grams without stalling, but most standard grinders choke past 30 grams. Respect the capacity and grind in batches if needed.
Burrs Need Seasoning
New burrs are sharp and can catch or bind slightly for the first few uses. Run a few ounces of cheap, medium-roast beans through and discard the grounds. This wears the micro-burrs into a smooth mating surface. After that, the grinder should feel noticeably easier to turn.
Preventive Maintenance: What to Do Monthly
Most grinder failures are avoidable with a simple monthly routine. Here’s what works, based on years of testing grinders at home and in the shop.
- Disassemble completely and brush out all coffee residue with a stiff nylon brush.
- Wipe the burrs with a dry microfiber cloth — never rinse them with water.
- Check the shaft for wear and apply a drop of mineral oil if it feels dry.
- Inspect the drive pin and adjustment threads for damage.
- Run two tablespoons of dry rice through the grinder on a medium setting to polish the burrs.
That’s it. Five minutes a month. If you skip this, you’ll eventually face the problems above. A clean grinder is a reliable grinder.
For a deeper cleaning routine, see our coffee grinder cleaning guide — it covers the full process with photos.
Common Problems at a Glance
| Symptom | Likely Cause | Quick Fix | Time to Fix |
|---|---|---|---|
| Handle spins free, no grinding | Drive pin broken or inner burr loose | Re-engage burr on pin; replace pin if sheared | 5 minutes |
| Handle won’t turn | Foreign object or burrs set too fine | Remove debris; widen grind setting | 10 minutes |
| Inconsistent grind | Worn burrs or loose adjustment collar | Replace burrs; tighten collar | 15 minutes |
| Slow, stiff grinding | Dry shaft or overfilled chamber | Lubricate shaft; reduce bean load | 5 minutes |
| Metal shavings in grounds | Burrs rubbing against each other | Realign burrs; check for damage | 10 minutes |
If you see metal shavings, stop using the grinder immediately. That means burrs are making contact. Disassemble, check for chips or warping, and realign the burrs carefully. If they’re damaged, replace them — you don’t want metal in your coffee.
When to Stop Fixing and Start Shopping
Some problems are worth fixing; others aren’t. If the grinder is more than five years old and needs a new burr set that costs half the price of a new grinder, replace it. Same goes for a bent shaft — that’s a structural failure that’ll never grind right again.
If the grinder is relatively new and under warranty, contact the manufacturer before you disassemble anything. Some warranties void if you’ve opened the unit. Check your paperwork first.
If you decide to replace, consider what caused the failure in the first place. If you kept jamming it with hard beans, a grinder with a sturdier build makes sense. If capacity was the issue, look for a larger hopper. The CEVING 60g grinder solves the small-batch problem with double the standard capacity, and its external click ring means no hidden adjustment parts to strip or lose.
Before you buy, check our burr grinder vs blade guide to make sure you’re getting the right type for your needs.
Frequently Asked Questions
Why does my manual grinder produce so many fines (dust)?
Fines are normal — every grinder produces some. High fines usually mean the burrs are dull, the grind setting is too fine, or the beans are over-roasted and brittle. Try a coarser setting first. If fines persist, inspect the burr edges for wear. A good burr set should produce mostly uniform particles with about 10-15% fines on a medium grind.
Can I wash my manual grinder with soap and water?
No. Water causes rust on the burrs and shaft, and soap leaves a residue that taints the coffee. Always dry-brush after use. If you absolutely must wash it (say you dropped it in something sticky), disassemble fully, wash only the plastic and glass parts in warm soapy water, and wipe the metal parts with a damp cloth. Dry everything completely before reassembly.
How do I know if my burrs are actually worn out?
Run a test grind on a medium setting and look at the particles. If they’re visibly uneven — some chunks, some powder — and the grinder feels smooth instead of crunchy, the burrs are dull. Also check the cutting edges: they should feel sharp when you run a finger across them (carefully). Rounded edges mean replacement time.
My grinder’s adjustment ring is stuck. What do I do?
Don’t force it. The ring is usually stuck because coffee oils have gummed up the threads. Apply a few drops of mineral oil to the thread area and let it sit for ten minutes. Then gently work the ring back and forth. If it’s still stuck, tap the ring lightly with a wooden spoon handle to break the seal. If that fails, disassemble and clean the threads with a toothbrush and isopropyl alcohol.
Is it normal for a new grinder to have a metallic smell or taste?
Yes, for the first few uses. Manufacturing oils and metal dust from the machining process need to be removed. Grind and discard three or four batches of cheap beans before your first real brew. That’s enough to season the burrs and eliminate the off-taste. If the smell persists after a pound of coffee, there’s a manufacturing defect — return it.
Three Mistakes That Kill Manual Grinders
After troubleshooting countless grinders, these three mistakes cause most premature failures.
Mistake 1: Storing it with beans inside. Beans left in the hopper absorb moisture and swell, putting pressure on the burrs. They also go stale and oily, which gums up the mechanism. Always empty the grinder after use.
Mistake 2: Crank speed. People grind too fast. A frantic crank generates heat, which degrades the coffee oils and can warp plastic parts. Slow down — aim for about one revolution per second. It takes longer, but the grind is more consistent and the grinder lasts longer.
Mistake 3: Ignoring the click. If the adjustment ring starts making a different sound — a grinding or clicking noise — stop. That’s the burrs rubbing. Back off the setting immediately. Continuing to grind at that setting will chip the burrs.
A manual grinder is a simple tool. Treat it with basic respect, clean it monthly, and it’ll outlast your patience. When it does break, you’ll know exactly what to fix — or when to move on.
For more on keeping your whole coffee setup running, check our coffee maker cleaning guide to pair with your grinder maintenance routine.
Products related to this article
Sponsored / affiliate links. As an Amazon Associate I earn from qualifying purchases. I may earn additional commission from eligible campaigns.
 Cutting Board Oil 12 oz, Food Grade Mineral Oil Added Orange Lemon Scent
 Large Wooden Spoon for Cooking,17 inch Big Acacia Wood Spoon for Deep Pot,Giant Wooden Spoon with Long Handle,Versatile Wood Spoons for Stirring,Cooking Mix Flipping,Servin
 8 Pcs Wooden Coffee Spoon, Long Handle Wwood Spoons for Eating