You’ve pulled a perfect shot of espresso, but the milk is a disaster. It’s either a watery mess with giant bubbles, or you’ve scalded it so badly it tastes like burnt custard. We’ve all been there. The culprit isn’t your machine or your milk. It’s almost always the technique, and the tool you’re using to steam it.
This guide walks through the entire process of using a milk frothing pitcher, from picking the right size to the exact angle you hold the wand. You’ll learn how to get that silky, glossy microfoam for latte art, and how to avoid the common mistakes that ruin a good cup. No fluff, just the steps that work.

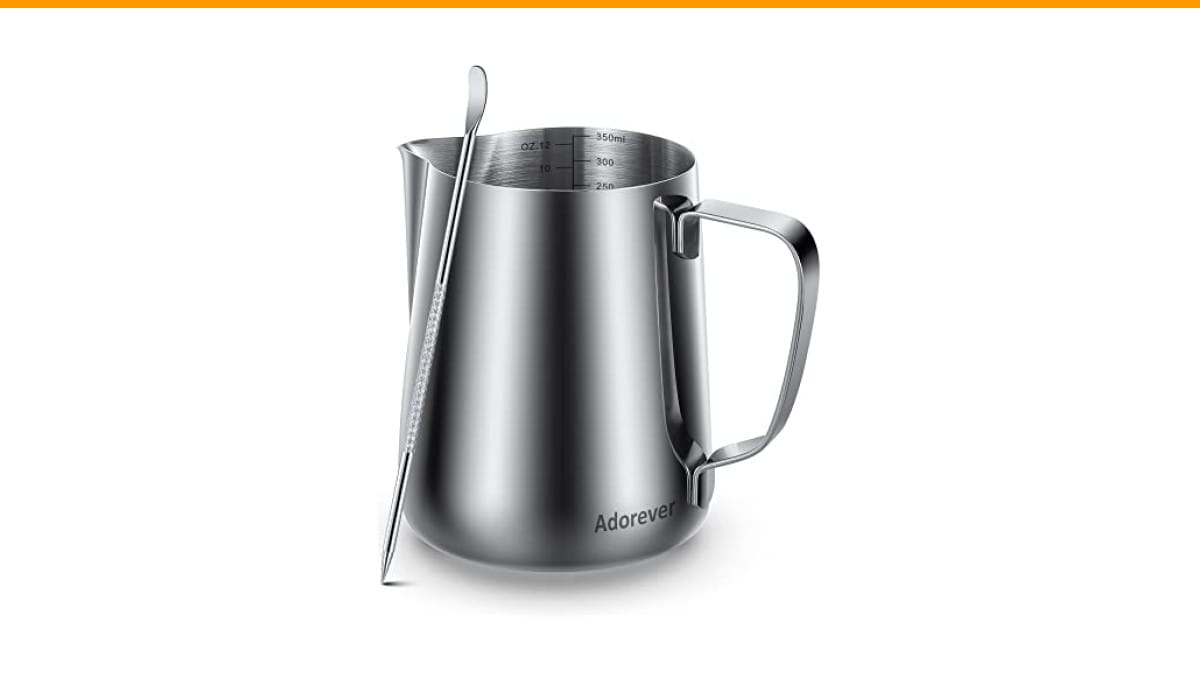
Adorever
Milk Frothing Pitcher, 8.5oz/12oz/20oz/32oz/50oz/66oz Milk Frother Cup…
- Perfect Combination Of Milk Frothing Pitcher And Latte Art Pen: The milk frother jug can be used in different ways: froth or steam…
- Premium Quality: The milk steaming pitchers and coffee art pen are made of chrome finished #304 stainless steel. Rust-proof, stain…
- Point-Mouth Design: Can prevent liquid leaking from the jug and make the coffee pattern pretty. Offer 12oz/20oz/32oz/50oz milk jug…
As an Amazon Associate I earn from qualifying purchases.
If you’re starting out, a solid stainless steel pitcher makes a difference. The Adorever Milk Frothing Pitcher is a good option because it includes a latte art pen and comes in multiple sizes, so you can grow into it as your skills improve.
Why the Pitcher Matters More Than You Think
The pitcher isn’t just a metal cup. It’s a heat exchanger and a texture tool. The shape of the spout controls your pour, and the volume of the pitcher affects how the milk spins in the vortex.
Here’s the key fact: you need room for the milk to expand. If you fill a 20oz pitcher to the brim, there’s no space for the milk to stretch and aerate. The general rule is to fill it only a third to halfway full. For a 12oz pitcher, that means about 4 to 6 ounces of milk. For a 20oz pitcher, use 7 to 10 ounces.
That extra space is where the magic happens. The milk needs to swirl in a tight vortex, pulling air down into the liquid. No vortex, no microfoam. You get a flat, dense liquid instead of the silky texture you want.
Most home machines have a single-hole steam wand, which is weaker than commercial wands. You can compensate by using a smaller pitcher. The Adorever 12oz size is ideal for home espresso machines because it gives you more control over the smaller volume of milk.
Step-by-Step: Steaming Milk with a Pitcher
Let’s break this down into a sequence you can follow every morning. It’s not complicated, but it requires attention to what you hear and feel.
- Start with cold milk. Whole milk or barista blends work best because they have more fat and protein. Pour cold milk into the pitcher, filling it to about one-third to one-half full.
- Purge the steam wand. Turn it on for two seconds before you start. This clears out any condensed water that will make your milk watery.
- Submerge the tip. Place the steam wand tip just below the surface of the milk, near the side of the pitcher, not the center. The angle of the pitcher matters: tilt it slightly so the wand tip is off-center.
- Start the vortex. Turn on the steam. You want the milk to start spinning immediately. If you hear a loud, aggressive hissing, the tip is too high. Lower it until you hear a gentle, paper-tearing sound. That’s the sweet spot.
- Aerate for 2 to 5 seconds. The stretching phase adds air. For a cappuccino, stretch longer (5 seconds). For a latte, keep it short (2 to 3 seconds). The milk should look like it’s increasing in volume slightly.
- Submerge the tip deeper. Once you’ve added enough air, lower the pitcher so the tip is about one inch below the surface. You want the vortex to continue but without adding any more bubbles. The milk should be spinning fast enough to pull the surface down.
- Watch the temperature. This is the part everyone gets wrong. You’re aiming for 140°F to 150°F (60°C to 65°C). If it’s hotter than that, you’ve broken the proteins and the milk won’t be sweet. If you don’t have a thermometer, use your hand. When the pitcher becomes too hot to hold for more than a few seconds, that’s roughly the right temperature.
- Turn off the steam before you lift the pitcher. This prevents the wand from sucking milk back into the machine, which is a hygiene nightmare.
- Tap and swirl. Tap the pitcher on the counter to pop any large bubbles, then swirl it gently to mix the foam with the milk. You should have a glossy, paint-like consistency.
That’s the whole process. It takes about 20 seconds of actual steaming time, but getting the feel for it takes a few tries. Don’t get discouraged if the first few attempts are mediocre. It took me a week of daily practice to get a consistent vortex.
Choosing the Right Pitcher Size and Shape
Not all pitchers are the same. The size, spout design, and material all change how you work. Here’s a breakdown of what you’ll find on the market.
| Feature | Small (8.5-12oz) | Medium (20oz) | Large (32oz+) |
|---|---|---|---|
| Best for | Single latte or cappuccino | Two drinks or practice | Multiple drinks or commercial use |
| Home machine fit | Excellent, better control | Good, but requires more milk | Poor, wand may not reach |
| Steam time | Shorter, easier to overheat | More forgiving | Long, hard to manage |
| Spout style | Pointed, precise pour | Pointed or rounded | Rounded, less control |
| Milk needed | 4-6 oz | 7-10 oz | 12-16 oz |
For a home user, I’d strongly suggest the 12oz size. It matches the boiler capacity of most home espresso machines. A 20oz pitcher on a Breville or Gaggia will take too long to heat up, and the milk will lose its sweetness before you reach the right temperature.
Spout design matters more for latte art than for basic frothing. A sharp, pointed spout gives you a thin stream for drawing patterns. A rounded spout is fine for pouring milk into a cup, but you’ll struggle to make hearts or rosettas. The Adorever pitcher has a point-mouth design that works well for this purpose.
Material is a simpler choice. Stainless steel is standard because it conducts heat evenly and doesn’t hold onto odors. The Adorever uses #304 stainless steel with a chrome finish, which resists staining from coffee oils. That’s a practical detail, not just a marketing line.
Frothing Without a Steamer: Cold Foam and Manual Options
What if your machine doesn’t have a steam wand? You can still use a pitcher effectively. The same principles apply, but you’re doing the work by hand or with a separate frother.
For cold foam, pour cold milk into the pitcher and use a handheld electric frother. Hold it near the surface to add air, then move it deeper to blend. The pitcher’s spout makes it easy to pour the foam onto a cold brew or iced latte.
For manual frothing, you can use a French press. Pour warm milk into the pitcher, then use the plunger to pump up and down. It’s not as fine as steamed milk, but it works in a pinch. The pitcher is still useful here because it gives you a clean vessel to pour from.
One thing to note: you cannot recreate the exact texture of steamed milk without steam. The heat changes the proteins in a way that cold or warm agitation doesn’t. But for iced drinks, cold foam is actually better. It sits on top of the drink and doesn’t melt into the ice.
If you’re dealing with a stubborn steam wand that isn’t producing enough pressure, check out our guide on fixing a frother that won’t froth. Sometimes the issue is the wand, not your technique.
Cleaning and Maintenance: The Part Nobody Enjoys
You need to clean the pitcher immediately after use. Milk residue dries fast and becomes a nightmare to remove. Rinse it with hot water, and if you have a brush, give it a quick scrub. The stainless steel surface makes this easier than it sounds.
Most stainless steel pitchers are dishwasher safe, but I’d recommend hand washing. The dishwasher detergent can dull the finish over time. It’s a 30-second job, so there’s no excuse to leave it sitting in the sink. The Adorever is dishwasher safe, but the chrome finish will last longer with a quick hand rinse.
Don’t forget the steam wand. After you finish steaming, purge it again for a second to clear out any milk that got sucked up. Then wipe the wand with a damp cloth. Milk burns onto the wand and creates a crust that’s hard to remove. For a deeper clean, soak the wand tip in a solution of warm water and a bit of dish soap. You can read more about proper steam wand care if you’re running into issues.
One honest caveat: the Adorever pitcher’s measurement markings on the inside are handy, but they fade after a few months of heavy use and scrubbing. It’s not a dealbreaker, but don’t rely on them forever. You’ll learn to eyeball the fill level anyway.
Common Questions About Milk Frothing Pitchers
Can I use a milk frothing pitcher on an induction stove?
Yes, if the pitcher is made of magnetic stainless steel. Most #304 stainless steel is not magnetic, so it won’t work on induction. Check the bottom of your pitcher for an induction symbol. The Adorever does not list induction compatibility, so treat it as stove-top safe only for hot water or milk baths, not direct heat.
Why does my milk have large bubbles instead of fine foam?
Large bubbles mean the steam tip was too high above the milk surface. You let too much air in at once. Submerge the tip just below the surface and angle the pitcher to create a vortex. The vortex pulls the air down and shears it into smaller bubbles. If you already have large bubbles, tap the pitcher on the counter and swirl it to pop them.
How much milk should I put in the pitcher?
Fill it to about one-third to one-half full. For a 12oz pitcher, that’s 4 to 6 ounces of milk. For a 20oz pitcher, use 7 to 10 ounces. The milk needs room to expand and spin. If the pitcher is too full, you’ll get no vortex and weak foam.
What’s the difference between a cappuccino and a latte in terms of frothing?
The ratio of foam to liquid. A cappuccino has a thick layer of dry, stiff foam that holds its shape. A latte has a thin layer of microfoam that’s more like wet paint. To achieve this, you aerate longer for a cappuccino (5 seconds) than for a latte (2 to 3 seconds). The rest of the technique is identical.
Do I need a thermometer to froth milk?
No, but it helps. The target is 140°F to 150°F. If you don’t have a thermometer, use the palm test. When the pitcher feels too hot to hold comfortably for more than a few seconds, you’re around 140°F. Stop there. Overheating ruins the sweetness of the milk and makes it taste flat.
What to Do Next: Practice Drills
You’ve read the steps. Now you need to practice. Here’s a simple drill to build muscle memory.
- Fill the pitcher with water and a drop of dish soap. Steam it like you would milk. The soap creates bubbles so you can see your vortex and aeration clearly.
- Practice the angle. The pitcher should be tilted so the wand tip sits off-center, creating a whirlpool effect.
- Time your aeration. Count to three slowly, then submerge the tip. Do this ten times in a row.
- Once the water technique feels natural, switch to cold milk. Don’t worry about temperature first. Just focus on the sound and the texture.
- Pour your steamed milk into a clear glass to see the layers. You want a uniform, creamy appearance with no separation.
This drill takes ten minutes a day for a week. It’s the fastest way to improve, and it doesn’t waste coffee. You’ll know you’ve got it when the milk pours out in a glossy stream and leaves a clean pattern on the surface.
If you’re serious about improving your espresso game, the pitcher is only one part. Make sure your machine is clean and well-maintained. A dirty machine produces weak steam and off flavors. Check our guide on how often to clean your coffee maker to keep everything in top shape.
Using a milk frothing pitcher is a skill, not a talent. The tools matter, but the technique matters more. Start with the right size pitcher, keep your milk cold, and watch the thermometer. In a few weeks, you’ll be pouring latte art without thinking about it.
Products related to this article
Sponsored / affiliate links. As an Amazon Associate I earn from qualifying purchases. I may earn additional commission from eligible campaigns.
 Cascade Platinum Plus Dishwasher Detergent Pods Dish Soap Lemon 57 Count
 Quick Heating Cup Warmer, Three Temperature Settings, Splashproof and Portable, for Coffee, Milk, Lightweight ABS Material
 HomeBeyond Espresso Coffee Maker 12 Cups, Classic Stovetop Espresso Maker, 600ml / 20oz Coffeemaker for Gas & Ceramic Stovetops (Silver)