In many home setups, it makes sense to buy the grinder first; choose a brewer or machine first only when your current one cannot brew your target method at all. Ignore that order and you’ll spend more while chasing sour, bitter, or erratic cups caused upstream. This guide pinpoints the first gear bottleneck, compares realistic espresso, pour over, and mixed-method options, and shows what to buy first.
The core trade-off is simple: cup impact, workflow impact, and cross-method reuse rarely point to the same purchase. In my own setups, a grinder usually changes flavor most, a scale fixes repeatability fastest, and a brewer or filter choice decides whether the cup leans clear, heavy, fast, or messy.
For most home brewers, start with three basics: a burr grinder, a scale, and a brewer or filter setup that fits the method you actually use each morning. Home Grounds lists digital coffee scales as an accessory category, lists espresso tampers as an accessory category, and says grinder needs vary by brewing method. That order matters more than prestige add-ons.
Start here: fix the first bottleneck, not the fanciest upgrade
How to read the comparisons in this guide
Each comparison answers four questions. Does it change the cup? Does it make the morning routine easier or harder? What failure mode shows up when the tool is wrong? Can the purchase be reused across methods, or does it stay trapped in one setup?
The three direct-answer must-haves
A burr grinder sets the upper limit for extraction quality because it controls particle size far more tightly than a blade grinder. A scale controls dose and brew ratio measurement. The right brewer and filter path decide flow rate, contact time, clarity, and body. Everything else should wait until one of those three stops being the problem.
Where competitors usually miss the decision sequence
Many gear roundups group products by category and stop there. That leaves readers with no upgrade order, no bottleneck test, and no clear answer on when a kitchen scale, regular kettle, or espresso accessory is good enough.
Must-have
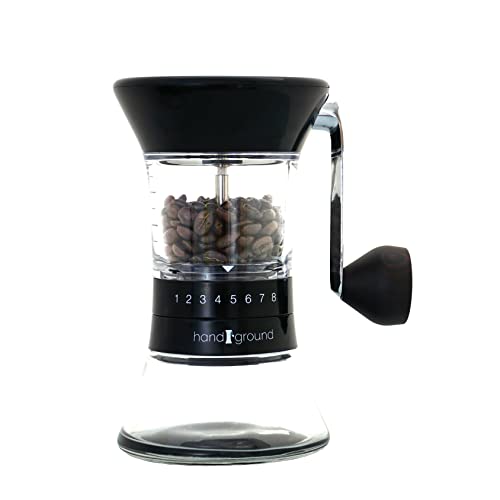
HAND GROUND Precision Manual Coffee Grinder
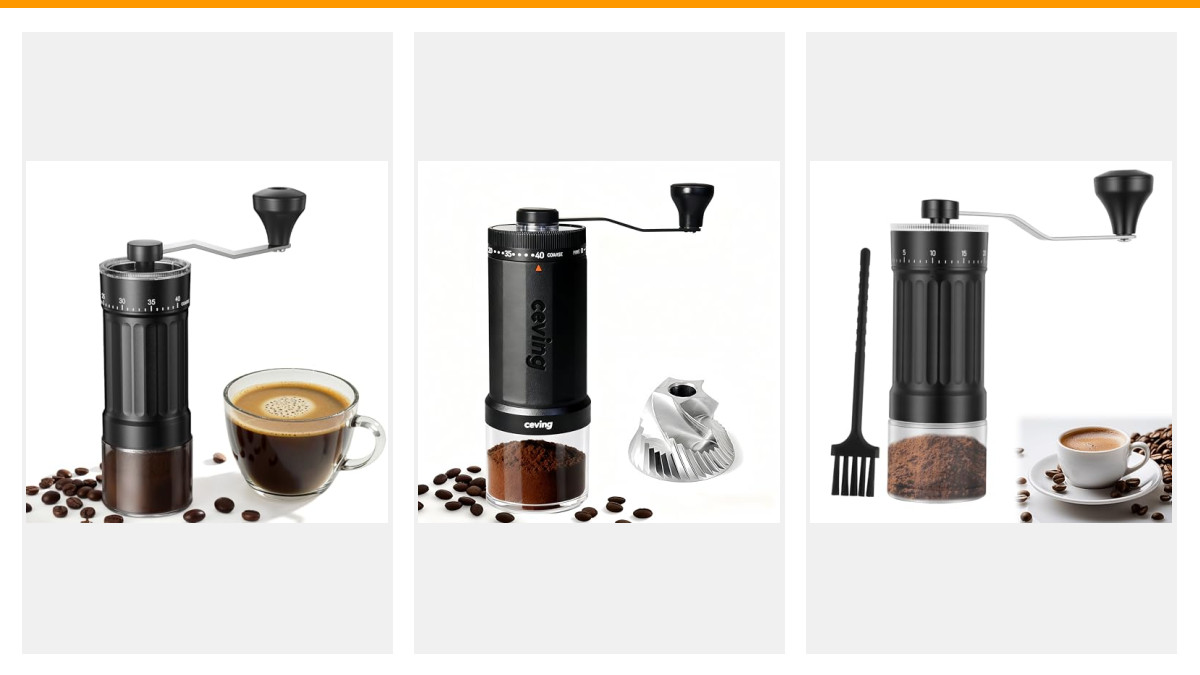
Based on specs and reviews, this is the most relevant listed product for fixing the first bottleneck in many pour over and hybrid homes. Its conical ceramic burrs and adjustable settings matter because burr alignment and repeatable adjustment affect grind spread far more than cosmetic accessories do.
The drawback is speed and ceiling. A manual grinder can be slow for multiple cups, and it is not the same thing as an espresso-capable grinder with very tight fine-end control. Still, at $59.95, it fits the “buy this before accessories” logic better than most decorative upgrades.

HARIO V60 Ceramic Coffee Dripper
This is a method-defining purchase, which means it belongs in the must-have section for pour-over-first homes. The ceramic body, spiral ridges, and single large hole point to a brewer that rewards careful pouring and filter choice.
The drawback is that it exposes weak technique fast. A wide-spout kettle, a laggy scale, or poor grind uniformity shows up immediately with uneven drawdown or cups that swing from thin to muddy.

Bodum 34oz Pour Over Coffee Maker
For buyers who want one-piece simplicity, this combines brewer and reusable metal filter in one product. Based on the spec sheet, owner feedback, and our range experience, its borosilicate glass and permanent stainless steel filter make it attractive for lower ongoing filter cost and fuller-bodied cups.
The honest drawback is cup style and cleanup. Metal filtration usually lets more fines and oils through than paper, and mesh filters need more thorough rinsing to avoid stale residue. It is also less portable than a simple dripper.
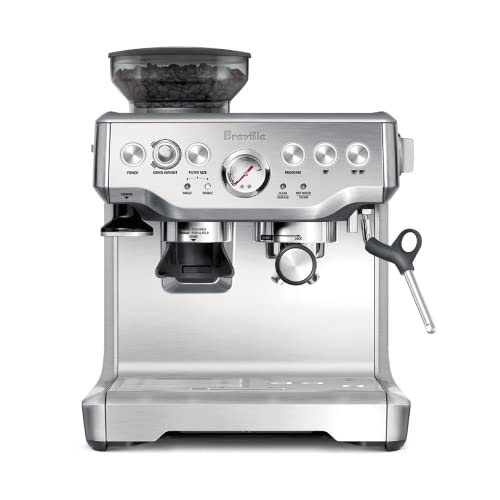
Breville Barista Express espresso machine
This belongs in must-have only when the current setup cannot brew espresso at all. The integrated conical grinder, PID temperature control, and steam wand make it a full pathway into espresso and milk drinks. Home Grounds says accessories can be mandatory for making a latte; a steam-capable machine is one of the few true gatekeepers there.
The drawback is lock-in. An integrated grinder is convenient, but it limits upgrade flexibility compared with a separate espresso grinder. At $499.95, it is also a large first purchase if the real bottleneck is still dose control or puck prep basics.
What coffee gear should I buy first?
Buy the item that removes the earliest failure in the chain: usually a burr grinder, then a scale, then the brewer or machine required for the target method. Espresso-first homes need grinder accuracy fastest. Pour-over homes need grind and ratio control first. Mixed-method homes should favor shared tools before single-use accessories.
Espresso-first homes
Start with an espresso-capable grinder or a machine that includes one, then add a scale, then a tamper matched to basket diameter if the machine does not already include a usable one. Basket fit matters because a loose tamper leaves an uneven edge and makes channeling easier to trigger.
Pour-over-first homes
Start with a burr grinder, then a scale, then the brewer and filter path. A kettle upgrade usually comes after those unless the current kettle makes controlled pouring impossible. Home Grounds says a gooseneck kettle is a great accessory in some cases. In practice, those cases are usually brewers sensitive to pour pattern, like a V60-style dripper.
Hybrid homes
Buy shared items first: grinder, scale, and a brewer path that covers the non-espresso side. If espresso is a regular habit, the grinder must handle that method’s tighter tolerance. If espresso is occasional, a dedicated brewer plus a simpler shared grinder may still be the better ownership-cost choice.
Gear-priority snapshot
| Upgrade | Cup impact | Workflow impact | Reuse across methods | Main failure mode when wrong |
|---|---|---|---|---|
| Burr grinder over blade grinder | Very high | Medium | High | Uneven extraction, mixed sour and bitter cup |
| Coffee scale over rough kitchen scale | High | High | High | Inaccurate dose and brew ratio drift |
| Method-matched brewer or filters | High | Medium | Medium | Wrong flow, wrong body, poor fit to routine |
| Gooseneck kettle over regular kettle | Medium | Medium | Medium | Uncontrolled pour rate on sensitive drippers |
| Tamper matched to basket | Medium | Medium | Low | Uneven puck density and edge channeling |
| Distributor | Low to medium | Medium | Low | Extra step that may add little |
| Bottomless portafilter | Low direct | Low | Low | Cannot see channeling or prep errors |
Cold brew maker vs French press for iced coffee
If you want iced coffee that is smooth, low-acid, and easy to batch, the brewing method matters more than the recipe tweaks. A dedicated cold brew maker is usually the better choice for concentrate and make-ahead servings, while a French press can be a faster, cheaper option for a smaller amount of coffee when you do not mind a little sediment.
The supporting article compares the two side by side on brew time, cleanup, batch size, strength, and flavor so you can choose the method that fits your routine. It also explains when each option makes sense for iced coffee, helping you avoid weak cups, muddy texture, or overcomplicated prep. See the full cold brew maker comparison for the details.
Storing beans correctly to preserve flavor
Roasted coffee degrades quickly when exposed to heat, light, and moisture, so selecting the right storage location is just as critical as buying fresh beans. To prevent stale, bitter, or off-flavored cups, store beans in a sealed, opaque container away from direct sunlight. If your kitchen is humid or you buy in bulk, controlled environments can help, but frequent temperature swings damage the roast profile. For a direct comparison of when to keep beans on the counter versus moving them to the fridge, see counter vs fridge storage.
Airtight Canister vs Valve Bag: Which Keeps Coffee Fresher
Choosing between a rigid canister and the original packaging depends entirely on how fast you consume your beans. The airtight canister guide breaks down this decision by analyzing oxygen exposure and degassing requirements. For unopened beans, the valve bag often preserves aroma better due to controlled degassing, whereas a canister is superior for daily use after opening because it blocks ambient light and moisture. The article provides a specific storage decision table based on roast date and consumption rate, ensuring you match the container to your brewing schedule rather than relying on marketing claims.
Thermal vs Glass Carafe: Which Keeps Coffee Tasting Better?
A thermal carafe usually keeps the last cup tasting better because it holds coffee hot without cooking it further on a warming plate, unlike a glass carafe that can develop stale, bitter notes after 30‑45 minutes. The guide breaks down flavor impact, heat retention, typical brew habits, and cleanup effort so you can match the carafe to staggered pours, slow drinkers, or office use.
Understanding these trade‑offs helps you avoid burnt‑tasting coffee and unnecessary cleaning hassles, ensuring every sip stays fresh. See the full comparison in our thermal vs glass carafe analysis.
Do you need a CO2 valve canister?
For most home coffee drinkers, the short answer is no: a simple airtight tin is usually enough once the beans have finished their early burst of degassing. The key question is how fresh the roast is. Beans roasted within the last week or two can benefit from a canister designed to vent CO2, while older beans mainly need protection from air, light, and moisture. The CO2 valve canister guide breaks down how each storage option works and when the extra valve is worth paying for.
That matters because storage is easy to overbuy: the right container depends more on roast age and your pace of use than on a special feature.
Do I need a coffee scale or is a kitchen scale enough?
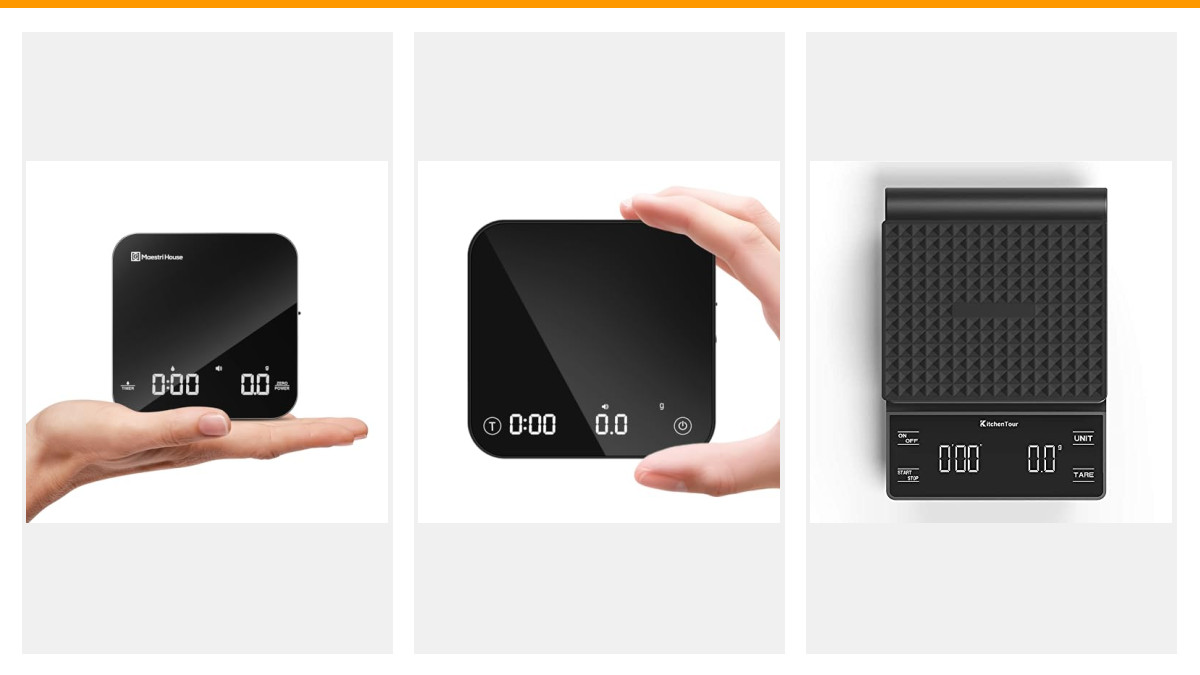
A kitchen scale is enough until it becomes the bottleneck. For immersion brewing and larger batches, 1 g resolution can be fine. For espresso and small pour overs, a coffee scale with fine resolution, quick response, a timer, and a low-profile platform can give cleaner dose control and better workflow.
Head-to-head comparison
| Criteria | Coffee scale | Kitchen scale |
|---|---|---|
| Resolution | Often 0.1 g | Often 1 g or larger increments |
| Timer function | Common | Often missing |
| Brew ratio measurement | Built for dose plus beverage tracking | Usually fine for dose, less convenient for live brewing |
| Platform shape | Low-profile, fits under drippers or cups more easily | Wider platform, better for food prep |
| Spill resistance | Often better protected for brew use | Varies, often less brew-specific |
| Cross-use | Great for coffee, less useful for general kitchen work | Very versatile beyond coffee |
Where a kitchen scale becomes the bottleneck
Espresso exposes bad scales first. A slow or coarse scale makes dose trimming clumsy and shot yield tracking unreliable. On pour over, the problem appears when pulse pours overshoot or when the scale footprint is too tall or wide to fit comfortably under a brewer and server.
Choose a coffee scale if… / Choose a kitchen scale if…
Choose a coffee scale if: espresso is part of the routine; small brews are common; a built-in timer will replace phone timing; or the brewer setup needs a low-profile platform with better spill resistance.
Choose a kitchen scale if: the main use is larger batch brewing, French press, or general food prep; 1 g resolution is good enough; and the current scale reacts fast enough that live pouring does not turn into guesswork.
When is a burr grinder worth the upgrade over a blade grinder?
A burr grinder is often worth the upgrade once the cup tastes both sour and bitter at once, drawdowns swing unpredictably, or espresso becomes a goal. Burrs produce a tighter particle spread, which gives more even extraction. Blade grinders stay viable only when budget is extremely tight and precision is not yet the main limit.
Head-to-head comparison
| Criteria | Burr grinder | Blade grinder |
|---|---|---|
| Particle size consistency | Better controlled | Broader spread of fines and boulders |
| Espresso capability | Possible on espresso-capable models | Poor fit for espresso precision |
| Brew-method fit | Manual or electric, from brew-focused to espresso-focused | Best limited to rough chopping tasks |
| Ownership cost | Higher upfront, fewer wasted beans from failed dialing | Lower upfront, more inconsistency in the cup |
| Cross-method reuse | High if the grind range is broad enough | Low for serious brewing |
Failure modes in the cup
With blades, the same dose can contain too many fines and too many large fragments. Fines overextract and taste harsh. Larger pieces underextract and taste thin or sour. That split is why the cup can feel confused instead of simply weak or strong. Home Grounds says it reviews burr grinders only and never uses blade grinders, which matches this practical limit.
Manual versus electric burr grinders
Manual burr grinders reduce cost and travel well. Electric grinders win on speed and repeatability for frequent use, especially in espresso. Home Grounds says its team tests hundreds of coffee products yearly, and that breadth is useful context here: grinder needs vary a lot by method, volume, and tolerance for morning effort.
Choose a burr grinder if… / Choose a blade grinder if…
Choose a burr grinder if: consistency is the current problem; pour over clarity matters; espresso is planned; or bean waste from redialing feels expensive.
Choose a blade grinder if: budget is extremely constrained; brewing is infrequent; and the goal is acceptable immersion coffee rather than repeatable extraction across several methods.
Stainless steel or ceramic burrs: which grinder material should you pick?
For most home brewers, stainless steel burrs are the safer default because they’re durable, widely available, and less likely to chip in normal use. Ceramic burrs can still make sense if you want strong chip resistance and are willing to accept different wear and maintenance trade-offs. The right choice depends less on a “better” label and more on your brew method, cleaning habits, and how hard you use the grinder.
This steel vs ceramic burr guide breaks down the practical differences for drip, espresso, and manual brewing, plus when each material is the smarter buy. That matters because burr material affects longevity, upkeep, and whether your grinder fits the way you actually make coffee every day.
Is a gooseneck kettle really better for pour over?
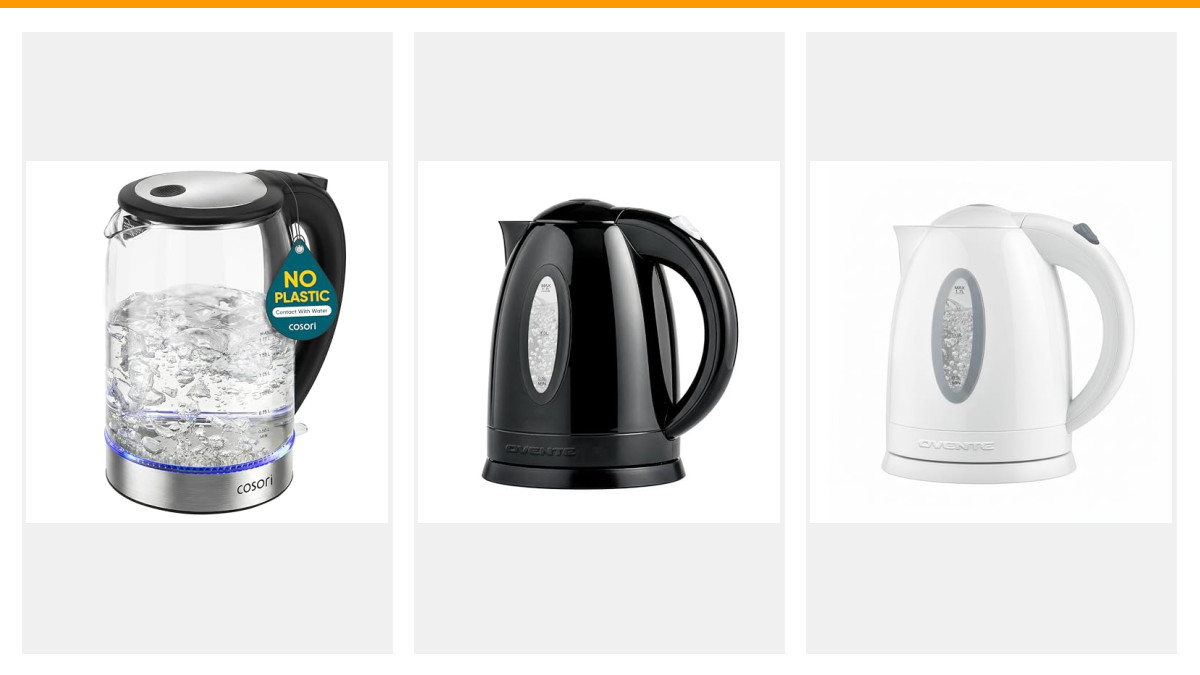
A gooseneck kettle is better when the brewer reacts strongly to pour rate and placement. Its narrow spout helps control agitation and drawdown on devices like a V60. A regular kettle is still fine when brewing immersion, using forgiving brewers, or prioritizing faster boiling for general kitchen use.
Head-to-head comparison
| Criteria | Gooseneck kettle | Regular kettle |
|---|---|---|
| Spout design | Narrow for controlled pouring | Wider, faster stream |
| Flow control | High | Lower |
| Temperature control variants | Common in electric models | Available, but less tied to brew-specific use |
| Electric or stovetop | Both common | Both common |
| Boil speed for general use | Often slower in practice | Usually simpler for all-purpose boiling |
Where the kettle changes extraction
On a single-hole dripper with paper filters, pour pattern changes agitation and bed shape. That can alter contact time and extraction noticeably. On French press, AeroPress, or metal-filter brewers with more forgiving flow paths, the cup often changes less than it would from fixing grind or scale problems first.
Choose a gooseneck kettle if… / Choose a regular kettle if…
Choose a gooseneck kettle if: a V60-style brewer is in daily use; pulse pours drift out of control; or temperature control and repeatable flow matter more than all-purpose kitchen speed.
Choose a regular kettle if: immersion methods dominate; the kitchen wants one fast-boiling tool for tea and cooking water; or the current bottleneck is still grind quality or dose accuracy.
Do I need both an espresso tamper and distributor?
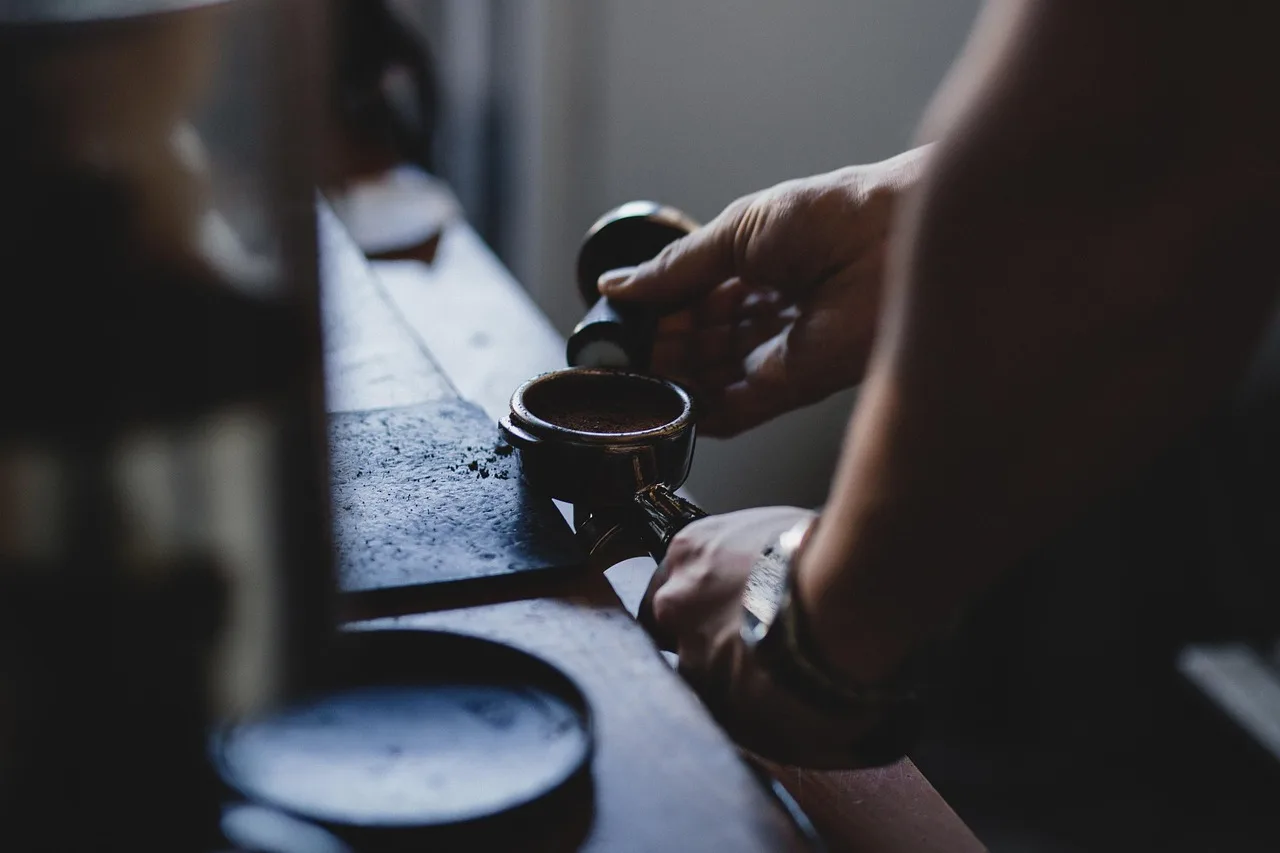
No. A tamper matched to basket diameter is the one that actually compresses the puck and belongs on the must-have side. A distributor mainly moves grounds before tamping and can improve neatness or repeatability in some workflows, but it is optional and often unnecessary once distribution technique is already sound.
Tamper versus distributor
| Criteria | Espresso tamper | Coffee distributor |
|---|---|---|
| Main job | Compress grounds into a level puck | Move grounds across the basket surface |
| Fit issue | Must match basket diameter closely | Must match basket size to work neatly |
| Base options | Flat or convex | Often adjustable depth |
| Workflow role | Mandatory for manual puck prep | Optional, WDT-adjacent prep step |
| Failure mode when wrong | Uneven puck density, edge gaps | Extra step with little cup gain |
What a tamper actually fixes
A well-fitted tamper improves pressure repeatability and edge coverage. Flat bases are the safer default for most users because they are easier to level consistently. Convex bases still appear in some setups, but they matter less than proper size and a repeatable routine.
What a distributor often does, and when it adds little
A distributor can tidy the top of the puck and smooth workflow. It does not replace good grinding or basket-appropriate tamping. If grind clumps are minimal and the barista already has a clean distribution method, it can become a low-value extra step.
Bottomless versus spouted portafilter
| Criteria | Bottomless portafilter | Spouted portafilter |
|---|---|---|
| Main benefit | Exposes extraction flaws for diagnosis | Cleaner, more forgiving daily use |
| Mess reduction | Low when prep is poor | Higher |
| Shot splitting | No | Yes, often into two cups |
| Compatibility concern | Must match machine and basket size | Must match machine and basket size |
Choose espresso tamper if… / Choose distributor if…
Choose an espresso tamper if: the machine requires manual tamping; the included tamper fits poorly; or channeling appears around the basket edge.
Choose a distributor if: puck prep is messy; shot prep needs a cleaner routine; or the workflow benefits from adjustable depth more than the cup needs another correction.
Choosing Between Built-In and Separate Timers
Deciding whether a coffee scale with a built-in timer or a separate device suits your workflow depends on your primary brew method and budget. Integrated scales streamline pour-over and espresso routines by reducing clutter, while separate timers offer lower costs and easier readability for those prioritizing flexibility over convenience. timer setup comparison breaks down how each option performs across different brewing scenarios, ensuring you invest in gear that actually improves your daily routine rather than adding unnecessary complexity. This guide helps you match your equipment to your specific needs, avoiding the common pitfall of buying features you will rarely use in your home setup.
Which filter or brewer material changes the cup most?
Filter material changes the cup more than brewer body material in most home setups. Paper usually gives the cleanest cup, metal keeps more oils and body, and cloth sits between them with a smooth texture. Brewer material matters more for heat handling and routine than for big flavor shifts.
Paper, cloth, and metal compared
| Filter type | Flow behavior | Cup character | Cleanup | Best fit |
|---|---|---|---|---|
| Paper | Usually more controlled | Higher clarity, lighter body | Easiest disposal | Pour over, AeroPress paper path |
| Cloth | Can be smooth but maintenance-sensitive | Balanced clarity and body | Needs careful rinsing and storage | Users willing to maintain it |
| Metal | More fines can pass through | More body, more oils | Needs thorough cleaning | French press, reusable pour-over filters |
How this plays out across brewers
AeroPress can swing from cleaner to heavier depending on paper or metal. Pour over reacts strongly to paper type and pour control. French press already leans body-first, so metal filtration fits naturally there. Home Grounds says its best pour-over brewer pick comes in stainless steel, ceramic, glass, and copper, which is a useful reminder that body material varies while the filter path often drives the bigger cup change.
Choose paper if… / Choose cloth if… / Choose metal if…
Choose paper if: clarity matters, cleanup must stay quick, or channeling and fines need tighter control.
Choose cloth if: a smoother middle ground is appealing and maintenance discipline is realistic.
Choose metal if: fuller body is welcome, recurring paper cost is annoying, or a reusable filter fits the routine better than consumables do.
Dripper Material Impact on Brew Consistency
Material choice significantly affects heat retention and flow dynamics during brewing. Plastic drippers heat up rapidly but can lead to uneven extraction if the bed geometry is suboptimal, often resulting in slower flow rates. Ceramic options retain heat better but require specific preheating protocols to avoid thermal shock or inconsistent extraction. Ignoring these differences often leads to underextracted cups that vary significantly from one pour to the next.
You can compare heat retention metrics, specific flow geometry, and common failure modes in our detailed breakdown of plastic versus ceramic drippers to identify the hardware that best fits your routine.
Metal vs Cloth Filters: Which Brews a Cleaner Cup
A cloth filter produces a cleaner cup than reusable metal because it traps more fines and oils before they reach your mug. Metal filters let those particles through, yielding a fuller body but risking grit or sludge at the bottom of every pour-over or drip brew.
Maintenance differs just as much. Metal requires a quick rinse, while cloth demands thorough washing and occasional boiling to prevent stale residue from ruining future batches. Choosing between them depends on whether you prioritize clarity or convenience in your daily routine. The breakdown of metal versus cloth filters covers flow rate, extraction differences, and long-term upkeep so you can match the right material to your brewing habits.
Which tool cuts cleanup more: funnel or dosing cup?
The supporting article explains the practical difference between a dosing funnel and a dosing cup when your main problem is stray grounds. In most workflows, a coffee dosing funnel reduces mess better because it keeps coffee contained while you grind directly into the portafilter.
It also shows when a dosing cup is the smarter pick, especially if your spills happen during transfer from grinder to basket. That matters because the right tool depends on where the mess starts, not just which accessory looks cleaner on the counter.
Reusable K-Cup vs paper pod: which fits your routine?
Choose a reusable K-Cup if you care most about a fuller cup and want control over grind size; choose a paper pod if you want the fastest cleanup and the least mess. The tradeoff is simple: reusable pods can improve flavor, but they add rinsing, refilling, and occasional maintenance, while paper pods keep mornings quick but offer less flexibility.
This Reusable K-Cup comparison breaks down taste, cleanup, and daily convenience so you can match the pod style to your Keurig routine instead of guessing.
Programmable vs Manual Drip: Matching the Brewer to Your Morning
A programmable coffee maker delivers a finished pot at a set time, which matters for households of two or more who need caffeine immediately upon waking. A manual drip brewer gives you tighter control over extraction and produces a fresher cup if you drink it right away. Picking the wrong style means either waiting during a rushed morning or letting brewed coffee sit on a hot plate until it turns bitter.
The comparison between a programmable versus manual drip coffee maker breaks down routine, household size, carafe type, and the automation-to-freshness tradeoff. It also includes a decision matrix so you can match your specific schedule and volume needs to the machine that actually fits your workflow.
Manual vs semi-automatic espresso: the pressure tradeoff
If you’re deciding between these two machines, the main question is how much control you want over pressure versus how much consistency you want from shot to shot. The manual espresso comparison breaks down how each option affects flavor, workflow, temperature stability, and pre-infusion, so you can match the machine to your skill level and routine.
This matters because the wrong choice can make espresso harder to diagnose: a manual machine can reward technique but magnify mistakes, while a semi-automatic can make repeatable shots easier with less practice. The guide helps you decide which tradeoff fits your setup.
Match machine size to how you actually brew
The main tradeoff is workflow, not just footprint: compact machines suit smaller kitchens and lighter use, while full-size machines make more sense when you pull several drinks a day or want less waiting between milk drinks. The supporting guide breaks down the practical differences that matter most, including water tank refills, steam recovery, cup clearance, cleanup, and consistency. If you are torn between saving counter space and getting a smoother daily routine, this comparison helps you avoid buying a machine that feels awkward after the novelty wears off.
See the full compact espresso machine comparison for a clear side-by-side breakdown of which size fits different brewing habits.
Paper vs Cloth Filters for Pour Over
The filter you choose shapes more than just flow rate — it changes the taste of your coffee. Paper filters trap most oils and fine sediment, producing a cleaner, brighter cup. Cloth filters let more oils pass through, giving a fuller body and rounder flavor, but they can leave sediment and require more care between uses.
If you are unsure which direction to go, understanding how each filter affects clarity, body, and maintenance will help you pick the right one for your routine. The paper vs cloth filter comparison covers taste differences, roast pairings, cleanup routines, and when to reach for each option.
Plastic vs. Ceramic: How Material Affects Heat Retention and Flow
Dripper material influences thermal mass and flow stability, but geometric design often dictates extraction quality more than the substance itself. A well-structured ceramic cone can outperform plastic if preheated correctly, preventing temperature drop and uneven saturation that lead to sour, underextracted coffee. Conversely, poorly shaped plastic drippers may fail to maintain consistent bed temperature during pour-over. The plastic vs ceramic comparison breaks down how heat retention interacts with cone geometry to affect flow rate and taste clarity. This matters because choosing the wrong material without accounting for preheating protocols can create a slow, inconsistent brewing routine that masks grind size errors.
What gear matters most for espresso versus pour over?
Espresso cares first about grind precision, scale accuracy, and basket-fit puck prep. Pour over cares first about grind consistency, brew ratio control, and filter-brewer behavior. Kettle control matters earlier in pour over than it does in espresso. Diagnostic accessories matter earlier in espresso than they do in most manual brews.
Buy this first: espresso checklist
- Espresso-capable grinder or a machine that truly covers the method.
- Scale that can handle small dose and yield changes cleanly.
- Tamper matched to basket diameter.
- Only then consider bottomless diagnostics or a distributor.
Buy this first: pour over checklist
- Burr grinder.
- Scale with timer if possible.
- Brewer plus filter choice.
- Gooseneck kettle after the first three are no longer limiting the cup.
Buy this first: hybrid setup checklist
- Shared grinder suited to the stricter method in the house.
- Shared coffee scale.
- One manual brewer path and one espresso path only if both are used often.
- Skip duplicate accessories until the daily bottleneck is obvious.
Drip coffee maker vs pour over: pick the easier starting point
If you want the simplest path to a good cup, a drip coffee maker is usually the better beginner choice: it removes most of the variables and reduces the chance of mistakes. The supporting guide compares drip coffee setup with pour over so you can see how each method stacks up on setup cost, effort, and consistency.
That matters because the wrong choice can lead to wasted coffee, weak brews, or bitter cups from poor ratios and uneven pouring. Use this section when you want to match your gear to your comfort level, not just chase the fanciest brewing style.
Milk frothing tools: pick the right wand for the drink you want
If you are deciding between a milk frother and a steam wand, the main difference is the kind of foam each tool produces. A steam wand is usually better for fine, glossy microfoam that works well in lattes, cappuccinos, and latte art. A frother wand is faster and simpler, but it tends to create lighter, airier foam that fits iced drinks or quick coffee drinks better. The wrong match can leave you with big bubbles, thin texture, or milk that separates too quickly. For a direct side-by-side breakdown, see milk frother wand comparison.
Which coffee accessories are actually mandatory?
Mandatory depends on method. For espresso, a grinder, scale, machine, and usually a tamper are practical requirements. For pour over, a grinder, scale, brewer, and filters are the baseline. Gooseneck kettles, distributors, bottomless portafilters, travel storage, and serving extras are optional until a specific problem makes them useful.
Nice-to-have
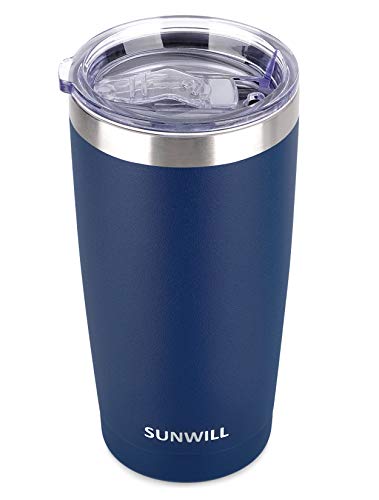
SUNWILL Travel Coffee Tumbler
This helps workflow more than extraction. A holdable insulated vessel is useful if brewed coffee sits during a commute or long morning, but it does not fix grind, ratio, or pouring errors. The honest drawback is size and purpose: it is a drink vessel, not a brewing upgrade.

Cosmos Mini Coffee Press storage bag
For travel kits, organization can cut setup friction and protect small parts from spills. Based on specs and reviews, the value here is storage discipline rather than cup quality. The drawback is narrow use. If brewing happens at home, this solves a packing problem that may not exist.
Consumables and spares
Paper, cloth, and metal filter upkeep
Paper is the easiest to manage because each brew starts clean. Cloth needs rinsing and consistent care or it can carry stale flavors. Metal avoids recurring paper purchases but needs more attention to trapped oils and fines. Separate durable gear from these ongoing supplies to avoid overspending on accessories first.
Espresso spares versus pour-over spares
Espresso owners should keep cleaning supplies, an extra basket if the workflow demands it, and replacement seals or gaskets when the machine uses them. Pour-over homes mainly need the right paper filters, a backup reusable filter if that is the chosen path, and some protection for the scale from drips and slurry.
Budget setups
| Path | Starter | Mid | Serious |
|---|---|---|---|
| Pour over | HAND GROUND grinder + Bodum pour over maker | HAND GROUND grinder + HARIO V60 | HARIO V60 with a stronger grinder budget later |
| Quoted price from listed gear | $59.95 + $19.99 | $59.95 + $23.90 | $23.90 |
| Espresso | Save until the machine path is viable | Breville Barista Express espresso machine | Breville Barista Express plus later accessory upgrades only if needed |
| Quoted price from listed gear | — | $499.95 | $499.95 |
| Mixed-method household | HAND GROUND grinder + Bodum or HARIO | Brewing path first, espresso later if truly used | Breville for espresso plus a manual brewer for non-espresso cups |
| Quoted price from listed gear | $79.94 or $83.85 | — | $519.94 or $523.85 |
Products related to this article
Sponsored / affiliate links. As an Amazon Associate I earn from qualifying purchases. I may earn additional commission from eligible campaigns.
 Coffee Espresso Machine Handle Replacement Parts, Cafe Bracket Handle for Lidl Silvercrest CM4621 CM4218 KF5002 KF500S Barista (for 51mm Portafilter Basket - Not included)
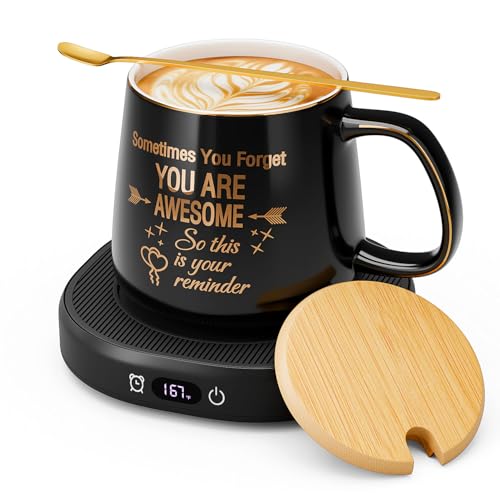 Coffee Mug Warmer & You are Awesome Mug Set, Electric Cup Warmer for Desk
 Coffee Mug Warmer & You are Awesome Mug Set, Electric Cup Warmer for Desk