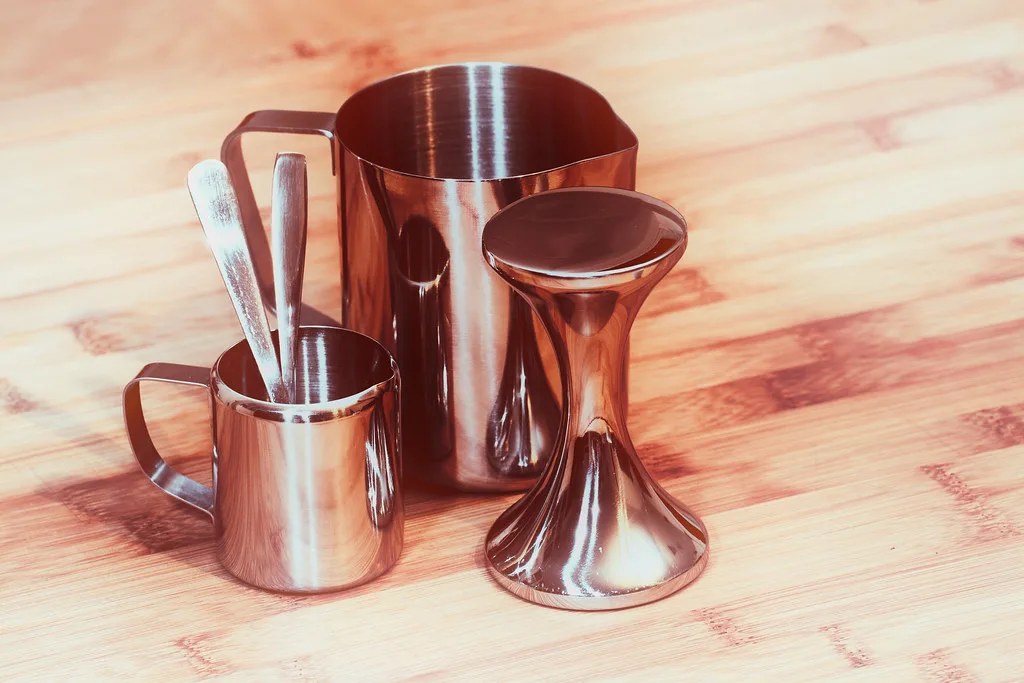
For most home setups, buy two espresso dosing tools first: a dosing cup matched to your grinder chute and basket diameter, plus a 10-15 mm funnel you can leave on for grinding and WDT. If the fit is off, static spreads grounds, the counter gets dirty, dose weights drift, and puck prep varies enough to show up right away in shot taste. This guide covers cups, funnels, dosing rings, blind shakers, and workflow fixes for basket fit, cleaner transfers, and repeatable single-dose prep.
What espresso dosing tools actually do in a home workflow


Espresso is made by pushing hot water at high pressure through finely ground coffee packed into a puck. In the cup, grind size, water temperature, pressure, and tamping all shape the result, and dose handling matters because it decides how much coffee actually makes it into the basket, and how evenly it gets there.
In home use, dosing tools control the workflow. Their job is to keep grounds where they belong, help the intended dose reach the basket, and make distribution and tamping more repeatable. They will not rescue a bad grind setting. They will cut avoidable errors between grinder and puck.
The common failure points are easy to spot: grounds spray from static, a grinder chute misses the basket, a funnel wobbles on the rim, a portafilter will not fit on a scale cleanly, or the bed ends up mounded on one side before tamping. Each problem points to a different tool choice.
Where dosing tools sit in the sequence
The useful order is simple: grind, transfer, distribute, tamp, then brew. The standard espresso serving is small, so prep mistakes show up fast in the cup. Espresso can be pulled directly into a preheated demitasse cup or shot glass to maintain temperature, but that comes after the puck is built well.
Dosing cups act before the grounds reach the basket. Dosing funnels act once the basket is involved. WDT tools can break up clumps and help even out density. Tampers still finish the puck by compressing it into a level bed for brewing.
Why workflow control matters more than accessory count
A home setup does not need every tool sold in the espresso aisle. It needs the few tools that remove the exact failure point in that kitchen, with that grinder, that portafilter, and that scale.
A narrow grinder chute may work cleanly with a cup and make a mess straight into the basket. A low cabinet or tall scale may make a thick funnel awkward. Portafilter basket size is the first filter, then clearance, then transfer style.
📊 A standard espresso serving is typically 25–30 ml. Source: Espresso.
Which espresso dosing tool keeps your counter cleaner?
If your main goal is less mess around the grinder and portafilter, the choice usually comes down to a funnel or a dosing cup. The espresso dosing tools guide breaks down when each one works best: funnels are stronger for controlling spills at the basket rim, while dosing cups help catch grounds before they reach the portafilter. It also explains why basket size, fit, and chute behavior matter more than brand names.
That matters because a small mismatch can turn a tidy workflow into scattered grounds, wasted dose, and extra cleanup. Use the article to match the tool to your setup instead of guessing.
What is the difference between a dosing cup and a dosing funnel?
A dosing cup catches coffee before it reaches the portafilter, which makes it useful for weighing and tidy single-dose grinding. A dosing funnel sits on the basket and keeps grounds inside during grinding, transfer, WDT, and sometimes tamp-adjacent prep. One collects; the other contains at the basket.
What a dosing cup does
A dosing cup is a container that receives ground coffee. It catches grounds from the grinder, lets the user weigh the dose, and then pours or flips that dose into the basket. That is why it fits single-dose home workflows so well.
It is the better tool when the grinder chute sits too high above the portafilter, when the grinder forks do not support the portafilter cleanly, or when direct grinding into the basket causes spray. It also helps when dose checking happens on a scale before the basket is involved.
What a dosing funnel does
A dosing funnel helps keep grounds inside the basket. That sounds simple, but it changes three messy steps: direct grinding into the portafilter, WDT, and tapping or settling the bed before tamping.
A funnel does not collect the dose on its own. If coffee is ground into a cup first, the funnel becomes the guardrail for the transfer and distribution stages. If coffee is ground straight into the basket, the funnel starts working even earlier.
When to use one, both, or neither
Use a cup alone when the grinder works cleanly into a cup and the transfer into the basket is easy. Use a funnel alone when the grinder can dose directly into the basket and the real problem is spray, side-wall loss, or messy WDT.
Use both when the workflow is single-dose, the user wants clean weighing, and the basket tends to lose grounds during transfer or distribution. I find that this is the most forgiving setup in many home kitchens.
In my own use, this split becomes obvious fast. A DF64-style single-dose grinder is easy for me to run cup-first because the grounds stream is broad enough that direct-to-basket can dust the rim. A Eureka Mignon-style setup, by contrast, often feels better with a funnel on the basket because the fork position and chute height favor direct grinding once the rim is protected. On a 58mm bottomless portafilter with an IMS or VST-style straight-wall basket, magnetic funnels usually seat more predictably for me than they do on baskets with thicker or more rounded lips.
Neither tool is mandatory if the grinder, fork height, basket, and routine already line up. But most messy home routines fail at one of those points.
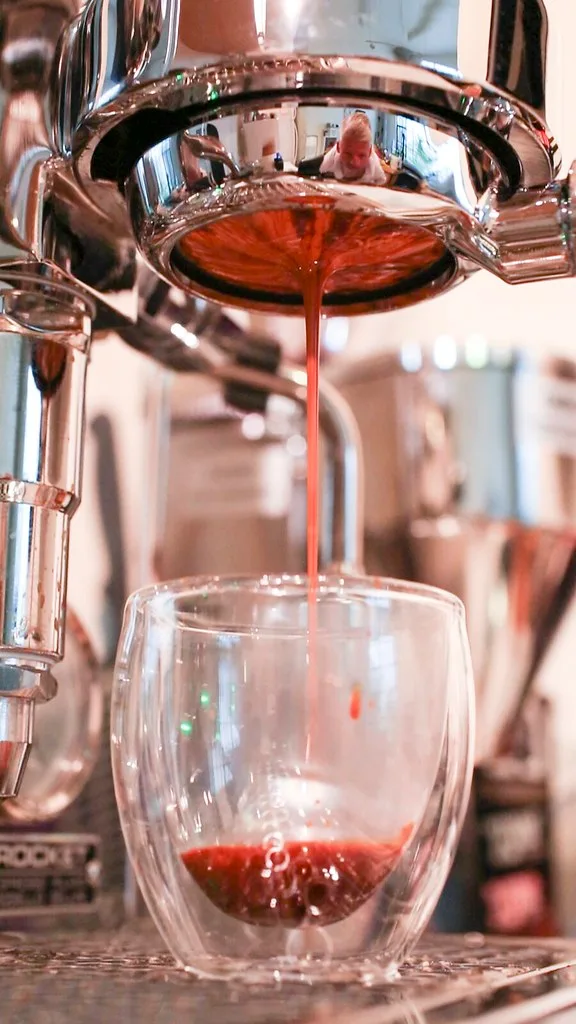
Dosing cup vs. funnel: Which tool fixes your specific workflow problem?
Not all dosing tools solve the same issues. A **dosing cup** is ideal if your grinder sprays grounds or you need a cleaner transfer to the portafilter, while a dosing funnel targets overflow during distribution or tamping—especially with bottomless baskets. Choosing the wrong one wastes coffee and adds cleanup. This comparison breaks down the core trade-offs and helps you pick the tool that aligns with your setup’s biggest frustration.
For a detailed breakdown of when to use each, including workflow integration and compatibility, see the dosing tool differences guide.
How do you choose the right dosing funnel?
The right dosing funnel starts with basket diameter, because a funnel that does not sit squarely on the basket rim can shift, spill grounds, and make prep slower. After size, check attachment type, funnel height, grinder chute clearance, and whether the portafilter still fits on the scale.
Start with basket diameter and rim shape
Portafilter basket size is the main selection constraint. Many home machines use 58 mm baskets, though other basket sizes are also common, and accessories may not swap cleanly across sizes.
Even within 58mm, rim shape matters. Some funnels sit on the outer basket edge, some index inside the rim, and some rely on magnets contacting the basket wall. A nominal 58mm label does not guarantee a stable fit.
Check whether the funnel sits flat without rocking. If it tips during WDT, it is the wrong fit even if the package says it matches the basket size.
I have had 58mm funnels fit a straight-wall basket cleanly but rock on a stock double basket from the same machine because the lip was thicker and more rounded. That is the kind of mismatch that looks minor on the counter and becomes obvious the moment you stir with a WDT tool.
Attachment types: magnetic, clip-on, and friction-fit
Magnetic funnels are fast to place and remove. They tend to suit repeated use well, especially when the basket wall gives the magnets a clean surface to grab. If the magnetic pull is weak or the basket shape is unusual, they can shift during aggressive WDT.
Clip-on funnels grab the basket mechanically. They can be very secure, but clips may interfere with grinder forks, basket ears, or close scale placement. They also add more parts that can trap coffee fines.
Friction-fit funnels rely on a snug seat. They are simple and often compact, but they depend heavily on true basket compatibility. If the fit is too loose, they wobble. If it is too tight, removal can disturb the bed.
Height, grinder clearance, and scale clearance
Funnel height matters twice. First, the grinder chute needs enough clearance to dose into the basket without the funnel hitting the chute or forcing the portafilter to sit at a bad angle. Second, the portafilter with funnel attached needs to fit on the scale if weighing in the basket.
A taller funnel contains WDT better. A shorter funnel usually clears more grinders and scales. The best choice depends on whether the routine values containment during distribution or a lower overall stack height.
On compact grinders with low chutes, I have seen a tall funnel force the portafilter nose-down so the mound forms at the front of the basket. On the other hand, a very short funnel on a fluffy grinder can let grounds jump the rim during WDT. That is why I treat funnel height as a workflow choice, not just a spec sheet detail.
Material choices: stainless steel, aluminum, and plastic
Stainless steel is widely chosen because it is durable, easy to wipe down, and stable in use. Aluminum is light and often comfortable for quick on-off handling. Plastic is usually light and gentle on contact surfaces, though it may show wear sooner depending on the rim design.
Material should come after fit and clearance. A perfect material in the wrong size is still a bad funnel.
When a Dosing Funnel Is Not Enough
A dosing funnel helps keep grounds inside the basket, but it does not break up clumps or correct uneven distribution. A WDT tool does the opposite: it redistributes coffee inside the puck so water can flow more evenly. That is why many home baristas end up choosing one tool based on the problem they actually see, not the one that sounds more advanced. The funnel vs WDT guide shows how each tool works, when one is enough, and when both make sense. Use it to avoid buying extra gear that does not solve your specific espresso issue.
When to Use a Basket-Side Dosing Ring vs a Dosing Funnel
If your main problem is grounds spilling around the portafilter basket, the right fix is usually a basket-side accessory rather than a dosing cup. This guide explains the practical difference between a dosing ring comparison and a dosing funnel, and why both serve the same job: keeping coffee in the basket while you dose, distribute, and tamp. The article also clarifies when the terms are interchangeable and when fit matters more than brand name.
That distinction matters because the wrong accessory can still leave you with mess, retention, or awkward clearance under the grinder. If you want to choose the simplest option for your workflow, the comparison breaks down how each tool affects cleanup, consistency, and compatibility with your portafilter.
What size dosing funnel do I need for a 58mm portafilter?
A 58 mm portafilter needs a funnel made for that basket size, though the label alone may not be enough. The funnel also needs to match the basket rim shape, sit flat without rocking, and leave enough clearance for the grinder chute and scale. Stable fit matters more than the printed size.
What to verify on a 58mm basket
Confirm that the funnel contacts the basket securely, does not cover the rim in a way that blocks proper seating, and can be removed without dragging the coffee bed. If the basket lip is rounded, shallow, or unusually thick, some 58mm funnels will fit poorly.
For direct grinding, place the portafilter under the chute with the funnel installed before buying if possible. For in-basket weighing, check whether the portafilter still balances well on the scale platform.
In practice, I would also test the exact basket you use most. A 58mm funnel that behaves on a ridgeless precision basket may not behave the same way on a ridged stock basket, even though both are sold as 58mm parts. That is one of the most common fit surprises in home espresso.
How do you choose the right dosing cup?
The right dosing cup needs to match the grinder output and the transfer style, with enough volume to catch the full dose cleanly and a rim shape that pours into the basket without spilling. It also helps if the cup fits the grinder forks or sits steadily on a scale.
Cup diameter and volume versus grinder output
A dosing cup that is too narrow may catch grounds poorly if the grinder chute sprays broadly. A cup that is too shallow may let coffee bounce out. A cup that is too wide may not fit the grinder forks or may feel awkward to flip into the basket.
Volume matters as much as diameter. The cup should comfortably hold the full ground dose without coffee piling to the lip before transfer.
I have had narrow stainless cups work beautifully under a conical single-dose grinder and fail under a flatter, wider grounds stream that coated the rim instead of dropping into the center. When that happens, the problem is usually cup mouth size rather than cup material.
Best uses for weighing and single-dosing
Dosing cups are strongest in single-dose workflows. Beans are weighed, ground into the cup, checked on the scale if needed, then transferred to the basket. That isolates weighing from the portafilter and makes the setup less sensitive to scale size or portafilter balance.
This is also a tidy fix for grinders with limited portafilter support or high chutes that scatter grounds around the basket rim.
It is also the route I prefer when the scale is small. A narrow espresso scale may hold a cup steadily but wobble with a bottomless portafilter and handle hanging off one side. In that case, weighing in the cup is simply less frustrating.
Transfer styles: pour, flip, and cup-to-basket
Pour works when the cup has a controlled rim and the basket has a funnel attached. Flip works when the cup is designed to sit over the basket opening and the user inverts the pair together. Cup-to-basket transfer with a short shake can settle grounds quickly, though a funnel still helps catch strays.
Blind shakers fit a different niche. They mix and settle grounds before the basket stage, but they are still a transfer tool rather than a basket containment tool.
My cleanest cup transfer is usually a short pour into a funnelled basket rather than a full flip. Flip transfers are fast, but if the cup and basket diameters are only barely compatible, I find they can trap a ring of coffee on the lip and then dump it unevenly when separated.
Material choices: metal, glass, and plastic
Metal cups are common and durable. Glass lets the user see retained fines and residue easily, though it needs careful handling. Plastic cups are light and often easy to fit under awkward grinder chutes.
The best material is the one that fits the grinder well, pours cleanly, and gets cleaned often.
Which dosing cup material minimizes static and mess
Stainless steel is the best all-around dosing cup material for home baristas because it weighs cleanly, transfers grounds efficiently, resists wear, and rinses fast. Choosing the wrong material—like certain plastics or silicone—introduces static cling that slows your workflow and spills coffee across your counter.
A detailed breakdown of stainless steel, aluminum, plastic, silicone, glass, and ceramic shows how each performs across weighing accuracy, grind transfer, static control, cleaning effort, and long-term durability. Ceramic, for example, excels at bean-side weighing but adds unnecessary weight during transfer. Matching the right material to your specific grinder and scale setup prevents daily friction. Compare these options in this guide to espresso dosing cup materials before buying your next accessory.
Which dosing cup material should you choose?
The material you choose affects how cleanly grounds release, how long the cup lasts, and whether it adds friction to your prep routine. For most home baristas, the main tradeoffs are simple: stainless steel is the most durable and usually the easiest to keep clean, plastic is lighter and often cheaper, and aluminum sits in between but can be more finicky depending on finish and fit.
The full espresso dosing cup materials guide compares these options by static behavior, durability, cleaning, weight, and portafilter compatibility so you can pick a cup that matches your grinder, basket, and workflow instead of creating extra mess.
How do I measure espresso dose with a dosing cup?
A dosing cup measures espresso dose by catching all grounds from the grinder in one vessel that can be placed on a scale before transfer. This works best in single-dose routines because the full dose is weighed cleanly, corrected if needed, and then moved into the basket in one controlled step.
Simple cup-based measuring workflow
- Tare the empty dosing cup on the scale.
- Grind into the cup.
- Check the ground dose weight.
- If the grinder retains or misses coffee, correct before transfer.
- Place a funnel on the basket.
- Pour or flip the cup into the basket.
- Use WDT if needed, then tamp.
This routine reduces one common source of drift: assuming the grinder delivered the intended dose when some coffee stayed behind or sprayed outside the basket.
In my workflow, this also makes retention checks easier. If I expect a certain dose and the cup comes up light, I can tap the grinder chute or run a bellows before the coffee ever reaches the basket. That is much cleaner than discovering the shortfall after distribution.
When an espresso dosing cup is worth adding
An espresso dosing cup is most useful when you weigh beans before grinding or want a cleaner way to move grounds from the grinder to the portafilter. The supporting article explains when that extra step is genuinely helpful, and when it is just another accessory you do not need.
It also compares dosing cups with funnels, shows how they fit into a single-dose routine, and helps you decide whether the cleanup and workflow benefits justify the cost. For a practical breakdown of the tradeoffs, see espresso dosing cups.
How do dosing tools affect puck prep and shot consistency?
Dosing tools can improve consistency when they reduce workflow errors before tamping, such as side-wall loss, uneven transfer, and clumpy distribution. They do not change extraction by themselves. They help the basket receive the intended dose in a tidier, more even bed, which lowers the chance of channeling caused by poor prep.
Cleaner dosing means less dose drift
If grounds miss the basket rim or stick to the counter, the puck weight changes even when the grind setting stays the same. Small transfer losses are easy to miss and hard to repeat. A funnel and cup reduce that drift by keeping more of the coffee in the workflow.
WDT fixes distribution; funnels contain the bed
A WDT tool is for distribution, not dose collection. Its needles break clumps and spread grounds more evenly through the basket. A funnel pairs well with WDT because it keeps loosened coffee from spilling over the edge while the bed is being leveled.
If clumping is the issue, buy or use WDT before expecting a funnel to solve it. The funnel contains the problem area. The WDT tool fixes it.
When channeling starts before tamping
Channeling often gets blamed on tamping alone, but poor transfer can start the problem earlier. Grounds dumped in a single mound, especially after static-heavy grinding, can create dense and sparse zones before the tamper ever touches the coffee.
Dose management is part of puck prep. Grind, transfer, distribute, tamp is the useful order because each step sets up the next one.
I notice this most with fluffy, clumpy grinds in deeper baskets. If I dump that dose straight into a bare basket, the center mounds and the edges stay thin. With a funnel in place, I can stir and level without losing coffee over the rim, and the tamp starts from a bed that is already closer to even.
Do espresso dosing tools actually improve shot consistency?
Dosing tools improve shot consistency when inconsistency comes from messy transfer, missed grounds, unstable basket fit, or uneven prep before tamping. They do not guarantee better espresso on their own. Their value is repeatable workflow control: same dose in, cleaner distribution, fewer avoidable prep errors.
What they can and cannot fix
They can reduce side-wall loss, contain WDT, and make dose weighing easier. They cannot fix a poor grinder, stale coffee, or an unsuitable grind setting.
That matters because espresso quality is influenced by grind size, water temperature, pressure, and tamping. Dosing tools matter most when those variables are already close and the routine still feels messy or erratic.
Do I still need a tamper after using a dosing funnel?
Yes. A dosing funnel helps keep grounds inside the basket during grinding, transfer, and distribution, but it does not compress the coffee into a level puck. A tamper is still used to form the compressed bed that the espresso machine brews through under pressure.
How funnels and tampers interact
Some low-profile funnels can stay on during light settling or distribution, but many are too tall or too narrow to allow tamping. If the tamper base hits the funnel wall, remove the funnel before tamping.
Espresso machines commonly include a portafilter and grouphead, and the puck still has to fit and seal properly in that brewing path. The funnel is prep equipment. The tamper finishes the prep.
I have also run into the opposite problem: a funnel that fits the basket perfectly but hides the coffee line enough that it is easy to overfill before tamping. If the tool blocks your view of the basket depth, it can slow you down instead of helping.
What causes static when using espresso dosing tools?
Static usually comes from the coffee and grinder more than the dosing tool itself. Bean freshness, low humidity, grinder design, retention, and fast grounds movement can all increase spray and clumping. Dosing cups and funnels help contain the mess, but they do not remove the underlying cause on their own.
Why static shows up
Very fresh beans can throw more chaff and fines. Dry air often makes spray worse. Some grinders produce a broader, more chaotic grounds stream than others. Retained coffee can also break loose in clumps and make the next dose look inconsistent.
Workflow fixes that help
Keep the transfer path short. If direct grinding into the basket causes spray, move to a dosing cup. If the cup-to-basket dump creates a ring of stray grounds, add a funnel to the basket before transfer. Clean old fines from the chute and cup often so residue does not build up and spread static-prone dust.
If static is severe across every tool setup, the problem likely sits with beans, room conditions, or grinder design rather than funnel material alone.
From experience, the worst mess usually comes from combining a static-prone grinder with a basket that sits slightly too low under the chute. In that situation, changing from no tool to a cup-first workflow helps more than swapping between two funnel materials.
How do I transfer grounds from the grinder to the portafilter neatly?
The neatest transfer depends on where the mess begins. If the grinder sprays around the basket, grind into a dosing cup first. If the transfer from cup to basket is the messy step, add a fitted funnel before pouring. Clean transfer comes from matching the tool to the failure point.
Three tidy transfer routes
Direct to basket with funnel: best when the grinder aligns well with the portafilter and the issue is rim loss during grinding or WDT.
Grinder to cup, then cup to funnelled basket: best for single-dose use, weighing, and poor grinder-to-portafilter alignment.
Grinder to blind shaker, then to funnelled basket: useful when clumps and spray make the first drop into the basket untidy.
For 54mm home baskets, I usually find cup-to-funnelled-basket transfer easier because the smaller opening is less forgiving. For 58mm baskets under a grinder with good fork alignment, direct grinding into a funnelled basket is often fast enough that I skip the extra cup step.
How do you reduce static, clumping, and grinder-to-basket mess?
Reduce static and mess by shortening the transfer path, using a dosing cup when the grinder chute sprays, using a fitted funnel during transfer and WDT, and cleaning retained fines from the grinder path. If clumping remains heavy after that, the issue is likely grinder behavior or coffee condition rather than tool choice alone.
Mess control by failure point
If grounds miss the basket during grinding, use a funnel or switch to cup-first grinding. If grounds spray out during the pour, the cup rim shape or pour angle is the problem. If the basket overflows during WDT, the funnel is too short or missing entirely.
When the tool is not the root cause
Machine type is rarely the reason for dosing mess. Grinder path, bean condition, humidity, and basket compatibility matter far more in this part of the routine.
Compact setups for tight spaces
For narrow countertops, the focus shifts to compact, efficient tools that prevent mess without requiring extra space. This guide details the top portable solutions, including the Normcore magnetic funnel for 54mm retention, the ETZRUNO single-dose cup, and the MEION WDT distribution tool, explaining exactly which one fits a small kitchen based on your grinder and portafilter size. It highlights specific picks to keep grounds in the basket area while ensuring your setup fits easily inside a cabinet. small kitchen dosing tools
Decision matrix: which dosing tool fixes which problem
Problem-to-tool matrix
| Home problem | Main failure point | Best tool | Why it helps | Compatibility check |
|---|---|---|---|---|
| Grounds on counter during grinding | Chute misses basket rim | Dosing funnel | Keeps grounds inside the portafilter during direct grinding | Basket diameter, rim shape, grinder chute clearance |
| Spray from static under grinder | Broad or chaotic grounds stream | Dosing cup | Catches the full dose before transfer | Cup diameter under chute, cup volume, fork fit |
| Mess when pouring grounds into basket | Open basket during transfer | Cup plus dosing funnel | Combines tidy collection with contained transfer | Basket fit, cup pour shape, scale space |
| Unstable funnel during WDT | Poor basket fit | Better-matched funnel | Prevents rocking and side-wall leaks | Exact basket size, rim shape, attachment type |
| Awkward in-basket weighing | Portafilter and funnel too tall or unstable on scale | Dosing cup | Moves weighing off the portafilter | Scale platform size, cup stability |
| Slow back-to-back prep | Too many transfer steps | Direct grind with magnetic funnel | Fast on-off use for repeated shots | Magnet hold, grinder clearance, basket fit |
| Clumps and uneven puck density | Distribution problem | WDT tool with funnel | Breaks clumps while keeping grounds contained | Funnel height for WDT movement |
| Uneven puck after prep | No compression step | Tamper | Forms the level compressed puck required for brewing | Tamper size, funnel removal before tamping if needed |
Compatibility checklist
- Confirm the portafilter basket size first, with 58mm and non-58mm treated as separate accessory families.
- Check the basket rim shape, because flat, rounded, or thick lips change funnel stability.
- Decide whether the routine doses into the basket or into a cup first.
- Measure grinder chute clearance with the portafilter and any funnel in place.
- Check whether the portafilter with funnel attached still fits on the scale.
- For cups, confirm fork fit, cup volume, and whether the cup rim pours cleanly into the basket.
- For magnetic funnels, confirm that the basket wall gives enough contact for a stable hold.
Best combinations by use case
Single-dose home workflow: dosing cup, fitted funnel, WDT tool, tamper. This route works well when weighing accuracy and tidy transfer matter more than absolute speed.
Faster repeated shot prep: direct grind into a funnelled basket, WDT only if the grinder needs it, then tamp. This reduces handling steps when the grinder aligns well with the portafilter.
Small-basket or awkward-fork setup: cup first, then funnelled transfer. I reach for this when a grinder does not support the portafilter securely or when a 54mm basket opening makes direct grinding messy.
Which dosing tool fits your workflow?
If your biggest annoyance is spilled grounds, a dosing funnel is the safer default; if you want a quieter transfer from grinder to basket, a dosing cup is often the better fit. The supporting article on espresso dosing tools breaks down the clean-transfer vs. quiet-prep tradeoff, then compares specific options by fit, cleanup, and workflow type. That matters because the right tool can remove one of the most common friction points in home espresso: mess on the counter or noise at the grinder. It also helps you choose based on your actual routine instead of buying a tool that looks useful but slows you down.
Are magnetic dosing funnels worth it?
Magnetic dosing funnels are worth buying when the basket accepts them securely and the routine benefits from quick on-off use. They save time and feel clean in repeated prep, but weak magnetic hold or poor basket compatibility can make them less stable than clip-on or friction-fit options.
When magnetic makes sense
Choose magnetic when the goal is speed and the basket wall supports a solid hold. Skip it if the funnel shifts during WDT, if the magnets collect metal dust around the workstation, or if a clip-on design fits that basket more securely.
For me, magnetic is best on a dedicated daily setup where one basket stays in rotation. If I am swapping between baskets with different lip shapes, friction-fit or clip-on often ends up more predictable.
How to use espresso dosing tools without slowing down your routine
The fastest routine is the one with the fewest corrective steps. A good dosing setup removes cleanup, re-weighing, and spill recovery. If a tool adds extra handling without solving an actual failure point, it is slowing the workflow rather than controlling it.
Minimal workflow with a dosing funnel
Lock the basket in the portafilter. Add the funnel. Grind directly into the basket, distribute if needed, remove the funnel, tamp, and brew.
Minimal workflow with a dosing cup
Grind into the cup, weigh, transfer into the basket, distribute, tamp, and brew. This is often the cleaner route when the grinder and portafilter do not line up well.
Common mistakes that add steps
Buying a funnel before confirming basket fit. Using a cup that barely fits under the chute. Weighing in the basket when the setup is too unstable. Leaving a tall funnel on and then discovering the tamper cannot enter the basket cleanly.
The workflow that feels fastest in real use is usually the one that matches the grinder. When I am using a grinder that sprays or clumps, trying to force a direct-to-basket routine costs more time in cleanup than a simple cup-first routine ever does.
How do I clean espresso dosing funnels and cups properly?
Clean dosing funnels and cups by removing loose grounds after each session and wiping away oil and fines before residue builds up. Regular cleaning matters because old coffee dust can worsen static, trap odors, and interfere with fit at the basket rim, clips, or magnets.
Daily cleaning
Brush or tap out loose grounds. Wipe the inner walls and rim with a dry or lightly damp cloth. Clean any magnet pockets, clip joints, or friction surfaces where fines collect.
Material-specific care
Stainless steel: wipe regularly and dry fully to keep the surface clean. Aluminum: clean gently and avoid abrasive scrubbing that can mark the finish. Plastic: wash with mild soap when oils build up, then dry well. Glass: rinse and dry carefully to avoid chips around the rim.
What to inspect for wear
Check magnetic hold, clip tension, and friction-fit edges. If a funnel starts rocking on the basket or a cup develops a chipped pouring edge, workflow control drops quickly.
I also check for a thin film of coffee oil around the inside lip, especially on metal cups and magnetic funnels. That film is easy to ignore, but once it builds up it can hold fines, dull the pour, and make an otherwise good-fitting tool feel messier than it really is.
For a complete reset, wash the tool with mild soap, rinse thoroughly, and dry it before the next session. The goal is simple: keep the contact surfaces clean enough that the cup still pours cleanly and the funnel still seats flat. If you do that, cleanup stays quick, fit problems are easier to spot, and the dosing tool keeps doing its actual job instead of becoming another source of mess.
Frequently asked questions
How do I use a dosing funnel without making a mess?
Start with a funnel that matches the basket size and rim shape, then seat it fully before grinding or pouring. Keep the portafilter level, avoid overfilling the basket, and remove the funnel gently after WDT or settling so the coffee bed stays in place.
Products related to this article
Sponsored / affiliate links. As an Amazon Associate I earn from qualifying purchases. I may earn additional commission from eligible campaigns.