You’re standing there at 6:45 AM, bleary-eyed, and the machine just groans. The grinder whirs for a second, then stops. Or worse, it grinds fine but the brew basket stays dry. These are the moments that test your patience and your budget. Most people either live with bad coffee or throw the whole unit in the trash. Neither is a good option.
This guide is the mechanic’s approach to the most common coffee maker with grinder problems and fixes. You’ll learn a simple diagnostic flow to figure out if the issue is in the grinder or the brewer. Then we get into specific fixes, including how to safely test electrical parts with a multimeter. You’ll walk away knowing exactly what to do, or at least knowing exactly when to call it quits.

ERETOW
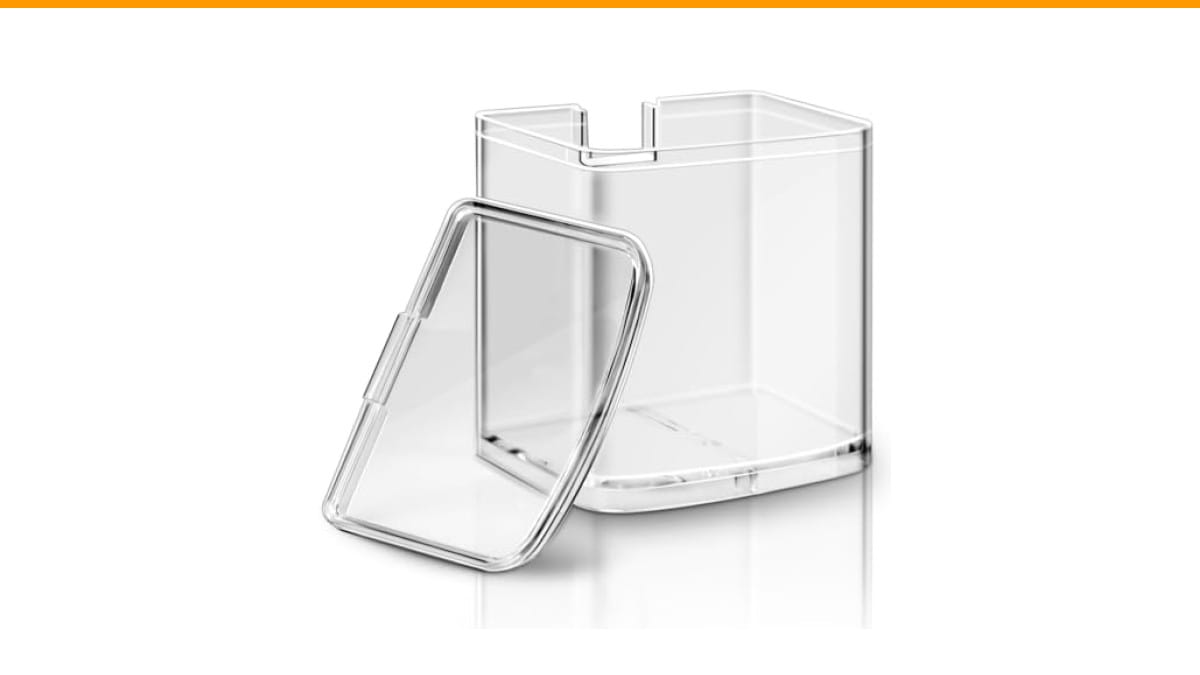
DBM-8GC Grind Chamber With Lid for Cuisinart…
- Fits for Cuisinart Burr Coffee Grinder Parts- Part Number DBM-8GC, this grind chamber with lid is compatible with Cuisinart coffee…
- Storage Function - This replacement coffee grind chamber is ideal for storing coffee grounds, effectively replacing worn or cracke…
- Premium Material - Crafted from lightweight and durable polystyrene(PS) material, this food processor parts for Cuisinart automati…
As an Amazon Associate I earn from qualifying purchases.
Before you tear anything apart, know that some fixes are simple. A cracked grind chamber is a common failure point on combo units. If your Cuisinart DBM-8P1 has a cracked or cloudy chamber, a direct replacement like the ERETOW DBM-8GC replacement part solves that specific problem without buying a whole new machine. It’s a cheap, practical fix for a very common issue.
Before You Start: Safety First and Quick Diagnostic Flowchart
Unplug the machine. Every time. Water and electricity are a lethal mix, and you’ll be poking around inside. If you’re testing electrical components, wait at least 15 minutes after unplugging. Capacitors can hold a dangerous charge, and you don’t want to learn that lesson the hard way.
Now, run this quick mental checklist before you touch a screwdriver. Does the grinder spin? Does the pump make noise? Does the heating element get hot? Answering these three questions tells you which system to dig into.
- Grinder spins but no grounds? The burrs are dull, jammed, or the chamber is blocked.
- Pump runs but no water? You have a clog, a failed check valve, or a bad solenoid valve.
- Water flows but it’s cold? The heating element or thermal fuse is likely dead.
This decision tree separates the guesswork from the diagnosis. If you skip this, you’ll waste an hour cleaning parts that aren’t the problem. Trust the process.
Grinder-Specific Problems (Jams, Slow Grinding, Inconsistent Grounds)
Combo machines often have weak motors in the grinder section. They get bogged down with oily beans or a foreign object like a tiny stone. The result is a machine that stalls mid-cycle or sounds like it’s struggling.
How to Clear a Jammed Burr Grinder Safely
First, unplug the unit. Remove the bean hopper and empty it. Look down into the burr chamber—you’ll likely see the culprit. Use a stiff brush or a wooden skewer to dislodge any debris. Never use metal tools. You’ll scratch the burrs and ruin the grind quality permanently.
If the burrs are seized, check for a rubber drive bushing. These wear out and slip, causing the motor to spin but the burrs to stay still. It’s a cheap part and a common failure on units that see daily use. If the burrs themselves are visibly dull or chipped, replacement is the only fix.
Adjusting Grind Size for Drip vs. Espresso
Most combo grinders have a dial that adjusts the distance between burrs. If your coffee tastes bitter or your espresso shot runs too fast, the grind size is wrong. For drip coffee, you want a medium grind, like coarse sand. For espresso, you need a fine grind, like powdered sugar.
Here’s the catch: you must adjust the dial while the grinder is running. If you turn it while the burrs are stationary, you can jam the mechanism. Run the grinder, turn the dial slowly, and listen. A higher-pitched whine means a finer grind. A lower, chugging sound means coarser. It takes a few tries to dial it in, but it’s worth it. In testing, most people are surprised how much a quarter-turn changes the brew time.
If your grounds are still inconsistent, the burrs are likely worn. A good set of burrs lasts about 500 pounds of coffee. If you buy cheap beans in bulk, you might hit that number faster than you think. For a deeper look at burr vs. blade differences, check out our burr grinder guide.
Brewing System Failures (No Water, Slow Flow, Cold Coffee)
This is where most people give up. The machine looks fine, but the water just sits there. The problem is usually scale buildup or a failed pump. Hard water is the enemy here. It leaves calcium deposits that clog the tiny tubes and valves.
Testing the Thermal Fuse and Heating Element with a Multimeter
If the coffee is cold or lukewarm, skip the descaling and test the heating system. You’ll need a multimeter. Set it to the resistance (ohms) setting. Unplug the machine and remove the base plate to access the internals.
First, find the thermal fuse. It’s a small, white or black cylinder with two wires attached, usually clipped to the boiler or heating element. Touch one probe to each terminal. A good fuse reads near zero ohms. If it reads infinite (OL on the display), the fuse is blown. This is a safety device that trips when the machine overheats. Replacing it is simple, but you must also figure out why it tripped. Usually, it’s scale buildup on the heating element.
Next, test the heating element itself. It has two larger terminals. The resistance should be between 10 and 50 ohms, depending on the wattage. If you get an open reading, the element is burnt out. That’s a bigger repair. You can often find a replacement part, but the labor and cost might not be worth it on a budget machine. A thorough clogged coffee maker cleaning might prevent this whole scenario.
Leaks, Overflow, and Sputtering: Finding the Source
Water pooling under the machine is a bad sign. It’s rarely a simple fix. The most common sources are a cracked hose, a failed seal on the boiler, or a clogged brew basket that forces water out the top.
Start by removing the water reservoir and checking the rubber gasket where it connects. That’s a common leak point. If it’s dry, run a brew cycle with the top open and watch where the water goes. Sputtering from the brew head usually means the check valve is stuck. This valve prevents water from flowing back into the tank. When it fails, you get a geyser effect.
If the machine overflows the filter basket, the problem is too fine a grind or too much coffee. The water can’t pass through the grounds fast enough, so it backs up. Fix the grind size first. If that doesn’t work, check the solenoid valve. This valve controls the flow of water. A stuck solenoid will flood the basket. Cleaning the valve often fixes it, but a replacement is sometimes necessary.
Taste and Quality Issues (Bitter, Metallic, or Weak Coffee)
You fixed the mechanics, but the coffee still tastes off. Bitter coffee usually means over-extraction. The water is too hot, the grind is too fine, or the brew time is too long. Weak coffee is the opposite. The grind is too coarse, or there’s not enough coffee in the basket.
A metallic taste is a red flag. It often means the water is sitting in the boiler too long, picking up minerals and a metallic flavor from the heating element. Run a descaling cycle with a vinegar solution to flush the system. If the taste persists, the boiler might be corroding internally, and that’s a terminal condition.
Don’t forget the grinder itself. Oily beans leave a residue that goes rancid and ruins the flavor of every batch after. You should clean the grinder burrs and chamber regularly. We have a detailed coffee grinder cleaning guide that covers this exact process. It takes ten minutes and makes a noticeable difference.
Intermittent Faults: The “Ghost” Problems
This is the most frustrating issue. The machine works fine for a week, then dies for a day, then works again. You can’t diagnose a problem that isn’t there. These ghost faults are almost always a loose wire or a failing thermostat.
Start by wiggling the power cord where it enters the machine. If the unit flickers or shuts off, the strain relief is broken and the wire is shorting. That’s a safety hazard and needs immediate repair.
If the cord is fine, open the case and inspect every wire connector. Look for discolored or loose spade connectors. Push them back on firmly. A failing thermostat will also cause intermittent heating. It works when cold, but once it heats up, it opens the circuit and kills the power. When it cools down, it resets. That’s why the machine works sometimes and not others.
Maintenance Schedule That Prevents 80% of Problems
Most of these failures are preventable. Hard water scale is the #1 killer of coffee makers. It coats the heating element, causing it to overheat and trip the thermal fuse. It also clogs the check valve and solenoid valve.
Here’s a realistic schedule. Descale every 3 months if you use tap water, every 6 months if you use filtered water. Use a proper descaling solution or a 50/50 white vinegar and water mix. Run it through a full cycle, then run two cycles with clean water to rinse. The vinegar smell lingers if you don’t rinse thoroughly.
Clean the grinder burrs every month. Use a brush or run a few tablespoons of instant rice through the grinder. The rice absorbs the oils and polishes the burrs. It’s a cheap trick that works. Also, wipe down the brew basket and carafe daily. Old coffee oils go rancid and add a bitter taste to fresh brews. For a full routine, see our guide on how often to clean your coffee maker.
When to Repair vs. Replace: The Cost-Benefit Math
This is the cold, hard truth. A combo machine is a complex device. It has a grinder, a pump, a heater, and a control board. When one system fails, the repair cost can approach the cost of a new unit.
Use this simple rule: if the repair part costs more than 50% of the price of a new machine, replace it. Labor costs also matter. If you’re paying a technician $80 an hour, a $20 part can become a $100 repair.
| Problem | Part Cost | Repair Effort | Verdict |
|---|---|---|---|
| Jammed grinder (debris) | $0 | 10 minutes | Fix it |
| Cracked grind chamber | $15-$25 | 5 minutes | Fix it |
| Blown thermal fuse | $5-$10 | 30 minutes | Fix it |
| Burnt-out heating element | $20-$40 | 1 hour | Depends on machine age |
| Failed pump | $30-$60 | 1-2 hours | Likely replace |
| Corroded boiler | $40+ | 2+ hours | Replace the machine |
If your machine is over 5 years old and the pump or boiler fails, just replace it. The new models are more efficient and brew better coffee. Don’t sink money into an aging appliance. If the machine is under 2 years old, parts and labor are usually worth it.
Frequently Asked Questions
Why does my grinder stop working mid-cycle?
The motor is overheating or the burrs are jammed. If you hear a hum but no spinning, the burrs are stuck. If it spins then stops, the thermal overload protector on the motor is tripping. Let it cool for 30 minutes, clear the burrs, and try again. If it keeps happening, the motor is worn out.
Can I use vinegar to descale my combo machine?
Yes. Mix equal parts white vinegar and water and run it through a brew cycle. Let it sit in the reservoir for 30 minutes first. Then run two or three cycles with fresh water to rinse. Don’t use vinegar on the grinder burrs, though. It can strip their coating. Clean those with a dry brush.
Why is my coffee maker leaking from the bottom?
Usually, a cracked hose or a failed gasket on the water reservoir. Check the water tank connection first. If it’s dry, remove the base and look for water stains or mineral deposits. A cracked boiler is the worst-case scenario and usually means it’s time for a new machine.
My coffee tastes like plastic. What’s wrong?
This happens with new machines. The manufacturing oils and plastic residue need to be flushed. Run two or three full cycles with plain water before your first brew. If the taste persists after a week, the water reservoir might be made of a low-grade plastic that’s leaching chemicals. That’s a health concern, and you should stop using the machine.
How often should I replace the burrs on my grinder?
For home use, every 2-3 years. If you grind daily, you’ll notice the grind size becoming inconsistent before the burrs are completely dull. Your shots will pull faster, and the coffee will taste sour. If you can’t fix it with the adjustment dial, the burrs are done.
What You Can Do Right Now
- Run the diagnostic flow before opening anything. It saves time and prevents mistakes.
- Keep a multimeter handy. Testing the thermal fuse and heating element is the fastest way to confirm an electrical failure.
- Clean the grinder burrs monthly. A dry brush or instant rice works wonders for flavor.
- Descale every 3 months if you have hard water. This single habit prevents most brewing failures.
- Check if your specific model has a known weak part, like the rubber drive bushing or the grind chamber. Replacing a $20 part beats buying a $200 machine.
- Don’t be sentimental about old machines. If the boiler is corroded or the pump is dead, the math rarely works in your favor.
Products related to this article
Sponsored / affiliate links. As an Amazon Associate I earn from qualifying purchases. I may earn additional commission from eligible campaigns.
 HomeBeyond Espresso Coffee Maker 12 Cups, Classic Stovetop Espresso Maker, 600ml / 20oz Coffeemaker for Gas & Ceramic Stovetops (Silver)
 Belly Moka Coffee Maker Stovetop Espresso Maker 9 Cup Aluminum Moka Pot Percolator 15oz 450ml Easy Brewing for Electric Ceramic Stoves Home Camping Italian Cuban Café Classic Black
 Belly Moka Coffee Maker Stovetop Espresso Maker 6 Cup Aluminum Moka Pot Percolator 10oz 300ml Easy Brewing for Electric Ceramic Stoves Home Camping Italian Cuban Café Classic Silver