You’re pulling a shot at 6 a.m., and your grinder sounds like a blender full of gravel. It’s loud, it’s jarring, and you’re pretty sure your neighbors can hear it. Before you panic and start shopping for a new machine, know this: most grinder noises are fixable, and you can usually do it in under an hour with basic tools.
This guide will teach you to diagnose the exact type of noise your espresso grinder is making—crackling, screeching, rattling, whistling, or buzzing—and then walk you through the specific fix for each. You’ll learn what to check first, what tools you need, when to stop DIY and call it quits, and how to prevent future noise with a simple maintenance schedule. No guesswork, no unnecessary disassembly.
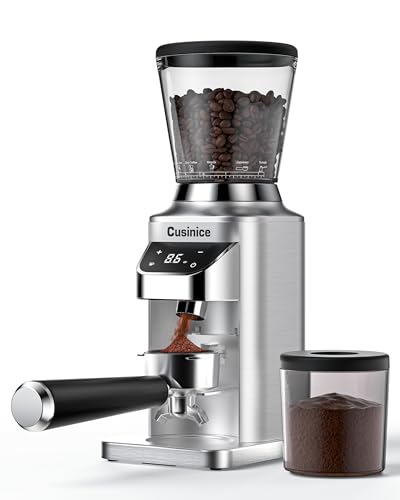
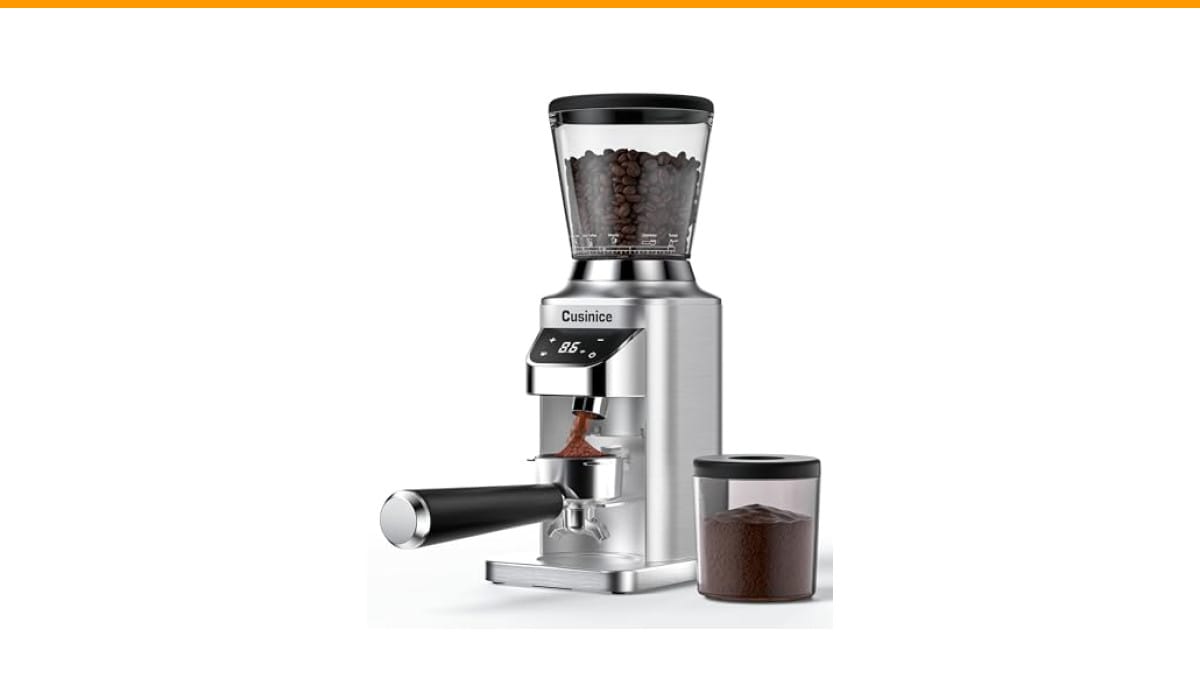
Cusinice
Conical Burr Coffee Grinder, Anti-Static, 0.1s Single/Double…
- 0.1s Timer with Smart Memory for Repeatable Dosing: The 0.1-second electronic timer lets you fine-tune grinding time for better do…
- 40mm Stainless Steel Conical Burr for Even Grinding: Built with a 40mm stainless steel conical burr, this conical burr coffee grin…
- Anti-Static Design for a Cleaner Countertop: The anti-static coffee bean grinder helps reduce clumping and scattered grounds durin…
As an Amazon Associate I earn from qualifying purchases.
If you’re in the market for a quieter, more reliable grinder, the Cusinice Conical Burr Coffee Grinder is a solid option worth considering. It uses a 40mm stainless steel conical burr with 34 grind settings, and its anti-static design cuts down on the clumping that often causes sputtering and buzzing in cheaper grinders.
Diagnose the Noise: A Quick Audio Checklist
Before you take anything apart, listen carefully. The type of sound tells you where the problem lives. Here’s a quick breakdown:
- Crackling or popping – foreign objects or hard debris in the burrs
- Screeching or high-pitched grinding – burr misalignment or worn burrs
- Whistling or stalling – declumper or chute blockage
- Rattling or clunking – gear or motor issues
- Buzzing or spitting – static or clumping
Run a small amount of beans through and note the exact sound. Is it constant or intermittent? Does it change when you adjust the grind setting? That info will narrow down the fix.
For example, a crackling sound that only happens with dark-roast beans usually means a small stone or unroasted bean made it through. A screech that gets louder as the burrs spin suggests metal-on-metal contact—that’s urgent.
Fix 1: Foreign Objects and Hard Debris (The “Crackling” Noise)
If you hear crackling or popping, something hard is caught between the burrs. It could be a pebble, a twig, or even a piece of chaff that got baked on. Don’t ignore it—that debris can chip your burrs permanently.
Step-by-Step Removal
- Unplug the grinder. Always.
- Remove the hopper and any beans sitting above the burrs.
- Use a brush or vacuum to clear loose debris from the burr chamber.
- If the noise persists, you’ll need to access the burrs. Most grinders have a top burr that twists off counterclockwise, and a bottom burr secured by screws. Check your manual for the exact disassembly steps.
- Inspect both burrs with a bright light. Look for chips, cracks, or stuck debris. Remove anything you find with tweezers or a soft brush.
- Reassemble and run a small amount of beans through to test.
If you find a chip in the burr, it’s time to replace it. A chipped burr won’t grind evenly and will keep making noise.
Fix 2: Burr Alignment and Wear (The “Screeching” or “Grinding” Noise)
A high-pitched screech or a deep grinding sound often means the burrs are misaligned or worn out. Misalignment can happen after cleaning—if you don’t seat the top burr correctly, it rubs against the bottom burr. Worn burrs happen after years of use, especially if you grind very fine for espresso daily.
How to Check Alignment
Remove the burrs and look at the wear pattern. Even wear is fine. Uneven wear—shiny spots on one side, dull on the other—means the burrs are tilted. Re-seat them carefully, making sure the locking tabs or screws are fully engaged.
For burr wear, run a simple test: grind a few beans and feel the grounds. If they’re noticeably uneven, or if you see shiny spots on the burr edges, it’s time for a new set. Burr sets cost $20–$60 depending on your grinder, which is far cheaper than a new machine.
While you’re in there, check the burr screws. Loose screws cause a rattling vibration that sounds worse than it is. Tighten them gently—don’t overtighten, or you’ll strip the threads.
If you have a Breville Barista Express, you might notice this issue more often. Check out our grinder problems guide for model-specific fixes.
Fix 3: The Declumper and Chute Blockage (The “Whistling” or “Stalling” Noise)
If your grinder whistles or sounds like it’s struggling to push grounds through, the declumper—that little plastic piece at the bottom of the chute—is likely clogged. Grounds build up behind it, creating back-pressure that makes the motor work harder and whine.
Clearing the Chute
- Unplug the grinder and remove the hopper and burrs.
- Find the declumper (it’s usually a small plastic or metal plate with holes).
- Use a paper clip or a thin brush to push out the compacted grounds.
- Vacuum the chute thoroughly.
- Reassemble and run a few beans through to confirm the airflow is clear.
This fix takes five minutes and can eliminate a noise that sounds like a dying motor. It’s also a good time to clean the chute and the area around the burrs—check our coffee grinder cleaning guide for a full routine.
Fix 4: Gear and Motor Issues (The “Rattling” or “Clunking” Noise)
If you hear a rhythmic clunk or a rattle that seems to come from the base of the grinder, the problem is likely in the gearbox or motor. This is more serious, but it’s not always terminal.
What to Check
- Loose motor mounts – The motor might be vibrating against the housing. Tighten any visible screws.
- Worn gears – Plastic gears wear out over time, especially in budget grinders. If you see worn or broken teeth, replace the gear assembly. It’s a $10–$20 part on most models.
- Burnt-out motor – If the grinder smells like burning plastic or the motor stalls completely, it may be beyond repair.
For a rattling sound, check the hopper and the grind chamber for loose parts. Sometimes a screw just needs a quarter-turn.
If you have an automatic espresso machine with an integrated grinder, the noise might come from the pump rather than the grinder. Read our guide on automatic espresso machine loud noise to differentiate.
Fix 5: Static and Clumping (The “Buzzing” or “Spitting” Noise)
Static electricity makes grounds cling to the chute and spit out in bursts. That spitting sound is annoying, and it also means your dosing is inconsistent.
The fix is simple: add a drop of water to your beans before grinding. A spray bottle with a fine mist works best—one or two spritzes per dose. The moisture reduces static and clumping dramatically.
If you’re using a grinder without an anti-static design, you’ll notice this more in dry climates. The Cusinice grinder mentioned earlier has an anti-static design that helps, but even that benefits from a spritz in winter.
When to Stop DIY: Safety and Cost-Benefit Analysis
Not every noise is worth fixing. If the motor smells burnt, the burrs are visibly cracked, or the gearbox is shattered, replacement is often the smarter move. A new burr set costs $20–$60; a new gear assembly is $10–$30. But if the motor itself is dead, you’re looking at $50–$100 in parts plus your time—and a new grinder might cost $100–$200.
Also, if you’re not comfortable disassembling your grinder, or if you strip a screw, you’ll make things worse. Know your limits. A grinder that’s beyond repair is a good excuse to upgrade to a model with better build quality, like the Cusinice grinder with its stainless steel burrs and 34 settings.
Preventative Maintenance: The Pound-Based Schedule
Most grinder noise comes from neglect. Here’s a schedule based on how much coffee you grind, not time:
| Pounds Ground | Maintenance Task | Why |
|---|---|---|
| Every 5 lbs | Brush out the burr chamber and chute | Prevents buildup that causes back-pressure noise |
| Every 20 lbs | Deep clean with grinder cleaner tablets | Removes oil residue that makes burrs stick and screech |
| Every 50 lbs | Inspect burrs for wear and alignment | Catches worn burrs before they damage the motor |
| Every 100 lbs | Replace burrs (if needed) | Keeps grind quality consistent and noise low |
If you grind a pound a week (about one shot per day), that’s a brush-out every five weeks, a deep clean every five months, and a burr inspection annually. Mark it on your calendar.
FAQ: Quick Answers for Urgent Problems
Why is my espresso grinder suddenly loud after cleaning?
You likely didn’t re-seat the top burr correctly. It’s rubbing against the bottom burr. Turn it until it clicks or locks into place, and run a few beans through to test.
Can I use WD-40 to lubricate the burrs?
No. WD-40 is a solvent, not a lubricant, and it’ll contaminate your coffee. Use food-grade mineral oil or grinder-specific lubricant if you must, but most burrs don’t need lubrication—they’re designed to run dry.
What if the noise is coming from the motor, not the burrs?
If you’ve cleaned everything and the motor still whines or clunks, it might be a worn bearing or a failing winding. That’s a repair job for a professional, or a sign to replace the grinder.
Is a loud grinder always a bad sign?
No. Some grinders are just loud by design, especially budget models with metal gears. But a sudden change in sound—from quiet to loud—always indicates a problem.
How do I know if my burrs are worn out?
Look for shiny, polished spots on the cutting edges, or feel the grounds—if they’re inconsistent, even at the same setting, the burrs are dull. A new set will restore quiet operation and better extraction.
Final Thoughts: What to Do Next
- Listen first—the sound tells you exactly where to start.
- Always unplug before disassembling.
- Clean the chute and declumper regularly to prevent back-pressure noise.
- Check burr alignment after any cleaning or maintenance.
- Keep a spray bottle near the grinder to reduce static and clumping.
- Replace worn burrs—it’s cheaper than a new grinder and fixes most noise issues.
- If the motor is dead, don’t sink money into it; look for a new grinder with better build quality.
Now you’ve got a plan. Go fix that grinder, and enjoy a quiet morning coffee.
Products related to this article
Sponsored / affiliate links. As an Amazon Associate I earn from qualifying purchases. I may earn additional commission from eligible campaigns.
 Coffee Espresso Machine Handle Replacement Parts, Cafe Bracket Handle for Lidl Silvercrest CM4621 CM4218 KF5002 KF500S Barista (for 51mm Portafilter Basket - Not included)
 Linnkyfloa Coffee Espresso Maker Handle Replacement for Stovetop Moka Pot or Percolator, Black Plastic for Spare Part Compatible with Italian(9-12 Cup)
 Cutting Board Oil 12 oz, Food Grade Mineral Oil Added Orange Lemon Scent