You set up your pour-over station, fill the kettle, and hit the switch. A minute later, you notice a small puddle forming under the base. Your first thought is that the whole unit is broken. But before you toss it, you need to know something: most of these puddles aren’t actually leaks.
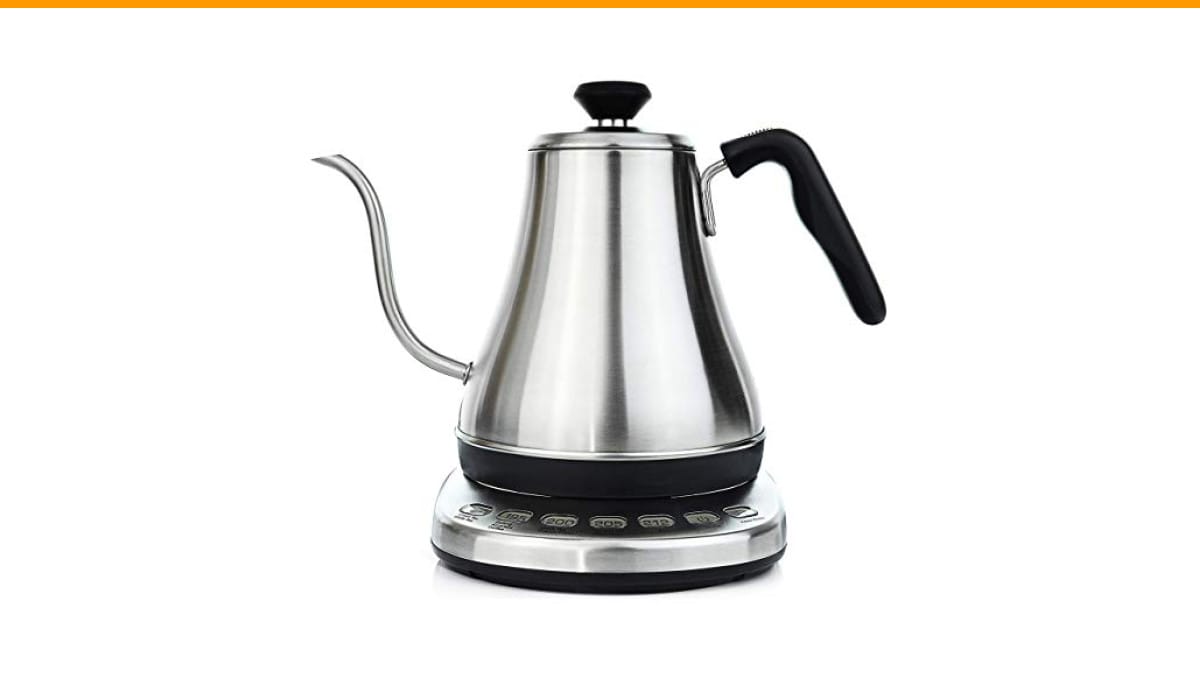
I’ve tested a lot of gooseneck kettles over the years, including the Willow & Everett model that sits on my counter right now. I’ve taken them apart, replaced seals, and run descaling cycles more times than I can count. This article walks you through the exact diagnostic steps I use to figure out where water is coming from, how to fix the common problems, and when you’re just throwing good money after bad.
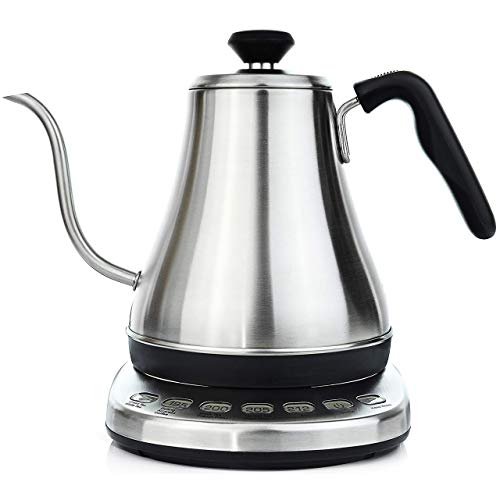
Willow & Everett
Gooseneck Electric Kettle with Temperature Control -…
- Heat water and retain peace of mind with the Willow & Everett Gooseneck Electric Kettle. The stainless steel body and neck are con…
- The plastic base and handle are smoothly molded to the metal body to create a single, sturdy kettle. It won't come loose or shed p…
- The brushed steel body is rust-resistant, so no special handling is needed to keep it in top condition. The base is also scratch-r…
As an Amazon Associate I earn from qualifying purchases.
If you’re dealing with a Willow & Everett Electric Gooseneck Kettle or any similar stainless steel model, the good news is that the fix is often a $3 rubber ring, not a $60 replacement. The Willow & Everett kettle’s brushed steel body and secure lid design make it a solid unit, but even the best kettles develop issues with mineral deposits over time.
Is It a Leak or Just Condensation? (The First Test)
Before you do anything, put a dry paper towel under the kettle and run a full boil cycle. Don’t touch it. Let it cool completely. Then check the towel.
If the towel is wet, you have a real leak. If it’s dry, what you saw earlier was condensation. Here’s why that happens: the heating element warms the base, and the cool countertop causes water vapor in the air to collect on the bottom of the kettle. It drips down, and it looks exactly like a leak.
Another common false alarm is steam from the vent. When water boils, steam escapes from the lid and the spout. If your kettle sits near a cabinet or wall, that steam condenses and runs down the side. That water pools on the counter, but it never came from inside the kettle body. People swear their kettle is leaking when it’s just physics.
Run the towel test twice. If the second test is also dry, you don’t have a leak. You have a ventilation issue. Move the kettle away from the wall and use a trivet. If the towel comes back wet, read on.
The 4 Most Common Leak Points on an Electric Gooseneck Kettle
Real leaks happen in specific places. Once you know where they are, you can skip the guesswork. I’ve broken down the four spots I check first, in order of danger.
Leaking from the Base (Electrical Hazard Alert)
This is the serious one. If water pools inside the base unit, near the electrical pins, stop using the kettle immediately. Unplug it and let it dry for 48 hours before you even inspect it.
The leak usually comes from a failed seal where the heating element meets the bottom of the stainless steel tank. On many kettles, this is a silicone gasket that degrades over time. If you see water inside the base connector, check the pins for corrosion. Green or white crust on the pins means moisture has been sitting there for a while. That’s a short-circuit risk.
You can try replacing the gasket, but honestly, if water has reached the electrical base, the safer move is replacement. The cost of a new kettle is far lower than the cost of an electrical fire. If you have a leaking appliance and you’re not sure about the electrical safety, err on the side of caution.
Drips from the Spout After Pouring
This is the most common complaint, and it’s usually not a defect. After you pour, a few drops of water remain in the gooseneck spout. They dribble out and land on your counter or scale. It’s annoying, but it’s normal.
However, if the drip continues for more than a few seconds after you’ve returned the kettle to the base, you have a different problem. Mineral deposits (limescale) can build up inside the narrow spout, creating a rough surface that holds water. The fix is a thorough descale, which I cover below.
Another cause is a cracked spout weld. If you’ve dropped the kettle or banged it against a sink, the seam where the spout meets the body can develop a hairline fracture. Run your finger along the underside of the spout. If you feel a sharp edge or see a hairline crack, that’s a structural failure. It’s not worth repairing.
Water Escaping Around the Lid
The lid on most gooseneck kettles isn’t airtight. It’s designed to let steam escape. But if you see water actively bubbling out from under the lid during boiling, you’re overfilling the kettle.
Check the max fill line. Most kettles, including the Willow & Everett 0.8L model, have a marked line inside. If you fill past that line, the boiling water expands and forces its way out of the lid seal. It’s not a gasket failure; it’s user error. Pour out a cup of water and test again.
If you’re under the line and still getting water escaping, check the lid gasket itself. It’s usually a silicone ring that fits into a groove. Over time, it can warp or crack. You can often pop it out and replace it with a generic silicone ring from a hardware store.
The Hidden Leak: The Viewing Window Seal
Some kettles have a small clear window on the side to show the water level. That window is held in place by a plastic or silicone gasket. These gaskets shrink and harden with heat cycles.
If you see water streaks running down the inside of the window, or if the window feels loose when you press on it, that’s your leak point. This is a harder fix because the gasket is often custom-molded. Check if your manufacturer sells replacement parts. If not, a high-temperature silicone sealant applied around the edge can work as a temporary fix, but it’s not a permanent solution.
How to Fix a Leaking Kettle: DIY Steps for the Average User
Two fixes solve about 80% of real leaks: replacing the O-ring and deep descaling. Both are cheap and take less than 15 minutes.
Replacing the O-Ring and Gasket
First, unplug the kettle and let it cool completely. Empty all water. Turn it upside down and look at the base plate. You’ll see screws holding the bottom cover on.
- Remove the screws and lift the bottom cover off. You’ll see the heating element and the electrical connections.
- Look for the rubber gasket that sits between the heating element and the stainless steel tank. It’s usually black or white silicone.
- Gently pry it out with a flathead screwdriver. Don’t scratch the metal.
- Measure the inner and outer diameter. You need a food-grade silicone O-ring with the same dimensions. Hardware stores carry these, but a plumbing supply store will have a better selection.
- Install the new ring, reassemble the base, and run a test boil.
This is the same process you’d use on a machine that’s not sealing correctly. The principle is the same: a worn rubber part is causing a liquid escape route.
Descaling the Spout and Internal Chamber
Limescale is the enemy of gooseneck kettles. The narrow spout is a perfect place for calcium to build up. It traps water and can also cause the kettle to boil noisily and shut off early.
Mix a 1:1 solution of white vinegar and water. Fill the kettle to the max line. Boil it. Let it sit for 30 minutes. Pour it out and rinse thoroughly. For a deeper clean, use a descaling powder specifically for electric kettles. I prefer the powder because it’s faster and doesn’t leave a vinegar smell.
For the spout specifically, you can’t always reach inside. I use a long pipe cleaner or a thin bottle brush dipped in vinegar. Run it through the spout a few times to break up the scale. Rinse with clean water. If you live in an area with hard water, do this monthly. It prevents the drip issue and extends the life of the heating element.
When to Stop Fixing and Replace the Kettle (Cost vs. Safety)
I’m a fan of repairing things. But there’s a line. If the leak is coming from the base and has reached the electrical components, stop. If the stainless steel body is cracked, stop. If the kettle is more than five years old and the heating element is exposed to water, stop.
Here’s the math I use. A replacement kettle costs between $30 and $80. A replacement gasket costs $5, but it takes an hour of my time. If the fix takes more than two attempts, I replace the unit. The time spent troubleshooting a cheap appliance isn’t worth it.
Also, consider the hidden costs. A leaking kettle can damage your countertop, especially if you have wood or laminate. Water seeps into the seams and causes swelling. That’s a repair bill that dwarfs the cost of a new kettle. If your kettle has leaked onto a wooden counter, check for warping immediately.
Preventing Future Leaks: A 3-Minute Weekly Routine
You can avoid most of these problems with a simple habit. Once a week, do this:
- Empty the kettle completely. Don’t leave water sitting in it overnight.
- Wipe the rim of the lid and the spout opening with a dry cloth.
- Check the base for any signs of moisture or mineral dust.
- If you have hard water, run a quick vinegar cycle every two weeks.
That’s it. Most leaks start because mineral deposits compromise a seal, or because standing water breeds corrosion. Keeping the kettle dry when it’s not in use prevents both.
You should also check the power cord connection. If the cord gets bent at the base, the insulation can crack, allowing water to wick up into the plug. That’s a fire hazard. Replace the cord if you see any fraying.
Frequently Asked Questions About Gooseneck Kettle Leaks
Can I use a gooseneck kettle without the lid?
You can, but you shouldn’t. The lid helps direct steam and prevents splashing. Without it, boiling water can spit out of the top and cause burns. The Willow & Everett kettle’s lid sits securely, but it’s not a pressure seal. It’s there for safety, not function. Keep it on.
Why does my kettle leak only when it’s full?
That’s a classic overfill symptom. Water expands as it heats. If the kettle is filled past the max line, the expansion forces water out of the lid or the spout. It’s not a seal failure. Pour out some water and test again. If it still leaks, check the gasket under the lid.
Is it safe to use a kettle that leaks from the bottom?
No. A bottom leak means water is touching the electrical base. That’s a short-circuit risk. Unplug it immediately and don’t use it until you’ve inspected the heating element and the pins. If there’s any corrosion, replace the kettle.
How do I know if it’s a limescale problem or a broken seal?
Look at the color of the water. If you see white flakes or chalky residue, it’s limescale. If the water is clear but dripping from a specific spot, it’s a seal. Also, a limescale issue usually causes a noisy boil or a longer heating time. A seal issue doesn’t change the heating behavior.
Can I put a gooseneck kettle in the dishwasher?
Never. The electrical base and the heating element will be ruined. The stainless steel body can be hand-washed, but never submerge the base. Wipe the exterior with a damp cloth. The interior can be rinsed, but dry it thoroughly before storing.
Final Verdict: Fix It or Toss It?
Here’s my honest take after dealing with dozens of these kettles.
- If the leak is condensation, do nothing. Move the kettle away from the wall.
- If the leak is from the spout after pouring, descale it. That fixes 90% of drip complaints.
- If the leak is from the lid and you’re under the max line, replace the lid gasket. It’s a $5 fix.
- If the leak is from the base, replace the kettle. Don’t mess with electrical components.
- If the kettle body is cracked, replace it. Welding stainless steel costs more than a new kettle.
- If you have hard water, commit to a monthly descaling routine. It’s the single best thing you can do.
One last thought. A gooseneck kettle is a tool. It gets used hard and often. It’s not a lifetime purchase. When you’re shopping for a replacement, look for one with a removable lid gasket and a wide opening for cleaning. Those two features make maintenance exponentially easier. The Willow & Everett model is a good example of a kettle designed with easy access in mind, but even it will need care over time. Don’t let a small leak ruin your pour-over ritual. Diagnose it, fix it, or replace it, and get back to brewing.
Products related to this article
Sponsored / affiliate links. As an Amazon Associate I earn from qualifying purchases. I may earn additional commission from eligible campaigns.
 SOLUSTRE Electric USB Coffee Cup Warmer with Temperature Settings Portable Milk and Beverage Heating Coaster for Office Desk Small Lightweight Design Easy to Clean Surface Multi Functional
 Coffee Mug Warmer & You are Awesome Mug Set, Electric Cup Warmer for Desk
 Coffee Mug Warmer & You are Awesome Mug Set, Electric Cup Warmer for Desk