You bought an AeroPress because it promised a clean, fast cup without the drama of a full espresso machine. Then you opened Instagram and saw a wall of metal disks, funnels, and flow control caps. Now you are wondering if your $30 brewer needs $100 worth of plastic and steel to work properly. It doesn’t. Most accessories are solving a specific problem you might not even have yet.
This guide walks you through a simple decision tree. You will identify your primary frustration—messy grounds, bitter coffee, or a broken travel routine—and match it to the single accessory that fixes it. We will also break down the cost per brew of reusable filters, explain which add-ons do not fit the AeroPress Go, and tell you exactly what to skip so you do not waste money on redundant gear.

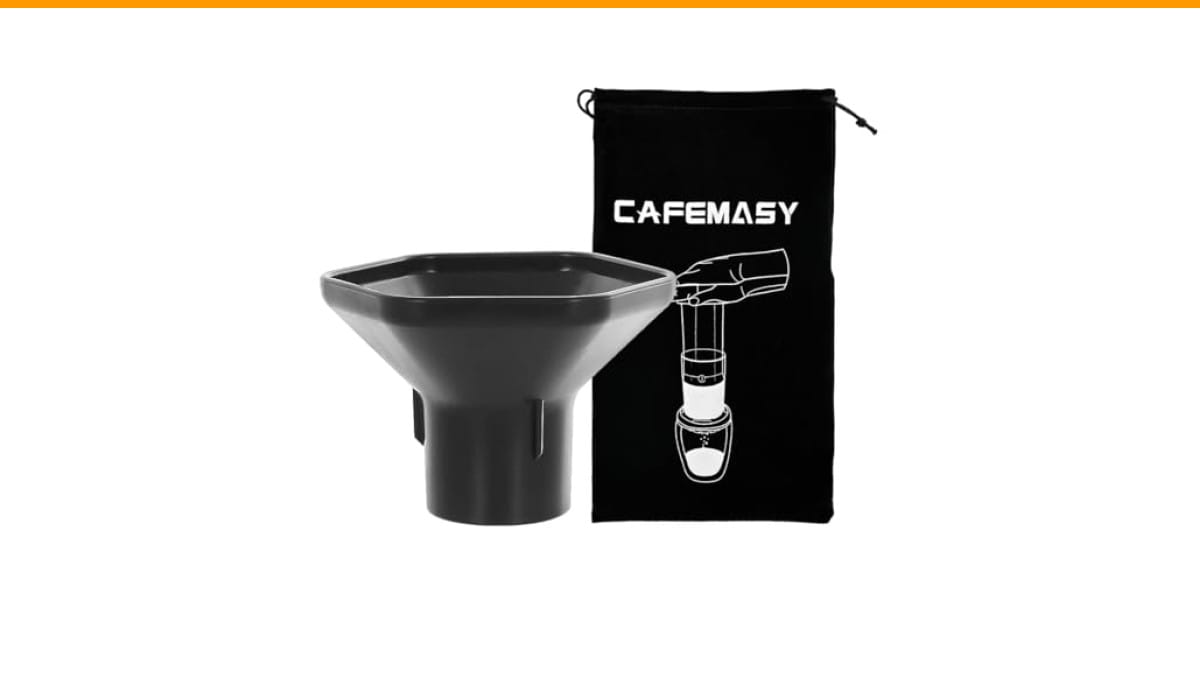
CAFEMASY
CAFEMASY Coffee Funnel and Travel Bag Kit…
- ✅ Packing including 1pc coffee grounds funnel and 1pc travel bag compatible for Aeropress Original/Go/Clear/XL espresso coffee mak…
- ✅ Coffee funnel is used for transfer coffee grounds from your coffee grinder bin/dosing cup/manual coffee grounds jar to the Aerop…
- ✅ You can also use it under the AeroPress coffee maker, to guide the pressed coffee into a small mouthed vessel, like an espresso…
As an Amazon Associate I earn from qualifying purchases.
If you already know your pain point, jump to the relevant section. If you are still figuring it out, start with the three questions below.
Before diving into the deep end, consider a simple kit that solves the most common complaint: mess. The CAFEMASY Coffee Funnel and Travel Bag Kit pairs a wide stainless funnel with a padded travel pouch. The funnel fits the AeroPress chamber mouth, so you can transfer grounds from a grinder bin or dosing cup without scattering coffee across the counter. It also works inverted, guiding the brewed coffee into a narrow espresso cup or travel mug. For less than the price of a bag of specialty beans, this kit addresses the daily annoyance most users complain about first.
The Only 3 Questions You Need to Answer Before Buying
Every accessory on the market exists to solve one of three problems. Answer these honestly, and the right purchase becomes obvious.
1. Is your coffee bitter or weak? Bitterness usually comes from over-extraction. That means your water is too hot, your grind is too fine, or your brew time is too long. Weak coffee means under-extraction. You need a finer grind or a longer steep. Accessories like a metal filter or a flow control cap change the pressure and extraction profile. A grinder upgrade changes everything.
2. Is your workspace a disaster zone? Coffee grounds on the counter, drips on the scale, a wet filter that flops everywhere. If mess is the issue, you need containment tools: a funnel, a sturdy filter cap, or a dedicated knock box. The AeroPress is already a tidy brewer, but the transfer from grinder to chamber is where most spills happen.
3. Do you travel with it? The AeroPress is famous for being portable, but the standard model is awkward in a backpack. The Go model has its own cup. For the original or XL, you need a padded bag that fits the plunger, chamber, and a bag of beans. If you are checking luggage, consider a metal filter so you do not run out of paper disks mid-trip.
Most people answer yes to two of these. That is fine. Just prioritize. Buying a flow control cap when your real problem is a bad hand grinder will not fix your cup.
The Essential Upgrades: Filters and Flow Control
These two categories change the taste and body of your coffee more than any other accessory. They also cause the most confusion.
Fellow Prismo vs. AeroPress Flow Control Cap: Which is Right for You?
The Fellow Prismo is a complete replacement cap with a built-in pressure valve. It creates a higher pressure environment inside the chamber, which produces a more concentrated, espresso-style shot. It also allows you to brew upright without the inverted method, because the valve prevents coffee from dripping through during the steep. That is a huge safety win—no more risking a scalding flip.
The AeroPress Flow Control Cap is simpler. It is a plastic cap with a silicone disc that seals the bottom until you press. It does not increase pressure. It just stops the drip. You still need to use the inverted method for a longer steep, but you do not need to worry about coffee leaking out while you wait.
In testing side by side, the Prismo produces a noticeably thicker body and a layer of crema on top. The Flow Control Cap produces a cup closer to the standard paper-filter brew, just with more control over steep time. If you want a concentrated base for milk drinks, get the Prismo. If you just want to avoid the inverted method’s mess, the cheaper Flow Control Cap does the job.
One honest caveat: the Prismo requires a paper filter on top of its metal mesh to keep fines out of your cup. That adds a step and a recurring cost. The Flow Control Cap uses standard AeroPress filters, which are cheap but not free.
Metal Filters (Able Disk, ALTURA) vs. Paper Filters: The Cost-Per-Brew Breakdown
Paper filters absorb coffee oils. That is why a paper-filtered cup tastes cleaner and brighter, with less body. Metal filters let those oils pass through, giving you a heavier mouthfeel and more sediment at the bottom of the cup. Some people love that texture. Others find it gritty.
Here is the cost math most reviews skip. A pack of 350 AeroPress paper filters costs roughly $8. That is about $0.02 per brew. Over 12 months of daily brewing, you will spend about $7.30 on paper. A metal filter costs anywhere from $12 to $25. It pays for itself after about 600 brews, or roughly two years of daily use. If you brew once a week, the payback period stretches to over a decade.
The real reason to buy a metal filter is not cost. It is convenience. You never run out. You never have to fold a paper disk into the cap. Rinse it under the tap and you are done. For travel, a metal filter is a no-brainer because it eliminates the need to pack a box of paper filters.
But there is a trade-off. Metal filters let more fines through, which means a muddier cup. The Able Disk uses a fine mesh that reduces this, but it does not eliminate it. If you are sensitive to sediment, stick with paper or use a metal filter with a paper disk on top. That hybrid approach gives you the oil and body without the grit.
The Grinder Upgrade: Why It Matters More Than Any Other Accessory
You can buy every cap and filter on the market, but if your coffee tastes bad, the grinder is the culprit. A blade grinder produces uneven particles. Some are dust, some are boulders. The dust over-extracts and turns bitter while the boulders under-extract and taste sour. No accessory fixes that.
You need a burr grinder. A hand grinder like the Timemore C2 or the 1Zpresso Q2 produces consistent grounds for around $50 to $90. An electric burr grinder like the Baratza Encore costs more but is easier for daily use. The difference in your cup is immediate. You will notice a cleaner flavor, a better balance, and less bitterness.
Here is the thing nobody tells you: the AeroPress is forgiving. It works with a wide range of grind sizes, from fine to coarse. But it cannot fix a grinder that produces inconsistent particles. If you are on a budget and can only buy one accessory, buy a burr grinder. Skip the fancy caps and filters until you have consistent grounds.
If you are using a hand grinder, the CAFEMASY funnel mentioned earlier becomes doubly useful. It fits over most hand grinder mouths, so you can pour beans in without spilling them across your lap. That is a small quality-of-life win that adds up over a year of mornings.
Convenience and Travel Add-Ons
Once your grind is consistent and your filter situation is sorted, you can look at the convenience layer. These are the accessories that make the AeroPress easier to use in specific situations.
Funnels. The AeroPress chamber has a narrow mouth. Pouring grounds from a grinder bin into it without a funnel is a recipe for mess. A wide stainless funnel like the CAFEMASY model sits on top of the chamber and guides grounds in cleanly. It also works inverted, guiding brewed coffee into a small cup. That dual use makes it one of the most practical accessories you can buy.
Travel bags. The standard AeroPress does not come with a case. If you throw it in a backpack, the plunger gets scratched and the chamber picks up lint. A padded travel bag protects the brewer and keeps the parts together. Look for one that fits the plunger, chamber, and a small bag of beans. The CAFEMASY kit includes a bag sized for the Original, Go, Clear, and XL models, which is rare—most bags only fit the standard size.
Carafes and mugs. The AeroPress brews directly into a cup. That works fine for a standard mug, but if you use a narrow espresso cup or an insulated travel mug, you will spill. A funnel or a dedicated carafe solves that. The Prismo also helps here because it directs the flow straight down into the vessel.
Cleaning tools. The AeroPress is easy to clean—just push the puck into the trash and rinse. But the plunger seal can accumulate coffee oils over time. A dedicated brush or a soak in a coffee maker cleaning solution keeps it fresh. Do not put it in the dishwasher; the heat can warp the plastic. Check our dishwasher safety guide for specifics.
The ‘Skip It’ List: Accessories That Waste Your Money
Not everything on Amazon is worth your money. Here is what to skip, especially if you are a beginner.
- Electric stirrers. A spoon works fine. You do not need a motorized whisk to agitate coffee grounds. Save the $20.
- Fancy paper filter holders. A ziplock bag or a dedicated box does the same job. These are pure counter clutter.
- Metallic caps that claim to create ‘real’ espresso. The AeroPress cannot produce 9 bars of pressure. No accessory changes that. The Prismo gets close, but it is still not espresso. Anyone who tells you otherwise is selling something.
- Bundled accessory kits with 20 pieces. You will use the funnel and maybe the metal filter. The rest—the tiny scoops, the stirring paddles, the extra seals—will sit in a drawer. Buy what you need, not what a bundle offers.
- Replacement plunger seals. Unless you see visible wear or the seal is leaking, you do not need a spare. The original seal lasts for years with proper care.
The common thread here is redundancy. The AeroPress is a simple device. It does not need a lot of accessories to work well. It needs a good grinder, a filter choice that matches your taste, and maybe a funnel for cleanliness.
Compatibility Check: AeroPress Standard vs. AeroPress Go
This is where a lot of people get burned. The AeroPress Go is smaller than the standard model. Its chamber is shorter, and the plunger is a different diameter. That means most standard accessories do not fit the Go.
| Accessory | AeroPress Standard | AeroPress Go | Notes |
|---|---|---|---|
| Fellow Prismo | Yes | No | Designed for the standard chamber only. |
| AeroPress Flow Control Cap | Yes | No | Fits standard and Clear models, not Go. |
| Able Disk (metal filter) | Yes | Yes | Fits both, but you need the correct size for the Go’s smaller cap. |
| Standard paper filters | Yes | Yes | The Go uses the same paper filter size. |
| Travel bags | Varies | Varies | Check dimensions. The CAFEMASY bag fits both. |
| Funnels | Yes | Yes | Most wide funnels fit both chamber mouths. |
The AeroPress XL is another beast entirely. It is larger, and its accessories are mostly incompatible with the standard model. If you own an XL, check the product description carefully before buying anything.
When in doubt, read the compatibility list on the product page. If it does not explicitly mention your model, assume it does not fit. Returning a $30 cap because you did not read the fine print is a waste of time.
The Verdict: Your Ideal Starter Kit Based on Budget
Here is a practical buying path depending on what you are willing to spend.
Budget under $30. Buy a metal filter. It eliminates the recurring cost of paper filters and improves the body of your coffee. If you already have a burr grinder, this is the single best upgrade.
Budget under $60. Add the CAFEMASY funnel and travel bag kit. It solves the mess problem and protects your brewer when you travel. You will use both items daily.
Budget under $100. Get a hand burr grinder. This is the biggest taste upgrade available. Pair it with the metal filter and you have a setup that beats many $500 electric machines.
Budget over $100. Add the Fellow Prismo if you want a stronger, more concentrated cup. Or buy the AeroPress Flow Control Cap if you want to ditch the inverted method without spending as much.
Skip the electric grinders at this price point unless you are brewing for more than two people. A good hand grinder is faster and quieter.
Frequently Asked Questions
Do I need the inverted method if I have a flow control cap?
No. The whole point of the flow control cap is to let you brew upright. The silicone disc seals the bottom, so coffee does not drip through during the steep. You can add water, stir, and wait without worrying about a mess. The Fellow Prismo does the same thing with added pressure.
Can I use a metal filter with the AeroPress Go?
Yes, but you need the correct size. The Go uses a smaller filter cap, so a standard metal filter will not fit. Look for a filter specifically listed for the Go model. The paper filters are the same size across models, but the metal disks are not.
How often should I clean my metal filter?
Rinse it under hot water immediately after brewing to remove the oils. Once a week, soak it in a solution of water and a mild coffee cleaner to break down the residue. A dirty metal filter will make your coffee taste bitter and oily. Do not use soap; it leaves a film that ruins the next brew.
Is the Fellow Prismo worth the price over the stock cap?
If you want a stronger, espresso-style shot with a layer of crema, yes. The pressure valve makes a real difference in the body of the coffee. If you are happy with the standard brew strength and just want to avoid the messy inverted flip, the cheaper Flow Control Cap is sufficient. The Prismo also requires a paper filter on top of the metal mesh, which adds a small recurring cost.
What is the best way to clean the AeroPress after using a metal filter?
Push the puck into the trash with the plunger, then rinse the chamber and cap under hot water. The metal filter will have coffee oils on it, so give it a direct spray. Once a week, soak the cap and filter in a cleaning solution. Do not put any part in the dishwasher; the heat can warp the plastic. For a full routine, see our clogged coffee maker guide for tips on dealing with stubborn residue.
A Few Final Thoughts Before You Click Buy
- Fix your grinder first. Uneven grounds ruin every other upgrade.
- Choose your filter based on taste: paper for clean and bright, metal for oily and heavy.
- Buy a funnel if you brew daily. It saves more mess than any other accessory.
- Check compatibility with your AeroPress model before ordering. The Go is not the same as the standard.
- Skip the 20-piece accessory bundles. You will use three items at most.
- A metal filter pays for itself in about two years of daily use, but its real value is convenience.
- Keep your brewer clean. A quick rinse after each use prevents bitter build-up.
Products related to this article
Sponsored / affiliate links. As an Amazon Associate I earn from qualifying purchases. I may earn additional commission from eligible campaigns.
 Coffee Espresso Machine Handle Replacement Parts, Cafe Bracket Handle for Lidl Silvercrest CM4621 CM4218 KF5002 KF500S Barista (for 51mm Portafilter Basket - Not included)
 Coffee Mug Warmer & You are Awesome Mug Set, Electric Cup Warmer for Desk
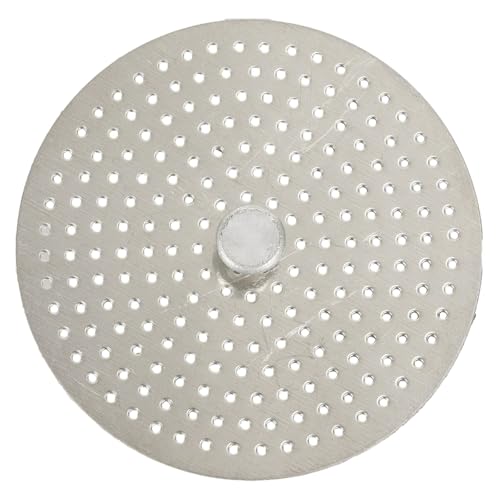 Stainless Steel Moka Pot Coffee Filter Disc for Espresso Brewing, Coffee Maker Replacement Filter Plate for Home Office Coffee Bar Cafe (FOR 4 Cups)