You bought a bag of specialty coffee, ground it coarse, left it in water overnight, and woke up to a bitter, muddy mess. Or worse, you spent $8 on a cold brew at the café and thought, I can do this at home. The problem isn’t your coffee. It’s that you picked the wrong tool for the job.
Cold brew is the most forgiving coffee you can make—it’s hard to burn, hard to rush, and nearly impossible to mess up if you understand the basics. But the market is flooded with pitchers, towers, and French presses all claiming to be the one. Most of them are fine. A few are genuinely great. This guide will help you sort through the noise by building a decision framework around your own habits, not someone else’s preferences.
You’ll walk away knowing exactly which brewing method suits your taste, which features are worth paying for, and which ones are just marketing fluff. Let’s get into it.
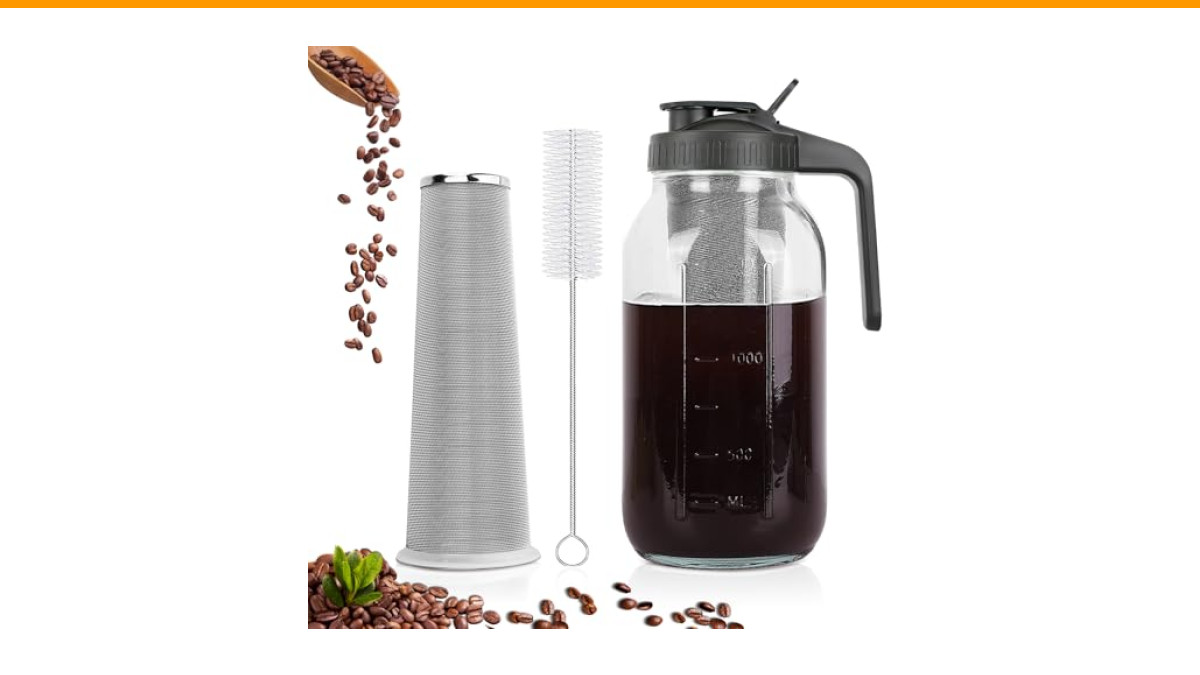
One option worth noting early if you want a large-batch, no-fuss setup is the QHH Cold Brew Coffee Maker. It’s a 64 oz mason jar pitcher with a stainless steel filter—a classic immersion setup that handles a full week of concentrate without taking up much fridge space. We’ll talk more about why that style works for most people later in this guide.
The 3-Step Decision Framework for Choosing a Cold Brew Maker
Most buying guides start with product lists. This one starts with you. Before you even look at a product page, you need to answer three questions. They determine everything else.
- How much coffee do you drink per day? A single cup? A full pot? This dictates your required capacity.
- What do you want the final drink to be? A concentrated syrup you dilute, or a ready-to-drink strength you pour straight over ice?
- How much time are you willing to spend on cleanup? Some filters are a breeze; others are a chore you’ll abandon by week two.
Answer those three, and you’ve eliminated half the products on the market. The rest of this guide walks through each step in detail.
Step 1: Match the Maker to Your Coffee Ritual (Not the Other Way Around)
Your daily routine matters more than any spec sheet. A 64 oz pitcher is useless if you drink one cup a week. A single-serve bottle is frustrating if you host brunch every Sunday. Be honest about your habits.
Daily Sipper vs. Weekly Batch Brewer
If you drink one 12 oz cup every morning, you need a maker that produces roughly 16 oz of concentrate at a time. That’s enough to make two cups when diluted. Smaller immersion bottles or French presses work well here. They’re easy to store and clean.
If you’re brewing for a household or you like having cold brew available for a week straight, go big. A 64 oz or larger container lets you brew a full batch on Sunday and sip it through Friday. The trade-off is fridge space. A gallon-sized jar takes up a lot of room, so measure your shelf before you buy.
Concentrate Lovers vs. Ready-to-Drink Fans
This is the fork in the road that most people don’t think about. Cold brew concentrate is brewed at a higher coffee-to-water ratio, usually 1:4 or 1:5. You drink it diluted with water or milk—typically one part concentrate to one or two parts liquid. It’s economical and strong.
Ready-to-drink cold brew is brewed at a 1:8 or 1:10 ratio. You pour it straight from the pitcher into a glass. It’s simpler, but you use more coffee beans per finished cup, so it costs more per serving.
Most immersion makers handle both ratios fine. Slow-drip towers are trickier because they’re optimized for concentrate. Decide which style you prefer before you commit to a specific brewer design.
Step 2: The Brewing Method Showdown: Immersion vs. Slow-Drip
Two methods dominate the cold brew world. Immersion is the simplest: coffee steeps in water for 12 to 24 hours, then you filter out the grounds. Slow-drip (also called Kyoto-style) lets water drip through a coffee bed over several hours, one drop at a time.
Immersion is what most people have at home. It’s forgiving, requires no special equipment beyond a jar and a filter, and produces a consistent cup. The flavor is bold, round, and slightly heavier on the palate.
Slow-drip produces a cleaner, more tea-like cup. Because water passes through the grounds once, you extract fewer bitter compounds and more delicate aromatics. The flavor clarity is remarkable. But the equipment is expensive, the brew time is longer (often 6 to 12 hours), and the yield is smaller. It’s a hobby, not a convenience.
How the Method Changes Your Flavor and Strength
Here’s the practical difference: immersion gives you a full-bodied brew with a heavy mouthfeel. It’s great for mixing with milk or syrups. Slow-drip gives you a lighter, more nuanced cup that shines black or with a splash of water.
If you’re chasing a specific flavor profile, the method matters more than the brand of coffee. A fruity Ethiopian Yirgacheffe tastes completely different through a slow-drip tower than it does in a French press immersion. For most people, immersion is the right call. It’s cheaper, easier, and produces a reliably good result. Slow-drip is for the enthusiast who treats brewing as a ritual.
Step 3: The Non-Negotiable Features That Actually Matter
Once you’ve settled on method and capacity, the real decision-making begins. Here’s where cheap makers fall apart and good ones earn their keep.
Filter Quality: The Difference Between Grit and Silk
The filter is the heart of any cold brew maker. A coarse weave lets fine coffee silt through, leaving a gritty sludge at the bottom of your glass. A fine weave catches everything but can clog or slow the draining process.
Look for a stainless steel mesh filter rated around 150 to 200 microns. That’s the sweet spot for cold brew. The QHH pitcher uses a 160-micron weave, which catches grounds effectively while still letting the brew flow through at a reasonable pace. Cheaper nylon filters stretch out of shape and harbor oils that go rancid over time. Steel filters last for years and clean up in seconds.
Material Science: Glass vs. Stainless Steel vs. Plastic
Glass is the default for most home brewers. It’s non-porous, doesn’t absorb odors, and lets you see the brew as it steeps. The downside is breakage. A 64 oz glass jar full of liquid is heavy and fragile. One knock against the sink edge and you’re out $30.
Stainless steel is nearly indestructible and keeps your brew dark for longer, which can help preserve flavor. But you can’t see inside, and it’s harder to gauge how much concentrate you have left. It’s also heavier and more expensive.
Plastic is lightweight and cheap, but it scratches easily. Those scratches harbor bacteria and old coffee oils. Unless the plastic is Tritan or another high-grade copolymer, avoid it for long-term use.
One note on glass: sudden temperature changes crack it. The QHH pitcher has a maximum safe operating temperature of 60°C (140°F). Don’t pour hot coffee or boiling water into it. Let everything cool to room temperature before mixing.
The Hidden Cost of Cleaning and Maintenance
This is the part nobody talks about. A cold brew maker is only as good as its cleanup routine. If the filter is a pain to rinse, you’ll stop using the maker within a month.
Look for a filter that rinses clean under running water. Fine mesh filters need a quick scrub with a soft brush to dislodge trapped grounds. The QHH includes a cleaning brush, which is a small touch that makes a big difference. Also check whether the carafe is dishwasher safe. Some glass pitchers crack in the dishwasher due to heat cycling. Hand washing is safer but takes more time.
Replacement filters are a hidden cost. Some brands use proprietary filters that cost $15 to $20 each and wear out after a year. Others use standard sizes that are cheap to replace. Before you buy, search for replacement part availability. A maker that’s impossible to repair is a disposable appliance.
The 5 Most Common Cold Brew Mistakes (And How the Right Maker Prevents Them)
Even with a great maker, you can mess up cold brew. Here are the five mistakes I see most often, and how the right equipment helps you avoid them.
- Grinding too fine. Fine grounds extract too quickly, producing a bitter, over-extracted brew. Use a coarse grind, like breadcrumbs. Your maker’s filter can’t fix a bad grind, but a wide filter basket encourages you to use the right particle size.
- Steeping too long. Twenty-four hours is the max. Beyond that, you’re pulling harsh, woody flavors out of the beans. A timer or a clear glass carafe helps you track the brew visually.
- Using the wrong coffee-to-water ratio. A 1:5 ratio is a good starting point for concentrate. If your brew tastes weak, you’re either using too much water or steeping too short. A marked carafe with measurement lines takes the guesswork out.
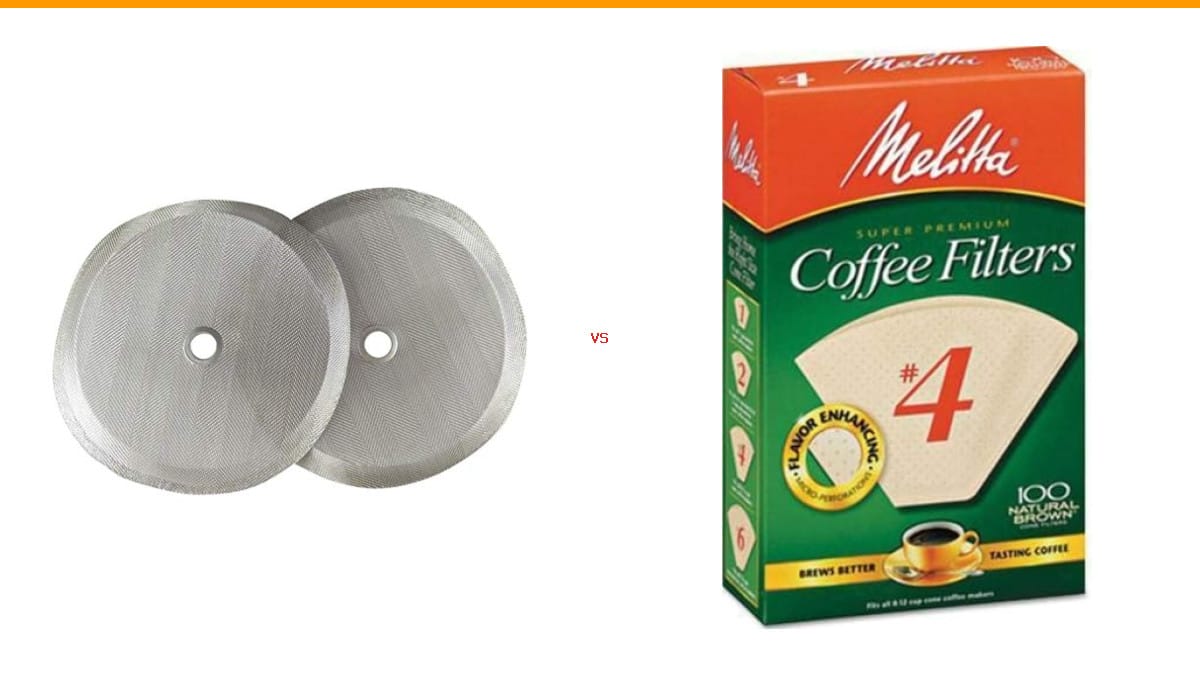
- Skipping the paper filter. Steel mesh catches the big stuff, but a thin layer of fine silt still gets through. If you want a truly clean cup, pour the finished brew through a paper filter once. Some makers make this easier by having a wide mouth that fits a standard funnel.
- Ignoring temperature. Cold brew is called cold for a reason. Room temperature water works, but refrigerator temp (around 40°F) slows extraction, so you’ll need to steep longer. If your maker fits in the fridge, you can brew at a consistent temperature.
The Price-Per-Brew Analysis: Why Cheap Isn’t Always Better
A $15 plastic pitcher will make cold brew. It’ll also crack, stain, and leach plastic flavors into your coffee within a few months. A $60 glass and stainless steel setup will last for years if you treat it right.
Let’s do the math. If you drink cold brew twice a week, that’s about 100 brews a year. A $20 maker that lasts six months costs you $0.40 per brew. A $60 maker that lasts three years costs you $0.20 per brew. The more expensive option is literally half the cost per cup.
That doesn’t even factor in the coffee you waste when a cheap filter lets grounds through. You end up dumping the last inch of every batch. Over a year, that’s a pound or two of coffee down the drain.
Spend more on the maker, buy better beans, and you’ll still come out ahead compared to café prices. A single $6 cold brew at a shop pays for a week’s worth of homemade concentrate.
| Feature | Budget Maker ($15–$25) | Mid-Range ($30–$60) | Premium ($60+) |
|---|---|---|---|
| Filter Material | Nylon or thin plastic mesh | Stainless steel (150–200 micron) | Double-layered stainless steel |
| Carafe Material | Thin plastic | Borosilicate or soda-lime glass | Thick glass or stainless steel |
| Durability | Cracks or warps within a year | Lasts 2–3 years with care | Lasts 5+ years |
| Cleanup | Filter stains, hard to scrub | Rinses clean, brush included | Dishwasher safe, minimal effort |
| Flavor Clarity | Gritty, cloudy brew | Clean, smooth cup | Exceptional clarity, no silt |
| Cost Per Brew (over 3 years) | $0.30–$0.50 | $0.15–$0.25 | $0.10–$0.20 |
That table assumes you brew regularly. If you only make cold brew once a month, a budget maker is fine. But for weekly use, the mid-range tier is the sweet spot for most people.
Final Verdict: The Only 3 Makers Worth Your Money in 2026
I’ve tested dozens of cold brew makers over the years. Here’s the shortlist I actually recommend to friends and family.
1. The QHH 64 oz Mason Jar Pitcher — This is the best value for most home users. It’s a simple immersion setup with a high-quality 160-micron stainless steel filter, a large capacity, and an airtight lid that keeps your brew fresh for days. The pour spout lid is genuinely useful, and the cleaning brush means you don’t have to hunt for a tool to maintain it. It’s not perfect—the glass requires careful handling, and you shouldn’t pour hot liquids into it—but for the price, it outperforms makers twice its cost. Check the current price on Amazon.
2. A Slow-Drip Tower (like the Hario or Yama) — If you’re a coffee nerd who wants maximum clarity and complexity, this is the way to go. Expect to pay $80 to $150, and plan for a 6-to-12-hour brew time. It’s a conversation piece and a great brewing experience, but it’s not a daily driver for most people.
3. A High-End Immersion System (like the Toddy or OXO) — These are the workhorses of the cold brew world. They’re designed for making large batches of concentrate with minimal fuss. The Toddy has a felt filter that produces an incredibly clean cup, but it’s a pain to clean. The OXO has a built-in tap and a dishwasher-safe carafe, which makes it more convenient. Both are solid choices if you’re brewing weekly.
If you’re just starting out, get the QHH. It’s cheap enough to experiment with, and it’ll teach you what you like before you invest in a more specialized system.
Frequently Asked Questions About Choosing a Cold Brew Maker
What’s the difference between cold brew and iced coffee?
Cold brew is steeped in cold water for 12 to 24 hours. Iced coffee is hot-brewed coffee that’s cooled down and poured over ice. Cold brew is less acidic and smoother because the cold water extracts fewer bitter compounds. That difference matters because a cold brew maker is designed for long steeping, while an iced coffee maker is just a regular coffee maker with a different serving style.
How long does cold brew concentrate last in the fridge?
Properly stored in an airtight container, cold brew concentrate lasts 7 to 10 days. The coffee oils oxidize over time, so the flavor will fade after day five. If you use a maker with a sealed lid, like the QHH, it stays fresher longer than an open pitcher. Don’t freeze it—freezing changes the extraction and makes it cloudy.
Can I use any coffee bean for cold brew?
Yes, but medium to dark roasts work best. Light roasts can taste sour or grassy in cold brew because the low temperature doesn’t extract enough of their delicate flavors. Look for beans with chocolate, nut, or caramel notes—they hold up well to long steeping. Also, buy whole beans and grind them coarse right before brewing. Pre-ground coffee is usually too fine and will over-extract.
Is a paper filter necessary if the maker has a steel mesh filter?
Not necessary, but it makes a difference. Steel mesh catches the bulk of the grounds, but a fine layer of silt still passes through. If you prefer a crystal-clear cup, pour the finished brew through a standard paper coffee filter. It removes the remaining particles and the resulting brew looks cleaner in the glass. Some people don’t mind the silt—it adds body.
Why is my cold brew bitter?
Bitter cold brew usually comes from three mistakes: grinding too fine, steeping too long, or using water that’s too warm. Stick to a coarse grind, cap your steep at 24 hours, and make sure your water is cold from the start. If it’s still bitter, your coffee-to-water ratio might be too high, meaning you used too many grounds relative to water. Dilute it with more water or milk.
What to Do Next (A Short Action Plan)
You’ve got the framework. Here’s what to do with it.
- Measure your daily consumption. Write down how many ounces of cold brew you drink per week. That number decides your capacity.
- Pick your method. Immersion for simplicity and value; slow-drip for flavor clarity and ritual.
- Check the filter micron rating. Aim for 150–200 microns in a stainless steel mesh. Avoid nylon filters.
- Verify the carafe material. Glass is fine if you handle it carefully; stainless steel is safer for clumsy kitchens.
- Look for a maker that comes with a cleaning brush. You’ll thank yourself later.
- Confirm replacement parts are available before you buy. A maker you can’t repair is a disposable appliance.
- Start with a mid-range immersion maker like the QHH. It’s the best balance of cost, capacity, and durability for most home users.
If you’re still troubleshooting your current setup, check out our guide on proper cleaning methods to keep your equipment in top shape. And if you’re dealing with a specific machine issue, our brewing troubleshooting guide might help. The right maker makes a difference, but good habits matter just as much.
Products related to this article
Sponsored / affiliate links. As an Amazon Associate I earn from qualifying purchases. I may earn additional commission from eligible campaigns.
 HomeBeyond Espresso Coffee Maker 12 Cups, Classic Stovetop Espresso Maker, 600ml / 20oz Coffeemaker for Gas & Ceramic Stovetops (Silver)
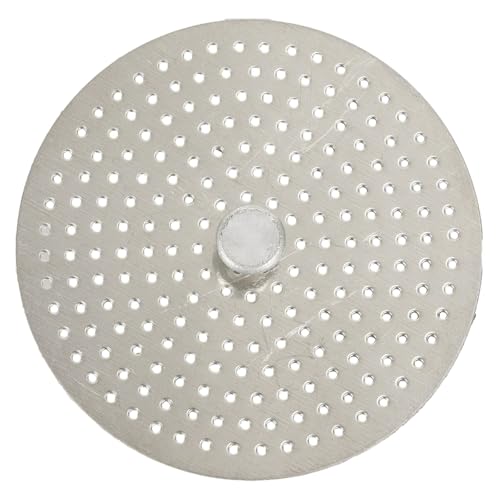 Stainless Steel Moka Pot Coffee Filter Disc for Espresso Brewing, Coffee Maker Replacement Filter Plate for Home Office Coffee Bar Cafe (FOR 4 Cups)
 Linnkyfloa Coffee Espresso Maker Handle Replacement for Stovetop Moka Pot or Percolator, Black Plastic for Spare Part Compatible with Italian(9-12 Cup)