You buy expensive beans, grind them fresh, and dial in your brew. Then one morning, your coffee tastes like the inside of an old gym bag. The culprit is usually not the beans or your grinder — it’s the container you store them in. Coffee oils go rancid, cling to walls, and quietly ruin every batch that touches them.
This guide covers how to clean a coffee bean storage container properly, no matter what it’s made of. You’ll learn the material-specific rules, a step-by-step deep clean, how to handle the one-way valve and gasket, and how to get rid of stubborn odors. By the end, you’ll know exactly what to do — and what to avoid — so your beans taste as fresh as the day you opened the bag.

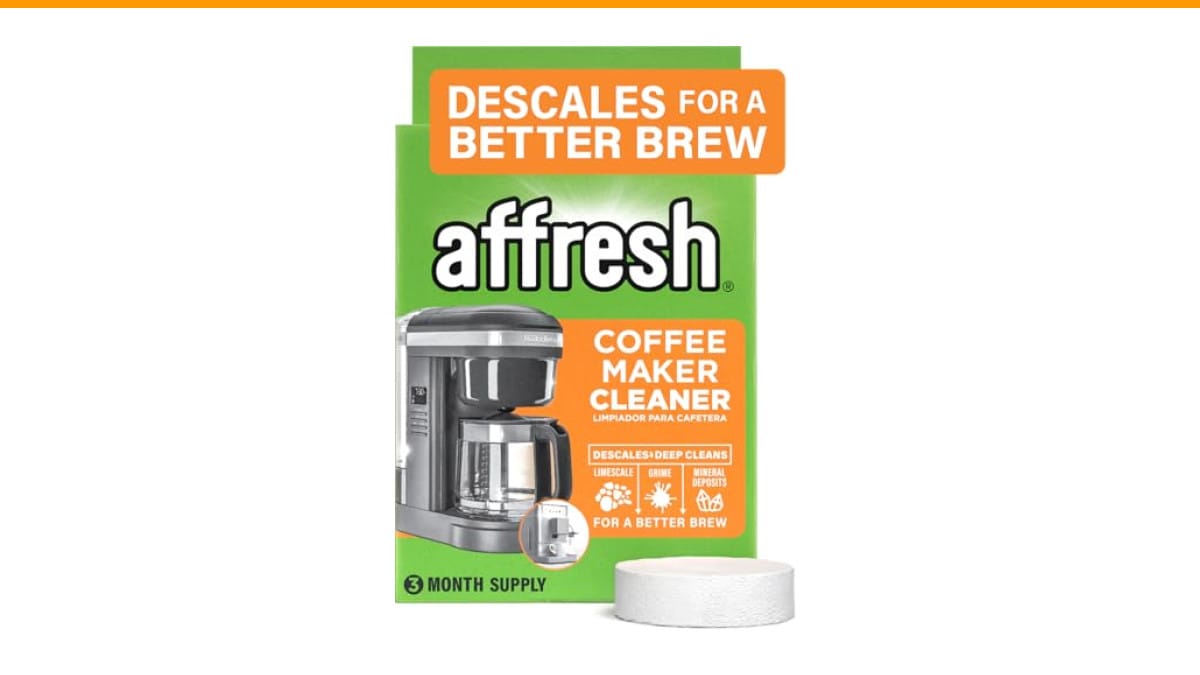
Affresh
Affresh Coffee Maker Cleaner, Unscented, Descales &…
- Descales your coffee maker, fighting hard water deposits and mineral buildup for a better tasting brew
- Deep cleans without the odor of vinegar
- Compatible with multi-cup and single-serve coffee makers
As an Amazon Associate I earn from qualifying purchases.
While you’re at it, don’t forget the machine itself. A clean container won’t fix a coffee maker full of scale. An Affresh Coffee Maker Cleaner handles descaling without the vinegar smell, and it’s worth running monthly if your water is hard. But first, the container.
Why a Clean Container Is Non-Negotiable for Fresh Coffee
Roasted coffee beans release CO₂ for days after roasting. That gas pushes aromatic oils to the surface, where they oxidize and go stale. A dirty container accelerates this process in two ways.
First, old oil residue acts as a seed for rancidity. Fresh beans touch that residue and pick up the stale flavor within hours. Second, moisture trapped in a dirty container creates mold. You might not see it, but you’ll taste it — a musty, earthy note that ruins everything.
Think of your container like a cast-iron skillet. You wouldn’t store a fresh steak in a pan with last week’s burnt fat still in it. Same logic applies to beans.
Know Your Container: Material-Specific Cleaning Rules
Not all containers respond the same way to cleaning. Hot water and soap that are fine for glass can warp a plastic lid or strip the coating off a ceramic finish. Here’s the breakdown.
Glass and Ceramic
These are the easiest to clean. Both are non-porous, so they don’t absorb oils. You can use hot, soapy water and a bottle brush without worry. For stubborn coffee oil stains, a paste of baking soda and water works well. Let it sit for 10 minutes, then scrub.
Ceramic has one catch. Some glazes are porous, especially on handmade pieces. If you see tiny cracks or crazing lines, avoid soaking for long periods. Water seeps in and can crack the glaze further. A quick wash with warm water and dish soap is enough.
Glass is nearly indestructible in this context. You can even run it through the dishwasher, though hand washing is gentler on the lid.
Plastic and Stainless Steel
Plastic absorbs odors. That’s its biggest flaw. A plastic container that held oily beans for a month will smell like old oil no matter how well you wash it. Use warm (not boiling) water and a mild dish soap. Boiling water can warp the plastic and release chemicals. If the plastic still smells after washing, it’s time to replace it.
Stainless steel is non-porous like glass, but it scratches easily. Abrasive scrubbers leave swirl marks that trap oils. Use a soft sponge or microfiber cloth. For the inside, a long-handled bottle brush with nylon bristles is ideal.
One more thing: check if your stainless container has a plastic gasket. That gasket is the weakest link. It absorbs odors and can harbor mold if not dried properly. We’ll cover gasket care in detail below.
The Complete Step-by-Step Cleaning Process
Here’s a process that works for every container type. Adjust the tools based on the material rules above.
Daily Quick Clean (30 Seconds)
- Empty any remaining beans into a separate bowl.
- Wipe the inside with a dry microfiber cloth to remove loose grounds and dust.
- Check the lid and gasket for visible oil or moisture.
- If dry, you’re done. If oily, follow the deep clean steps.
This quick wipe prevents oil buildup from ever starting. It’s the single best habit you can adopt.
Deep Clean (Weekly or Bi-Weekly)
- Empty the container completely. Wash the lid and gasket separately.
- Fill a sink with warm water and a few drops of unscented dish soap. Avoid strongly scented soaps — they leave residue that transfers to beans.
- Submerge the container and let it soak for 5–10 minutes. This loosens dried oils.
- Scrub with a bottle brush or soft sponge. Pay extra attention to the bottom corners and any ridges.
- Rinse thoroughly with warm water. Soap residue is worse than old oil because it adds a chemical taste.
- For stubborn stains, make a paste of baking soda and water. Apply, let sit for 10 minutes, scrub, rinse.
- Dry completely before adding beans. See the drying section below.
This deep clean takes about 15 minutes. It’s worth doing weekly if you live in a humid climate, bi-weekly if your environment is dry.
How to Clean the One-Way Valve and Gasket Without Damaging Them
Most coffee canisters have a one-way valve on the lid. It lets CO₂ escape while keeping oxygen out. This valve is delicate. If you push water or soap into it, the valve can stick and stop working. Then your beans will go stale faster.
Here’s the safe method. Do not submerge the lid. Instead, wipe the valve area with a dry cloth first. If there’s visible oil, dampen a cotton swab with a tiny amount of dish soap and gently clean around the valve opening. Never push the swab into the valve itself. Rinse the swab with water and wipe again to remove soap. Let it air dry completely.
The gasket is a different story. It’s the rubber or silicone ring that creates the airtight seal. Remove it from the lid if it’s detachable. Wash it with warm soapy water, then rinse. Check for cracks or stretching. A worn gasket breaks the seal, and then your beans go stale even with a clean container. Replace it if it looks tired.
If your gasket isn’t detachable, wipe it with a damp cloth and dry immediately. Do not soak the lid in water — that’s how water gets trapped in the valve housing.
Banishing Stubborn Coffee Oil Stains and Odors
Sometimes a normal wash isn’t enough. Dark-roast beans leave a brown film that laughs at dish soap. Here are the methods that actually work.
Baking soda paste. Mix three parts baking soda with one part water. Apply the paste to the stained areas. Let it sit for 15 minutes. Scrub gently, then rinse. This works on glass, ceramic, and stainless steel. It’s mildly abrasive, so avoid it on plastic with a glossy finish.
Vinegar solution. For odors, fill the container with a 50/50 mix of white vinegar and warm water. Let it soak for 30 minutes. Vinegar neutralizes the alkaline compounds in rancid oil. Rinse thoroughly afterward — you don’t want vinegar flavor in your beans.
Sunlight/UV treatment. This is the trick most guides skip. After washing and drying, place the container (lid off) in direct sunlight for 1–2 hours. UV light breaks down the residual oil molecules that cause odors. This works surprisingly well for plastic containers that absorb smells. It’s not a substitute for washing, but it’s the final step that kills lingering odors.
One caveat: sunlight can fade the color of some plastics and ceramic glazes. If your container is decorative, skip this step and rely on vinegar instead.
Drying Methods That Prevent Mold and Musty Smells
Moisture is the enemy. Beans left in a damp container will mold within days. Drying properly is just as important as cleaning.
After washing, shake out excess water. Then dry the container with a clean microfiber cloth. This removes 90% of the moisture. For the remaining 10%, leave the container upside down on a drying rack for at least an hour. Make sure the lid is off and the gasket is removed.
Never put beans back into a container that’s still damp. Even a few droplets can create a microclimate that ruins the batch. If you’re in a hurry, use a hair dryer on the cool setting to speed things up. Just don’t hold it too close to plastic.
For the lid, dry the valve area with a cotton swab. The gasket should be dried separately and only reattached when both it and the lid are bone dry.
How Often Should You Clean? A Simple Schedule
Here’s a realistic schedule based on how often you use the container.
| Usage | Quick Clean | Deep Clean | Notes |
|---|---|---|---|
| Daily use (every day) | Every refill | Weekly | Oils build up fast with daily opening and closing. |
| Occasional (2–3 times/week) | Every refill | Bi-weekly | Check for moisture before each use. |
| Rarely (once a week or less) | Before each use | Monthly | Empty the container between uses to avoid stale residue. |
The rule of thumb: if you can smell old coffee when you open the empty container, it’s time to clean. Your nose is more reliable than a calendar.
Troubleshooting: Why Your Beans Taste Off (Soap, Oil, or Plastic)
You cleaned the container, but something still tastes wrong. Here’s how to diagnose the problem.
Soap taste. This means you didn’t rinse enough. Soap residue clings to porous surfaces and gaskets. Fix it by wiping the container with a vinegar-dampened cloth, then rinsing with plain water. Dry completely before using.
Old oil taste. The container looks clean, but the flavor persists. This usually means the gasket or valve is holding onto rancid oil. Remove the gasket and wash it separately. If the valve itself is oily, you may need to replace the lid. Some lids are not worth the trouble.
Plastic taste. This happens with new plastic containers or old ones that have absorbed odors. Wash with baking soda paste, then do the sunlight treatment. If the plastic taste remains, the container is done. Buy glass or stainless steel next time.
Musty smell. This is mold. Toss the beans, wash the container with vinegar solution, and dry it completely. If mold has gotten into the gasket, replace the gasket. Mold spores are stubborn and can survive a normal wash.
For the broader picture on keeping your gear fresh, check our guide on cleaning coffee grinder — a dirty grinder can ruin beans even when your storage is spotless.
Final Checklist for a Pristine Coffee Container
Here’s what to remember the next time you clean your container.
- Wipe the inside with a dry cloth every time you refill. Thirty seconds now saves a deep clean later.
- Deep clean weekly for daily use, bi-weekly for occasional use. Adjust for humidity.
- Never submerge the lid if it has a one-way valve. Clean it with a cotton swab instead.
- Remove and wash the gasket separately. Check for cracks and replace when worn.
- Use baking soda paste for stains, vinegar soak for odors, and sunlight for stubborn plastic smells.
- Dry completely before adding beans. Moisture is the fastest route to mold.
- If a plastic container still smells after a deep clean, replace it. Glass or stainless steel is a better long-term investment.
Keeping your container clean is a small habit with a big payoff. Your beans will taste fresher, your coffee will be more enjoyable, and you’ll stop wasting money on beans that taste old before their time. For more on keeping your whole setup in shape, see our coffee machine maintenance guide and the proper cleaning routine for your brewer.
Products related to this article
Sponsored / affiliate links. As an Amazon Associate I earn from qualifying purchases. I may earn additional commission from eligible campaigns.