You buy a bag of quality beans, bring it home, and toss it in the pantry. Three weeks later, that bright, fruity Ethiopian pour-over tastes flat and dusty. The problem isn’t your brewing. It’s how you stored the beans.
Most coffee drinkers don’t think about storage until the flavor drops off. By then, the damage is done. Oxygen, light, heat, and moisture all work against your beans from the moment they’re roasted. A good storage container slows that process, but only if you use it correctly.
This guide walks through how to organize a coffee bean storage container so your beans stay fresh longer. You’ll learn the exact steps to set up your container, how to maintain it, and what mistakes to avoid. No fluff, just practical advice from someone who’s tested more canisters than they care to count.
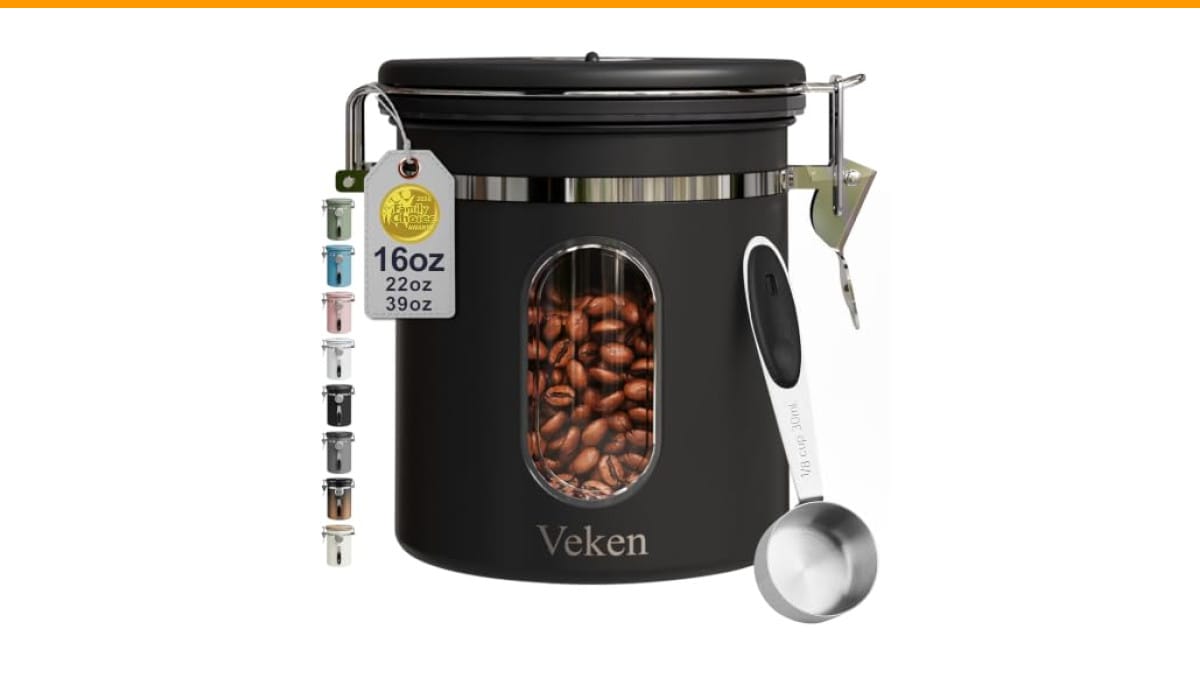
If you’re shopping for a new container, the Veken Coffee Canister with Window is a solid option. It’s made from 304 stainless steel, has a one-way CO2 valve, and includes a date tracker on the lid. The window lets you see how many beans remain without opening it, which means less oxygen exposure. We’ll reference it as an example throughout this guide, but the principles apply to any quality canister.
Why Your Current Storage Setup Is Failing
Before reorganizing anything, understand what’s actually going wrong. Coffee beans release carbon dioxide for days after roasting. That gas protects the beans from oxygen. When you seal beans in an airtight container without a valve, pressure builds up. Some containers pop open or crack. Others just hold the CO2 in, which isn’t terrible, but opening the lid releases all that protective gas at once.
The bigger issue is what happens after you open the container. Every time the lid comes off, fresh oxygen rushes in. Oxidation starts immediately. That’s the process that turns coffee stale and eventually rancid. A one-way valve, like the one on the Veken canister, lets CO2 escape without letting oxygen in. That’s a genuine advantage, not marketing talk.
Another common failure: storing beans in the original bag. Those bags have a foil lining and a degassing valve, which is fine for short-term use. But they don’t seal well after opening. The roll-top closure isn’t airtight, and the bag gets crushed in your pantry, breaking beans into uneven pieces. Ground coffee stales even faster than whole beans because more surface area is exposed.
So if you’re serious about coffee, get a dedicated container. Then organize it properly. Here’s how.
Step-by-Step: How to Organize a Coffee Bean Storage Container
Setting up your container takes about five minutes. The payoff is weeks of fresher coffee. Follow these steps in order.
Step 1: Clean and Dry the Container Completely
Wash the container with warm, soapy water. Rinse thoroughly. Dry it with a clean towel, then let it air dry for another ten minutes. Any residual moisture inside will accelerate staling and can cause mold in humid climates. The Veken canister’s stainless steel interior won’t absorb odors, but it will still harbor bacteria if you skip this step.
Pro tip: Don’t use a dishwasher. The heat and detergent can degrade the silicone seal over time. Hand wash only.
Step 2: Set the Date Tracker
Most quality canisters include a date dial on the lid. The Veken model has one. Set it to the roast date, not the purchase date. Roast date is listed on the bag, usually within a few days of roasting. If you bought beans without a roast date, use the best-by date and subtract two weeks. That’s a rough estimate, but it’s better than guessing.
Why track the date? Whole beans peak between 4 and 14 days after roasting. After three weeks, flavor declines noticeably. After six weeks, you’re drinking brown water with caffeine. The date tracker keeps you honest about how old your beans actually are.
Step 3: Fill the Container to the Right Level
Pour whole beans into the container. Fill it about 80% full. This leaves headroom for CO2 release while minimizing the air volume inside. A nearly empty container holds mostly air, which means more oxygen contact with the beans. A completely full container leaves no room for the valve to work properly.
If you’re storing less than half a bag, consider a smaller container. The 16-ounce Veken canister holds roughly a standard 12-ounce bag of beans with room to spare. That’s the right size for most home users. Buying a huge container for a small amount of beans defeats the purpose.
Step 4: Seal and Store in the Right Location
Close the lid firmly. You should hear a slight suction when you open it later. That indicates a good seal. Place the container in a cool, dark cabinet away from the stove, dishwasher, or any heat source. Ideal temperature is 60-75°F. Avoid the countertop unless it’s out of direct sunlight. Light degrades coffee oils quickly.
Do not refrigerate or freeze your beans. The moisture in a fridge condenses on cold beans, and freezer storage can introduce off-flavors. Room temperature in a sealed container is the standard recommendation from roasters and coffee scientists alike.
Step 5: Use the Container Correctly Every Day
Open the lid, scoop out the amount you need for that brew, close the lid immediately. Don’t leave it open while you fiddle with your grinder. Every second the lid is off is a second of oxygen exposure. The Veken canister includes a stainless steel scoop that attaches to the side, so you don’t have to search for a scoop while the lid sits open.
Grind only what you need. Whole beans stay fresh far longer than ground coffee. If you must grind ahead, store the ground coffee in a separate small container and use it within three days.
Comparing Coffee Storage Methods
Not all storage approaches are equal. Here’s a side-by-side comparison of common methods based on my testing and industry standards.
| Method | Oxygen Protection | Ease of Use | Best For | Downsides |
|---|---|---|---|---|
| Airtight canister with CO2 valve | Excellent | High | Daily use, 2-4 week storage | Costs more, takes counter space |
| Airtight canister without valve | Good | High | Short-term, pre-ground coffee | Pressure builds, gas release on opening |
| Original bag with roll-top | Fair | Moderate | First few days after purchase | Poor seal, easy to crush beans |
| Mason jar | Fair | High | Small quantities, display storage | No valve, light exposure if clear glass |
| Freezer in original bag | Poor | Low | Long-term storage (months) | Moisture risk, flavor transfer |
My recommendation: use a valved canister for beans you’ll finish within a month. For longer storage, split beans into small vacuum-sealed portions and freeze only those. But honestly, coffee is best consumed fresh. Buy smaller bags more often rather than storing bulk.
Maintaining Your Coffee Container
A storage container only works if it stays clean and functional. The silicone seal and valve are the two components that fail most often.
Weekly Cleaning Routine
Once a week, empty the container and wipe the interior with a dry paper towel. Coffee oils leave a residue that can turn rancid and contaminate fresh beans. If you see buildup, wash with warm soapy water, rinse, and dry completely.
Check the silicone seal for cracks or debris. A tiny coffee particle stuck in the seal breaks the airtight barrier. Run your finger along the seal to feel for anything lodged there. The Veken canister’s seal is removable, which makes cleaning easier. Not all canisters allow this, so check yours.
Cleaning the CO2 Valve
The one-way valve on the Veken and similar canisters can clog with coffee dust over time. Use a dry toothbrush to gently brush the valve area every few weeks. Don’t use water or cleaning solutions on the valve itself — they can damage the membrane. If the valve stops working, the canister becomes a standard airtight container, which is still functional but less ideal.
When to Replace Your Container
Stainless steel canisters last years if treated well. The Veken’s 304 stainless steel resists rust and odors. However, the silicone seal degrades after 12-18 months of daily use. If the lid doesn’t create suction when you close it, replace the seal or the whole canister. A worn seal is worse than no container at all because it gives false confidence.
Common Mistakes People Make With Coffee Storage
I’ve seen these mistakes repeatedly in my own kitchen and in reader questions. Avoid them and you’ll get noticeably better coffee.
Mistake 1: Storing Beans in the Fridge
This is the most common error. The fridge is humid, and coffee beans act like sponges. They absorb moisture and odors from other foods. Your beans end up tasting like last week’s leftovers. Freezing is slightly better if done right, but refrigeration is never a good idea.
Mistake 2: Overfilling the Container
Packing beans to the brim seems efficient, but it prevents the CO2 valve from functioning. The gas needs headroom to escape. Without that, pressure builds and the seal weakens. Fill to 80% and no more.
Mistake 3: Using a Clear Container in Direct Sunlight
Clear glass or plastic containers look nice on the counter, but light destroys coffee oils. UV rays accelerate oxidation. If you love a transparent canister, keep it in a dark cabinet. The Veken’s window is small enough that it doesn’t compromise the beans, but a fully clear container left on a sunny counter will stale your coffee in days.
Frequently Asked Questions
How long do coffee beans stay fresh in an airtight container?
Whole beans in a sealed, valved container at room temperature stay at peak flavor for 2-3 weeks after roasting. They remain drinkable for up to 6 weeks, but the nuanced flavors fade after the third week. Ground coffee degrades much faster — use it within 3-5 days for best results.
Should I transfer beans to a container immediately after buying?
Yes, but only if the bag’s seal is broken. Unopened bags with a one-way valve are fine for a few days. Once opened, transfer the beans to your canister. The original bag’s roll-top closure doesn’t provide an airtight seal, so leaving beans in it accelerates staling.
Can I store different coffee beans in the same container?
Technically yes, but you shouldn’t. Coffee beans absorb odors from other beans. A dark roast will flavor a light roast within a day. If you rotate between beans, clean the container thoroughly between uses. Better yet, use separate containers for different beans.
Is the Veken canister dishwasher safe?
No. The manufacturer recommends hand washing. The dishwasher’s heat and detergent can damage the silicone seal and the CO2 valve. Hand wash the stainless steel body and lid, dry completely, and reassemble.
How do I know if my coffee beans are stale?
Stale beans look dull and oily rather than matte. They produce less crema when brewed as espresso, and the aroma is flat or slightly sour. If your brewed coffee tastes bitter or papery, the beans are past their prime. When in doubt, check the date tracker on your canister.
What to Do Next
Your coffee storage doesn’t need to be complicated. Pick a quality canister with a CO2 valve, set the date, fill it 80% full, and keep it in a dark cabinet. That’s it. The rest is routine.
- Use a valved canister for beans you’ll finish within a month.
- Set the date dial to the roast date, not the purchase date.
- Fill the container to 80% capacity for proper gas exchange.
- Store in a cool, dark place — never the fridge or freezer.
- Clean the container weekly and check the seal monthly.
- Grind only what you need; whole beans last longer.
- Replace the silicone seal every 12-18 months.
If you’re dealing with stale-tasting coffee from a dirty machine, check our cleaning guide next. A clean brewer makes a bigger difference than most people realize. And if you’re still using a blade grinder, read our grinder comparison — a proper burr grinder will improve your coffee more than any storage container ever could.
Proper storage won’t make bad beans good, but it will keep good beans good for longer. That’s worth the five minutes it takes to set up your container correctly.
Products related to this article
Sponsored / affiliate links. As an Amazon Associate I earn from qualifying purchases. I may earn additional commission from eligible campaigns.