Why Your Keurig Accessories Need More Than a Quick Rinse
You pull out the water reservoir, give it a swish with soapy water, wipe the drip tray, and call it clean. Sound familiar? I did the same for months until I took apart the K-Cup holder and found a film of old coffee oil stuck to the needles. That film wasn’t just ugly—it was changing the taste of every cup I brewed.
Sanitizing your Keurig accessories isn’t about being obsessive. It’s about removing bacteria, mold spores, and mineral scale that plain soap and water miss. This guide covers every removable part, the right cleaning agents, and how often to do each step. You’ll walk away with a routine that takes under 30 minutes and keeps your brewer running like new.
Keurig
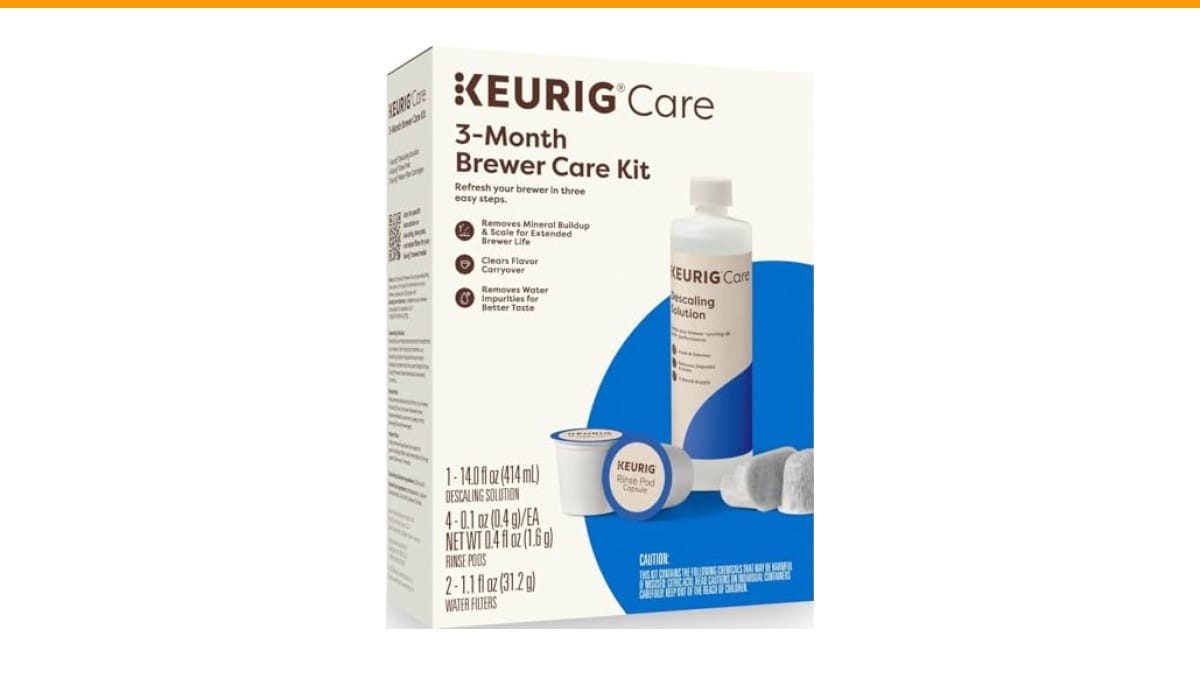
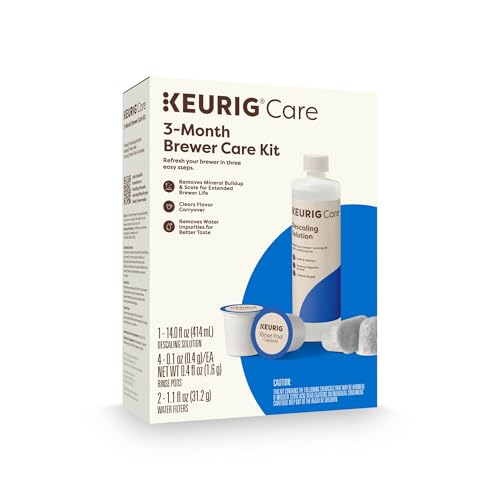
Keurig 3-Month Brewer Care Maintenance Kit |…
- INCLUDES: 4 Keurig Rinse Pods, 1 Descale Solution, and 2 Water Filter Cartridge Refills
- RINSE PODS: reduces flavor carry-over between brews
- QUICKEST WAY TO CLEAN YOUR K-Cup pod holder: rinse away residue and oils that can build up in your coffee maker
As an Amazon Associate I earn from qualifying purchases.
If you’re dealing with a specific issue like a stuck descale light or weak brew, check our guide on Keurig descale light stays on before you start scrubbing—it might save you time.
For a complete refresh, the Keurig 3-Month Brewer Maintenance Kit bundles four rinse pods, one descaling solution, and two water filter refills. It’s a convenient way to tackle both sanitizing and descaling in one go, especially if you’ve fallen behind on maintenance.
What Counts as a Keurig Accessory?
Before you start cleaning, know exactly what you’re working with. Most Keurig models share the same removable parts:
- Water reservoir – the tank and its lid
- K-Cup holder – the funnel-shaped piece that holds the pod
- Upper needle assembly – the part that pierces the top of the pod
- Drip tray – the base that catches spills
- Water filter basket – if your model uses one
Each part needs a different approach. The reservoir and drip tray can handle warm soapy water, but the needle assembly requires careful wiping to avoid bending the needles. The filter basket should never go in the dishwasher—it’ll warp.
Gather Your Supplies
You probably have most of these already:
- White vinegar or a descaling solution (like the one in the maintenance kit)
- Baking soda (for stubborn stains)
- Soft cloths or paper towels
- Cotton swabs or a small soft brush
- Clean water for rinsing
Step-by-Step Sanitizing Routine
Here’s the order I recommend—it works for classic 1.0 and 2.0 Keurig models.
Step 1: Unplug and Disassemble
Unplug the brewer. Remove the water reservoir, drip tray, and K-Cup holder. If you have a water filter, take it out and set it aside.
Step 2: Wash Removable Parts in Warm Soapy Water
Use mild dish soap and warm water. Scrub the reservoir, drip tray, and K-Cup holder with a soft sponge. For the needle assembly, dip a cotton swab in soapy water and gently wipe the needles. Don’t soak the upper assembly—water can get into the brewer’s internal parts. Rinse everything thoroughly with clean water. Let them air dry completely.
Step 3: Descale the Internal Lines
Descaling removes mineral scale that soap can’t reach. Fill the reservoir with equal parts white vinegar and water, or use the Keurig descaling solution. Run a brew cycle without a K-Cup. Let the machine sit for 30 minutes, then run another cycle. Repeat until the reservoir is empty. Then run two full reservoirs of plain water to flush out any vinegar taste. If you skip this, your coffee will keep tasting slightly sour.
Step 4: Sanitize the Water Filter
If you use a charcoal filter, rinse it under cold running water for 30 seconds. Don’t use soap—it will ruin the charcoal. Replace it every two months or after 60 tank refills. The Keurig maintenance kit includes two refills, so you can swap them without a separate trip.
Step 5: Wipe Down the Exterior
Dampen a cloth with soapy water and wipe the outside of the brewer, including the control panel. Dry with a clean cloth. Don’t spray water directly on the machine.
Sanitizing vs. Descaling: What’s the Difference?
People use these terms interchangeably, but they’re not the same. Sanitizing kills germs and removes organic buildup. Descaling dissolves mineral deposits like calcium and limescale. You need both, but on different schedules.
| Task | What It Removes | How Often | Best Product |
|---|---|---|---|
| Wash removable parts | Coffee oils, residue, visible dirt | Every 2 weeks | Dish soap and water |
| Sanitize needles and holder | Bacteria, mold spores, old coffee film | Monthly | Cotton swab + soapy water |
| Descale internal lines | Calcium, limescale, mineral buildup | Every 3-6 months | Vinegar or Keurig descaling solution |
| Replace water filter | Impurities, chlorine taste | Every 2 months | Keurig charcoal filter |
If you notice your Keurig won’t brew and all lights are on, it might be a clogged needle—not a descaling issue. Clean the needle first before you run a descale cycle.
Common Mistakes That Ruin Accessories
I’ve seen people make these errors, and they’re easy to avoid.
- Dishwasher use: The high heat and detergent can warp plastic parts and damage the water filter. Hand wash only.
- Soaking the upper assembly: Water seeps into the machine’s internal lines and can cause electrical issues. Wipe, don’t soak.
- Skipping the rinse cycle: Leftover vinegar or soap affects the taste of your next brew. Always run at least two full reservoirs of clean water.
- Using abrasive scrubbers: Steel wool scratches the plastic, creating grooves where bacteria hide. Stick to soft sponges.
How to Sanitize Keurig Accessories with Vinegar (The Budget Method)
Vinegar is cheap and effective, but it has a strong smell. If you’re sensitive to it, use the Keurig descaling solution instead—it’s odorless and works faster.
- Mix 1 part white vinegar with 1 part water. Fill the reservoir.
- Place a large mug on the drip tray. Run a brew cycle without a K-Cup.
- Let the machine sit for 30 minutes to break down scale.
- Run another brew cycle. Repeat until the reservoir is empty.
- Fill the reservoir with fresh water. Run two full cycles to flush out the vinegar.
This method also cleans the internal lines, so you don’t need to disassemble anything. It’s a good monthly maintenance habit.
Using Rinse Pods for a Quick Clean
Rinse pods are the lazy person’s friend—and I mean that as a compliment. You pop one in like a regular K-Cup, run a brew cycle, and it dissolves coffee oils and residue in the K-Cup holder. The Keurig maintenance kit includes four rinse pods, which gives you a month of weekly cleanings.
They’re not a substitute for descaling or washing the reservoir, but they’re perfect for between deep cleans. If you notice your coffee tastes stale even after cleaning, a rinse pod might fix it. For a full guide on keeping your brewer fresh, check our coffee maker cleaning frequency article.
Frequently Asked Questions
Can I put the water reservoir in the dishwasher?
No. Dishwasher detergent and high heat can warp the plastic and damage the water level sensor. Hand wash with warm soapy water instead.
How often should I sanitize the K-Cup holder?
Every two to four weeks, depending on how much coffee you brew. If you drink multiple cups daily, lean toward the two-week mark. The needles can clog with coffee grounds and oils, which slows brewing and affects flavor.
Is vinegar safe for all Keurig models?
Yes, but you need to dilute it with equal parts water. Full-strength vinegar can corrode internal rubber seals over time. The Keurig descaling solution is formulated to be safe and pH-balanced, so it’s a better choice if you’re unsure.
What’s the best way to clean the upper needle?
Unplug the machine, then use a paper clip or a cotton swab dipped in warm soapy water. Gently wipe around the needles to remove coffee grounds and oil. Don’t push hard—the needles are sharp and can bend.
Do I need to sanitize the water filter?
You should rinse it under cold water weekly, but don’t use soap. The charcoal absorbs impurities, and soap will ruin its effectiveness. Replace the filter every two months.
What You Should Remember
- Wash removable parts with soap and water every two weeks. Don’t use the dishwasher.
- Descale every three to six months with vinegar or a commercial solution.
- Sanitize the needle assembly monthly using a cotton swab—don’t soak it.
- Replace the water filter every two months to keep water tasting fresh.
- Use rinse pods weekly to prevent oil buildup between deep cleans.
- Always run two full reservoirs of clean water after any cleaning cycle to flush out residue.
- If you have a persistent issue, check our troubleshooting guides for Keurig not brewing full cup or other common problems.
Products related to this article
Sponsored / affiliate links. As an Amazon Associate I earn from qualifying purchases. I may earn additional commission from eligible campaigns.