You’ve just pulled a shot that looks like watery brown juice. The crema is thin, the flow is fast, and the taste is sour. You’ve dialed in the grind, checked the water temperature, and weighed every dose. Still, something’s off. Most of the time, that something is your tamping.
Tamping is the single most underrated step in espresso. It compresses the coffee grounds into a uniform puck so water flows through evenly. A poor tamp means channeling — water finds a path of least resistance and rushes through one spot, leaving the rest of the coffee under-extracted. This guide walks you through the exact technique, the common mistakes, and how to pick the right tamper for your setup. You’ll know how to use an espresso tamper correctly by the end, and your shots will taste better for it.

WYLOSUA
51mm Espresso Tamper-Premium Barista Coffee Tamper Coffee…
- THE DIAMETER OF THIS TAMPER IS 51MM - please check that this will fit your filter basket before purchasing.Fits all 51mm Commercia…
- UNIQUE DESIGN - The tamper has an exquisite appearance, Stainless steel design, the handles were ergonomically designed to ensure…
- PROFESSIONAL HANDMADE - Due to the high quality of the steel espresso control, the tamper has an ideal size and weight, because of…
As an Amazon Associate I earn from qualifying purchases.
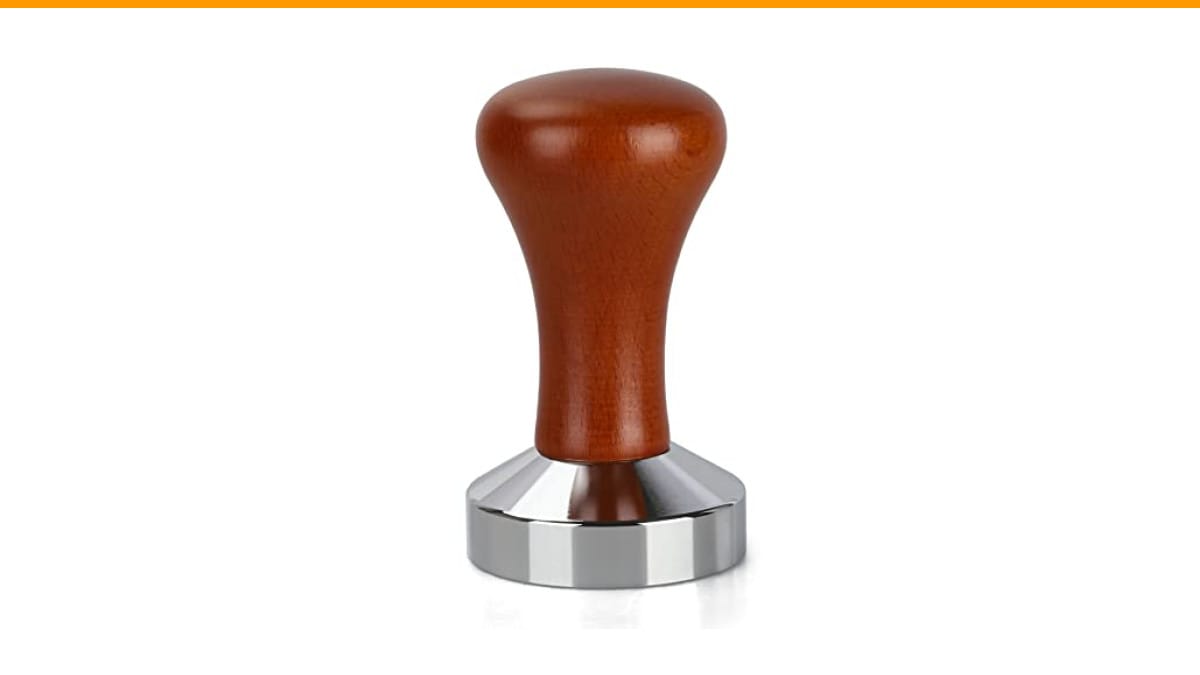
If you’re working with a 51mm portafilter — common on many home machines like Delonghi and certain Breville models — a well-fitting tamper matters even more. The WYLOSUA 51mm Espresso Tamper is a solid choice for these baskets. The stainless steel base sits flat and the solid wood handle gives you a comfortable grip. It’s not flashy, but it does the job without flexing or wobbling. More on that later.
Why Tamping Matters More Than You Think
Your grinder does most of the heavy lifting. But even a perfect grind distribution leaves air pockets between the particles. Tamping removes those pockets and creates a dense, even bed. Water then has to push through the entire puck uniformly, extracting oils and flavors at a consistent rate.
The numbers tell the story. Most baristas aim for a tamping pressure between 15 and 30 pounds. That sounds precise, but the real goal is consistency. Tamping at 15 pounds every time beats tamping at 30 pounds once and 10 pounds the next shot. Your machine’s pump pressure is typically 9 bars. That’s about 130 psi. Your 20-pound tamp is nothing compared to that, but it sets the structure the water works against.
The biggest issue isn’t force — it’s levelness. A tilted tamp creates a wedge-shaped puck. Water flows through the thin side quickly and stalls on the thick side. You get a shot that’s both sour and bitter at the same time. That’s the worst outcome.
So, the real skill is pressing straight down with consistent pressure, every single time. That’s what you’ll practice below.
Step-by-Step: How to Use an Espresso Tamper Correctly
Here’s the exact routine I use. It takes about ten seconds once you get the hang of it.
- Distribute the grounds first. After grinding into your portafilter, break up any clumps. Use a toothpick, a distribution tool, or just tap the side of the portafilter gently. The surface should look flat and even before you touch it with the tamper. This step is non-negotiable. Tamping can’t fix an uneven bed.
- Hold the tamper like a doorknob. Your palm should rest on the top of the handle, with your fingers wrapped around the side. Your wrist should be straight, not bent. This position keeps your forearm aligned with the tamper shaft, which helps you press straight down.
- Rest the base on the coffee. Place the tamper base flat on the grounds. Make sure the entire base is in contact with the coffee. If the base is smaller than your basket, you’ll leave a ring of loose grounds around the edge. That’s a problem.
- Press straight down with steady pressure. Push down with your shoulder and arm, not just your wrist. Aim for 15-20 pounds of pressure. You don’t need to bounce. One smooth, firm press is enough.
- Give it a slight twist. As you reach full pressure, rotate the tamper about a quarter turn. This polishes the surface of the puck and helps release any suction between the tamper and the coffee. Don’t twist while pressing — that can crack the puck.
- Check the puck. Lift the tamper straight up. The coffee should look flat, smooth, and dry on top. No cracks, no tilt. If you see a slanted surface, your wrist was bent. If you see cracks, you pressed twice or twisted too hard.
That’s it. Six steps. The whole process takes less than ten seconds once you’re comfortable.
Pro tip: If you’re using a tamper with a 51mm base like the WYLOSUA tamper, make sure it fits your basket snugly. A tamper that’s too small leaves a gap around the edge. A tamper that’s too big won’t fit at all. Measure your basket’s inner diameter before buying. Most home machines use 51mm or 54mm, while commercial machines use 58mm.
Common Tamping Mistakes and How to Fix Them
I’ve watched plenty of home baristas struggle with the same issues. Here are the three most common, and the fixes that actually work.
Mistake 1: Tamping at an Angle
This is the most frequent error. Your wrist bends slightly, and the tamper presses down harder on one side. The resulting puck is wedge-shaped, and your shot runs unevenly.
Fix: Slow down. Place the tamper on the coffee and look at it from eye level. The base should sit flush against the rim of the basket. If you see a gap on one side, adjust before pressing. Also, keep your elbow up. A dropped elbow forces your wrist to compensate.
Mistake 2: Using Too Much Pressure
More force doesn’t mean better espresso. Once the coffee is compressed to its maximum density, extra pressure does nothing. In fact, pressing at 50 pounds can crack the puck or create micro-channels.
Fix: Use a bathroom scale to calibrate your feel. Place the tamper on the scale and press until it reads 15 pounds. Do that a few times to memorize the feeling. Then replicate it without the scale. Your goal is consistency, not maximum force.
Mistake 3: Tamping Wet or Stale Coffee
Fresh coffee absorbs moisture and expands slightly. Stale coffee is brittle and crumbles. Neither tamps well. If your beans are more than three weeks past their roast date, you’re fighting a losing battle.
Fix: Use fresh beans. If you must use older beans, grind slightly finer to compensate for the lack of expansion. And never tamp coffee that’s already wet — that only happens if you’re re-tamping after a failed shot, which you shouldn’t do anyway.
Choosing the Right Tamper Size and Type
Tamper size is the first thing to get right. The base must match your basket’s inner diameter, not the outer rim. A 51mm tamper fits a basket that measures 51mm across the inside. If you use a 51mm tamper in a 54mm basket, you’ll leave a ring of uncompressed coffee around the edge. That ring extracts faster and ruins the shot.
Here’s a quick comparison of common tamper types:
| Tamper Type | Best For | Pros | Cons |
|---|---|---|---|
| Flat base | Most home users | Even pressure distribution, simple to use, works with any basket | Requires good technique for levelness |
| Convex base | Some commercial baristas | Can help with even extraction on certain baskets | Not ideal for all baskets, can cause channeling |
| Spring-loaded / calibrated | Beginners or those who want consistency | Clicks at a set pressure, removes guesswork | More expensive, can feel bulky |
| Wood handle | Aesthetics and grip | Comfortable, warm feel, looks great | Can absorb moisture if not sealed properly |
The WYLOSUA classic tamper falls into the flat base category with a solid wood handle. The stainless steel base is machined flat, which is what you want. The weight feels substantial, which helps with a steady press. It’s not a calibrated tamper, so you’ll need to develop your own consistent pressure. That’s fine — most baristas prefer the feel of an uncalibrated tamper once they’ve practiced.
One thing I noticed in testing: the wood handle is smooth, not textured. That means your hand can slip if your fingers are wet. Dry your hands before tamping, or grip the handle firmly. It’s a minor quibble, but worth knowing.
How to Practice Tamping Without Wasting Coffee
You don’t need to pull a shot every time you want to practice. Here’s a drill that costs nothing.
- Grind a small dose of coffee into your portafilter — even old, stale beans work for this.
- Tamp it using the technique above.
- Knock the puck out into the trash.
- Repeat ten times, focusing on keeping the tamper level.
After a few sessions, you’ll develop muscle memory. Your wrist will stay straight, your pressure will be consistent, and you won’t have to think about it. That’s the goal.
Another drill: place a piece of carbon paper on a flat surface, put a sheet of paper over it, and tamp on top. The imprint will show you exactly where you’re pressing harder. It’s a cheap way to see your own unevenness.
Frequently Asked Questions
How hard should I press when tamping espresso?
Aim for 15 to 20 pounds of pressure. That’s enough to compress the grounds fully without overdoing it. If you don’t have a feel for it, use a bathroom scale to practice. The key is consistency — the same pressure every time — not maximum force.
Should I twist the tamper after pressing?
A slight quarter-turn twist after you’ve pressed down is fine. It polishes the surface and releases suction. But don’t twist while you’re pressing down. That can crack the puck and create channels. A gentle polish at the end is all you need.
What happens if my tamper is too small?
A tamper that’s too small leaves a ring of uncompressed coffee around the edge of the basket. That ring extracts faster than the rest, leading to an uneven and bitter shot. Measure your basket’s inner diameter and buy a tamper that matches it exactly. For many home machines, that’s 51mm.
Can I use a tamper with a 51mm base on a 58mm portafilter?
No. It won’t even touch the coffee properly. A 51mm tamper is designed for a 51mm basket. Using it on a 58mm basket would leave a huge gap. Always match the tamper to your specific portafilter. Check the manufacturer’s specs for your machine.
How do I know if I’m tamping level?
Look at the puck after you knock it out. It should be flat and even, with no visible tilt. If you see a wedge shape, your wrist was bent. You can also use a leveling tool or a distribution tool to help, but the best fix is practicing with a straight wrist and a steady press.
What to Do Next: Build a Routine
Tamping is one part of a larger workflow. If you’re still pulling inconsistent shots, check your grind size and your dose weight first. A good reference point: start with a 1:2 ratio — 18 grams of coffee in, 36 grams of espresso out — and adjust from there. If your shots run too fast, grind finer. If they drip, grind coarser.
If your machine is producing odd noises or leaking, that’s a separate issue. Tamping won’t fix a mechanical problem. Check out our guides on loud espresso machine noises and water leaks if that’s happening to you.
And if you’re deciding between machine types, the tamping technique is the same. But a semi-automatic machine gives you more control over the whole process. Read our comparison of automatic vs semi-automatic espresso machines to see which fits your style.
Here are the quick takeaways to remember:
- Distribute your grounds evenly before tamping. Tamping can’t fix an uneven bed.
- Hold the tamper like a doorknob, with a straight wrist.
- Press straight down with 15-20 pounds of pressure. Consistency beats force.
- Give a quarter-turn twist after pressing, not during.
- Check your puck after the shot. A flat, dry puck means you did it right.
- Match your tamper size to your basket’s inner diameter. A 51mm tamper for a 51mm basket.
- Practice with stale beans to build muscle memory without wasting good coffee.
Your next shot will be better. Not perfect, but better. That’s the point.
Products related to this article
Sponsored / affiliate links. As an Amazon Associate I earn from qualifying purchases. I may earn additional commission from eligible campaigns.
 Coffee Espresso Machine Handle Replacement Parts, Cafe Bracket Handle for Lidl Silvercrest CM4621 CM4218 KF5002 KF500S Barista (for 51mm Portafilter Basket - Not included)
 Stainless Steel Moka Pot Pressed Powder Tool for 2 4 6 9 Cup Espresso Coffee Brewer(6 Cups)
 Linnkyfloa Coffee Espresso Maker Handle Replacement for Stovetop Moka Pot or Percolator, Black Plastic for Spare Part Compatible with Italian(9-12 Cup)