You just pulled a shot that looked like brown water. It sprayed everywhere, tasted sour, and the crema disappeared in ten seconds. You check your grinder, your beans, your machine. Everything seems fine. So you start wondering: is the cheap plastic tamper that came with the machine the real problem?
That’s a fair question. Most home baristas start with a flimsy tamper that doesn’t fit their basket properly. Swapping it for a solid stainless steel one feels like a step up. But does it actually change the flavor in your cup, or is it just a nice piece of gear to hold?

WYLOSUA
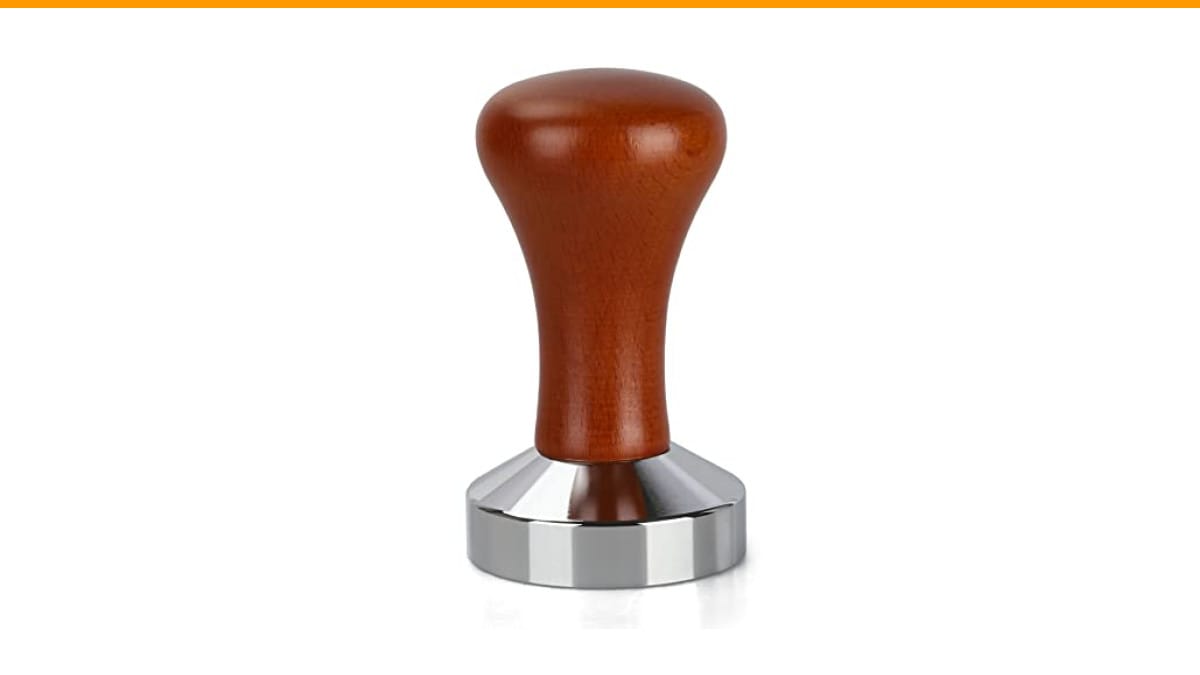
51mm Espresso Tamper-Premium Barista Coffee Tamper Coffee…
- THE DIAMETER OF THIS TAMPER IS 51MM - please check that this will fit your filter basket before purchasing.Fits all 51mm Commercia…
- UNIQUE DESIGN - The tamper has an exquisite appearance, Stainless steel design, the handles were ergonomically designed to ensure…
- PROFESSIONAL HANDMADE - Due to the high quality of the steel espresso control, the tamper has an ideal size and weight, because of…
As an Amazon Associate I earn from qualifying purchases.
This guide breaks down the physics of tamping, how to diagnose a bad tamp, and when spending more money on a tamper actually makes sense. You’ll walk away knowing exactly what your current setup is doing wrong—and whether a new tool is the fix or just a distraction.
The Check Price on Amazon is a solid example of what a proper tamper should feel like. It has a flat stainless steel base and a solid wood handle, which gives you the weight and grip needed for a consistent press. If you have a 51mm portafilter, this is a good reference point for what an upgrade feels like in the hand.
Does a Tamper Actually Change Your Espresso? (The Short Answer)
Yes, but not for the reason most people think. A tamper doesn’t push flavor into the coffee. It creates a dense, even bed of grounds that forces water to flow through the entire puck uniformly. That uniformity is what prevents channeling—where water finds a weak spot and rushes through, leaving the rest of the coffee dry and under-extracted.
If your current tamper is too small for your basket, you’re leaving a ring of loose coffee around the edge. Water will always take the path of least resistance, so it flows down those edges. You get a watery, sour shot with almost no body. That’s not a coffee bean problem. That’s a mechanical problem.
So yes, a properly sized tamper improves your coffee. But here’s the catch: the technique matters more than the tool. You can buy a $100 tamper and still make terrible espresso if you don’t distribute the grounds evenly before pressing.
The Science: Why Tamping Matters (and When It Doesn’t)
Tamping gets treated like a mystical ritual, but it’s really just physics. You’re compacting coffee grounds into a puck that resists water pressure. The espresso machine pushes water at around 9 bars of pressure. That’s roughly 130 pounds per square inch. Your puck needs to be dense enough to create that back-pressure so the water extracts flavors slowly and evenly.
If the puck is too loose, water blows through it in five seconds. The result is a weak, sour shot. If the puck is too dense in one spot and loose in another, you get channeling. The water carves a path through the loose area, over-extracting those grounds (bitter) while leaving the dense areas untouched (sour).
Here’s where it gets interesting: tamping matters less when your grind is very fine. A fine grind packs tightly on its own. Some baristas can pull a decent shot with no tamp at all if the grind is fine enough. But that’s a risky game. A consistent tamp gives you a safety net that makes every other variable—grind size, dose, temperature—more forgiving.
The Real Goal: Back-Pressure and Even Flow
Think of your espresso puck as a dam. The water wants to rush through. Your job is to make the dam uniform so the water has to work through every grain of coffee equally. That even flow extracts the full range of flavors—acids, sugars, and bitter compounds—in the right order.
An uneven tamp creates weak spots. Water finds those spots instantly. This is why you see shots that spray or pour in a thin, fast stream. The puck has cracks or channels. A good tamper, used correctly, prevents those weak spots from forming in the first place.
Why “30 lbs of Pressure” is a Myth
Every forum post tells you to tamp with 30 pounds of pressure. That’s nonsense for most home users. You don’t have a scale under your tamper, and your arm doesn’t know what 30 pounds feels like. What actually matters is consistency—pressing with the same force every single time.
A calibrated tamper removes the guesswork. It clicks or stops at a set pressure, so every shot gets the same density. But you can achieve the same result with a standard tamper if you practice. Press until the coffee stops compressing. You’ll feel the puck stop giving way. That’s your baseline. Do that every time.
The 3 Ways a Tamper Improves (or Ruins) Your Shot
A tamper isn’t a magic wand. It’s a tool with specific strengths and failure modes. Here’s how it affects your shot in three concrete ways.
Consistency vs. Force: The Calibrated Tamper Advantage
Force matters less than repeatability. A calibrated tamper—like a spring-loaded model—ensures you apply the same pressure shot after shot. That’s valuable if you’re dialing in a new coffee. You want to change one variable at a time. If your tamp pressure varies by 20%, you’re chasing ghosts in your recipe.
That said, a calibrated tamper won’t fix a bad distribution. If you dump coffee in the basket and it’s mounded on one side, pressing down evenly will still leave one side denser. You need to break up clumps and level the bed first. Use your finger, a WDT tool, or just shake the portafilter gently before tamping.
The WYLOSUA tamper we mentioned earlier isn’t calibrated, but its flat base and solid weight make it easier to press straight down without rocking. That consistent angle is often more important than hitting a specific pound target.
The Leveler Trap: Why You Might Be Making Things Worse
Distribution tools (levelers) are popular right now. They spin across the top of the basket to flatten the coffee bed. The problem? Many home users treat them as a replacement for tamping. That’s a mistake.
A leveler only touches the top few millimeters of coffee. It doesn’t compress the entire puck. If you skip tamping, your puck is still loose and fluffy. Water will blow through it. You’ll get a fast, sour shot that looks like tea.
Worse, some levelers are set to a depth that compresses the coffee unevenly. If the tool is slightly off-center, it creates a slant in the puck. That’s the worst possible scenario—worse than not leveling at all. If you use a leveler, follow it with a proper tamp. Don’t use it as a shortcut.
How to Diagnose a Bad Tamp (Symptoms & Fixes)
You don’t need to guess what’s wrong with your shot. The symptoms tell you exactly what went wrong. Here’s a quick reference table for troubleshooting.
| Symptom | Likely Cause | Fix |
|---|---|---|
| Sour, thin shot with fast flow | Under-tamped (too loose) or grind too coarse | Press harder and ensure level bed; adjust grind finer |
| Bitter, dark shot with slow drip | Over-tamped or grind too fine | Reduce pressure slightly; grind coarser |
| Shot sprays from the portafilter | Uneven tamp, channeling, or cracked puck | Distribute grounds evenly before tamping; press straight down |
| No crema, watery body | Puck too loose or stale beans | Increase tamp pressure; check bean roast date |
| Channeling (gushing in one spot) | Worn basket or tamper too small | Verify tamper size matches basket; replace worn parts |
Pay attention to the spray symptom. If your shot sprays, you have a channeling problem. That’s almost always a distribution issue, not a force issue. Slow down your prep. Break up clumps with a toothpick or WDT tool. Then tamp once, straight down, without twisting.
Do You Need an Expensive Tamper? (The Price vs. Taste Curve)
Here’s the honest answer: the difference between a $15 tamper and a $50 tamper is mostly build quality and feel. The difference in taste is minimal if both are sized correctly and used with proper technique. The difference between a $50 tamper and a $150 tamper is almost entirely aesthetic and brand name.
In a blind tasting, most people cannot tell the difference between a shot tamped with a $20 tamper and one tamped with a $100 tamper, provided the technique is identical. The tamping pressure is the same. The puck density is the same. The tool just feels nicer in your hand.
So where should you spend your money? First, make sure your tamper fits your basket perfectly. A 51mm basket needs a 51mm tamper. A 58mm basket needs a 58mm tamper. A 54mm Breville basket needs a 54mm tamper. Using the wrong size is the single biggest mistake home users make. Check your portafilter diameter before buying anything.
If your current tamper fits well and you’re getting decent shots, a new tamper won’t fix your problems. If your tamper is loose, wobbly, or clearly the wrong size, upgrading to a solid stainless steel model with a comfortable handle is a worthwhile investment. The WYLOSUA 51mm tamper fits that bill for smaller machines—it’s heavy, flat, and the wooden handle gives you a stable grip without slipping.
The Verdict: Upgrade or Practice First?
Before you buy anything, do this test. Pull a shot and watch the flow. Is it fast and thin? Slow and drippy? Spraying? Write down what you see. Then change one thing: your distribution or tamp pressure. Pull another shot. Compare.
If your shots are inconsistent, practice your technique for a week. Focus on leveling the bed and pressing straight down. Most people see a massive improvement just from slowing down and being deliberate.
After that week, if you still feel the tool is holding you back—it slips, it’s too small, it’s uncomfortable—then upgrade. A good tamper is a lifetime purchase. It won’t make bad beans taste good, but it will remove one more variable from your control.
If you’re still troubleshooting other issues, check out our guide on espresso tasting burnt or learn about burr grinder vs blade differences, since grind consistency is just as critical as tamping.
Here are the practical takeaways to remember:
- Fit matters most: A tamper that’s 1mm too small ruins your puck. Measure your basket first.
- Consistency beats force: Press the same way every time. Calibrated tampers help, but practice works too.
- Distribution is half the battle: Break up clumps and level the bed before you tamp.
- Don’t skip the tamp: A leveler is not a substitute. It only touches the surface.
- Diagnose before you buy: Sour, bitter, and spraying shots have different fixes. Know your symptom.
- Expensive doesn’t mean better tasting: A $20 tamper with good technique beats a $100 tamper with sloppy habits.
- Upgrade for feel, not magic: A solid tamper with a comfortable handle makes prep easier, which indirectly improves your consistency.
Start with your technique. If you still feel limited by your gear, a quality tamper is a smart upgrade. Just check the size first.
Products related to this article
Sponsored / affiliate links. As an Amazon Associate I earn from qualifying purchases. I may earn additional commission from eligible campaigns.
 Coffee Espresso Machine Handle Replacement Parts, Cafe Bracket Handle for Lidl Silvercrest CM4621 CM4218 KF5002 KF500S Barista (for 51mm Portafilter Basket - Not included)
 Quick Heating Cup Warmer, Three Temperature Settings, Splashproof and Portable, for Coffee, Milk, Lightweight ABS Material
 Linnkyfloa Coffee Espresso Maker Handle Replacement for Stovetop Moka Pot or Percolator, Black Plastic for Spare Part Compatible with Italian(9-12 Cup)