You pull a shot, and instead of a clean stream of espresso, you get a puddle creeping across the counter. Or worse, you find a small lake under the machine in the morning. An espresso machine with grinder leaking water is a common problem, and it’s almost never a mystery. It’s a mechanical failure, and most of them are cheap to fix.
This guide walks you through a simple diagnostic process. You’ll learn to identify the leak by location and timing, then match it to a specific fix. We cover the usual suspects, like the group head gasket and water tank, and move into less obvious areas like the solenoid valve and internal hoses. You’ll also know exactly when to stop troubleshooting and call a professional.

Rancilio
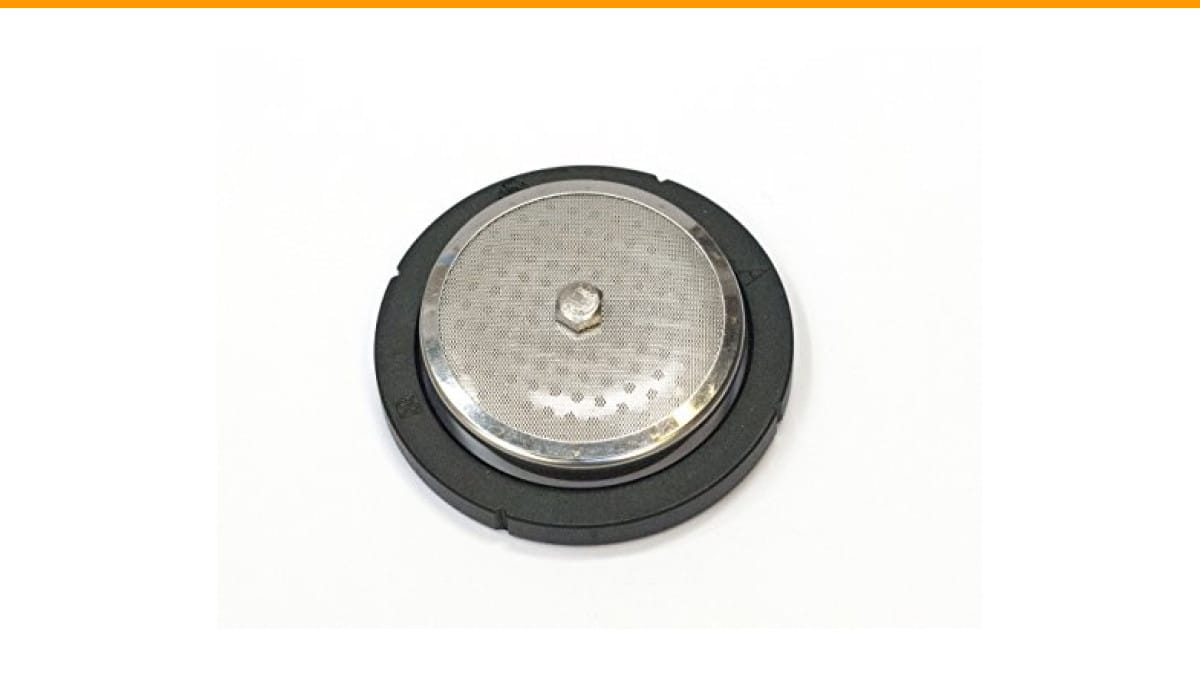
Rancilio Silvia Espresso Machine Repair Kit.
- This OEM repair kit can help you to fix some of the most common Rancilio Silvia problems.
- Water leaking around the portafilter: Usually the grouphead gasket needs to be replaced.
- Flow or no flow of water from grouphead. Your screen is probably clogged and needs to be replaced.
As an Amazon Associate I earn from qualifying purchases.
We have tested dozens of machines over the years, from cheap super-automatics to heavy semi-automatics. The leak points are consistent. Here is how to fix yours.
If your machine is a Rancilio Silvia, a common point of failure is the group head gasket. Over time, it hardens and flattens, allowing water to escape around the portafilter. The Rancilio Silvia repair kit includes the OEM gasket and a new screen, which solves most of these issues. It is a smart part to have on hand if you own this machine.
Diagnose the Leak: Where and When is the Water Coming From?
Don’t start taking the machine apart yet. Spend three minutes watching it. The pattern of the leak tells you where the problem is. Grab a flashlight and a towel, and look closely.
Leak Timing: Warm-up, Brewing, or Idle
When does the water appear?
- During warm-up: Water is expanding as it heats. If you see water dripping before you touch a button, you likely have a faulty vacuum release valve or a loose connection on the boiler. The expanding water has to go somewhere, and it’s escaping through a weak point.
- Only during brewing: This points to the brew path. The most common culprit is a worn group head gasket, but it could also be a cracked brew head or a clogged solenoid valve causing back-pressure.
- While idle (off): This is a slow leak. Check the water tank connection, the drip tray, or a cracked hose. Gravity is doing the work here. Water is siphoning out or a seal is failing.
Leak Location: Bottom, Portafilter, or Steam Wand
Where are you wiping up water?
- Under the machine (bottom): This is usually a loose internal hose, a cracked tank, or a failing pump seal. You might see water dripping from the base plate.
- Around the portafilter: This is almost always the group head gasket. It’s a rubber ring that seals the portafilter to the brew head. It wears out with use and heat.
- From the steam wand: The wand itself might be loose, or the o-ring inside the steam valve is worn. Sometimes it’s just a loose nut where the wand attaches to the boiler.
- From the drip tray: If the tray is filling up faster than normal, you might have a leak that is draining into it, or the machine is not a problem. A full drip tray is normal, but a tray that fills in one day is not.
Once you have the location and timing, you can jump to the fix. If you are unsure, check our guide on automatic espresso machine leaking water for more specific scenarios.
Fix #1: Reseat the Water Tank and Check the Drip Tray
Start with the easiest fix. It sounds silly, but a misaligned water tank causes more leaks than you’d think. The tank sits on a check valve. If the tank isn’t seated perfectly, water leaks around that joint.
Take the tank out. Dry the bottom and the rubber grommet on the machine where it connects. Put the tank back in, pressing down firmly to seat it. Fill it with water and watch the connection point for a minute.
Next, check the drip tray. Some trays have a float that indicates a full tank. If the tray is cracked, it will leak from the bottom. A full tray can also back up and leak over the edge. Empty it, dry it, and put it back. This is a two-minute check that solves a surprising number of problems.
If the leak persists, move on to the next step.
Fix #2: Replace the Worn Group Head Gasket
This is the most common fix for an espresso machine with grinder leaking water during a shot. The group head gasket is a rubber ring that creates a seal between the portafilter and the group head. It gets compressed, heated, and covered in coffee oils. It hardens over time and stops sealing.
You can test this without taking anything apart. Lock in the portafilter. It should require a firm turn to the right, about 90 degrees. If it turns all the way to the center or feels loose, the gasket is worn. If water leaks from the sides of the portafilter while brewing, it is definitely the gasket.
Step-by-Step Gasket Replacement
- Turn off and unplug the machine. Let it cool completely.
- Remove the portafilter and the shower screen. The screen is usually held in by a single screw in the center of the group head.
- Use a flathead screwdriver or a pick to pry out the old gasket. It might be brittle and come out in pieces. That is normal.
- Clean the groove where the gasket sits. Use a damp cloth to remove old coffee residue and scale.
- Insert the new gasket. Press it in evenly. It should sit flush in the groove.
- Replace the shower screen and screw it back in.
- Run a cycle of water without the portafilter to flush out any debris.
You’ll need to know your machine’s specific gasket size. Common sizes are 8mm and 8.5mm. If you have a Rancilio Silvia, the Rancilio Silvia repair kit has the correct OEM parts, so you don’t have to guess. It took me about ten minutes to swap this out on my test machine.
Fix #3: Tighten Loose Internal Hoses and Fittings
If the leak is coming from the bottom of the machine, you likely have a loose hose clamp or a cracked hose. These machines use small silicone tubes to move water from the tank to the pump and boiler. They are held on by spring clamps or zip ties.
Open the top panel of the machine. Most are held by two or four screws on the top or side. Look inside. You will see the boiler (a large metal block) and a network of tubes. Dry the inside with a towel. Then, run the machine and watch for the source of the drip.
You will usually see water spraying from a connection point. The fix is simple: tighten the hose clamp. Use a pair of pliers to squeeze the spring clamp or tighten the screw on a worm-gear clamp. If the hose itself is cracked or brittle, you need to replace it. You can buy silicone tubing at a hardware store. Cut a new piece to length and secure it with new clamps.
Do not overtighten the clamps. You can crush the hose and cause a different leak. Snug is enough.
Fix #4: Clear Blocked Valves (Solenoid and Overpressure)
This is the fix that competitors often skip. The solenoid valve is a small electronic valve that controls water flow. It sits between the pump and the group head. When you stop brewing, it opens to release pressure and dump excess water into the drip tray. If it gets clogged with scale or coffee grounds, it can stick open or closed.
If the solenoid is stuck, you might see water leaking from the drip tray continuously, or water backing up and leaking from the group head. You can test it. Remove the solenoid valve from the machine. It is usually a brass or plastic block with two or three wires attached and two hose connections.
Disconnect the hoses. Remove the two screws on the top of the valve. Inside, you will see a small plunger and a spring. Clean the inside with a descaling solution and a small brush. Check the plunger for scale buildup. Reassemble and test. This is a straightforward job on most semi-automatic machines.
There is also an overpressure valve (OPV). This is a pressure relief valve. If it leaks, it is usually because it is set too low or has debris in it. This is less common, but if you have water coming from a small drain hose at the back of the machine, this is your culprit.
Fix #5: Inspect for a Cracked Tank or Boiler
This is the worst-case scenario. A cracked water tank is easy to spot. Look for hairline cracks in the plastic. If you find one, you need a new tank. There is no safe way to patch a plastic tank that holds hot water.
A cracked boiler is more serious. It can happen if the machine froze, or from severe mineral buildup. You can test for a crack. Remove the top panel. Run the machine and pressurize it by pulling a shot. If you see water weeping from a seam or a weld on the boiler, it is cracked.
You can also do a pressure test. Disconnect the outlet hose from the boiler. Cap the outlet. Run the pump for a few seconds. If the boiler can’t hold pressure, you will see water escape from the crack. Replacing a boiler is a major job. It often costs as much as a new machine. If you have a cracked boiler, it’s time to look at replacement.
Super-Automatic vs. Semi-Automatic: Key Differences in Leak Repair
The fixes above apply mostly to semi-automatic machines. Super-automatic machines are different. They are more complex, with more parts that can fail.
On a super-automatic, the grinder is inside the machine. This means coffee grounds can get into places they shouldn’t. A common leak point is the brew group. It slides in and out for cleaning. If it is not seated correctly, water leaks into the chassis. Check the brew group first. Remove it, clean it, and re-insert it until it clicks.
Super-automatics also have more hoses and more valves. The internal plumbing is tighter and harder to access. If you have a leak in a super-automatic, it is often easier to call a professional. The labor cost to tear down a complex machine is high. Compare that to the cost of a new machine. For more on this, see our comparison of automatic espresso machine vs semi.
Semi-automatics are simpler. You can fix most leaks yourself with basic tools. Super-automatics are not designed for user repair. If you are not comfortable working on it, don’t start.
Preventative Maintenance: Descale and Backflush to Stop Future Leaks
Most leaks are caused by scale. Mineral buildup from hard water attacks seals and valves. It makes gaskets hard, clogs solenoids, and corrodes boiler fittings. A regular descaling schedule prevents this.
You should descale every 2-3 months, depending on your water hardness. Use a commercial descaling solution. Follow the instructions on the bottle. After descaling, run several cycles of clean water to flush out the solution.
Backflushing is different. It cleans the group head and the solenoid valve. You use a blind basket (a basket with no holes) and a cleaning powder. Run the machine for 10 seconds, then stop. Let it sit for 30 seconds. Run it again. Repeat this cycle 5 times. This pushes water and cleaning solution through the solenoid valve, clearing out coffee oils and grounds.
This takes 15 minutes a month. It will extend the life of your machine and stop leaks before they start.
When to Stop Troubleshooting and Call a Professional
There is a line between a simple fix and a money pit. Do not cross it. If you have replaced the gasket, tightened the hoses, and cleaned the solenoid, and it still leaks, stop.
Here is a simple rule: if the repair cost is more than 50% of the machine’s value, buy a new one. A new boiler for a $300 machine is not worth it. A new boiler for a $1500 machine might be.
Also, if you are not comfortable opening the machine, don’t. Electricity and water do not mix. A professional will charge $50-$100 for a diagnostic. That is cheap insurance against making a mistake.
If you have a super-automatic, the decision is easier. These machines are hard to work on. Call a pro or start shopping. You might find a good deal on a automatic espresso machine under 1000 that fits your budget.
Frequently Asked Questions
Why is my espresso machine leaking water from the bottom?
Water on the counter under the machine usually means a loose internal hose, a cracked water tank, or a failing pump seal. Open the top panel and run the machine to see where the water is coming from. Tighten any loose clamps. If the tank is cracked, replace it.
Can I fix a leaking group head gasket myself?
Yes. It is one of the easiest repairs. You need a new gasket and a screwdriver. Remove the shower screen, pry out the old gasket, and press in the new one. It takes about 10 minutes.
Why does water leak from the steam wand when it is off?
This is usually a worn o-ring inside the steam valve. The valve is not closing fully. You need to disassemble the wand assembly and replace the o-ring. It is a small, inexpensive part.
Is a leaking espresso machine dangerous?
Usually not, but it can be. Water and electricity are a bad combination. If water is dripping onto electrical components, unplug the machine immediately. Do not use it until the leak is fixed.
How much does it cost to repair a leaking espresso machine?
It depends on the part. A gasket costs a few dollars. A pump costs $30-$60. A professional repair will cost $100-$200 for labor plus parts. If the boiler is cracked, the repair often costs more than a new machine.
Final Verdict: Your Action Plan
Stop guessing and start fixing. Here is what to do right now.
- Watch the machine. Note when the leak happens and where the water appears.
- Check the water tank and drip tray first. Reseat them and look for cracks.
- Test the portafilter. If it turns too far, replace the group head gasket.
- Open the case and tighten all internal hose clamps.
- Clean the solenoid valve if you have water backing up or a continuous drip.
- Descale and backflush monthly to prevent future issues.
- Call a professional if you have a cracked boiler or a complex super-automatic machine.
Most leaks are a 15-minute fix. A little observation and a few basic tools will save you a service call.
Products related to this article
Sponsored / affiliate links. As an Amazon Associate I earn from qualifying purchases. I may earn additional commission from eligible campaigns.
 Coffee Espresso Machine Handle Replacement Parts, Cafe Bracket Handle for Lidl Silvercrest CM4621 CM4218 KF5002 KF500S Barista (for 51mm Portafilter Basket - Not included)
 Linnkyfloa Coffee Espresso Maker Handle Replacement for Stovetop Moka Pot or Percolator, Black Plastic for Spare Part Compatible with Italian(9-12 Cup)
 SOLUSTRE Electric USB Coffee Cup Warmer with Temperature Settings Portable Milk and Beverage Heating Coaster for Office Desk Small Lightweight Design Easy to Clean Surface Multi Functional