You go to boil water for your morning pour-over, press the power button, and… nothing. No light, no heat, no hum. Your electric gooseneck kettle not turning on is a frustrating way to start the day, especially when you’ve got beans ground and a brewer waiting.
Most troubleshooting guides treat every electric kettle the same. That’s a mistake. Gooseneck kettles have a few design quirks that make them fail differently than a standard kettle. The narrow spout, the lid-mounted float switch, and the way the base connects all create unique failure points. This guide walks through those specific issues in a logical order, so you can find the problem in minutes instead of guessing.

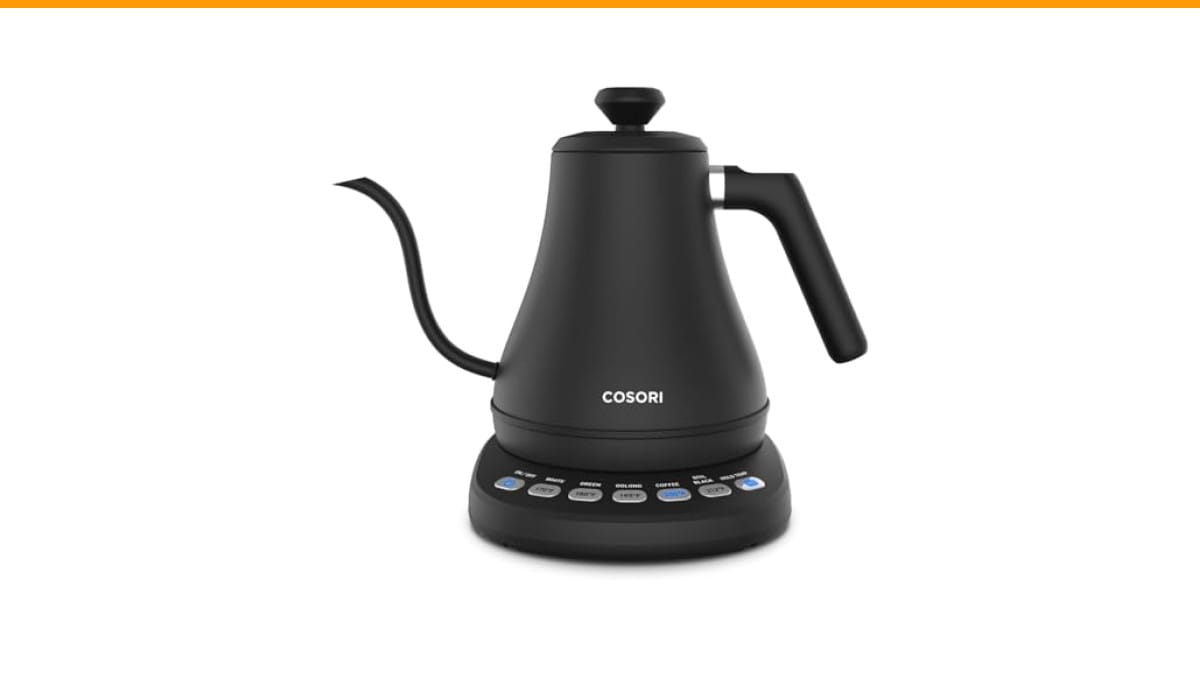
Cosori
Cosori Gooseneck Electric Kettle with Temperature Control,…
- 5 𝑶𝑵𝑬-𝑻𝑶𝑼𝑪𝑯 𝑷𝑹𝑬𝑺𝑬𝑻𝑺: Your Gooseneck Electric Kettle features 5 precise temperature presets. These accurate presets make brewing co…
- 1-𝑯𝑶𝑼𝑹 𝑲𝑬𝑬𝑷 𝑾𝑨𝑹𝑴: Use the HOLD TEMP function to keep the contents of your kettle warm for up to 1 hour so that you can enjoy your…
- 𝑬𝑹𝑮𝑶𝑵𝑶𝑴𝑰𝑪 𝑫𝑬𝑺𝑰𝑮𝑵: Refined ergonomic design allows for precise water flow control for perfect pour-over brewing
As an Amazon Associate I earn from qualifying purchases.
You’ll learn the 60-second diagnostic that separates a power problem from a kettle problem, where the hidden reset button lives on most goosenecks, and exactly when to stop tinkering and file a warranty claim. No vague advice, just steps you can do right now.
If you’re in the market for a replacement while you troubleshoot, the Cosori Gooseneck Electric Kettle with Temperature Control (0.8L, Black) is a solid option. Its 304 stainless steel interior and precise spout make it a favorite for pour-over, and the 1-hour keep-warm function means you won’t be stuck with lukewarm water mid-brew.
Safety First: Unplug and Inspect
Before you touch anything, unplug the kettle from the wall. Water and electricity don’t mix, and a faulty kettle can give you a shock if you’re not careful. Let the kettle cool completely if it was recently used.
Now look at the outside. Check the power cord for cuts, kinks, or exposed wires. A chewed cord (pets love these) or a bent plug prong is an obvious culprit. If you see damage, stop here. Don’t attempt a DIY cord repair on a kettle that handles water. Replace it.
Also check the base unit for cracks or water stains. A spilled kettle can short the base internals, and that’s not something you can fix safely at home.
If the cord and base look fine, move on to the diagnostic. This next section takes less than a minute and will save you from taking apart a perfectly good kettle.
The 60-Second Diagnostic: Is It Power or the Kettle?
Plug the kettle back in and look at the base or the kettle’s LED display. Does anything light up? This single observation splits the troubleshooting path in half.
Check the Outlet and Circuit Breaker
No light at all? Start with the outlet. Plug your phone charger or a lamp into the same socket. If that doesn’t work, you’ve got a dead outlet. Check your circuit breaker or GFCI outlet – they trip for a reason, often from a small surge when the kettle’s heating element kicks on. Reset the breaker and try again.
If the outlet works but the kettle still shows no sign of life, try a different outlet in another room. This rules out a wiring issue in one specific wall socket.
One thing most people skip: the power cord connection at the base. On many goosenecks, the cord detaches from the base. Make sure it’s fully seated and not loose. A half-plugged cord feels secure but doesn’t make electrical contact.
Inspect the Base and Spout Contacts
If the kettle has power (light on) but won’t heat, the problem is likely in the connection between the kettle and its base. Gooseneck kettles use a circular ring of contacts on the bottom that mate with spring-loaded pins on the base. Over time, these contacts can corrode, especially if you live in a hard-water area or the kettle was left with water on the base.
Look at the bottom of the kettle and the top of the base. You’ll see small metal rings or dots. If they’re black, green, or crusty, that’s corrosion. Clean them gently with a dry cloth or a soft eraser. Don’t use water or spray cleaner – you’ll make it worse. After cleaning, set the kettle back on the base and try again.
Also check the spout. Water can drip down the outside of the spout and pool around the lid hinge or the top rim. On some goosenecks, a small micro-switch lives in the lid. If that switch gets sticky from mineral deposits, it can prevent the kettle from turning on, thinking the lid is open. We’ll cover that in detail in a moment.
The Hidden Reset Button (Gooseneck Specific)
Most electric kettles have a thermal reset switch, and goosenecks are no exception. But here’s the catch: on many models, it’s not labeled or visible. You have to hunt for it.
Flip the kettle over. Look at the bottom of the base, near the cord entry point. You’re looking for a tiny hole with a small button inside, sometimes marked with a red or black dot. A paperclip or a ballpoint pen can press it. Some models hide the reset under a rubber foot – you’ll have to peel that back to see it.
Why does it trip? The thermal fuse blows when the kettle overheats, usually from running dry or boiling with too little water. If you ever let the kettle boil dry, that’s almost certainly the cause. The heating element heats up beyond its safe limit, and the fuse cuts power permanently until reset.
Press the reset button firmly. You should feel a small click. Then try turning the kettle on. If it works, you’ve saved yourself a replacement. But be honest with yourself: if you boil dry regularly, this will keep happening. The reset is a safety feature, not a convenience.
If there’s no reset button visible, check your user manual. Some manufacturers (like Cosori) place it on the underside of the base, but it’s not always obvious. If you can’t find it after a thorough look, move on to the next step.
One more thing: the reset button does not fix a broken heating element. It only resets the thermal fuse. If the kettle still won’t turn on after a reset, the problem is deeper.
The Lid and Float Switch: A Common Gooseneck Culprit
Here’s where gooseneck kettles differ from standard models. The narrow spout and the lid design often include a float switch or a lid position sensor. The kettle won’t heat if the lid isn’t closed properly, because steam escaping through the spout could cause burns.
If your kettle has a visible float – a small plastic or metal piece that rises with water level – it can get stuck. Minerals from hard water build up around the float, preventing it from moving freely. The switch then reads ’empty’ or ‘open,’ and the heating element stays off.
Open the lid and look for the float mechanism. On many goosenecks, it’s a small disc near the hinge or a rod that extends into the water. Gently move it up and down with your finger. If it feels gritty or sticks, that’s your problem.
To fix it, you’ll need to descale. Mix a 1:1 solution of white vinegar and water, fill the kettle to the minimum line, and bring it to a boil (if the kettle will heat). If it won’t heat at all, let the vinegar solution sit for an hour, then scrub the float area with a soft brush. Rinse thoroughly. Limescale dissolves in acid, so this usually clears the stickiness.
If the float is part of a sealed assembly and it’s still stuck after descaling, you’re looking at a replacement part. Don’t try to pry it apart – you’ll break the seal and ruin the kettle.
Also check the lid itself. Some goosenecks have a button or latch that must be fully engaged. If the lid sits slightly askew, the kettle may not turn on. Press down firmly until you hear a click.
Advanced Fixes: Thermal Fuse and Heating Element
If you’ve cleaned the contacts, reset the button, and freed the float, but the kettle still won’t turn on, you’re down to two likely components: the thermal fuse or the heating element itself. Both require opening the base, which is a critical decision point.
Opening the base voids the warranty on almost every electric kettle. If your kettle is under warranty, stop here and contact the manufacturer. We’ll cover that in the next section.
If you’re out of warranty and comfortable with a multimeter, here’s the basic test. Unplug the kettle, remove the base screws (usually Phillips or Torx), and lift the bottom plate. You’ll see the heating element terminals and the thermal fuse, often a small white or black cylinder with two wires.
Set your multimeter to continuity mode. Test the thermal fuse – it should show near-zero resistance. If it reads open (infinite resistance), it’s blown. Replace it with a fuse of the same temperature rating (usually 240°F/115°C, but check the printed value). You can buy a pack of thermal fuses online for a few dollars.
Test the heating element next. It should show low resistance, typically 20–50 ohms for a 120V kettle. If it reads open, the element is burned out. Replacing a heating element is rarely worth it – the cost of the part plus your time approaches the price of a new kettle. And the risk of a bad solder joint causing a fire isn’t worth saving $20.
If both the fuse and element test fine, the issue could be a broken wire or a faulty switch on the base. Trace the wires from the power cord to the switch and look for loose connections or burnt insulation. Resolder if needed, but again – be honest about your skill level.
One caveat: if you smell burning or see scorch marks, don’t even bother testing. That’s a sign of a serious electrical fault. Replace the kettle. Electricity and water are a deadly combination, and a compromised kettle isn’t worth the risk.
When to Stop DIY and Call for a Replacement
You’ve got two options when the troubleshooting fails: repair or replace. Here’s how to decide.
First, check your warranty. Most electric kettles come with a 1-year limited warranty, but some brands like Cosori offer 2 years. If you’re within that period and the kettle failed due to a manufacturing defect – not user error like boiling dry – file a claim. The manufacturer will likely send a replacement or a refund. That’s the easiest path, and it’s free.
If you’re out of warranty, do the math. A replacement gooseneck kettle costs anywhere from $30 to $100. A new heating element costs $10–15, but you’ll spend an hour of your time and risk a botched repair. Unless you’re genuinely handy with electronics, replacement is the smarter move.
Also consider the kettle’s age. If it’s more than 3 years old, the plastic parts may be brittle, and the seals may be degrading. A repair might extend its life by a year, but you’ll likely face another issue soon. Newer kettles have better insulation and more precise temperature control.
One more thing: if the kettle has ever been dropped or knocked hard off the base, internal damage might not be visible. Even if you manage to get it working, a cracked internal component could fail dangerously later. When in doubt, replace.
If you decide to replace, look for a model with a detachable cord and a clear reset button – it makes future troubleshooting much easier. The Cosori Gooseneck Electric Kettle we mentioned earlier is a good reference point for what to expect from a modern unit.
How to Prevent This From Happening Again
Most gooseneck kettle failures are preventable. Here’s what I do to keep mine running for years.
Descale every 4–6 weeks if you have hard water, or every 2–3 months if your water is soft. Fill the kettle with a 1:2 vinegar-water mix, let it sit for 30 minutes, then boil and rinse thoroughly. This prevents limescale from building up on the heating element, the float switch, and the base contacts.
Never fill the kettle past the max line, and always empty it after use. Leaving water sitting in a gooseneck encourages mineral deposits and can cause the float to stick.
Dry the base and the kettle’s bottom before seating it on the base. A few drops of water on the contacts can cause corrosion over time. I keep a small towel near my kettle just for this.
Don’t let the kettle boil dry. Set a timer if you’re distracted, or use a kettle with an auto shut-off that triggers before the water level gets too low. Most modern kettles have this, but it’s not a substitute for attention.
Finally, store the kettle with the lid open. This lets moisture evaporate and reduces the chance of mold or mineral buildup inside the spout.
Frequently Asked Questions
Why does my electric gooseneck kettle have power but won’t heat?
This usually points to a connection issue between the kettle and the base, or a stuck float switch. Check the contacts on the bottom of the kettle for corrosion, and make sure the lid is fully closed. If those are fine, the heating element or thermal fuse may be blown.
How do I know if my kettle’s thermal fuse is blown?
If the kettle shows no signs of power (no light, no heat) after you’ve confirmed the outlet works and the base contacts are clean, the thermal fuse is a prime suspect. Use a multimeter to test for continuity – if it reads infinite resistance, it’s blown. You can also try pressing the reset button, which is often hidden under the base.
Can I use a travel adapter with my gooseneck kettle?
Technically yes, but only if the adapter matches the voltage and wattage of your kettle. A 120V kettle plugged into a 240V outlet via a simple plug adapter will likely blow the fuse or damage the heating element. Check your kettle’s voltage rating and use a proper voltage converter if needed.
Is it safe to open the base of my electric kettle?
Only if it’s unplugged and you know what you’re doing. Opening the base voids the warranty and exposes live electrical components. If you’re not comfortable with a multimeter and basic soldering, don’t do it. Call the manufacturer or replace the kettle.
How often should I descale my gooseneck kettle?
If you have hard water, every 4–6 weeks. If your water is soft, every 2–3 months. You’ll know it’s time when you see white flakes in your water or the kettle takes longer to boil. Regular descaling prevents most of the issues covered in this guide.
What You Should Remember
- Unplug and inspect the cord and base before any testing – safety first.
- Check the outlet and circuit breaker before blaming the kettle.
- Clean the base contacts and the kettle’s bottom with a dry cloth – corrosion is a top cause.
- Look for the hidden reset button on the underside of the base – it’s there on most goosenecks.
- Descale regularly, especially if you have hard water, to keep the float switch and heating element clear.
- If the kettle is under warranty, don’t open it – file a claim.
- If it’s out of warranty and the heating element is dead, replace the kettle – it’s not worth the risk.
If you’re dealing with other coffee gear issues, we’ve got similar guides for Nespresso Vertuo problems and Mr. Coffee water flow issues. And if you’re thinking about a new kettle, the Cosori model we mentioned is a reliable choice – check the current price on Amazon to see if it fits your budget.
Products related to this article
Sponsored / affiliate links. As an Amazon Associate I earn from qualifying purchases. I may earn additional commission from eligible campaigns.
 Coffee Mug Warmer & You are Awesome Mug Set, Electric Cup Warmer for Desk
 25W Electric Candle Warmer for Coffee Mugs, 75℃ Heating & Auto Shut-Off, Spill-Proof Desk Warmer for Beverages (Black)
 SOLUSTRE Electric USB Coffee Cup Warmer with Temperature Settings Portable Milk and Beverage Heating Coaster for Office Desk Small Lightweight Design Easy to Clean Surface Multi Functional