You pull the lever, the grinder whirs to life, but the water hitting your portafilter is cold. Or worse, the machine is completely silent and the grinder is jammed. The term “espresso grinder not heating” usually points to the wrong culprit. The grinder rarely generates the heat; the boiler, thermoblock, or thermojet does. But a grinder failure can trip a safety switch that kills power to the whole system.
This guide gives you a logical triage sequence. You will learn how to isolate the failing component in under ten minutes using a multimeter, a screwdriver, and a clear head. We will cover the safety protocol first, then walk through the diagnostic flowchart, and finish with brand-specific quirks from Breville, Gaggia, and DeLonghi. You will know exactly when to fix it yourself and when to call a professional.
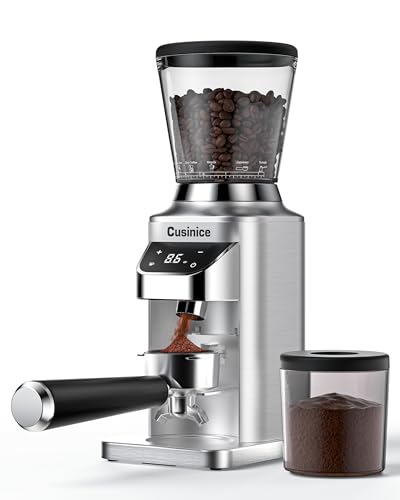
Cusinice
Conical Burr Coffee Grinder, Anti-Static, 0.1s Single/Double…
- 0.1s Timer with Smart Memory for Repeatable Dosing: The 0.1-second electronic timer lets you fine-tune grinding time for better do…
- 40mm Stainless Steel Conical Burr for Even Grinding: Built with a 40mm stainless steel conical burr, this conical burr coffee grin…
- Anti-Static Design for a Cleaner Countertop: The anti-static coffee bean grinder helps reduce clumping and scattered grounds durin…
As an Amazon Associate I earn from qualifying purchases.
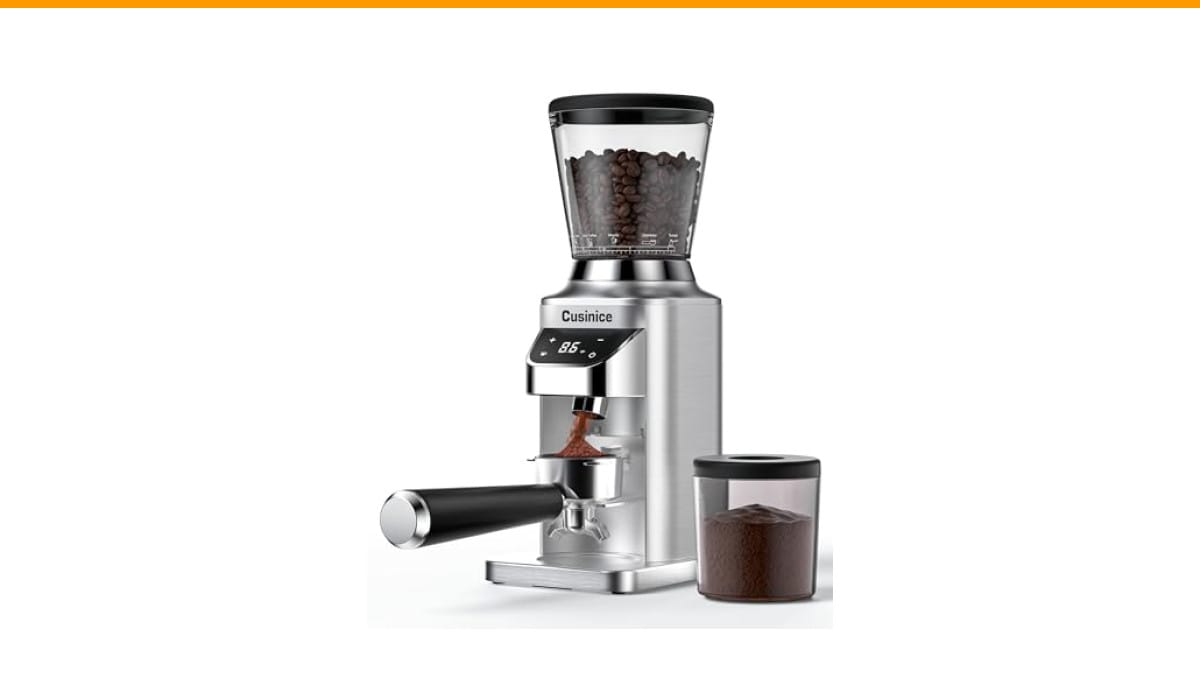
Most home setups pair a separate grinder with a machine. If you are shopping for a new grinder to eliminate variables, the Cusinice Conical Burr Coffee Grinder offers a 0.1-second timer and 34 grind settings, which helps rule out grind consistency issues when you are diagnosing temperature problems.
Safety First: Unplug, Discharge, and Prepare
Before you touch a single screw, unplug the machine from the wall. Do not just switch it off at the outlet. Pull the plug.
Next, wait at least 30 minutes. The internal capacitors in many espresso machines store a lethal charge. If you open the case immediately, you risk a shock that can stop your heart. A coffee machine is not a toy.
After waiting, press and hold the power button for five seconds. This drains residual charge from the capacitors. If your machine has a removable water tank, take it out. Empty the boiler by opening the steam wand if it is cool enough to touch.
Gather your tools: a Phillips screwdriver, a multimeter set to resistance (ohms), and a flashlight. You will also need a pair of insulated gloves rated for at least 1000 volts. They cost a few dollars and are worth every penny.
Work on a dry, non-conductive surface like a wooden table. Keep a fire extinguisher nearby, not because you will need it, but because cheap insurance is smart.
Isolate the Problem: Grinder vs. Heating System
You must determine whether the grinder is the cause or the victim. The symptom tells you which path to take.
The “Grinder Runs, No Heat” Scenario
If the grinder spins and produces grounds, but the water is cold, the problem is entirely in the heating circuit. The grinder is fine. Look at the thermal fuse, thermostat, and heating element. This is the most common misdiagnosis. People search for “espresso grinder not heating” when they actually have a dead boiler.
Check the brew temperature. If it is lukewarm but not hot, the thermostat is likely stuck open. If it is cold, the heating element or thermal fuse is blown.
The “No Power at All” Scenario
If the grinder does not spin and the machine has no lights, you have a power delivery problem. This could be a tripped internal circuit breaker, a blown thermal fuse, or a jammed grinder that overloaded the motor and tripped a safety relay.
A jammed burr set can draw excessive current. The machine’s thermal cutoff opens to prevent a fire. This is the “ghost” symptom: the grinder looks broken, but it is actually a protective shutdown. You need to clear the jam and reset the thermal fuse.
If you suspect a jam, check our guide on grinder jam fixes before you open the machine’s main body.
The Diagnostic Flowchart: From Symptom to Fix
Follow this sequence in order. Do not skip steps. The order matters because each test rules out a cheaper fix before you pay for an expensive part.
Step 1: Check the Thermal Fuse (Most Common)
The thermal fuse is a one-time safety device. It blows at a specific temperature (often 150°C to 190°C) and cannot be reset. When it blows, the machine loses all heating power.
Here is how to test it:
- Open the bottom or back panel of the machine.
- Locate the fuse. It looks like a small white or black cylinder with two metal leads. It is usually attached near the boiler or heating element.
- Set your multimeter to the continuity setting (the symbol that looks like a speaker).
- Touch one probe to each lead.
- If the multimeter beeps, the fuse is good. If it reads infinite resistance (OL), the fuse is blown.
Replace it with an identical fuse rated for the same amperage and temperature. Do not bypass it with a wire. That is how house fires start.
Step 2: Test the Thermostat
The thermostat regulates temperature. Unlike a fuse, it is resettable. It can be a bimetal disc or a capillary bulb type.
Test it the same way as the fuse. At room temperature, a closed thermostat should show continuity. If it reads open, it is stuck and needs replacement.
One nuance: some thermostats are normally open and close when heated. Check your machine’s wiring diagram. If you test a normally open thermostat at room temperature and get no beep, that is correct. Do not replace a good part.
Step 3: Inspect the Heating Element (Boiler vs. Thermojet)
The heating element is the most expensive part to replace. Test it last.
For a boiler machine (Gaggia, Rancilio), the element is a metal rod immersed in water. Measure resistance between the two terminals. A good element reads between 10 and 50 ohms. Lower than 10 ohms means a short circuit. Infinite resistance means the element is burned out.
For a thermoblock or thermojet (Breville), the element is a thick aluminum block with an embedded heating coil. The test is the same, but the element is harder to access. You may need to remove the entire brew group.
Also check the thermal fuse on the element. Many thermoblocks have a secondary fuse mounted directly on the block. It blows when the block overheats due to scale buildup.
Brand-Specific Quirks (Breville, Gaggia, DeLonghi)
Each brand has a weak point you should know before you start testing.
Breville (Thermojet models like the Barista Express): The thermojet is a sealed unit. You cannot rebuild it. If it fails, you replace the whole assembly. The most common issue is a tripped thermal cutoff due to limescale. Descale first, then test. If the element reads infinite resistance, the unit is dead.
Gaggia (Classic Pro): The boiler is a simple aluminum block. The heating element is replaceable, but it is often cheaper to buy a new boiler assembly. The thermostat is a common failure point. It is a small silver disc held by two clips. Gaggia thermostats are notoriously sensitive to orientation; install the new one exactly as the old one sat.
DeLonghi (Dedica and EC155): These machines use a thermoblock. The thermal fuse is the number one failure. It is located under a metal clip on the side of the block. DeLonghi uses a 169°C fuse. You can find them for a few dollars online. If the machine dies suddenly with no error code, suspect this fuse first.
If you are dealing with a DeLonghi that also has water flow issues, check our guide on water pump diagnostics to rule out a separate pump failure.
Grinder Issues That Mimic Heating Problems
Sometimes the grinder is the root cause, but the symptom looks like a heating failure.
Jammed Burrs Causing Overload and Shutdown
Hard beans or a foreign object (a small stone) can jam the burrs. The motor stalls. The current draw spikes. The machine’s internal breaker trips, cutting power to the entire unit, including the heating element.
The fix is simple: unplug, remove the hopper, and inspect the burrs. Turn the upper burr counterclockwise to free the jam. Remove any debris. Then press the reset button on the bottom of the machine. Most grinders have a small red reset button. If yours does not, wait 30 minutes for the thermal overload to cool down and reset automatically.
This is why a reliable grinder matters. A grinder with consistent burr alignment is less likely to jam. The Cusinice grinder uses a 40mm stainless steel conical burr, which handles hard beans better than cheaper blade grinders.
When to Call a Professional vs. DIY
Repair cost is the deciding factor. A simple rule: if the replacement part costs more than 50% of the machine’s current value, buy a new machine.
DIY is smart for thermal fuses, thermostats, and descaling. These parts cost under $20 and take 30 minutes to replace.
Call a professional if you need to replace a heating element on a sealed thermoblock, if you see burnt wires or scorch marks, or if you are not confident working with mains voltage. A botched repair can void your warranty or cause an electrical fire.
Labor costs for espresso machine repair run $50 to $100 per hour. A boiler replacement on a $300 machine can cost $150 in parts and labor. That is not worth it.
Preventative Maintenance to Avoid Future Failures
Most heating element failures are caused by hard water scale. Scale acts as an insulator. The element gets hot, but the water does not. The element overheats and burns out.
Follow this schedule:
- Weekly: Backflush with water only (no detergent) if your machine has a three-way valve.
- Monthly: Descale with a citric acid solution. Run a full cycle, let it sit for 20 minutes, then rinse twice.
- Quarterly: Replace the group head gasket and shower screen.
- Annually: Test the thermal fuse and thermostat with a multimeter.
Use filtered water. A simple Brita pitcher reduces scale by 50% compared to tap water. That alone can double the life of your heating element.
If your machine has a steam wand, purge it for 3 seconds after each use. This prevents milk residue from clogging the solenoid valve, which can cause pressure issues that mimic heating problems.
Frequently Asked Questions
Why is my espresso machine not heating but the grinder works?
The grinder runs on a separate circuit from the heating element. If the grinder works but the water is cold, the issue is in the boiler, thermoblock, or the thermal fuse protecting them. Test the fuse first. It is the cheapest part and the most likely failure.
Can a clogged grinder cause the machine to not heat?
Yes, indirectly. A jammed grinder can cause a motor overload that trips the machine’s main circuit breaker. This shuts off power to the entire unit, including the heater. Clear the jam and reset the breaker to restore heating.
How do I reset an espresso machine after it overheats?
Unplug the machine and wait 30 to 60 minutes. Most thermal cutoffs reset automatically when they cool down. Some machines have a small red reset button on the bottom or back. Press it firmly until it clicks. Plug the machine back in and test.
What does a blown thermal fuse look like?
It looks normal. You cannot visually inspect it. The only way to know is with a multimeter. Set it to continuity. Touch the probes to each lead. No beep means the fuse is blown. Replace it with the same temperature rating (usually printed on the fuse body).
Is it worth repairing a 10-year-old espresso machine?
Usually not. The seals, gaskets, and wiring degrade with age. A single repair may fix the heat, but the pump or solenoid valve may fail next month. If the repair costs more than half the price of a new comparable machine, replace it. Compare your options in our automatic espresso machine guide.
Final Verdict: Repair or Replace?
You now have a clear decision tree. Test the fuse, then the thermostat, then the element. If you find a blown fuse, replace it and move on. If the element is dead, weigh the cost.
Here are the practical takeaways:
- Always unplug and wait 30 minutes before opening the machine.
- Test the thermal fuse first; it fails most often and costs under $20.
- A jammed grinder can trip the main breaker, cutting power to the heater.
- Descale monthly to prevent heating element burnout from scale.
- Use a multimeter, not your eyes, to test electrical components.
- Replace the machine if parts cost more than 50% of its value.
- Consider a grinder with anti-static features to reduce clumping and jams in the chute.
If you decide to replace your grinder rather than repair it, the Cusinice Conical Burr Grinder is a solid home option. The 0.1-second timer helps you dial in repeatable doses, and the 34 settings cover espresso to French press. Check the current price on Amazon to see if it fits your budget.
Your machine is not dead. It just needs a logical diagnosis. Start with the fuse, work your way up, and you will have hot espresso in under an hour.
Products related to this article
Sponsored / affiliate links. As an Amazon Associate I earn from qualifying purchases. I may earn additional commission from eligible campaigns.
 Coffee Espresso Machine Handle Replacement Parts, Cafe Bracket Handle for Lidl Silvercrest CM4621 CM4218 KF5002 KF500S Barista (for 51mm Portafilter Basket - Not included)
 House Gem Coffee Mug Warmer for Desk, Candle Warmer Plate, 12H Timer, Wood
 Quick Heating Cup Warmer, Three Temperature Settings, Splashproof and Portable, for Coffee, Milk, Lightweight ABS Material