You set your mug down, get absorbed in a spreadsheet, and come back thirty minutes later to a lukewarm cup that tastes like regret. A mug warmer fixes that. But here’s the thing nobody mentions: that little plate collects coffee rings, dried-on splashes, and dust. Left alone, it stops transferring heat efficiently. Your drink gets warm slower, or not at all, and the heating panel starts looking like a crime scene.
This guide covers the actual schedule you should follow, why it matters beyond appearances, and how to clean different surfaces without damaging the electronics. You’ll walk away knowing exactly what to do, what to avoid, and how to tell if your cleaning routine is working.

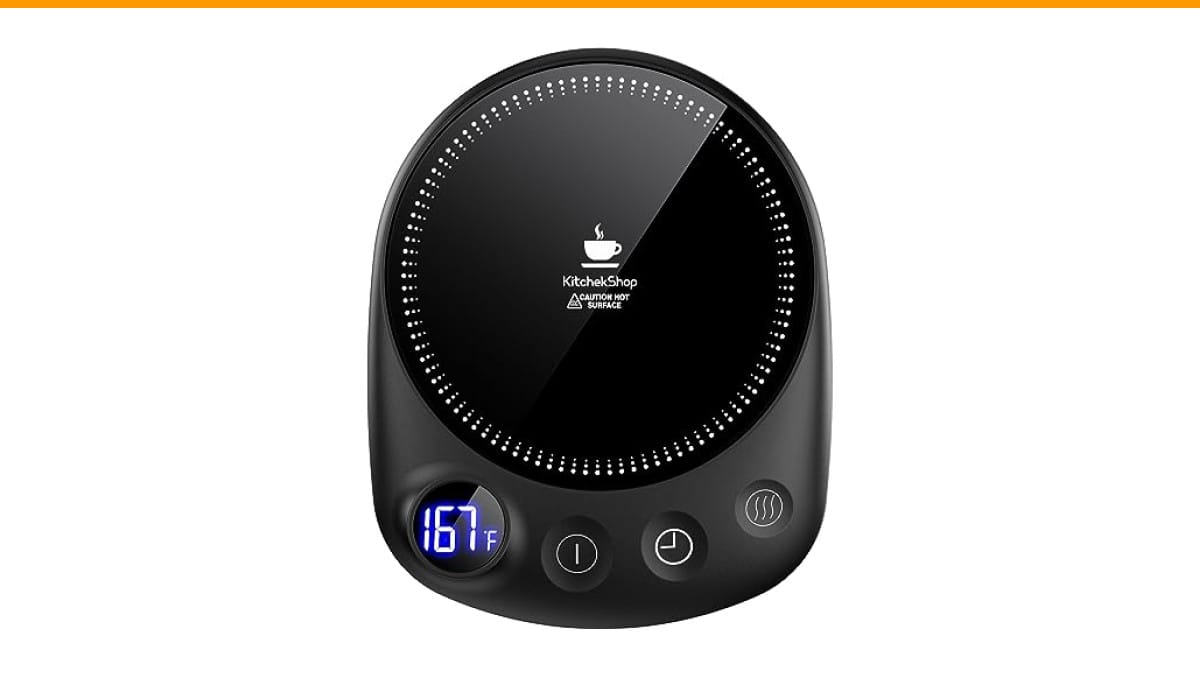
KitchekShop
KitchekShop Coffee Mug Warmer-Fastest Heating & Highest…
- 【Unparalleled Heating Speed】Enjoy the fastest heating and highest temperature with our coffee warmer. Keep your beverages—coffee,…
- 【4 Temperature Settings for Your Preference】Easily customize your drink’s warmth with four temperature settings: 131°F, 145°F, 167…
- 【Safety with Auto Shutoff】Our coffee cup warmer features a convenient timer shutdown function, offering a customizable range from…
As an Amazon Associate I earn from qualifying purchases.
If you’re in the market for a warmer that handles daily use well, the Check Price on Amazon has a large heating panel and four temperature settings, which makes it easier to keep clean since you can adjust heat to avoid scorching spills in the first place.
Why a Clean Mug Warmer Matters (and What Happens If You Skip It)
Think about what lands on that heating surface. Coffee oils leave a sticky film. Sugar residue turns into a hard, brown crust when it re-heats repeatedly. Hard water from rinsing your mug leaves chalky mineral deposits. Each layer acts as an insulator, blocking heat from reaching your cup.
Here’s the math: a thin layer of dried coffee can reduce heat transfer by 10-20 percent. That means your 145°F setting might only deliver 120°F to the bottom of your mug. You compensate by cranking the temperature up, which burns the residue into a tougher stain. It’s a downward spiral.
There’s also a safety angle. Buildup can trap moisture against the heating element. Over time, that accelerates corrosion and can shorten the lifespan of the unit. A cleaner warmer runs cooler internally, uses less power, and heats more consistently.
How Often to Clean: A Simple Usage-Based Schedule
Most advice says ‘wipe it down weekly.’ That’s lazy. Your schedule depends entirely on how often you use the warmer and what you heat on it. Here’s a realistic breakdown based on real usage patterns.
Daily Wipe-Down (30 Seconds)
If you use your warmer every day, give it a quick wipe each evening. You don’t need soap. Just a damp microfiber cloth, wrung out well, wiped across the surface once or twice. This removes the day’s residue before it has a chance to bake on overnight.
Do this while the unit is unplugged and cool. It takes less time than finding a parking spot. Skipping this step is why you end up with crusty buildup by Friday.
Weekly Deep Clean (5 Minutes)
Once a week, go deeper. Use a drop of mild dish soap in warm water. Dip a cloth in that solution, wring it out thoroughly, and wipe the entire heating surface. Pay attention to the edges where the plate meets the housing. That’s where grime collects.
For stubborn spots, use a non-abrasive sponge or a soft nylon brush. Avoid steel wool and scouring pads—they scratch the surface, and scratches give residue new places to cling. Rinse the cloth, wipe again with clean water to remove any soap film, then dry the surface completely with a soft towel.
Monthly Maintenance (For Heavy Users)
If you run your warmer for 6+ hours a day, or you only ever drink sugary drinks on it, add a monthly deep clean. This targets mineral deposits and burnt-on coffee that weekly cleaning misses.
Mix one part white vinegar with two parts water. Dampen a cloth with this solution and lay it over the heating surface for 10-15 minutes. The acidity breaks down mineral scale and dissolves sticky residue. Wipe clean, then go over the surface with a damp cloth to remove any vinegar smell. This is the same principle as descaling a coffee maker with vinegar, just on a smaller scale.
Here’s a comparison table to make this dead simple:
| Usage Pattern | Wipe Down | Deep Clean | Vinegar Treatment |
|---|---|---|---|
| Daily user (1-2 mugs) | Every evening | Weekly | Monthly |
| Heavy user (6+ hours daily) | After each session | Twice weekly | Every 2 weeks |
| Occasional user (2-3 times a week) | After each use | Every 2 weeks | Every 6-8 weeks |
| Rarely used (storage) | Before storing | Before first use | Not needed |
What You Need (and What You Should Never Use)
Keep it simple. You need:
- Microfiber cloths (lint-free)
- Mild dish soap
- White vinegar
- Soft nylon brush or non-abrasive sponge
- Cotton swabs for tight corners
Never use these:
- Steel wool or metal scrubbers—they scratch the coating
- Bleach or ammonia-based cleaners—they can corrode electrical contacts
- Submerging the unit in water—this kills the electronics
- Abrasive powders like Comet or Bar Keepers Friend on coated surfaces
One thing I learned the hard way: don’t use paper towels. They leave lint behind, and that lint burns onto the plate the next time you heat it. Microfiber is worth the extra penny.
Step-by-Step: The Safe Cleaning Process
Order matters. Here’s the sequence that works every time.
Unplugging and Cooling Down
Unplug the warmer first. Let it cool for at least 10 minutes. Cleaning a hot surface causes two problems: the cleaning solution evaporates instantly, leaving streaks, and you risk burning yourself. Patience pays off here.
Removing Surface Residue
Start with a dry cloth to wipe away loose dust and crumbs. Then use your damp microfiber cloth with a drop of dish soap. Work in small circles, covering the entire surface. Don’t forget the sides and the base if you’ve had spills.
Check the power cord connection point. Use a cotton swab dipped in rubbing alcohol to clean around the base of the cord where it enters the unit. This area collects dust and can become a fire hazard if ignored.
Tackling Burnt-On Stains and Mineral Deposits
For baked-on coffee rings, make a paste of baking soda and water. Apply it to the stain with your finger or a soft cloth. Let it sit for 5 minutes, then gently rub in a circular motion. The mild abrasiveness lifts the stain without scratching.
For hard water mineral deposits, use the vinegar solution mentioned earlier. If the deposits are thick, soak a paper towel (yes, here it’s fine) in the vinegar solution and leave it on the surface for 20 minutes. Rinse and dry thoroughly.
If your warmer has a non-stick or coated surface, skip the baking soda paste. Use only the vinegar solution or a dedicated ceramic cooktop cleaner. Baking soda is too abrasive for those coatings.
How to Clean Different Surfaces (Ceramic, Metal, Non-Stick)
Not all mug warmers are built the same. The surface material changes the cleaning rules.
Ceramic surfaces are the most forgiving. They resist scratching and handle vinegar well. Use the full cleaning routine without worry. Just avoid thermal shock—don’t put a cold, wet cloth on a hot ceramic plate or it might crack.
Stainless steel surfaces show fingerprints and water spots easily. After cleaning, dry with a clean microfiber cloth to prevent streaking. For stubborn marks, a tiny bit of olive oil on a cloth can restore the shine, but wipe it off completely before use.
Non-stick or coated surfaces are the most delicate. The coating is there to prevent residue from sticking, but it scratches easily. Use only soft cloths and the vinegar solution. Never use baking soda paste, abrasive sponges, or any cleaning tool with a rough texture. If the coating starts flaking, it’s time to replace the warmer.
Preventing Buildup: Daily Habits That Extend the Life of Your Warmer
An ounce of prevention beats a pound of scrubbing. A few habits make cleaning easier and keep your warmer running like new.
First, use a flat-bottomed mug. Warped or textured bottoms trap liquid between the mug and the heating plate, which boils and leaves crusty residue. A flat bottom makes full contact and minimizes spillage.
Second, don’t overfill your mug. A mug filled to the brim will splash when you set it down. Leave at least half an inch of headspace.
Third, wipe up spills immediately when they happen. A quick blot while the surface is still warm prevents the spill from drying into a stain. This takes 5 seconds and saves you a 5-minute scrub later.
Fourth, if you use your warmer for hours at a stretch, consider placing a silicone trivet or a thin piece of parchment paper between the mug and the plate. It catches drips and can be tossed in the trash when dirty. Some people worry this reduces heat transfer, but with a thin material, the difference is negligible.
Finally, store your warmer with a dry cloth or paper towel covering the surface if you don’t use it daily. This keeps dust from settling on the plate and baking on the next time you power it up.
Troubleshooting: Why Isn’t My Warmer Heating After Cleaning?
You cleaned it, plugged it back in, and nothing. This happens more often than you’d think. Here are the common culprits and fixes.
Moisture in the power connection. Water can seep into the cord port or the switches during cleaning. Wait 24 hours and try again. If it works, you’re fine. If not, the moisture may have caused a short. This is why you should always dry the unit completely before plugging it in.
Residue on the temperature sensor. Some warmers have a small sensor on the heating plate. If it’s covered in gunk, it may misread the temperature and refuse to heat. Clean the sensor area gently with a cotton swab dipped in rubbing alcohol.
Residue on the mug bottom. The warmer might be fine, but your mug’s bottom has a film that blocks heat. Clean the mug bottom with dish soap and try again.
The auto-shutoff kicked in. If your warmer has a timer, it may have shut off while you were cleaning. Check the timer settings and reset it.
If none of these work, the unit may have a damaged heating element. Check if your warmer is still under warranty before buying a replacement.
Final Verdict: A Clean Warmer is a Better Warmer
Here’s what you should remember:
- Wipe down your warmer daily if you use it every day—30 seconds prevents 5 minutes of scrubbing later.
- Deep clean weekly with mild dish soap and a damp microfiber cloth.
- Use a vinegar solution monthly to dissolve mineral deposits and restore heating efficiency.
- Never submerge the unit or use abrasive scrubbers—scratch damage is permanent.
- Match your cleaning frequency to your usage: heavy users need more frequent attention.
- Dry the unit completely before plugging it back in to avoid electrical issues.
- If your warmer stops heating after a clean, check for moisture, sensor residue, or a dirty mug bottom first.
A mug warmer isn’t a set-and-forget appliance. It needs the same basic care you give your coffee maker or espresso machine. Follow this routine, and your warmer will keep your coffee hot for years instead of months.
Products related to this article
Sponsored / affiliate links. As an Amazon Associate I earn from qualifying purchases. I may earn additional commission from eligible campaigns.
 Coffee Mug Warmer, Heating Cup Mat Electric Cup Warmer Pad Electric Thermostat Coaster USB Cup Heater Electric Beverage Warmers for Office Home (A)
 Coffee Mug Warmer,Cup Warmer with 7 Temp Settings,8H Auto Shut Off & 12H Timer,Fast Bottle Warmers for All Bottles,The Ultimate Coffee Warmer Plate for Beverage Lovers (Wood)
 VOBAGA Mug Warmer & Coffee Mug Warmer with 4 Hours Auto Shut-Off, Coffee Warmer Plate for Office Home Desk Use with 3 Temperature Settings, Cup Warmer for Cocoa, Tea, Milk, Water, Coffee Gifts(No Cup)