That burnt, bitter taste in your morning cup isn’t the beans. It’s the buildup. Single serve coffee makers pull water through a narrow path, and every brew leaves behind mineral scale and coffee oil. Over time, that residue affects flavor and slows down the machine. You might also notice the brew cycle taking longer or the machine getting louder. That’s the scale working against you.
This guide walks through the entire cleaning process, from the quick daily rinse to the deep descaling that removes hard water deposits. You’ll learn what supplies actually work, how often to clean based on your water hardness, and what to do when your machine still acts up after a cleaning. No guesswork, just the steps that keep your brewer running like it did on day one.

IMPRESA
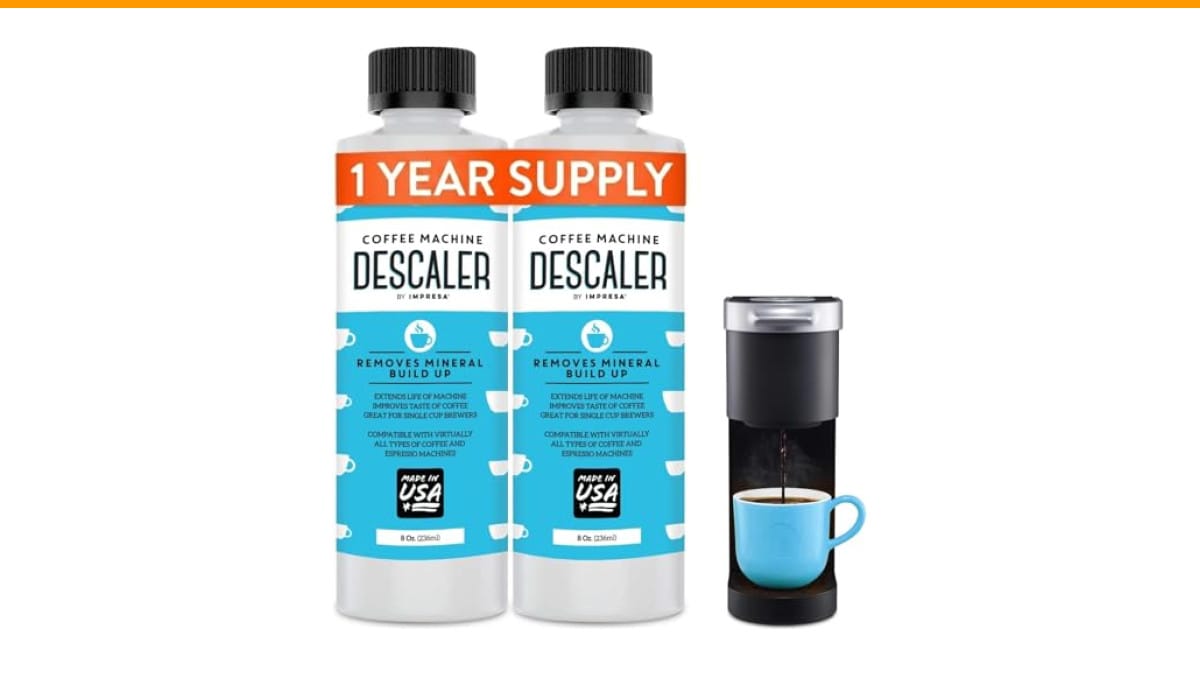
IMPRESA Coffee Machine Descaler, 2-Pack (1-Year Supply)…
- 2-Pack Coffee Descaler and Cleaner - Clean and rinse away residue and oil buildup in your coffee maker with Impresa's Coffee Desca…
- Highly Effective, Made in USA Formula - Unlike most common solutions, our coffee machine cleaner uses just 4 ounces (1/2 bottle) p…
- Preserves Your Machine - Using a coffee descaling solution eliminates limescale and mineral build-up to prevent corrosion, signifi…
As an Amazon Associate I earn from qualifying purchases.
For most machines, a dedicated descaling solution does the job better than vinegar. The IMPRESA Coffee Machine Descaler comes as a two-pack with enough solution for four full descaling sessions. Each bottle treats two cycles, and the formula is designed for Keurig, Nespresso, Breville, and other single-serve brands. It’s a simple option to keep on hand so you’re not running to the store when your machine starts acting up.
Why Your Single Serve Machine Needs Regular Cleaning
Single serve brewers are small, but they work hard. Every cup heats water to near boiling, and that heat accelerates mineral buildup. Hard water leaves calcium and magnesium deposits inside the heating element and the water lines. These deposits act like insulation, forcing the machine to work harder to heat the water. That’s why a neglected brewer gets slower and noisier over time.
Coffee oil is the second culprit. Each pod or capsule releases oils that cling to internal parts. These oils go rancid, which is exactly what you’re tasting in that bitter, flat cup. The combination of scale and rancid oil is why a machine that worked fine for months suddenly produces bad coffee.
The fix isn’t complicated. A regular cleaning routine handles both problems. The key is knowing which cleaning method to use and how often to do it. If you’re wondering about the broader picture, our guide on regular cleaning importance explains why skipping this step costs you more than just flavor.
The Complete Cleaning Process: Daily to Deep Clean
Cleaning a single serve coffee maker isn’t one task. It’s a few different routines that happen on different schedules. Here’s the breakdown.
Daily and Weekly Maintenance
After each brew, remove the used pod and toss it. Leave the lid open for a few minutes so the brew chamber can dry out. This simple habit prevents mold and mildew from taking hold. Once a week, wipe down the exterior and the drip tray with a damp cloth. The drip tray collects stray drips and can get sticky fast. For the water reservoir, give it a rinse and let it air dry. This keeps the water fresh and prevents algae growth in the tank.
Monthly Rinse Cycle
Once a month, run a water-only brew cycle. Fill the reservoir with fresh water, place a mug under the spout, and run a brew cycle without a pod. This flushes out loose coffee grounds and any residual oil. It’s a quick step that takes two minutes and keeps things moving between deep cleans.
Deep Descaling: The Main Event
Descaling is the deep clean that removes mineral scale. This is the step people skip, and it’s the one that actually matters. The frequency depends on your water hardness. If you have hard water, descale every month. With soft water, every three months works. The manufacturer recommendation for most machines is every three to six months, but hard water speeds up the need.
Here’s the step-by-step process for a standard single serve machine:
- Empty the water reservoir and remove any remaining pods.
- Fill the reservoir with the descaling solution mixed with water. Check your machine’s manual for the exact ratio. Many solutions, including the IMPRESA formula, have you use a specific amount per session.
- Place a large mug or container under the spout to catch the solution.
- Run a brew cycle without a pod. Let the machine heat and dispense the solution.
- Turn the machine off and let the solution sit inside for 15 to 30 minutes. This dwell time lets the acid break down the scale.
- Turn the machine back on and run another brew cycle to empty the reservoir.
- Refill the reservoir with fresh water and run at least two full water-only cycles to rinse out all remaining solution.
That last rinse step is critical. Leftover descaling solution tastes awful and can be harsh on your stomach. Run enough water through until you can’t smell any vinegar or citrus from the solution. If you’re dealing with a particularly stubborn machine, our guide on deep cleaning a coffee machine covers extra steps for heavy buildup.
Descaling Solutions: Vinegar vs. Commercial Cleaners
There’s a long-running debate about whether white vinegar works as well as commercial descalers. The short answer: both work, but they’re not identical. Vinegar is cheap and effective at dissolving scale. It’s also acidic enough to break down mineral deposits. The downside is the strong smell that lingers. You’ll need several rinse cycles to get the vinegar odor out, and even then, a faint taste can remain in the first cup.
Commercial descalers like the IMPRESA formula are formulated to be food-safe and rinse out more completely. They also work faster because they’re designed specifically for coffee machine scale, not general household cleaning. The trade-off is cost. A two-pack costs more than a bottle of vinegar, but it lasts for a full year of quarterly descaling. For most people, the convenience and lack of aftertaste make commercial solutions worth the money.
There’s also the question of what not to use. Avoid soap and detergent inside the machine. Soap leaves a film that’s nearly impossible to rinse out completely, and it ruins the taste of your coffee. Stick to descaling solutions or vinegar only.
| Method | Cost per Use | Effectiveness | Aftertaste Risk | Best For |
|---|---|---|---|---|
| White Vinegar | Very low | Good on light scale | High, needs extra rinsing | Budget cleaning, soft water areas |
| Commercial Descaler | Moderate | Excellent, fast acting | Low if rinsed properly | Regular maintenance, hard water |
| Citric Acid Powder | Low | Good, similar to vinegar | Moderate | DIY users, bulk mixing |
| Water Only Rinse | Free | Poor for scale, good for oils | None | Monthly maintenance between descales |
If you decide to go the vinegar route, use a 1:1 ratio of white vinegar and water. For commercial solutions, follow the bottle instructions. The IMPRESA solution uses four ounces per session, which is half a bottle. That’s a concentrated formula, so you don’t need to dump the whole thing in. If you’re unsure about the process, our guide on cleaning with vinegar walks through the details.
Troubleshooting After a Clean
Sometimes you clean the machine and it still doesn’t brew right. A few common issues pop up after descaling. First, the machine might not recognize the water level. This happens when the water level sensor is dirty or the reservoir isn’t seated properly. Take the reservoir off, wipe the sensor contacts, and reseat it firmly.
Second, the machine might still taste like the cleaning solution. This means you didn’t rinse enough. Run another full reservoir of fresh water through the machine. If the taste persists, the solution might have gotten into a part of the machine that’s hard to reach. Try running a brew cycle with the lid open and a mug underneath to flush the needle that pierces the pod.
Third, the machine might brew slower than before. This is usually a sign of a clogged needle or a blocked water line. Use a paperclip to gently clear the entry and exit needles on the brew head. Unplug the machine first. For a deeper look at clogs, check our guide on cleaning a clogged coffee maker.
Frequently Asked Questions
How often should I descale my single serve coffee maker?
Every three months for most people. If you have hard water, move that to every month. If you use filtered water, you can stretch it to four or five months. Watch for signs like slow brewing, loud noises, or a change in coffee taste. Those signals mean it’s time to descale, regardless of the calendar.
Can I use vinegar instead of a commercial descaler?
Yes, white vinegar works on light to moderate scale. Mix equal parts vinegar and water and run it through the same descaling cycle. The downside is the smell and aftertaste, which requires extra rinsing. Commercial descalers are more convenient and leave less residue behind.
Do I need to clean the outside of the machine?
Yes, but it’s separate from descaling. Wipe the exterior, drip tray, and K-cup holder weekly with a damp cloth. Don’t use harsh cleaners or abrasive pads. They can scratch the plastic and dull the finish.
Why does my coffee taste bitter even after cleaning?
Bitter taste after a clean usually means leftover cleaning solution or rancid coffee oil. Run more water through the machine. If the taste persists, check the pod holder and needle for old coffee grounds. Sometimes grounds get stuck and bake onto the hot parts, which tastes burnt.
Is it safe to use a descaling solution in a Keurig or Nespresso?
Yes, that’s what these machines are designed for. The IMPRESA solution is compatible with Keurig, Nespresso, Breville, and most other single serve brands. Always check your machine’s manual for specific instructions, but the general descaling process works across brands.
What to Remember for a Longer-Lasting Brewer
- Descale every 1 to 3 months depending on your water hardness.
- Run a water-only rinse cycle monthly to flush out coffee oils.
- Always remove the used pod immediately after brewing to prevent mold.
- Use a commercial descaler for a thorough clean without the vinegar aftertaste.
- Rinse thoroughly after descaling; leftover solution ruins your next cup.
- Clean the entry and exit needles with a paperclip if the brew slows down.
- Wipe the drip tray and exterior weekly to keep the machine looking new.
Cleaning a single serve coffee maker isn’t glamorous, but it’s the difference between a machine that lasts five years and one that dies at eighteen months. The scale you remove today is the repair you avoid next year. Set a reminder on your phone for the first of every season, and your brewer will keep producing good coffee for a long time.
Products related to this article
Sponsored / affiliate links. As an Amazon Associate I earn from qualifying purchases. I may earn additional commission from eligible campaigns.
 HomeBeyond Espresso Coffee Maker 12 Cups, Classic Stovetop Espresso Maker, 600ml / 20oz Coffeemaker for Gas & Ceramic Stovetops (Silver)
 Belly Moka Coffee Maker Stovetop Espresso Maker 9 Cup Aluminum Moka Pot Percolator 15oz 450ml Easy Brewing for Electric Ceramic Stoves Home Camping Italian Cuban Café Classic Black
 Belly Moka Coffee Maker Stovetop Espresso Maker 6 Cup Aluminum Moka Pot Percolator 10oz 300ml Easy Brewing for Electric Ceramic Stoves Home Camping Italian Cuban Café Classic Silver