You know the scene. The counter is wet, coffee grounds are scattered around the sink, and the filter cap just slipped into the dish rack. The coffee tastes great, but the cleanup makes you question the whole ritual. It doesn’t have to be that way.
Most messes with the AeroPress come from rushing the steps and treating every accessory like it’s disposable. The scoop, the stirrer, the filter basket — each one has a specific way to be handled that keeps grounds where they belong. This guide covers the practical details, from the inverted method to filter storage, so your coffee station stays presentable.

AeroPress
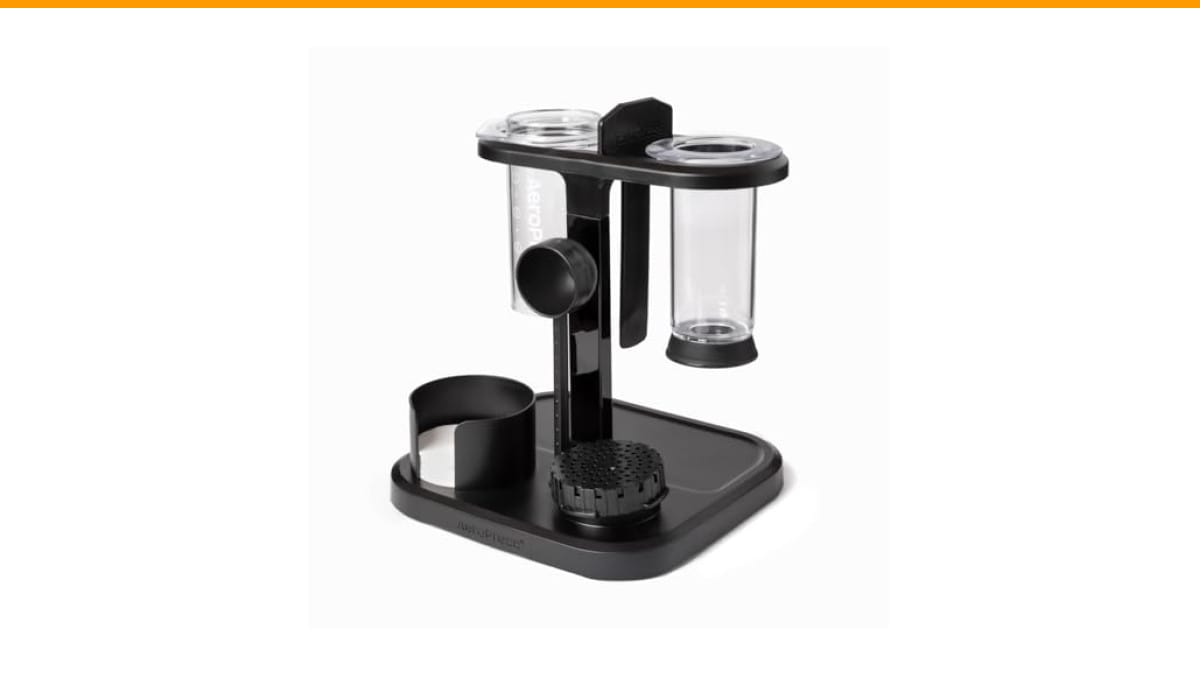
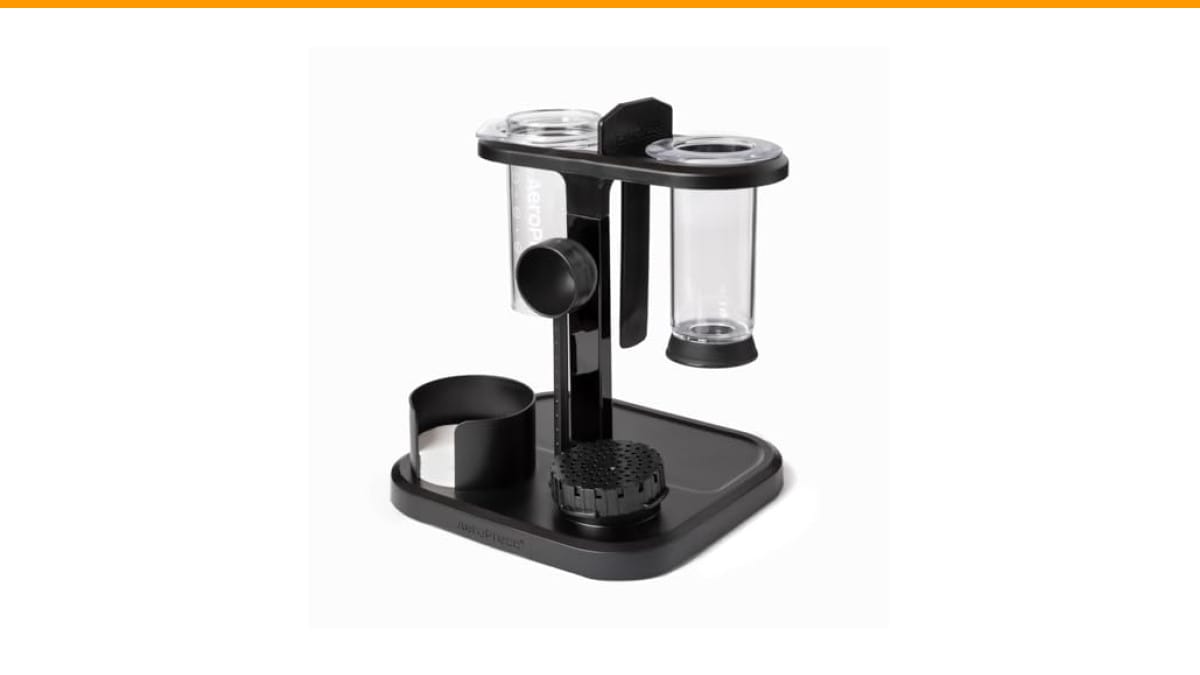
AeroPress Organizer Stand | Durable Coffee Bar…
- Compact Storage Solution – Declutter your home or office coffee station, dorm room or kitchen cabinet with this small footprint co…
- Keep All Your Coffee Gear in One Place – Keep All Your Coffee Gear in One Place – Saves kitchen countertop space and keeps your Ae…
- Custom Fit for AeroPress Coffee Makers – Fits all AeroPress Coffee Makers (except Premium and Go) with dedicated spots for coffee…
As an Amazon Associate I earn from qualifying purchases.
You’ll walk away with a clear routine for using every standard accessory without turning your kitchen into a disaster zone. No vague advice, just what works after years of daily use.
If you’re tired of hunting for your scoop under a pile of mail, a dedicated AeroPress Organizer Stand solves the storage side of the mess. It holds the brewer, scoop, stirrer, and both paper and metal filters in one compact footprint, so nothing rolls around loose.
Why the Mess Happens in the First Place
Most people make a mess because they use the standard method while looking at the press from the wrong angle. The plunger goes in, and then you realize the coffee is dripping through before you’re ready. That’s a recipe for a wet counter.
The number one culprit is the inverted method. It’s popular because it prevents early dripping, but it also creates a tall, unstable tower. One wrong nudge and you’ve got hot water everywhere. If you use it, keep your hand on the chamber at all times.
The second culprit is the scoop. A heaping scoop of coffee grounds creates a dust cloud when you tap it against the chamber rim. The fix is simple: level the scoop with a chopstick or the flat edge of a butter knife before you pour. That single habit cuts ground spillage by at least half.
Finally, the filter cap. People rinse it under the tap and then shake it dry, flinging water droplets across the room. Instead, tap it twice on the edge of the sink, then set it on a dry paper towel. You’ll avoid the water spots on your counter.
The Right Order of Operations for a Clean Brew
Order matters more than you think. Here’s the sequence that keeps everything contained.
- Prep the filter first. Place the paper filter in the cap and rinse it with hot water. This removes the papery taste and warms the cap. Let the cap rest on your mug while you do the rest.
- Weigh or scoop your grounds. Use the level scoop technique. For a standard 1:15 ratio, that’s about 17 grams of coffee. Pour them into the chamber using a funnel if you have one. The AeroPress scoop holds roughly 11 grams when level, so you’ll need 1.5 scoops.
- Add water in two stages. Pour just enough hot water to saturate the grounds (about 50 ml), stir once, then fill to the top. This stops the grounds from floating up and sticking to the plunger.
- Attach the cap before you flip. Screw it on while the chamber is still upright. This is the step people skip, and it’s why they spill.
- Press slowly. A 30-second press is ideal. Pressing faster than that forces fines through the filter, which adds grit to your cup and creates a mess on the plunger.
Once you’ve pressed, remove the cap and eject the puck directly into the trash. Don’t knock it against the sink edge. The puck holds a surprising amount of water, and that flick sends droplets flying.
Handling Specific Accessories Without the Drama
Each accessory has its own quirk. Here’s how to deal with them.
The Stirrer (Paddle)
The flat stirrer is great for agitation, but it collects grounds in its grooves. Rinse it immediately after use, not after you’ve finished your coffee. Dried grounds are much harder to remove and end up in your sink drain. A quick rinse under hot tap water for three seconds is enough.
The Scoop
This one’s simple. Don’t store it inside the coffee bag. The static from the bag makes grounds stick to the scoop, and then you transfer that mess to the counter. Keep it in a holder or standing upright in a cup. When you scoop, dip it deep and level it off over the bag, not over the chamber.
The Metal Filter
Metal filters let more oils through, which is great for flavor, but they trap fine particles in the mesh. After use, hold it under running water and rub it with your thumb. Once a week, soak it in a solution of one part vinegar to three parts water for five minutes. This prevents clogging, which causes coffee to squirt sideways during the press.
Comparing Storage Solutions for Your Gear
How you store your accessories directly impacts how messy your brewing routine is. Here’s a side-by-side look at the common options.
| Method | Mess Factor | Counter Space | Best For |
|---|---|---|---|
| Drawer (loose) | High — items roll and collect crumbs | Zero | Travel bags only |
| Mug or cup on counter | Medium — scoop and stirrer stay put, but filters are loose | Small | Minimalist setups |
| AeroPress Organizer Stand | Low — every item has a dedicated slot | 5×5 inches | Daily home use |
| Cabinet shelf | Low, but you must carry items to the counter each time | None | Small kitchens |
The stand is the only option that keeps the filter cap upright and the scoop separated. That separation matters because a wet filter cap left touching a dry scoop will transfer grounds and moisture. If you’re short on space, the mug trick works, but you’ll still be fishing paper filters out from under the toaster.
Cleaning Up the Aftermath Efficiently
Even with perfect technique, you’ll get a few stray grounds. The trick is cleaning them up without smearing them.
Use a dry paper towel first. Wipe the counter with a dry towel to pick up loose grounds. Then use a damp cloth to get the sticky coffee residue. If you use a wet cloth first, you turn the grounds into a paste that stains the counter.
For the plunger rubber, rinse it under hot water and rub it with your fingers. Don’t use soap every time — it degrades the rubber faster. A water rinse removes the coffee oils. Soap once a week is plenty. If you’re curious about deeper cleaning, check our guide on AeroPress dishwasher safety to avoid warping the plastic.
One habit worth stealing from commercial baristas: keep a small dedicated towel just for coffee gear. A microfiber cloth works best. It catches fines that paper towels miss, and it doesn’t leave lint on the filter cap.
Frequently Asked Questions
Why does my AeroPress leak during the press?
Usually, it’s a loose filter cap. Make sure it’s hand-tight, but not torqued. Over-tightening warps the threads over time. Another cause is a worn-out plunger seal. If you see coffee bypassing the rubber, it’s time to replace the seal — they typically last a few hundred brews.
Can I use the metal filter and paper filter together?
Yes, but it’s messy. The metal filter holds the paper one in place, but the double layer slows the press significantly. You’ll push harder, and that extra force often causes a sideways squirt. Stick to one or the other unless you’re experimenting with a specific recipe.
How do I stop coffee grounds from sticking to the plunger?
That’s a sign your grind is too fine or you stirred too vigorously. Use a medium-coarse grind, similar to sea salt. When you stir, do three gentle back-and-forth motions instead of a full circular swirl. The grounds will settle at the bottom instead of riding up the chamber walls.
Is the inverted method worth the mess risk?
Only if you’re brewing less than 150 ml of water. The standard method drips a bit, but it’s stable. The inverted method gives you a cleaner immersion, but the risk of tipping is real. If you do it, keep the plunger seated only halfway — that gives you a better grip point.
Why does my counter still have coffee stains after wiping?
You’re probably using a wet cloth first. Coffee grounds contain tannins that bind to surfaces when wet. Dry-wipe first to remove the solids, then use a mild cleaner. For stubborn stains, a paste of baking soda and water works, but test it on a small spot first. Regular vinegar cleaning of your whole station prevents buildup; see our vinegar cleaning guide for the full process.
Keeping the Mess at Bay Long-Term
You don’t need to be a perfectionist to keep your station clean. You need a routine that doesn’t rely on willpower.
- Level your scoop over the bag, not the chamber, to stop the ground cloud.
- Rinse the stirrer and scoop immediately after brewing, before the grounds dry on.
- Store the filter cap upside down on a dry towel so residual water doesn’t pool.
- Use a dedicated dry microfiber cloth for ground cleanup — it catches fines better than paper.
- Replace the plunger seal at the first sign of bypass to avoid sideways leaks.
- Keep all accessories in one spot, like the AeroPress stand, so you’re not carrying loose parts across the kitchen.
- If you use the inverted method, practice over the sink for the first few weeks.
The mess isn’t inevitable. It’s just a matter of matching your technique to the gear. Once you break the habit of rushing the flip and the press, you’ll find the whole process takes less time than cleaning up after it.
Products related to this article
Sponsored / affiliate links. As an Amazon Associate I earn from qualifying purchases. I may earn additional commission from eligible campaigns.